This site is supported by our readers. We may earn a commission, at no cost to you, if you purchase through links.
 To create a faux flat felled seam, start by placing fabrics wrong sides together and stitching with a 5/8" seam allowance.
Trim one seam allowance to 1/4" and press both toward the longer side. Fold the longer allowance over the trimmed edge, then press again.
Topstitch close to the fold to secure everything in place. You’ll get that classic jeans look without flipping your project inside out multiple times.
This technique creates strong, enclosed seams that won’t fray—perfect for denim, activewear, or children’s clothing. The real secret lies in your pressing technique, which determines how professional your finished seam appears.
Table Of Contents
Key Takeaways
- You’ll achieve a professional finish by placing fabrics wrong sides together, stitching with a 5/8" seam allowance, trimming one side to 1/4", and folding the longer allowance over before topstitching close to the fold.
- You can create strong seams that won’t fray using medium-weight fabrics like denim, twill, or sturdy cotton that maintain structure through multiple folds.
- You’ll find this technique easier than traditional flat felled seams, especially for curved areas like armholes, while still providing excellent durability for high-stress areas.
- Your pressing technique is crucial—use steam and proper pressure between steps to create crisp creases that transform ordinary seams into professional-looking finishes.
Faux Flat Felled Seam Basics
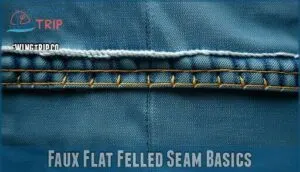
You’ll find that faux flat felled seams create strong, professional-looking finishes on both sides of your fabric without the complexity of traditional methods.
This technique encloses raw edges with topstitching for durability, making it perfect for high-stress areas in garments like jeans, shirts, and workwear.
Definition and Purpose
A faux flat felled seam provides the look of a traditional flat felled seam with less effort.
This sewing technique serves five essential purposes:
- Creates durable garment construction without specialized equipment
- Offers professional finish on both fabric sides
- Encloses raw edges for clean seam finishing
- Provides aesthetic appeal with decorative topstitching
- Serves as a practical alternative for curved areas where true flat felled seams prove difficult
The key benefits of this technique make it a valuable asset for sewers, offering a professional finish and durable construction.
Key Characteristics
Looking at a faux flat felled seam, you’ll notice several distinctive features.
The seam appearance shows parallel topstitching lines visible from the right side, creating that classic jeans look.
Unlike traditional methods, this flat felled alternative excels at curve suitability, making it perfect for armholes and crotch seams.
Your seam allowance needs are smaller (3/8" to 1/2"), and the construction creates strength benefits while enclosing raw edges for a clean finish inside and out.
Benefits and Advantages
Now that you understand what makes these seams distinctive, let’s talk about why you’ll love using them.
Faux flat felled seams offer remarkable durability and strength while being much easier to create at home.
You’ll achieve a professional finish even in curved areas where traditional methods struggle.
This flat felled alternative saves time without sacrificing that polished flat seam look—perfect when you need both quality seam finishes and efficiency.
Choosing Right Fabric
You’ll need medium-weight fabrics like denim, twill, or sturdy cotton for successful faux flat felled seams that hold their shape without fraying.
Choose fabrics with enough body to maintain structure through multiple folds, but avoid extremely thick materials that create excess bulk at seam intersections, allowing for successful seams.
Suitable Fabrics for Faux Flat Felled Seams
Choosing the right fabric makes all the difference when creating faux flat felled seams. Medium to heavyweight fabrics like denim, canvas, and twill work best due to their stable weave type and minimal stretch factor.
Cotton blends with good fiber content provide excellent durability while maintaining drape suitability. Avoid very lightweight or extremely stretchy materials, as they won’t provide the structure needed for proper seam reinforcement.
Consider the fabric’s weight requirements for the project to guarantee the right tools are selected and ensure a successful outcome with the right fabric weight and seam reinforcement.
Fabric Preparation and Cutting
Now that you know which fabrics work best, let’s prepare your material properly. Start by washing and pressing your fabric to prevent later shrinkage.
Lay out your pattern following the fabric grain arrows for maximum strength.
Use sharp cutting tools for clean edges and mark notches at 1/8" or shorter.
Water-soluble marking methods work best for this mock flat felled seam tutorial, ensuring precision during construction.
Proper pressing can be achieved with specialized ironing tools for a professional finish with clean edges.
Seam Allowance Considerations
When working with faux flat felled seams, proper seam allowance is essential to your success.
You’ll need at least 1/2" allowance width for most projects, though curved seams might require 5/8" for easier manipulation. Adjust your pattern alterations accordingly before cutting.
Different fabric types influence your trimming techniques—thicker materials need more precise reduction. Consider using a helpful seam guide for consistent results.
Remember, mock flat felled seam construction relies on consistent measurements throughout your seam construction for professional results.
Sewing Faux Flat Felled Seam
You’ll create a professional-looking faux flat felled seam with this straightforward technique that encloses raw edges and adds strength to your garment.
Start by sewing right sides together, then press, fold and topstitch twice for that classic denim look you want without the complexity of traditional methods, which helps achieve a professional-looking result.
Step by Step Sewing Instructions
Now that you’ve got your fabric ready, let’s walk through the actual sewing process.
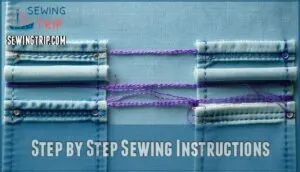
Here’s your step-by-step guide:
- Align fabric pieces with right sides together
- Stitch a standard 1/2" seam allowance
- Trim one seam allowance to 1/4"
- Press both seam allowances toward the untrimmed side
- Fold the wider allowance under itself
- Press again
- Topstitch through all layers twice
Understanding the correct seam allowance correct seam allowance is essential for accuracy.
Tips for Smooth Seam Construction
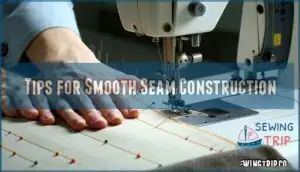
Throughout your sewing journey, achieving smooth faux flat felled seams requires attention to detail.
With proper technique, you’ll create professional-looking results every time.
- Maintain consistent seam alignment by using pins at regular intervals, especially on curved seams.
- Practice consistent stitching by using your presser foot edge as a guide for accurate topstitching.
- Apply proper pressing techniques between steps to reduce bulk and set your stitches permanently, which is crucial for achieving professional-looking results.
Common Mistakes to Avoid
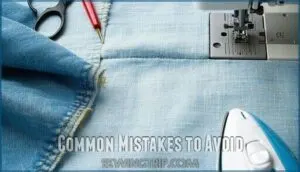
Now that you’ve got the basics down, let’s look at what not to do. Even experienced sewers make these missteps when creating faux flat felled seams.
| Common Mistake | Consequence | Solution |
|---|---|---|
| Uneven trimming | Fabric crimping | Use sharp scissors, measure twice |
| Incorrect pressing | Bulky seams | Press at each step, use steam |
| Rushing topstitching | Poor stitch alignment | Mark guidelines, adjust thread tension |
Don’t skimp on pressing technique—it’s where the magic happens for that perfect flat felled effect!
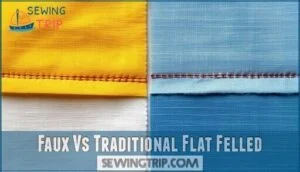
Faux Vs Traditional Flat Felled
While traditional flat felled seams trim one side of the seam allowance before wrapping and topstitching for maximum strength, faux flat felled seams simplify the process by serging or zigzagging raw edges before topstitching from the right side.
You’ll notice traditional methods create stronger seams ideal for high-stress garments, while the faux technique offers similar appearance with less bulk in curved areas, providing a notable difference in appearance.
Comparison of Techniques
Both seam techniques offer distinct advantages in different sewing scenarios.
When comparing traditional and faux flat felled seams, understanding their key differences helps you choose the right approach for your project.
| Feature | Traditional Flat Felled | Faux Flat Felled |
|---|---|---|
| Strength | Maximum durability | Good strength |
| Technique Difficulty | Complex, requires practice | Beginner-friendly |
| Aesthetic Effect | Clean both sides | Clean outside only |
While traditional seams excel in durability analysis, the faux flat felled technique creates a similar effect with less complexity.
Proper tension settings are essential for achieving professional results with maximum durability and a clean aesthetic effect, using either traditional or faux flat felled seams.
Choosing The Right Method
Several factors should guide your method selection when deciding between traditional and faux flat felled seams. Your project goals, fabric type, and skill level all play vital roles in this decision.
| Factor | Traditional Method | Faux Method |
|---|---|---|
| Seam allowance | Requires 5/8" minimum | Works with 3/8" to 5/8" |
| Skill level | More technical | Beginner-friendly |
| Aesthetic preference | Identical inside/outside | Cleaner outside, visible inside |
| Project timeline | Time-intensive | Quick alternative |
Choose traditional for heirloom projects and faux for curved seams or when sewing for durability with limited time. This decision is crucial as it affects the overall outcome of your sewing project, considering factors such as skill level.
Seam Strength and Durability
Now that you’ve selected your method, let’s examine why these seams stand the test of time.
Your seam’s strength and durability directly impact how long your garment will last.
| Feature | Traditional Flat Felled | Faux Flat Felled |
|---|---|---|
| Stress Points | Extremely resistant | Very strong |
| Long-Term Wear | Superior durability | Excellent performance |
| Stitch Density | Double reinforcement | Single with zigzag |
Fabric choice substantially affects seam reinforcement. Denim garments benefit from both techniques, but the traditional method offers slightly better durability for high-stress applications, providing superior results.
Essential Tools and Materials
You’ll need just a few basic tools to create professional-looking faux flat felled seams: fabric shears, straight pins, a standard presser foot (though an edge stitch foot is helpful), an iron with steam function, and properly cut fabric with at least 1/2" seam allowances.
Having these essentials ready before you start will save you from that frustrating mid-project scramble we’ve all experienced, by ensuring you have everything necessary for a smooth workflow, including properly cut fabric.
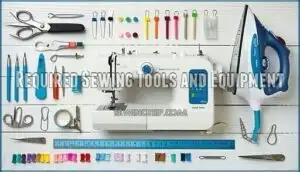
Required Sewing Tools and Equipment
To create perfect faux flat felled seams, you’ll need these essential tools: a reliable sewing machine with straight stitch capability, sharp fabric shears for precise cutting, and a standard presser foot (though an edge stitching foot helps with accuracy).
Don’t forget a seam ripper for mistakes, quality marking tools for seam allowances, a ruler for measurements, pins or clips, and a good iron with steam function, which are all crucial for achieving professional-looking results with straight stitch capability.
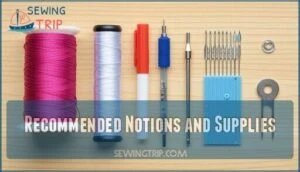
Recommended Notions and Supplies
Having the right tools at hand makes faux flat felled seams much easier to execute.
Beyond basic equipment, you’ll need these specific notions and supplies:
- Medium-weight thread that matches your fabric (or contrasting for decorative topstitching)
- Universal needles in sizes 80/12 for lightweight fabrics or 90/14 for denim
- Water-soluble marking pens for accurate seam allowance marking
A good seam ripper is invaluable when learning this sewing technique—we’ve all been there, and it’s a crucial tool for accurate seam allowance marking.
Optional Accessories for Precision
While basic tools will get the job done, precision accessories elevate your faux flat felled seam work.
An edge stitcher foot maintains perfect distance from the fold, while adjustable seam guides guarantee consistent allowances.
Consider investing in a point turner or awl for managing tight corners.
Twin needle setups create parallel topstitching in one pass, saving time and guaranteeing evenness that makes your mock flat felled seams look professional.
Investing in specialty presser feet expands your machine’s capabilities.
Sewing Machine Settings
You’ll need to set your machine to a medium stitch length of 2.5-3mm and adjust your tension to normal (around 4-5) for ideal faux flat felled seam results.
Using an edge stitch foot or standard presser foot with your needle position shifted slightly will help you achieve precise topstitching that gives your seam that professional, durable finish.
Optimal Stitch Length and Tension
Now that you’ve gathered your tools, let’s set up your machine properly. For a professional faux flat felled seam, stitch length and tension must work together perfectly.
- Use 2.5-3mm stitch length for standard fabrics
- Adjust to 3-3.5mm for thicker denim or canvas
- Set balanced tension between 4-5 for most threads
- Test on fabric scraps before committing
- Loosen tension slightly when using heavier thread
Thread type and fabric thickness directly impact your seam durability and stitch appearance. Uneven stitches may indicate incorrect bobbin threading.
Presser Foot Selection and Usage
Which presser foot should you choose for perfect faux flat felled seams? Your regular presser foot works fine for basic construction, but switching to an edgestitching foot gives you precise topstitching control.
For consistent results, adjust your foot pressure—lighter for thick fabrics, heavier for slippery ones.
Many specialty feet like edge guides and seam guides can help maintain even stitching lines when creating those professional-looking parallel rows.
Troubleshooting Common Issues
Now that you’ve selected the appropriate presser foot, let’s tackle those frustrating issues that can pop up when creating your faux flat felled seams.
When problems arise during your sewing tutorial, check these common culprits:
- Seam shifting – start stitching at thickest points and work outward
- Fabric slippage – use a walking foot for better control
- Uneven seams – maintain consistent seam allowances throughout
- Thread breaks – adjust tension when working through multiple layers
Remember, mock flat felled seams can show needle holes in lighter fabrics, so use smaller needles to minimize visibility, and always consider the seam allowances and thread tension to achieve a professional finish with your sewing tutorial.
Finishing and Pressing Techniques
You’ll need to use steam while pressing your seam allowances to set crisp creases that make your faux flat felled seams look truly professional.
After pressing, examine your work closely for any loose threads or uneven stitching that might compromise the strength of this durable seam.
Pressing Seam Allowances for Professional Finish
A hot iron transforms your faux flat felled seam from good to professional.
Press your seam allowance consistently in one direction before topstitching for a crisp appearance.
Adjust iron temperature based on fabric type to prevent damage while reducing seam bulk.
Apply steady pressure and use steam to set creases firmly in place, which guarantees your mock flat felled seam maintains its structure through wear and washing, ensuring a professional finish.
Final Inspection and Quality Control
After completing your faux flat felled seam, examine both sides critically.
Check for stitch consistency throughout the seam and verify measurement accuracy matches your pattern specifications.
Test durability by gently tugging the fabric perpendicular to the seam line, and look for any defect identification opportunities like puckering or skipped stitches.
Your mock flat felled seam should have a clean, professional appearance that rivals traditional flat felled seam sewing finishes.
Frequently Asked Questions (FAQs)
What is a ‘faux flat-felled seam’?
A faux flat-felled seam gives you the same professional look as traditional flat-felled seams but with less work.
You’ll create it by zigzagging edges, folding, and topstitching instead of fully enclosing raw edges.
How do you sew a flat felled seam?
Like a well-constructed bridge, a flat felled seam requires you to sew right sides together.
Trim one seam allowance, fold the other over it, press flat, and topstitch twice for durability.
How do you make a fake flat fell seam?
To make a fake flat fell seam, sew right sides together, then press seam allowances to one side.
Topstitch twice from the right side, creating parallel lines that mimic the traditional flat felled seam appearance.
What is a flat felled seam?
Rock-solid and sleek as a well-tailored suit, a flat felled seam encloses raw edges completely within two parallel lines of stitching.
Creating a durable, professional finish visible on both sides of your garment.
What is a mock felled seam?
A mock felled seam gives you the appearance of a flat felled seam but with less work.
You’ll serge or zigzag the raw edges, press the seam to one side, and topstitch it from the right side.
What can you use instead of a flat felled seam?
You can substitute flat felled seams with mock flat felled seams, French seams, serged seams, or run and fell seams.
Each alternative offers varying levels of durability and finish depending on your project’s requirements.
Can faux flat felled seams stretch?
Faux flat felled seams don’t stretch much on their own, but you can add flexibility by using stretch thread or a slight zigzag stitch.
They’re less stretchy than standard seams in knit fabrics.
How to handle intersecting seams?
When you reach intersecting seams, trim the bulkiest layers first, then stagger remaining layers.
Press seams in opposite directions where possible and topstitch carefully, reducing speed over thicker sections to maintain control.
Curved vs. straight seam techniques differences?
Curved seams require more care with your faux flat felled technique.
You’ll need to notch the allowance when folding and press gradually, while straight seams can be folded and stitched in one continuous motion.
Best thread types for topstitching?
For topstitching, you’ll want to use heavy-duty thread like polyester topstitching thread, cotton-wrapped polyester, or heavyweight cotton.
These provide durability and visibility, making your seams stand out beautifully on your projects.
Conclusion
Like a well-constructed bridge, your faux flat felled seam tutorial journey connects raw fabric to professional results.
You’ve now mastered a technique that delivers durability without the complexity.
Whether you’re sewing denim, activewear, or children’s clothing, this faux flat felled seam tutorial empowers you to create professional-looking projects with enclosed edges that won’t fray.
Remember, it’s your careful pressing that transforms ordinary seams into refined perfection.
Now go show off those beautiful, sturdy seams!

