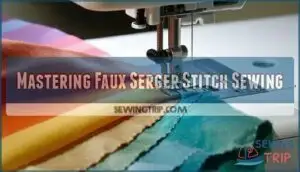
This site is supported by our readers. We may earn a commission, at no cost to you, if you purchase through links.
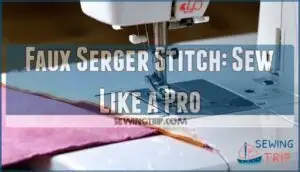
This technique mimics a serger’s overlocking capabilities, helping you finish seams and prevent fraying.
With a faux serger stitch sewing machine, you can achieve professional-looking results without a dedicated serger.
You’ll learn to use overcast stitches, zigzag stitches, and special presser feet to get the job done.
Now, you’re one step closer to sewing like a pro – and we’re about to share some game-changing tips to take your skills to the next level.
Table Of Contents
Key Takeaways
- You’ll master the faux serger stitch by using your sewing machine’s overcast or zigzag stitches, which will give your projects a professional finish and prevent fraying.
- To achieve a pro-level faux serger stitch, you’ll need to fine-tune your sewing machine settings, including tension, stitch width, and needle choice, and you’ll have to stabilize stretchy fabrics to prevent bunching.
- You can use various tools to enhance your faux serger stitch, such as a snap-on overcasting foot, a side cutter, or pinking shears, which will help you create clean, fray-free edges and add a decorative touch to your projects.
- By following tips like keeping consistent tension, selecting the right stitch for your fabric, and picking the proper needle, you’ll be able to avoid common mistakes and troubleshoot issues that may arise while sewing with a faux serger stitch.
Faux Serger Stitch Basics
You’re about to learn how to create a faux serger stitch, which is a great way to finish seams like a pro without a serger.
By using your regular sewing machine, you can achieve a similar look and prevent fraying, giving your projects a professional touch.
What is a Faux Serger Stitch
You’re about to master the faux serger stitch, a sewing machine stitch that mimics a serger’s appearance, offering great fabric compatibility and thread usage for seam durability.
This makes it suitable for various projects as a serger alternative, also known as a mock or fake serger stitch.
Benefits of Faux Serger Stitch
You’ll love the benefits of a faux serger stitch, a great serger alternative.
It offers cost savings, edge security, and a professional look.
This sewing machine stitch provides project versatility and machine compatibility, giving a neat edge finish, making it a fantastic edge finishing stitch option.
Types of Faux Serger Stitches
Now that you know the benefits, let’s explore the different types of faux serger stitches. You can achieve a neat edge finish with a sewing machine stitch.
A sewing machine overlock stitch, or faux overlock, offers several options.
- Multi-stitch zigzag for secure seams.
- Stretch stitch for knits.
- Blind hem for invisible hems.
- Decorative edges for a unique look.
You can also use a mock serger stitch, rolled hem, or even a faux serger stitch. These all help make your projects look great! For stronger seams, consider the 4-thread overlock stitch.
Overlock Stitch on Sewing Machine
You’re about to learn how to create an overlock stitch on your sewing machine, which is a great alternative to using a serger.
By using an overcast stitch or a zigzag stitch, you can mimic the look of a serger stitch and finish your seams like a pro.
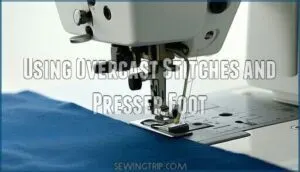
Using Overcast Stitches and Presser Foot
You’re using an overcast stitch and presser foot on your sewing machine to create a faux serger stitch.
This technique guides fabric edges and prevents curling. Foot compatibility and stitch selection are key for a neat finish, allowing for tension adjustments and edge control with the overcast foot.
Many sewers find a faux serger foot helpful.
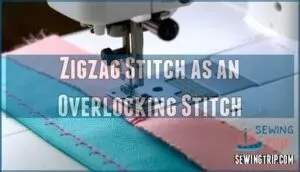
Zigzag Stitch as an Overlocking Stitch
You can create a faux serger stitch with a zigzag stitch on your sewing machine.
Adjust the stitch width and length for different fabric types.
This alternative to an overcast stitch works well for various fabrics, making it a great option for a faux serger stitch on your sewing machine.
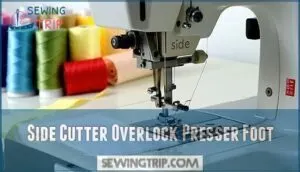
Side Cutter Overlock Presser Foot
While zigzag stitches work well, you’ll want to upgrade to a side cutter overlock presser foot for the ultimate faux serger stitch experience.
This game-changing attachment trims excess fabric while creating professional overlock stitches simultaneously on your sewing machine.
The built-in blade replacement system guarantees consistent stitch quality across various fabric compatibility types.
With proper adjustment settings and regular maintenance tips, you’ll achieve serger-like results using just your overcast foot.
Many users appreciate the side cutter’s features for their efficiency.
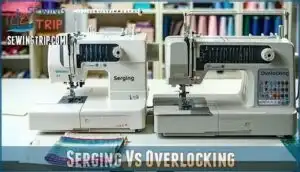
Serging Vs Overlocking
You might hear people use “serging” and “overlocking” like they’re twins, but they aren’t exactly the same.
Don’t worry if you’ve ever mixed them up—honestly, even my sewing machine gets confused sometimes!
Definition of Serging and Overlocking
Ready for some sewing lingo? Serging Defined—this is when a serger machine trims and tightly wraps fabric edges for a super clean finish.
Overlocking Defined, that’s what you do with your regular sewing machine and an overlock stitch—no trimming, just neat edges.
Both methods nail edge finishing and seam finishing, but the tool makes the DJ, right?
| Term | What It Means |
|---|---|
| Serging | Trims, stitches, finishes |
| Overlocking | Just stitches, no trim |
Key Differences Between Serging and Overlocking
So, you just learned what serging and overlocking mean. But here’s the difference: a serger cuts and sews at the same time, making a neat edge in one swoop.
Overlocking on your sewing machine fakes that look but skips the slicing part.
Check out this quick breakdown:
| Stitch Formation | Fabric Trimming | Machine Complexity |
|---|---|---|
| Serger | Yes | Advanced |
| Overlocking | No | Basic |
| Faux Serger Stitch | No | Basic |
| Overlock Stitch | No | Moderate |
| Professional Finish | Yes (Serger) | Both |
Choosing The Right Thread for Serging
When you fire up your serger, picking the right thread makes a world of difference. Choose lightweight serger thread for smooth seams and proper serger tension.
Polyester thread handles most jobs, while cotton thread fits natural-fiber projects. Keep an eye on thread weight—it matters! Match thread colors closely so mistakes hide better.
If the thread quality is high, you’ll spend less time fussing over thread tension and breakage. Many sewers prefer to purchase polyester serger thread for its durability.
| Thread Type | Best For | Watch For |
|---|---|---|
| Polyester | Versatility | Thread tension |
| Cotton | Natural fabrics | Lint build-up |
| Wooly Nylon | Stretchy seams | Thread weights |
| Cone Serger | High volume | Thread quality |
Top 5 Faux Serger Stitch Tools
If you don’t have a real serger, you can still get pro results with a few clever tools that tackle fraying edges and give your projects that clean, finished look.
Grab your fabric, try these time-saving favorites, and maybe laugh when you realize how much easier sewing gets with the right gear.
1. Snap On Overcasting Foot for Sewing
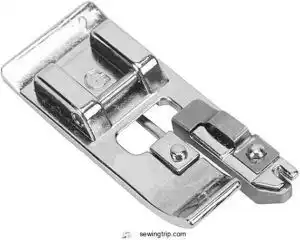
Why struggle with fraying edges when you can snap on this game-changing foot?
This universal attachment fits most low shank sewing machines and transforms your regular machine into a faux serger.
The metal guide bar holds fabric flat while wrapping thread around raw edges, preventing fraying and curling.
Simply snap it on, select your overcast stitch, and watch those edges get professional-looking treatment.
It’s like having a serger’s little cousin right at your fingertips.
Best For: Home sewers who want professional-looking finished edges without investing in a serger machine.
- Creates clean, fray-free edges that mimic serged results on regular sewing machines
- Universal snap-on design fits most low shank machines with easy attachment and removal
- Affordable alternative to expensive serger machines, costing only $10-30
- Mixed durability reports with some units breaking after minimal use
- Requires careful speed control to avoid needle strikes on the metal guide bar
- May need machine setting adjustments and compatibility verification before use
2. Brother Sewing Machine Side Cutter
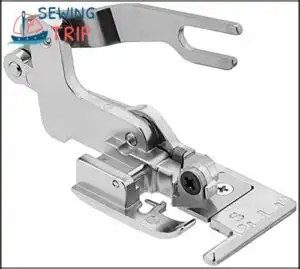
The Brother Sewing Machine Side Cutter (SA177) cuts fabric while you sew, creating professional serger-like edges in one smooth pass.
This genuine Brother accessory features a sharp precision blade that trims excess seam allowance while overcasting stitches form perfectly finished edges.
You’ll snap it onto most low shank machines easily, though you can’t use automatic needle threader with it installed.
Practice makes perfect with this tool that costs half the price of comparable attachments while delivering authentic serger results at an affordable price, making it a valuable genuine Brother accessory.
Best For: Sewers who want serger-like edge finishing on a regular sewing machine without investing in a separate serger.
- Trims and overcasts fabric edges in one pass for professional-looking results
- Compatible with most low shank Brother machines and costs half the price of comparable attachments
- Creates clean, finished edges that prevent fraying and enhance garment durability
- Cannot use automatic needle threader when this foot is installed
- Requires manual fabric insertion at the start and practice to master techniques
- Blade needs periodic sharpening or replacement to maintain optimal cutting performance
3. Pinking Shears Fabric Zig Zag Scissors
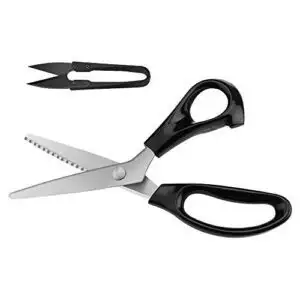
Not all heroes wear capes—some come with zigzag blades! Pinking shears are your not-so-secret weapon for taming fraying edges without fuss.
Just grab those comfy handled scissors, snip along the fabric edge, and presto: you get a fun zigzag that keeps things from unraveling.
These sturdy shears handle denim, silk, and paper with ease.
Bonus: they’ll give your projects a pro finish and a dash of charm.
Keep them sharp, and you’ll cut through sewing headaches in style.
Best For: Anyone who needs clean, decorative, fray-resistant edges on fabrics or crafts, whether you’re a pro or a hobbyist.
- Sharp, durable blades cut through various materials with ease.
- Ergonomic handles and sturdy build make them comfortable for long use.
- Zigzag edges help prevent fabric fraying and add a professional finish.
- Heavy and large size may be hard for some users to handle.
- Not ideal for frequent machine-wash projects, as fraying can still occur.
- Shouldn’t be used on very heavy fabrics to avoid damaging the blades.
4. Dritz Fray Check Liquid Seam Sealant
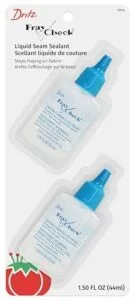
If you’ve ever chased a rogue thread across a favorite shirt, Dritz Fray Check is your new best friend.
It’s a clear liquid you dab right onto fabric edges to stop fraying in its tracks.
It dries fast—just fifteen minutes or so—and stays flexible after washing.
Use a pin for tiny spots, or snip the tip for bigger areas.
Works great on hems, buttonholes, or tricky corners.
Tip: test on a scrap first so you don’t end up with a surprise stiff spot!
Another way to prevent fraying is by using various seam finishes.
Best For: Home sewists, crafters, and anyone needing a quick, invisible solution to stop fabric edges from fraying or to secure thread ends.
- Simple to apply, dries clear and flexible, and holds up after washing and dry cleaning.
- Precision tip lets you tackle both small repairs and larger projects with ease.
- Extends garment life and delivers professional-looking results on hems, seams, and trims.
- Can stiffen or darken certain fabrics if used too heavily or without testing first.
- Liquid is flammable, has chemical fumes, and may irritate sensitive skin or eyes.
- Not ideal for visible repairs or high-lycra/stretch fabrics, and may cause itchiness on inside seams.
5. 45mm Pinking Rotary Cutter Blades
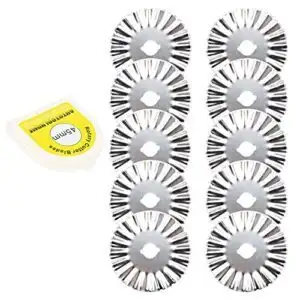
You’ll love the 45mm pinking rotary cutter blades if you want crisp zigzag edges that look sharp and help stop fraying.
They slice through cotton, fleece, or felt with the ease of a pizza wheel—way easier than snipping away with shears.
Just make sure you’re cutting on a self-healing mat and don’t smash the blade on pins.
They’re great for quilting, crafts, and appliqué. Keep an eye out though—sometimes a blade might go dull early, so have backups ready.
Best For: Anyone who wants to add decorative, fray-resistant zigzag edges to fabric quickly and easily, especially crafters, quilters, and sewists.
- Cuts multiple fabric layers fast, with cleaner results than pinking shears.
- Lightweight and easier on hands, reducing strain during long projects.
- Compatible with most major rotary cutter brands and comes with a storage case.
- Inconsistent blade sharpness; some may dull or chip quickly.
- Requires a self-healing mat and careful handling to avoid damage.
- Blades are not sharpenable and need regular replacement.
Preventing Fabric Fraying
You’re about to learn how to prevent fabric fraying, a vital step in achieving a professional finish with your faux serger stitch.
Stop fabric fraying in its tracks—your projects deserve that crisp, professional edge finish.
By using techniques like zigzag stitches, pinking shears, and fray check glue, you’ll be able to keep your fabric edges intact and looking great.
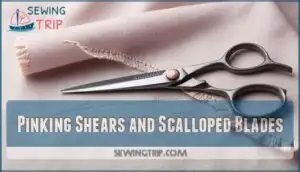
Pinking Shears and Scalloped Blades
You’re looking for ways to prevent fabric fraying.
Pinking shears and scalloped blades can help:
- Cut fabric edges
- Prevent fraying
- Finish seams
- Work on various fabric types
Pinking shears feature a distinct zig-zag pattern on their blades.
Use them to achieve a clean fabric edge finish for your faux serger stitch projects, utilizing the pinking shears effectively.
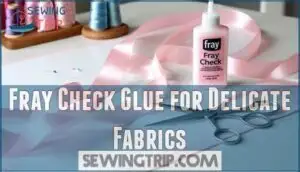
Fray Check Glue for Delicate Fabrics
When pinking shears aren’t enough for delicate fabrics, fray check glue becomes your fabric fraying superhero.
This liquid seam sealant works perfectly for ribbon ends and raw-edge designs without adding bulk.
Glue application is simple—just dab along the fabric edge and wait for drying time.
Check fabric compatibility first, as some materials react differently.
For purchasing, consider online fray check.
Alternative sealants exist, but fray check offers excellent seam durability for your sewing machine projects.
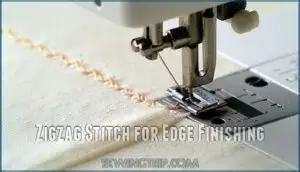
Zigzag Stitch for Edge Finishing
The zigzag stitch is your go-to edge finishing stitch when you need reliable fray prevention.
This versatile sewing machine stitch works great as a faux serger stitch for most fabric types.
Here’s how to nail it:
- Stitch width: Set to 3mm for medium fabrics, 2mm for delicate materials
- Stitch length: Use 1.5mm for balanced coverage and speed
- Tension settings: Adjust slightly looser than normal straight stitch
- Double rows: Sew twice on fabrics that fray easily
Test your settings on scraps first – the fabric edge finish should wrap cleanly without puckering.
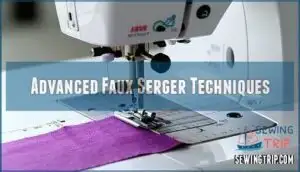
Advanced Faux Serger Techniques
Once you’ve mastered the basics, you can take your faux serger game to the next level with some professional techniques.
These advanced methods will help you create edges that look so good, people might think you actually own a serger!
Using Overlock Foot With Sewing Machine
You’re mastering the faux serger stitch.
Attach an overlock foot to your sewing machine for a professional edge finish.
This foot guides the fabric, preventing curling and puckering, and allows for various stitch selections, including overedge and zigzag, to achieve a neat finish with good edge control and the right tension settings.
Combining Zigzag and Straight Stitches
You can achieve a faux serger stitch look by combining
- 3 main stitches:
- zigzag stitch
- straight stitch
- sewing machine stitch
for seam durability and fabric stability, adjusting tension for the right stitch density and edge protection.
Understanding stitch strength factors is key to success.
Overcast Stitches for Professional Finish
When sewing, you’ll find overcast stitches give a professional finish.
Proper stitch selection and foot compatibility are key. Adjust tension for smooth fabric handling, ensuring seam durability.
Use your sewing machine’s overlock or overcasting stitch for a faux overlock finish, achieving a clean fabric edge finish with ease.
Mastering Faux Serger Stitch Sewing
You’re about to master faux serger stitch sewing, which is a game-changer for your sewing projects.
By following these tips, you’ll be able to achieve professional-looking results and take your sewing skills to the next level.
Tips for Achieving Professional Results
Ready to make your faux serger stitch look crisp and pro-level? Fine-tune your sewing machine settings and keep the fabric edge finish sharp.
Here’s your cheat sheet:
- Keep consistent tension—tight enough but not too much.
- Select the right stitch for your fabric.
- Stabilize stretchy fabrics so there’s no bunching.
- Pick the proper needle—it matters!
A little pressing goes a long way, too, to help you achieve a pro-level finish.
Common Mistakes to Avoid in Faux Serger Stitch
You’ve got your faux serger stitch looking sharp, but don’t fumble the basics while reaching for perfection.
Watch out for tension issues and fabric stretching—no one wants a wavy mess.
Dial in stitch width and foot pressure, and double-check your needle choice for every fabric.
Even with the sewing machine overcasting stitch, adjusting sewing machine for serging—and knowing those overcast foot benefits—makes the difference.
Here’s a handy cheat sheet:
| Mistake | Why It Happens | Quick Fix |
|---|---|---|
| Uneven Tension | Wrong settings | Tweak tension dial |
| Fabric Stretching | Too much pressure | Adjust foot pressure |
| Wide Stitches | Incorrect setting | Narrow stitch width |
| Broken Needles | Wrong type/size | Match needle to fabric |
Troubleshooting Faux Serger Stitch Issues
Even with the best gear, skipped stitches or tension problems can sneak in like uninvited guests at a picnic.
If your faux serger stitch look’s off—messy loops, thread breaks, or fabric puckering—double-check your needle and thread combo and those sewing machine tension settings.
Sometimes, just swapping in a fresh needle solves skipped stitches.
Don’t let little hiccups like thread breaking turn your masterpiece into a headache, and remember that fixing these issues can prevent major problems and ensure your sewing project turns out as a masterpiece.
Frequently Asked Questions (FAQs)
How to mimic a serger stitch?
You can mimic a serger stitch by using a zigzag stitch or overcast stitch on your machine, it’s like a fake serger, pretty cool, right?
How do you do a mock overlock stitch on a sewing machine?
You can do a mock overlock stitch on a sewing machine using a zigzag stitch or a specific overlock stitch, often labeled as stitch 14, to secure fabric edges neatly.
Can I use cotton thread for faux serging?
You can use regular polyester thread, but cotton thread works too for faux serging, just keep in mind it mightn’t be as strong or durable as polyester thread.
How tight should faux serger stitches be?
You’ll want your faux serger stitches to be snug, but not too tight, aiming for a balance that prevents fraying without puckering the fabric, usually a stitch length of 5 mm.
Do all fabrics require faux serging techniques?
You’ll find that not all fabrics need faux serging, but delicate or fray-prone ones definitely benefit from this technique to prevent unraveling.
Can I use faux serger on stretchy fabrics?
You can sew faux serger stitches on stretchy fabrics, but be careful not to stretch them too much, or they might lose their shape or get distorted.
Is faux serging suitable for heavy fabrics?
You can faux serger heavy fabrics, but shorter stitch lengths and wider stitch widths are needed for a secure finish, preventing bulkiness and ensuring durability.
Conclusion
You’re on a roll now, cutting through the noise with your new faux serger stitch skills.
Mastering the faux serger stitch sewing machine takes practice, but with these tips, you’ll be sewing like a pro in no time, achieving professional-looking results with your faux serger stitch sewing machine.
- https://mermaidsden.com/blog/2016/07/25/sewing-hacks-tested-can-serge-sewing-machine-using-overlock-foot
- https://madamsew.com/blogs/sewing-blog/finishing-your-edges?srsltid=AfmBOooYuSxAs0B1Xpt6Rx6UkEapHVLwY5uqR96rj5GYiYT2S_TLVUvv
- http://www.blogforbettersewing.com/2011/03/your-sewing-machine-overlock-stitch.html
- https://www.youtube.com/watch?v=7WOve8e8MSI&pp=0gcJCfwAo7VqN5tD
- https://youmakeitsimple.com/2020/09/18/overlock-stitch-no-serger-needed/

