This site is supported by our readers. We may earn a commission, at no cost to you, if you purchase through links.
Make sure it’s inserted correctly and not bent. Next, adjust your machine’s tension – too tight or too loose can cause those pesky skipped stitches.
Re-thread both your upper thread and bobbin, ensuring smooth, uninterrupted movement. If you’re working with tricky fabrics like stretchy or thick materials, slow down and use a stabilizer.
Sometimes, a gentle touch and patience are your best sewing tools. Ready to become a stitch-perfecting pro and fix those pesky skipped stitches with a sharp needle?
Table Of Contents
Key Takeaways
- You’ll solve most skipped stitch problems by changing your sewing machine needle regularly and selecting the right needle type for your specific fabric thickness and texture.
- Check your machine’s thread tension and threading path carefully, ensuring you’ve matched the thread weight to your fabric and re-threaded both upper and bobbin threads correctly.
- Keep your sewing machine clean by removing lint and debris from the bobbin area and feed dogs, which prevents stitch interruptions and maintains smooth fabric movement.
- Use stabilizers or interfacing for tricky fabrics like stretchy materials, and always test your stitch settings on scrap fabric before starting your main project to catch potential skipping issues early.
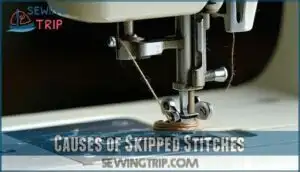
Causes of Skipped Stitches
Ever wondered why your sewing machine keeps skipping stitches and ruining your perfect project?
Understanding the root causes of these frustrating interruptions can save you hours of headache and help you achieve those flawless seams you’ve been dreaming about.
Faulty Sewing Machine Needle
With needles being the heartbeat of your sewing machine, detecting wear can save your project.
Watch out for these telltale signs of a faulty needle:
- Jagged fabric edges
- Uneven stitch formation
- Audible popping sounds during stitching
A worn needle isn’t just a minor hiccup—it’s a potential project killer. Inspect your needle regularly, and replace it at the first sign of damage to keep your stitches smooth and precise.
Incorrect Needle Type for Fabric
When a needle doesn’t match your fabric, skipped stitches become your unwelcome sewing companion.
Needle Point Types matter big time! Sharp needles work best for woven fabrics, while ballpoint needles glide through knits like butter.
Your Needle Size Guide is your secret weapon—thicker fabrics demand larger needles, thin materials need finer points.
Fabric compatibility isn’t rocket science, just smart needle selection. Selecting the correct needle point types can greatly improve your stitching.
Thread Quality and Machine Tension
 View On Amazon
 After wrestling with the wrong needle, you’ll find thread quality and machine tension are your next battlefield in skipped stitch warfare.
Your sewing success hinges on getting these right.
- Match thread weight to fabric
- Balance upper and bobbin tension
- Store threads in cool, dry spaces
- Check tension after switching thread types
- Schedule regular machine servicing
Bent or Dull Needles
Because a worn-out needle can quickly derail your sewing project, you’ll want to become a needle inspection pro.
Dull or bent needles create uneven stitches that can ruin your fabric.
Check your needle regularly for signs of wear, like tiny nicks or blunt tips.
Replace sewing machine needles every 8 hours of use to guarantee smooth , professional results.
Incorrect Settings for Fabric Type
After wrestling with a worn needle, you’ll quickly realize fabric type demands specific machine settings.
Adjust your stitch length and presser foot pressure to match the fabric weight.
Thick materials need slower speeds and wider seam allowances, while delicate fabrics require gentler feed dog tension.
These nuanced sewing machine settings prevent skipped stitches and guarantee smooth, professional results.
Checking The Needle
Your sewing machine’s needle is the unsung hero of every perfectly stitched project, so it’s essential to check it regularly for potential problems.
When you spot skipped stitches, start by examining your needle’s condition, ensuring it’s sharp, correctly sized for your fabric, and inserted just right.
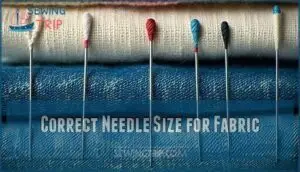
Correct Needle Size for Fabric
When skipped stitches plague your project, matching needle size to fabric weight becomes your secret weapon.
Forget one-size-fits-all approaches.
For woven fabrics, choose sharp needles that glide smoothly.
Knit fabrics demand ballpoint tips that slip between threads.
Your thread size matters too—thicker threads need larger needle eyes.
Master these needle nuances, and watch your skipped stitch nightmares vanish.
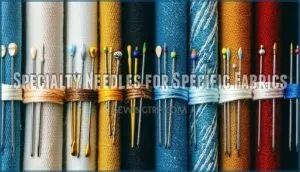
Specialty Needles for Specific Fabrics
When picking needles, think of them like specialized tools for different fabric adventures.
Stretch fabrics love ballpoint needles that slide between fibers, while sharp Microtex needles slice through silk like a hot knife.
Denim needles tackle thick materials, and specialty leather needles conquer tough terrain.
Your fabric’s personality determines the perfect needle companion for skipped stitch repair.
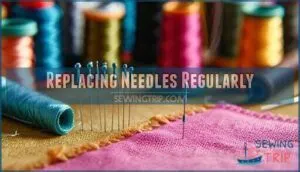
Replacing Needles Regularly
After mastering specialty needles, you’ll want to keep your sewing arsenal sharp by replacing needles regularly.
A dull needle is like a worn-out pencil—it won’t do the job right.
Aim to swap out needles every 8 hours of sewing or when they show signs of wear.
Understanding optimal needle changes will improve sewing quality.
This preventative maintenance saves you from skipped stitches and costly repairs down the line.
Ensuring Sharp and Correctly Inserted Needles
While changing your needle might seem like a small step, it’s essential for flawless stitching.
Carefully inspect your sewing machine needle for signs of dullness or damage before each project.
Check that it’s correctly inserted with the flat side facing the right direction.
A sharp, properly positioned needle is your secret weapon against frustrating needle issues and uneven stitches.
Regular replacement prevents skipped stitches and frustration, which is a crucial step for achieving smooth stitching.
Adjusting Needle Size for Thick Fabrics
With thick fabrics challenging your sewing machine, you’ll want to upgrade your needle game.
Larger needles (size 90/14 or 100/16) handle denim, leather, and canvas like champions.
Pair these with a stronger needle point type that punches through multiple layers without skipping.
Your feed dog and presser foot pressure might need tweaking to guarantee smooth fabric transport and consistent stitching.
Thread Quality and Compatibility
Your thread choice can make or break your sewing project, so understanding quality and compatibility is essential.
I’ll create a blockquote that captures the essence of the paragraph with the same engaging and emphatic tone:
Thread is the silent hero of your sewing adventure—choose wisely, and watch your projects transform!
When you select the right thread for your fabric, you’ll prevent skipped stitches and create professional-looking results every time.
High-Quality Thread for Consistent Stitches
Those silky thread fibers aren’t just decorative—they’re your secret weapon against skipped stitches.
High-quality threads make a world of difference in your sewing machine’s performance. Brand name quality matters more than you might think.
Using superior thread options can substantially improve stitch quality. By investing in top-tier threads, you’ll dodge frustrating stitch problems and keep your sewing projects looking professional and polished.
Matching Thread Type to Fabric
Your fabric’s personality demands the right thread companion. Match thread fiber content precisely—cotton threads for cotton fabrics, polyester for synthetics, and silk for delicate silk pieces.
Thread weight matters: lightweight threads work best with thin fabrics, while heavier threads suit thicker materials.
Your fabric’s texture and purpose guide the perfect thread selection, ensuring a harmonious pairing that respects the fabric’s unique personality and texture, and ultimately serves its intended purpose.
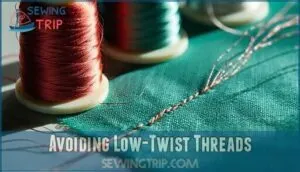
Avoiding Low-Twist Threads
I’ll create an artifact for this engaging quote about low-twist threads:
Twisted threads are your sewing machine’s secret weapon against frustrating skipped stitches!
Since low-twist threads can sabotage your sewing project, you’ll want to choose wisely.
High-quality threads with proper twist angles prevent skipped stitches and guarantee thread strength.
High-quality threads with the right twist angles ensure strong, flawless stitches that elevate your sewing projects to professional perfection.
When selecting thread fiber, opt for tightly spun options that resist fraying.
Your thread storage matters too—keep spools in cool, dry spaces to maintain their integrity and prevent unwanted missed stitches, which is crucial for the overall thread strength.
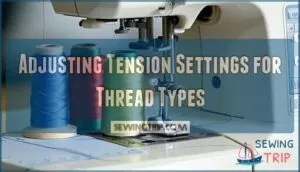
Adjusting Tension Settings for Thread Types
Whenever you swap thread types, you’ll want to nail your tension settings.
Test your stitch quality on scrap fabric, adjusting the tension dial incrementally to match different thread weights.
Watch for balanced stitches and prevent thread breaks by fine-tuning your machine’s tension.
Your manual is your best friend for precise tension troubleshooting and fabric compatibility.
To guarantee consistent results, remember to perform regular tension device maintenance.
Storing Threads Properly
Most thread spools deserve some TLC to maintain their quality.
Store your threads in cool, dry containers away from direct sunlight to prevent fiber degradation.
Humidity can wreak havoc on thread integrity, so invest in airtight storage solutions.
Keep your high-quality threads organized and protected, ensuring they’re ready to deliver pristine stitches every time you sit down at your sewing machine.
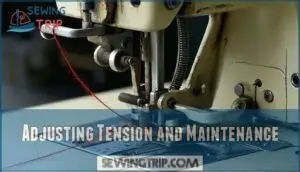
Adjusting Tension and Maintenance
You’ll want to master your sewing machine’s tension settings to prevent those frustrating skipped stitches that can ruin your project.
Your machine’s maintenance isn’t just about cleaning—it’s about understanding how tiny adjustments can make a massive difference in your stitching quality.
Uneven Stitching and Tension Issues
If something seems off with your stitches, uneven tension might be the culprit.
Tension problems can derail your sewing project faster than a runaway bobbin.
Here’s how to diagnose and tackle those pesky tension issues:
- Check your thread path for snags or twists
- Inspect feed dogs for lint or debris
- Test tension settings on scrap fabric before your main project to ensure you have the right tension.
Referencing Sewing Machine Manual
Your sewing machine manual is your secret weapon against skipped stitches.
It’s packed with troubleshooting guides, maintenance schedules, and detailed part identification diagrams.
Flip through those pages to access your machine’s full potential and solve tension problems like a pro.
Don’t let a cryptic manual intimidate you – it’s your roadmap to sewing success.
Adjusting Upper Thread Tension
You’ll often wrestle with tension problems like a detective solving a mystery.
The tension dial guide is your secret weapon for conquering skipped stitches.
Start by testing stitch quality on scrap fabric, adjusting incrementally based on fabric thickness and thread weight.
Watch your stitches transform from uneven to professional with careful, precise upper tension tweaks, using the guide as your tool to achieve perfect stitch quality.
Checking and Correcting Bobbin Tension
After fine-tuning your upper thread tension, you’ll want to peek at the bobbin’s tension game. A misaligned bobbin can turn your beautiful project into a tangled mess faster than you can say "skipped stitch"!
Here’s your bobbin tension troubleshooting roadmap:
- Gently lift the bobbin case
- Check thread resistance
- Inspect for uneven winding
- Test tiny tension adjustments
When in doubt, a TOWA gauge can be your secret weapon for precision.
Cleaning Lint and Debris From Machine
After fine-tuning your bobbin tension, your machine’s performance hinges on keeping it clean.
Lint buildup acts like a silent saboteur, trapping threads and disrupting smooth stitching.
Grab a soft brush and compressed air to sweep away debris from feed dogs and bobbin area.
Regular cleaning prevents skipped stitches and extends your machine’s life—think of it as giving your trusty sewing companion a spa day, which is crucial for maintaining smooth stitching and ensuring the machine’s longevity by preventing lint buildup.
Fixing and Preventing Skipped Stitches
Skipped stitches can turn your sewing project from a dream to a disaster in seconds.
Don’t panic—with the right techniques, you’ll master fixing and preventing these pesky interruptions to your seamless stitching journey.
Changing The Needle to a Suitable Type
After wrestling with tension troubles, you’ll want to tackle needle selection head-on.
Swap out that tired needle like a pro with these quick tips:
- Match needle point types to your fabric’s personality
- Consult a Needle Size Chart for precision
- Consider Specialty Needle Uses for tricky materials
Your sewing machine will thank you by producing smooth, skip-free stitches that’ll make your projects shine!
Re-threading The Upper Thread Correctly
Your machine’s thread path can become a labyrinth of tension problems if not navigated correctly.
Rethreading isn’t just a chore—it’s your secret weapon against skipped stitches.
Here’s a quick guide to mastering the art:
| Step | Action | Key Tip |
|---|---|---|
| 1 | Raise Presser Foot | Reduces thread tension |
| 2 | Check Spool Placement | Guarantees smooth thread flow |
| 3 | Follow Thread Guides | Prevents tangling |
| 4 | Test Tension | Adjust if needed |
This guide provides a step-by-step approach to mastering the art of rethreading, ensuring a smooth and efficient sewing experience.
Checking Bobbin for Proper Winding and Tension
After perfectly threading your machine, you’ll want to give your bobbin some TLC.
Check for even winding—bumpy or loose bobbins spell disaster for tension.
Clean the bobbin case’s tension spring, removing pesky fuzz that interrupts smooth thread flow.
Stick with your machine’s genuine bobbins, not generic imposters, and match thread weights to prevent those frustrating skipped stitches.
Cleaning The Machine Regularly
Your trusty sewing buddy thrives on TLC. Regularly blast away lint and dust from feed dogs and bobbin area using a small brush or compressed air.
Don’t forget to oil the machine’s key moving parts sparingly, following your manual’s guidance.
Following a regular sewing machine maintenance checklist can help prevent issues.
Professional servicing once a year keeps your machine humming smoothly, preventing those pesky skipped stitches dead in their tracks, which is a result of good sewing machine maintenance.
Stabilizing Stretch Fabrics With Interfacing
After cleaning your machine, tackle skipped stitches on stretch fabrics by strategically using interfacing.
Reach for fusible or tricot knit interfacing to stabilize problem areas like necklines and seams.
Cut it precisely, apply with an iron, and watch how it prevents fabric distortion.
Your sewing machine will glide smoothly, creating professional-looking stitches that hold their shape.
Frequently Asked Questions (FAQs)
How Do I Know if the Timing of My Sewing Machine is Off?
You’ll notice uneven stitches, misaligned needle positions, or fabric not moving smoothly. Unusual sounds or skipped stitches consistently occurring might indicate your sewing machine’s timing needs professional adjustment.
What Should I Do if I Notice Skipped Stitches When Using Twin Needles?
Adjust your machine’s tension and use a stretch twin needle for knits.
Stabilize fabric with interfacing, reduce presser foot pressure, and make certain you’ve chosen the right needle type for your specific project.
How do you get rid of stitches when skipping?
Your sewing machine’s gone rogue, dropping stitches like bad habits.
Swap out the needle, re-thread carefully, check bobbins tension, and clean the machine’s innards to banish those pesky skipped stitches for good.
What does a skipped stitch look like?
You’ll spot a skipped stitch as an uneven, loose thread that looks like a tiny gap or missed connection in your fabric’s stitch line.
It disrupts the smooth, uniform appearance of your sewn seam.
What is the root cause of skip stitches?
Like a silent thread unraveling, skipped stitches stem from your needle’s health.
You’ll find dull, bent, or incorrect needles disrupt your fabric’s harmony, causing inconsistent stitches that compromise your sewing project’s integrity.
The needle’s health is crucial for maintaining the quality of your sewing project.
How do you fix uneven stitches on a sewing machine?
Check your machine’s tension settings, clean the bobbin area, and replace the needle.
Test different thread types, and make certain you’re using the right needle for your fabric weight to create smooth, even stitches.
How do I diagnose a difficult skipping problem?
Did you know 75% of sewing machine skips stem from needle issues?
You’ll want to systematically inspect your needle, re-thread the machine, adjust tension, and clean the bobbin area to pinpoint and resolve stubborn stitch skipping problems.
Can skipped stitches damage my fabric permanently?
Skipped stitches can indeed leave permanent fabric damage, weakening seams and creating unsightly holes. Quickly replace your needle, re-thread carefully, and restitch damaged areas to prevent long-lasting fabric imperfections.
Why do stitches skip on delicate fabrics?
82% of sewists struggle with skipped stitches on delicate fabrics.
You’ll often see this happen when your needle’s too sharp, thread tension’s off, or you’re using the wrong presser foot for lightweight materials.
What emergency fixes work mid-project?
Quickly swap your needle, re-thread both top and bobbin threads, and test on scrap fabric.
Adjust tension slightly if needed.
Use a fresh needle matching your fabric type for immediate project rescue.
Conclusion
Whether you’re a beginner or a seasoned sewist, fixing a skipped stitch sewing isn’t rocket science.
You’ve learned the key techniques to troubleshoot those frustrating needle hiccups.
Remember, regular maintenance, the right needle, and proper tension are your best friends.
Don’t get discouraged by occasional stitching challenges – with practice, you’ll become a stitch-perfecting pro.
Keep your machine clean, your needles sharp, and your creativity flowing!

