This site is supported by our readers. We may earn a commission, at no cost to you, if you purchase through links.
Keep your tension balanced – too tight creates puckering, too loose looks sloppy. Practice on fabric scraps first to nail your technique.
Use a seam guide or tape to maintain straight lines, and stitch slowly for control. Don’t backstitch at corners; instead, pull threads to the back and tie them off.
The secret lies in understanding how different fabrics behave and adjusting your machine settings accordingly for consistent results.
Table Of Contents
Key Takeaways
- Choose the right thread and needle combination – You’ll need heavier thread (30-40 weight) for visibility and a 90/14 or 100/16 needle for smooth stitching through thick fabrics like denim.
- Master tension control before you start – Keep your tension balanced between 3-4 on your machine, since too tight creates puckering, while too loose looks unprofessional.
- Practice on scraps first to avoid costly mistakes – You cannot perfect your technique on your final project, so test different settings and thread combinations on fabric scraps.
- Use guides and sew slowly for consistent results – You’ll get straighter lines with seam guides or tape, and controlling your speed prevents wobbly stitching that screams amateur.
What is Topstitching
Topstitching is visible stitching you sew on the right side of fabric, creating both decorative appeal and functional strength in your garments.
Topstitching transforms ordinary seams into striking design elements while adding professional strength to every stitch.
You’ll find this technique reinforces seams, keeps edges flat, and adds that professional finish to everything from jeans and jackets to bags and belts.
Definition and Purpose
Topstitching creates visible stitching on your garment’s right side, typically placed 1/4 inch from seam lines.
This sewing technique serves dual purposes: decorative element enhancement and functional seam reinforcement.
You’ll use topstitching for edge control, keeping facings flat and adding structure to flimsy fabrics. It’s essential for professional finish work, providing layer attachment where fabrics won’t naturally stay positioned together.
Decorative and Functional Uses
Every project benefits from topstitching’s dual nature. You’ll find decorative stitching transforms plain seams into striking design elements, while functional applications provide essential seam reinforcement for durability.
Edge finishing with contrasting threads creates visual interest, and accent stitching adds professional polish to garments.
Split stitch techniques are popular for adding delicate, textured lines. This versatile technique enhances fabric structure through embellishment options, making ordinary sewing extraordinary.
Applications in Garments and Accessories
You’ll find topstitching everywhere once you start looking.
Jeans showcase classic denim detailing along seams and pockets. Leather jackets feature decorative stitching that doubles as reinforcement.
Handbags rely on topstitching for bag reinforcement and edge finishing around handles and flaps. Even casual shirts use subtle seam durability techniques.
These garments prove topstitching transforms basic construction into polished, professional results.
Thread Selection Guide
Your thread choice makes or breaks your topstitching results, affecting both the look and strength of every stitch.
Your thread selection is the foundation of topstitching success—choose wisely and watch your projects transform from amateur to extraordinary.
You’ll need to match thread weight to your fabric type and decide whether you want your stitching to blend in or stand out with contrast colors.
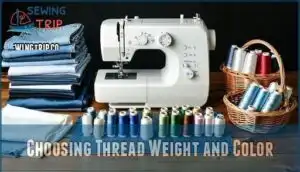
Choosing Thread Weight and Color
When selecting topstitch thread, match your thread weight to your fabric’s thickness.
Heavy fabrics like denim need heavier threads, while lighter materials work with all-purpose options.
- Thread weight guide: Use 30-40 weight for denim, 50 weight for cotton
- Thread type comparison: Polyester offers stretch, cotton provides natural feel
- Bobbin thread choice: Always use regular thread in bobbin
- Matching fabric color: Choose tone-on-tone for subtle looks
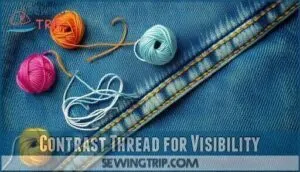
Contrast Thread for Visibility
Bold color pairings make your topstitch thread pop against fabric backgrounds.
White or orange contrast stitching on denim creates that signature jeans look you’ve seen everywhere.
Thread color psychology plays a role – bright colors grab attention while matching undertones keeps things subtle.
Consider visibility vs subtlety when choosing your sewing thread for topstitching projects.
For accurate results, use digital conversion charts to match thread colors across brands, ensuring a professional finish.
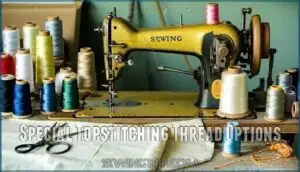
Special Topstitching Thread Options
Heavy-duty topstitching thread transforms your projects with superior strength and visibility.
Choose polyester threads for durability or cotton for natural softness. Thread weight affects prominence—size 30-40 creates bold lines. Double threading regular sewing thread works too.
Match your thread fiber to fabric type. Keep regular thread in the bobbin to prevent machine strain and maintain proper tension balance.
Selecting the right thread involves understanding synthetic and natural fibers for the best results.
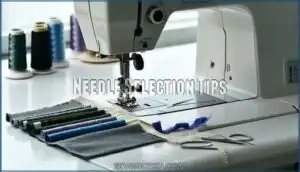
Needle Selection Tips
Your needle choice directly affects how smoothly your topstitching thread flows through thick fabrics and multiple layers.
The right needle prevents thread breakage, skipped stitches, and frustrating jams that can ruin your project’s professional appearance.
Denim and Embroidery Needle Options
When your fabric demands respect, denim needles deliver the muscle you need.
These reinforced warriors handle heavy-duty materials with sizes 90/14 to 110/18, while embroidery needles pamper delicate threads with larger eyes and chrome coating.
Match needle types to fabric thickness—denim needles for tough fabrics, embroidery needles for decorative topstitching techniques and thread compatibility success.
Selecting the right needle also involves understanding its anatomy, as the blade diameter determines the needle size, which is crucial for achieving the desired result.
Twin Needles for Parallel Rows
When you want parallel topstitching rows with perfect spacing, twin needles deliver professional results every time.
These specialized needles create two identical lines simultaneously, making them ideal for hemming knits and adding decorative effects to your projects.
Twin needles are available in various sizes, but understanding needle systems is essential for superior performance.
Here’s what you need to know:
- Twin Needle Size – Choose 2.5mm spacing for fine fabrics, 4.0mm for medium weight materials
- Spacing Adjustment – Match needle width to your fabric thickness and desired visual impact
- Knit Hemming – Twin needles provide stretch while maintaining clean, parallel lines
- Decorative Effects – Create professional-looking details on collars, cuffs, and seam lines
- Troubleshooting – Use walking foot to prevent fabric shifting during twin needle topstitching
Mastering Topstitching Skills
You’ll develop professional topstitching skills through consistent practice on fabric scraps, adjusting tension settings, and maintaining steady sewing speed.
Watch tutorial videos and experiment with different thread weights to refine your technique and achieve the clean, even stitches that make garments look store-bought.
Practice and Experimentation Techniques
Before diving into any project, you’ll want to test your Machine Settings on Scrap Fabric first.
Practice builds confidence and prevents costly mistakes on your final garment.
| Practice Element | Test Method | Key Focus |
|---|---|---|
| Stitch Length | Various settings (2.5-4mm) | Even appearance |
| Needle Size | Different weights (14-18) | Clean penetration |
| Tension Adjustment | Multiple thread combinations | Balanced stitches |
This sewing practice refines your sewing techniques before tackling the real thing.
You can find suitable materials here for this purpose, which helps in preventing costly mistakes and achieving balanced stitches with the right tension adjustment.
Tips for Maintaining Consistent Tension
After mastering your practice runs, tension becomes your make-or-break factor.
Set your tension dial between 3-4 for ideal results.
Match thread weight with needle size – heavier threads need larger needles.
Always test stitching on fabric scraps first.
Your sewing machine tension settings should balance topstitch tension perfectly.
Remember: consistent topstitch quality depends on proper sewing machine tension adjustments for each fabric type, which is crucial for achieving perfect tension.
Refining Topstitching Skills With Tutorial Videos
YouTube’s treasure trove of topstitching tutorials offers visual learning that transforms your sewing machine skills overnight.
Expert techniques become crystal clear when you watch demonstrations showing perfect topstitch execution.
Video tutorials provide troubleshooting tips for common problems like thread tension and fabric puckering.
One can also find videos about adjusting thread tension for even stitches.
This skill enhancement method lets you replay tricky sections until you master each topstitch tutorial technique completely.
Perfecting Topstitching Results
You’ve mastered the basics, but now it’s time to focus on the small details that separate good topstitching from great topstitching.
These final techniques will help you create straight, even lines while preventing fabric shifting and achieving the polished, professional look that makes your projects stand out.
Achieving Straight and Even Stitches
Your sewing machine becomes your best ally when you master consistent fabric tension and smooth guiding techniques.
Keep your hands steady while guiding fabric smoothly, letting machine guide usage direct your straight topstitch lines.
Use manual wheel control around corners for precision and apply stabilizer application when needed.
Practice creates even topstitching that looks professional every time you sew.
Managing Fabric Shifting and Puckering
Fabric shifting and puckering can turn perfect topstitch dreams into sewing nightmares.
Your machine needs help managing multiple layers and maintaining even tension during topstitching.
Here’s your fabric control toolkit:
- Walking Foot – Feeds layers evenly, preventing shifting during sewing
- Stabilizer Use – Supports fabric structure, reducing puckers and distortion
- Glue Basting – Temporarily holds layers for straight topstitch results
- Layer Management – Distributes bulk strategically for even topstitching
Ensuring Professional Finish and Durability
Once you’ve conquered shifting fabrics, your focus shifts to creating bulletproof results.
Check both fabric sides for perfect topstitch alignment and adjust tension accordingly. Reinforce stress points with extra stitching for sewing durability.
Press seams flat to prevent rolling and maintain edge stability. Test fabric compatibility on scraps first.
Your sewing precision determines whether topstitching becomes professional-grade seam reinforcement or amateur hour.
Frequently Asked Questions (FAQs)
How do you topstitch curved seams smoothly?
Navigate curves like threading a needle, guiding fabric like steering a wheel, controlling speed like taming a wild horse.
You’ll slow down, pivot frequently, and use your machine’s hand wheel for tight turns.
Practice makes perfect curves.
What presser feet work best for topstitching?
Choose the right foot for flawless results.
Edge guide feet keep lines straight and even.
Walking feet prevent fabric shifting on thick layers.
Zipper feet work great for close-to-seam topstitching.
Standard presser feet handle most basic topstitching tasks perfectly, and are ideal for topstitching.
How do you fix uneven topstitching lines?
Like untangling a messy fishing line, you’ll need patience to fix wonky topstitching.
Use a seam ripper to remove uneven stitches, then re-mark your guidelines with chalk and sew slowly using consistent tension.
Can you topstitch stretch fabrics successfully?
You can topstitch stretch fabrics, but use a ballpoint needle and slightly longer stitch length.
A walking foot prevents fabric stretching while sewing.
Test tension settings first—stretchy materials need gentler handling than wovens.
How do you topstitch thick seam intersections?
Ah, those bulky intersections that laugh at your machine’s feeble attempts.
Use a hump jumper or wooden spoon handle to lift your presser foot over thick spots.
Go slow, hand-crank if needed, and let gravity help.
Conclusion
Practice makes perfect when mastering this guide to perfect topstitching. You’ve learned the fundamentals: selecting proper thread weights, choosing the right needles, and maintaining balanced tension.
Remember to test your settings on fabric scraps before working on your final project. Take your time with each stitch, use seam guides for straight lines, and don’t rush the process.
With these techniques in your toolkit, you’ll create professional-looking garments and accessories that showcase your improved sewing skills.
- https://kazzthespazz.com/topstitching-how-to/
- https://moresew.com/category/sewing-techniques-and-tips/
- https://sewingbecomeasy.com/sewing-machine-maintenance-and-troubleshooting/
- https://www.centreofexcellence.com/types-of-hand-sewing-stitch/
- https://happyoff.com/blogs/news/how-to-master-the-strong-hand-stitch-a-step-by-step-guide

