This site is supported by our readers. We may earn a commission, at no cost to you, if you purchase through links.

A single needle punctures fabric thousands of times per minute, yet each stitch forms with mechanical precision that rivals a Swiss watch. That’s the hidden choreography inside your sewing machine—a dance between needle, bobbin, and thread that’s been refined over 150 years of engineering.
Most people think the needle simply pushes thread through fabric, but the real magic happens beneath the throat plate, where a rotating hook catches the upper thread at exactly the right millisecond to loop it around the bobbin thread.
Understanding how a sewing machine works reveals an elegant system where timing, tension, and coordinated motion transform two separate threads into a locked seam that won’t unravel, whether you’re hemming jeans or crafting a wedding dress.
Table Of Contents
Key Takeaways
- A sewing machine creates lock stitches by coordinating the needle’s downward thread loop with a rotating bobbin hook that catches and interlocks the upper and lower threads beneath the fabric in precise millisecond timing.
- The feed dogs grip and advance fabric through a synchronized four-motion cycle while the presser foot stabilizes material, ensuring consistent stitch formation at speeds exceeding 5,000 stitches per minute in industrial models.
- Thread tension control and the take-up lever work together to regulate slack and pull thread from the spool after each needle penetration, with proper balance preventing 48% of common quality complaints like puckering or skipped stitches.
- Modern computerized machines offer 50-500+ programmable stitches with automatic tension adjustment and fabric recognition, while mechanical models rely on manual dials and simpler gear-driven mechanisms for 10-30 basic stitch patterns.
How Does a Sewing Machine Work?
A sewing machine works by coordinating several mechanical systems to join fabric layers together with thread. Principally, the machine automates what your hand would do with a needle, but it does so with impressive speed and consistency.
Let’s break down the fundamental principles that make this process possible.
Basic Sewing Machine Operation Explained
At its heart, a sewing machine operation transforms rotary motion into precise stitching through synchronized machine components. Your mechanical function begins when the needle pierces fabric, carrying thread downward while feed dogs guide material forward.
- Threading basics connect upper and lower threads
- Speed control adjusts stitching pace smoothly
- Troubleshooting jams keeps fabric guidance consistent
Stitch selection determines your pattern type. The synchronized movement relies on the feed dog mechanism to pull fabric.
The Role of Automation in Stitching Fabric
Automation Benefits transform modern stitching through Robotic Stitching systems that handle fabric movement with precision your hands can’t match. AI Integration adjusts tension and speed automatically during the stitching process, reducing errors by 40% in production environments. The automatic stitching process eliminates manual inconsistencies, though Cost Implications start around $10,000 for basic systems.
Future Trends point toward fully autonomous stitch formation with real-time quality monitoring. Many modern machines also feature real-time machine monitoring.
Lock Stitch Formation Using Two Threads
The lock stitch intertwines two threads—upper needle thread and lower bobbin thread—beneath your fabric. When the needle pierces the fabric and rises, a hook catches the thread loop with precise hook timing, wrapping it around the bobbin thread.
Thread tension balances both threads to guarantee stitch durability and proper stitch formation, creating that secure fabric impact. Automation effects now control this process seamlessly.
Key Components of a Sewing Machine
A sewing machine might look complicated at first glance, but it’s really just a collection of carefully designed parts working together. Each component has a specific job, from moving the fabric to forming the actual stitch.
Let’s break down the essential pieces that make your sewing machine run smoothly.
Needle and Its Function in Stitching
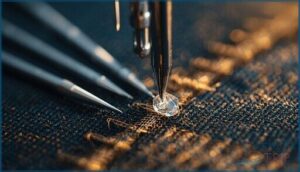
You mightn’t realize it, but your needle is the hardest-working part of any sewing machine. This tiny component pierces fabric thousands of times per minute, carrying the upper thread through to create a thread loop below.
Different needle types—like ballpoint, sharp, or stretch—affect stitch quality and fabric interaction. Thread compatibility matters too, and replacing your needle every 6-8 hours keeps your stitch formation process smooth.
Bobbin and Shuttle Assembly
Below the needle, your bobbin and shuttle assembly create the magic of lock stitches by interlocking upper and lower threads. The shuttle timing ensures its hook catches the thread loop precisely, weaving it around the bobbin.
Proper bobbin tension prevents thread breakage and maintains stitch quality throughout the stitch formation process.
Regular assembly maintenance keeps this critical mechanism running smoothly for consistent results.
Feed Dogs and Fabric Movement
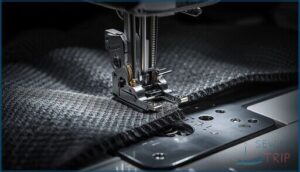
Working beneath your needle plate, feed dogs are small, tooth-like metal protrusions that pull fabric backward in precise steps. These mechanical components of sewing machines perform a four-motion cycle—rising, pulling, lowering, and returning—synchronized with your needle’s movement.
Different feed dog types and fabric feed control settings adapt to various materials, directly impacting stitch quality and sewing machine efficiency through consistent advancement.
Presser Foot and Fabric Stabilization
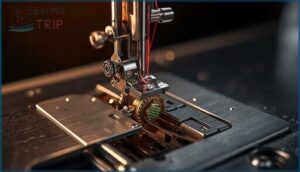
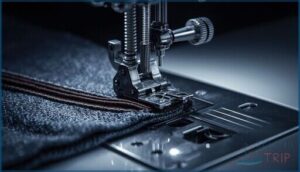
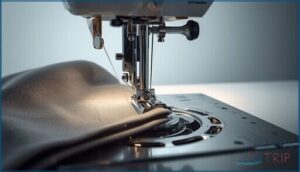
Above your feed dog, the presser foot clamps fabric flat, preventing fabric slippage and seam pucker during stitching. You’ll find foot pressure adjustment essential for material thickness variations.
- All-purpose feet suit general sewing with two toes stabilizing fabric edges
- Walking feet handle thick quilts with enhanced fabric manipulation
- Teflon feet glide over leather without sticking
- Industrial automation systems adjust pressure digitally at 5,000+ stitches per minute
- Specialized feet reduce distortion by 20–40% in production weaving
Electric Motor and Drive Mechanisms
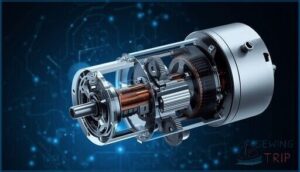
At the heart of your machine, electric motors convert electrical energy into rotary motion that drives internal mechanisms. Drive belt types—V-belts, timing belts, or polyurethane—transmit power through precisely engineered shafts. Motor control advantages include IoT-enabled sewing diagnostics and needle positioning. This mechanical engineering marvel coordinates every stitch.
Home models typically use motors ranging from 45W to 150W, while industrial machines employ servo motors that achieve 80–95% efficiency and deliver up to 70% energy savings.
| Motor Type | Power Range | Key Advantages |
|---|---|---|
| Home Electric Motors | 45W–150W | Compact, affordable, suitable for varied fabrics |
| Servo Motors (Industrial) | Variable consumption | 80–95% efficiency, speed-dependent power use |
| Clutch Motors (Legacy) | Constant high power | Continuous operation, less efficient |
| IoT-Enabled Systems | Optimized loads | Remote monitoring, predictive maintenance |
Stitch Formation and Mechanical Process
Understanding how a sewing machine creates stitches reveals the ingenious interplay of moving parts working in perfect sync. The process involves precise coordination between the needle, bobbin, and thread control mechanisms to form each lock stitch.
Let’s break down the key mechanical processes that make this stitching action possible.
Needle Mechanism and Thread Movement
Think of the needle assembly as a conductor orchestrating every stitch you create. As the needle descends, it pierces fabric with needle penetration force that increases dramatically at high speeds. The needle thread follows through the eye, forming a loop beneath the material. This process controls thread loop size, affecting lock stitch durability. High-speed dynamics demand precise needle design to prevent skipped stitches while the bobbin awaits its turn.
- Needle descends vertically, carrying your thread through the fabric layers
- Thread tension adjusts to prevent excess slack during penetration
- Upon rising, the needle creates a small loop underneath the fabric
- Loop size depends on your machine’s speed and thread properties
- Needle design features enable smooth thread passage and consistent loop formation
Bobbin Hook and Shuttle Rotation
The bobbin hook is where your lock stitch truly comes together. In rotary systems, the hook rotates continuously at over 5,000 stitches per minute, catching the needle’s thread loop with split-second hook timing.
Oscillating shuttles swing through a partial arc instead, offering larger bobbin capacity but less stitch precision at speed.
Modern shuttle materials like high-strength steel alloys guarantee durability, though proper maintenance needs include regular cleaning to prevent the lint buildup that causes 30% of service calls.
Thread Tension and Take-up Lever Control
Once the bobbin hook captures your needle thread, proper tension control becomes your secret weapon for stitch consistency. The take-up lever synchronization pulls thread from the spool after each needle penetration, regulating tension dynamically through its central stroke.
You’ll find tension troubleshooting straightforward: dial settings from 0 to 9 adjust disc pressure, while fabric influence dictates your adjustment practices—heavier materials need higher tension than delicate weaves.
Interlocking of Upper and Lower Threads
That tension dial setup powers the actual interlock between your sewing machine’s two thread sources. When your needle descends and retracts, the bobbin mechanics capture that upper thread loop—timing here matters because errors beyond 0.1 seconds cause missed stitches or jams.
Key factors affecting stitch quality and interlock failures:
- Needle timing synchronization maintains consistent locks at speeds reaching 5,000 stitches per minute
- Thread tension balance prevents puckering, with imbalance causing 48% of quality complaints
- Proper threading paths reduce skipped stitches by 98% compared to incorrect setup
- Bobbin tension adjustment requires 20-25 grams for balanced, professional results
Setting Up and Operating a Sewing Machine
Before you can watch your sewing machine create perfect stitches, you need to set it up correctly. Each step, from threading the needle to adjusting tension settings, plays a specific role in how smoothly fabric moves through the machine.
Here’s what you need to know to get your machine ready for stitching.
Installing and Threading The Needle
You’ll start by loosening the needle set screw and sliding a new needle upward until it stops, flat side facing back. Over 99% of household sewing machines use this flat-shank design for easy needle installation.
For threading, guide your needle thread through each tension point following your machine’s diagram, then pull it front-to-back through the needle eye. Replace needles every eight hours of sewing to prevent needle breakage.
Loading and Connecting The Bobbin
Once your needle thread is set, you’ll move on to bobbin placement—the lower half of your stitching mechanism.
Wind your bobbin at a slow, steady speed for even tension control, then drop it into the compartment or bobbin case until it clicks. Pull the thread tail through the slot, turn the handwheel manually, and catch the bobbin thread loop to connect both threads and prevent common issues like jamming.
Adjusting Presser Foot and Stitch Settings
Before you feed fabric through, you’ll fine-tune presser foot pressure and stitch settings to match your material. Foot pressure controls how firmly the presser foot holds fabric against the feed dogs—adjust it using the dial or lever on your machine. Meanwhile, stitch length (usually 0 to 4 mm) and stitch width (up to 5 or 6 mm) shape your seam appearance and prevent puckering.
- Foot pressure: Set low (around 4 Newtons) for delicate silks, higher (up to 18-25 Newtons) for denim
- Stitch length: Use 2.5 mm for standard seams, longer for basting
- Stitch width: Adjust from 0 mm (straight) to 3-4 mm (zigzag)
- Foot height: Make sure clearance matches fabric thickness
- Fabric feed: Balance pressure and settings for smooth, even movement
Starting and Guiding Fabric Through The Machine
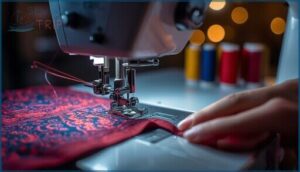
Once you position your fabric under the presser foot, align the edge with seam guides or tape—accuracy here prevents deviation beyond 1 mm across longer seams.
Gently press the pedal to control speed, letting the feed dog grip and advance the material steadily. Keep light hand pressure near the presser foot to maintain fabric alignment and stitch consistency, ensuring tension balance throughout machine operation.
Types of Sewing Machines and Their Uses
Not all sewing machines are built the same, and choosing the right one depends on what you’re trying to make. Some models rely on gears and levers, while others use computer chips to control every stitch.
Let’s look at the different types and what each one does best.
Mechanical Vs. Computerized Models
When you compare mechanical and computerized sewing machines, you’re looking at two distinct approaches. Here’s a feature comparison that reveals key differences:
- Stitch selection: Mechanical models use dials for 10–30 stitches, while computerized versions offer digital control of 50–500+ options
- Cost analysis: Computerized machines command premium pricing but face higher repair complexity
- Market trends: Computerized models captured 46% of sales in 2023, driven by user preference among professionals
- Mechanical parts: The electric motor, needle, and bobbin operate simpler in mechanical designs
Serger and Embroidery Machines
You’ll find serger sewing machines excel at finishing fabric edges while trimming simultaneously—they captured 32% of the North American market in 2024. Four-thread sergers dominate due to their versatility.
Embroidery machines, featuring computerized controls and smart hoop technology, deliver up to 850 stitches per minute with outstanding precision. Embroidery innovations enable rapid pattern transitions.
Both machine types require regular maintenance for peak fabric compatibility across diverse materials.
Industrial, Portable, and Handheld Options
Industrial sewing machines handle heavy fabrics at speeds reaching 5,500 stitches per minute, supporting high-volume production with enhanced fabric capacity—though machine cost averages $1,000 per unit.
Portable sewing machines offer 600-1,200 stitch speed for home use, expanding the user base among DIY enthusiasts. Handheld options provide quick repairs on-the-go.
Market growth reflects diverse mechanics of sewing needs across industrial sewing techniques and consumer applications.
Specialized Machines for Quilting and Leatherwork
Quilting machines now feature automation that manages complex patterns at high speed, with throat openings up to 255 mm for large projects. The quilting automation market is expected to reach $924 million by 2033, driven by technological advancements in industrial applications.
Leather sewing machines, like the Weaver 303, use walking presser foot mechanisms and specialized needle plates to stitch materials up to 1/4″ thick. Market growth reflects expanding industrial sewing machines demand.
Innovations and Evolution in Sewing Machines
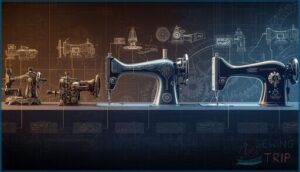
Sewing machines didn’t just appear fully formed—they evolved through centuries of mechanical breakthroughs and clever problem-solving. From the first patents in the 1700s to today’s computerized models, each innovation built on the last, expanding what these machines could do and who could use them.
Let’s trace the key milestones, technical advances, and industry impacts that transformed sewing from a slow hand process into the high-speed automation you see today.
Historical Milestones and Key Inventors
Throughout the history of sewing machines, inventors pushed boundaries that transformed how you create clothing today. Early patents in the 1790s by Thomas Saint launched experimentation, while Elias Howe’s lockstitch mechanism in 1846 revolutionized stitch durability. Singer’s innovations in the 1850s made machines accessible through mass production, and electric adoption around 1905 brought powered stitching into homes—sparking the Industrial Revolution’s textile impact on the development of clothing and innovations in textiles.
- Charles Weisenthal’s 1755 needle patent marked humanity’s first attempt to mechanize the ancient craft of sewing
- Barthélemy Thimonnier’s 1830 machine achieved 200 stitches per minute but faced fierce resistance from tailors fearing job loss
- Isaac Singer’s commercial success democratized sewing technology, making the evolution of sewing machines accessible beyond industrial factories
Advances in Stitch Variety and Machine Features
Modern machines expand your creative possibilities with hundreds of built-in stitches and stitch patterns accessible through LCD screen electronic controls for precise stitch selection and Stitch Customization. Automated Tension systems balance your threads automatically, while AI Integration powers Fabric Recognition that adjusts settings for different materials.
Some models even offer Remote Monitoring through Wi-Fi connectivity, letting you download new designs and update firmware remotely—features unimaginable during Singer’s era.
Impact on Textile Production and Garment Making
These innovations didn’t just add convenience—they transformed entire industries. You can see this impact across textile manufacturing and garment construction today:
- Productivity Gains: Industrial machines boost output by up to 500%, slashing production time by over half.
- Labor Costs: Automation reduces workforce needs while minimizing human error.
- Global Growth: The market hit $4.56 billion in 2024, projected to reach $5.53 billion by 2030.
- Quality Consistency: Uniform stitch formation means fewer defects and returns.
- Sustainability: New water-efficient technologies address textile production’s environmental footprint.
Frequently Asked Questions (FAQs)
How does a sewing machine work step by step?
You’ll start by raising the needle and take-up lever, positioning your fabric under the presser foot, then gently pressing the pedal.
Reverse stitching locks seams, and raising the needle permits safe thread removal at completion.
How did the sewing machine work?
Early mechanisms relied on hand-crank era power or treadle systems.
Original patents from the 1840s introduced the mechanical sewing machine, using needle and bobbin assembly for understanding lock stitches, revolutionizing initial automation completely.
How does a mechanical sewing machine work?
A mechanical sewing machine converts rotary motor motion into linear needle movement using cranks and shafts.
Feed dogs advance fabric while the bobbin shuttle catches thread loops, forming a mechanical lockstitch through precise timing.
How does the bobbin thread work?
Your bobbin holds the lower thread that loops with the needle thread, forming a lockstitch beneath the fabric.
Proper bobbin winding and thread tension prevent common problems like puckering or skipped stitches.
How do sewing machines handle different fabric thicknesses?
You adjust presser foot pressure, needle size, and thread tension to handle thick fabrics. Feed dogs maintain consistent fabric movement, while industrial machines offer enhanced capabilities for heavy materials requiring longer stitch length.
Can sewing machines create patterns or decorative stitches?
You can definitely “thread” new life into your projects—modern machines offer built-in stitches for decorative stitching, embroidery work, and pattern creation.
Computerized models provide stitch variety, thread control, and embroidery designs for quilting stitches.
What determines the speed of a sewing machine?
Your motor power drives the core speed, while fabric thickness, stitch length, and machine maintenance all affect performance.
User control through pedals or dials lets you adjust electric motors and sewing machine components during operation.
How do computerized sewing machines differ from mechanical ones?
Computerized sewing machines use electronic controls and microchip technology, featuring automatic threading and stitch customization via touch screens. In contrast, mechanical models rely on manual dials for operation.
Computerized versions offer sophisticated features but come with higher maintenance costs.
Are industrial sewing machines different from home models?
Industrial sewing machines differ markedly from home models in construction, motor power, and specialized features. Built for durability and high-speed production, industrial machines handle heavy fabrics on expansive work surfaces, dominating global textile manufacturing markets.
How do I troubleshoot common sewing machine problems?
Start by checking thread tension and needle alignment, which cause most dropped stitches. Clean bobbin assembly thoroughly, verify proper machine lubrication, and consult error codes.
Regular machine maintenance prevents timing issues before troubleshooting sewing machine issues becomes necessary.
Conclusion
Before you could YouTube a repair tutorial, sewing machines were already solving mechanical puzzles with rotating hooks and synchronized tensions. Now you know how a sewing machine works: needle descent, bobbin catch, thread interlock, and feed dog advancement—all timed within fractions of a second.
That needle piercing fabric thousands of times isn’t random motion. It’s engineered precision, turning two threads into permanent seams through coordinated components working in mechanical harmony you can trust.

