This site is supported by our readers. We may earn a commission, at no cost to you, if you purchase through links.
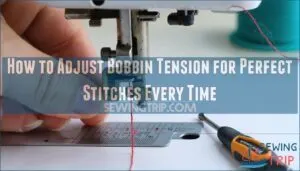 To adjust bobbin tension, first remove the bobbin case and hold it by the thread tail.
If it drops slightly, your tension is good.
If not, find the small screw on the case and turn it clockwise to tighten or counterclockwise to loosen—just a quarter turn at a time, like fine-tuning a guitar string.
Test between adjustments by sewing on scrap fabric.
You’re looking for even stitches with no loops or puckers.
Perfect bobbin tension is like a well-kept secret among sewing pros, making the difference between amateur-looking projects and professional results that’ll make your friends wonder about your hidden talents.
Table Of Contents
Key Takeaways
- You’ll know your bobbin tension is correct when the case drops slightly while holding it by the thread tail – this simple test indicates balanced tension for even stitches.
- When adjusting bobbin tension, turn the small screw clockwise to tighten or counterclockwise to loosen, making only quarter-turn adjustments at a time to avoid overcorrection.
- You should test your tension adjustments on scrap fabric between changes, looking for even stitches with no loops or puckering that lock properly in the center of your fabric.
- You’ll need to check and adjust your bobbin tension when changing thread types, switching fabric weights, or if you notice issues like thread breakage, bunching, or uneven stitches.
What is Bobbin Tension
Bobbin tension controls how tightly the thread is pulled from the bobbin as you sew, playing a big role in creating balanced stitches.
Without proper tension, your stitches could end up looking messy or even unraveling faster than yesterday’s leftovers.
Importance of Bobbin Tension
Bobbin tension is the backbone of perfect stitching.
It guarantees stitch durability, seamless fabric compatibility, and professional results.
Without proper sewing machine tension, you’ll face bobbin tension problems like uneven seams or thread tangles.
Think of it as teamwork between threads—balanced bobbin tension prevents issues while keeping stitches neat and strong.
Mastering it means flawless, frustration-free sewing!
Effects on Stitch Quality
Poor tension balance can ruin your stitch appearance, leaving loops or gaps.
Tight tension might snap threads, damaging fabric, while loose settings cause weak seams.
Adjusting bobbin tension guarantees uniform stitches that lock properly, boosting seam durability. A sewing machine tension problem may seem minor, but mastering bobbin tension adjustment transforms projects, delivering a professional finish every time.
Relationship With Upper Thread Tension
Great stitches happen when upper thread tension and bobbin tension work in harmony. Picture them as dance partners—imbalanced tension ruins the performance.
To achieve thread tension balance:
- Verify both threads interlock in the fabric middle.
- Adjust upper thread tension first, then the bobbin.
- Avoid over-tightening; test on scrap fabric.
- Remember, bobbin tension adjustment is subtle and requires careful consideration to ensure that the threads are properly balanced, which is crucial for achieving great stitches.
How to Adjust Bobbin Tension
Getting your bobbin tension just right might seem tricky, but it’s easier than you think. A small screw is your magic wand! Grab a tiny screwdriver and locate the screw on your bobbin case—this controls tension.
- Tighten the screw (clockwise) if your stitches look loose or messy.
- Loosen it (counterclockwise) when stitches appear tight or the thread breaks.
- Test adjustments regularly. Use scrap fabric and sew a few test stitches to spot issues.
- For thin threads, slightly tighten the screw; for thicker threads, loosen it a bit to avoid jamming.
Always tweak in tiny, quarter-turns. Incorrect threading can also cause tension issues. Patience is key. Too much at once, and you’ll be chasing your tail, backtracking adjustments. Simple, precise, and totally doable!
Identifying Correct Tension
Getting the right bobbin tension isn’t as tricky as it sounds, but it does take a keen eye and a little patience.
By spotting uneven stitches or feeling thread resistance, you’ll know exactly when your tension needs tweaking.
Visual Inspection of Stitches
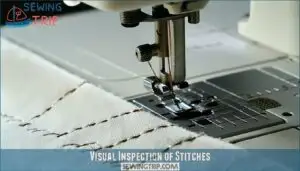
Take a close look at your stitch appearance. If you see loops, uneven tension balance, or fabric distortion, the bobbin tension might be off.
Loose stitches or overly tight bobbin thread can compromise seam integrity. A quick visual stitch inspection helps spot issues.
Remember, perfect stitch quality means threads locking smoothly in the fabric’s center, without gaps or puckering, which ensures a smooth finish!
Manual Thread Inspection
If stitches looked off, manual thread inspection’s your next step.
Gently tug the thread from your bobbin case. Feel for tension irregularities or thread consistency issues—it shouldn’t be too loose or too tight.
Check for thread fraying or lint buildup around the bobbin case. A smooth pull signals proper bobbin tension; anything else means a tension adjustment is needed.
Using Specialized Tools
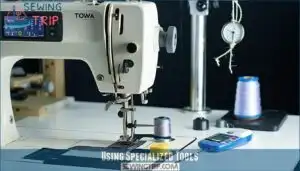
For accurate tension, a TOWA Bobbin Gauge or digital tension meter is your best friend.
These tools guarantee perfect tension calibration, especially for longarm machines.
You can find bobbin gauge products online for purchase.
A spring dynamometer is a budget-friendly option for tension measurement, and if you’re into DIY, try weight-based methods.
Tools like these save time and headaches, helping you nail precise stitches effortlessly!
Bobbin Types and Compatibility
Choosing the right bobbin type for your machine isn’t just about convenience—it’s key to getting perfect stitches.
Whether you’re using a front-loading or drop-in bobbin, compatibility with your machine guarantees smooth sewing without frustrating thread issues.
Front-Loading Vs Drop-in Bobbins
Front-loading and drop-in bobbins handle bobbin tension differently.
Front-loading systems, often in older or heavy-duty machines, offer precise control with separate bobbin cases, ideal for tricky fabrics.
Drop-in bobbins, popular in modern machines, simplify loading mechanisms and allow quick tension troubleshooting.
Front-loaders can handle speed better but need extra maintenance, while drop-ins are easier for everyday sewing and provide a quick solution.
Machine-Specific Bobbins
Choosing the right bobbin isn’t trivial—machines demand specific ones.
Incorrect bobbins, whether the wrong bobbin size or poorly matched aftermarket bobbins, can wreak havoc on tension.
Check your manual for compatible types like drop-in or front-loading bobbins.
Misfits damage the bobbin case or cause jams.
Many users purchase machine specific bobbins for superior performance.
Need bobbin alternatives? Stick to brand-specific options for reliable stitching!
Common Bobbin Brands
Singer, Brother, and Bernina lead the pack with diverse bobbin innovations.
Check your machine’s manual for compatibility since using the wrong bobbin affects both tension and stitch quality.
Plastic drop-in bobbins are great for beginners, while sturdy metal front-loading ones suit heavy fabrics.
Balancing cost and material guarantees smooth performance, so pick trusted brands to avoid cases of poor tension.
Different materials impact sewing, with metal offering durability, which is crucial for smooth performance and to ensure good tension.
Troubleshooting Tension Issues
When your stitches look messy or the thread keeps snapping, it’s time to troubleshoot the tension.
Don’t worry—spotting the issue and making small adjustments can save your project and your sanity.
Thread Breakage and Skipped Stitches
When dealing with thread breakage or skipped stitches, bobbin tension troubleshooting is key.
Faulty settings often cause these thread tension problems.
- Check needle size matches fabric type and thread quality.
- Verify proper bobbin winding and tension adjustment to prevent loose stitches.
- Regular machine maintenance stops lint buildup, helping fix thread breakage or skipped stitches before they ruin your project!
Puckering and Uneven Stitches
Catching puckering or uneven stitches? Check your fabric grain—bias stretching can trick you.
Match thread weight with bobbin tension; light threads need loosened tension, while heavy threads prefer snug adjustments.
Wrong needle size or skipped stabilizer use amplifies thread tension issues.
Keep presser foot pressure balanced for smooth seams.
Remember, small tension adjustments fix big mishaps—don’t overcorrect, as small adjustments can make a significant difference.
Adjusting Tension for Different Threads
If puckering wasn’t enough, different threads add a new twist. Each thread type—fine thread, thick thread, metallic threads, or elastic thread—needs specific tension tweaks for smooth stitches.
- Use looser tension for metallic or decorative threads.
- Tighten bobbin tension for heavier threads or fabrics.
- Test stitch for thread weight and thickness.
- Understanding how to address tension device malfunctions can prevent many common issues.
- Adjust thread tension in small steps, avoiding big swings, to ensure smooth stitches and prevent common issues.
Maintaining Optimal Tension
You’ll need to check your bobbins tension regularly, just like you’d check your car’s oil, to prevent those frustrating thread breaks and wonky stitches that can ruin your sewing projects.
Make small, precise adjustments with your tension screw whenever you switch to different fabrics or threads, turning clockwise for tighter tension or counterclockwise to loosen it up when needed, to achieve the perfect thread breaks.
Regularly Checking Tension
Now that you’ve tackled those pesky tension problems, let’s talk about keeping things running smoothly.
You’ll want to create a Tension Timeline for your machine, checking bobbin tension every 3-4 projects.
Fabric Impact and Thread Changes require attention – new materials often need adjustments. Don’t forget Seasonal Adjustments either; humidity affects thread behavior.
If you notice loose or baggy stitches, it’s time to re-evaluate your tension settings.
Make Consistent Testing part of your routine by sewing a quick test patch before starting any project. Your sewing machine tension will thank you!
Adjusting for Specific Sewing Techniques
Three specific sewing techniques need custom bobbin tension adjustments.
For free-motion quilting, loosen your bobbin tension slightly to prevent puckering.
When working with elastic shirring, tighten the bobbin case tension to create proper gathering.
Using twin needles or metallic threads? Adjust to a looser setting to prevent breakage.
For best results with specialty materials, consider adjusting for metallic thread.
Heavy fabrics require firmer tension settings for secure stitches.
Remember, small quarter-turn adjustments go a long way—your thread tension is the secret handshake to perfect results!
Preventing Thread Breakage and Wear
Now that you’ve mastered technique-specific adjustments, let’s keep your machine running smoothly.
To prevent thread breakage, always use high-quality thread and replace bent needles immediately.
Clean your machine regularly to remove lint that affects tension consistency.
When changing thread types, reset your bobbin tension and adjust stitch length accordingly.
Regular maintenance catches potential thread tension issues before they damage your fabric or cause frustrating sewing machine troubleshooting sessions, which can be prevented with proper regular maintenance.
Frequently Asked Questions (FAQs)
How do you adjust bobbin tension?
Did you know 90% of sewing tension issues involve the top thread, not the bobbin?
To adjust bobbin tension, turn the small screw clockwise to tighten or counterclockwise to loosen, using quarter-turn increments.
How to adjust upper tension for loose tension in the bobbin?
To fix loose bobbin tension, increase your upper thread tension by turning the dial to a higher number.
This pulls the bobbin thread tighter, creating balanced stitches where both threads meet properly in the fabric.
Can you adjust bobbin tension on a sewing machine?
Yes, you can adjust bobbin tension on your sewing machine.
About 90% of tension issues are fixed through upper thread adjustments, but bobbins tension can be tweaked using the small screw on the bobbin case.
Why do I need to adjust bobbin tension?
You’ll need to adjust bobbin tension when using specialty threads, during fabric changes, or if you’re seeing loops, puckering, or breaks. It’s like fine-tuning your car’s engine for peak performance.
Why is my bobbin thread bunching up underneath?
Bunching, tangling, or nesting? Your bobbin thread is likely rebelling due to incorrect upper thread tension.
Check your threading path, lower your top tension, and verify the bobbin is properly inserted, as these steps can resolve issues related to incorrect upper thread tension.
What happens if the bobbin tension is too loose?
When your bobbin tension is too loose, you’ll notice loops forming on your fabric’s underside.
Your stitches will look uneven and sloppy, with visible gaps.
Thread may also bunch up, creating a messy appearance.
Can changing bobbin brands affect tension?
Nearly 70% of tension issues stem from mismatched bobbins.
Your machine’s performance can drastically change with different bobbin brands, as variations in size, weight, and material affect thread delivery and tension consistency.
How often should I clean my bobbin case?
You should clean your bobbin case after every 3-4 projects or whenever you notice lint buildup.
It’s like giving your car an oil change – regular maintenance prevents problems and keeps everything running smoothly!
Will bobbin tension affect embroidery differently?
Picture perfect designs unravel when tension’s off balance.
Yes, your embroidery will show puckering, loose stitches, or thread breaks with incorrect bobbin tension.
You’ll need slightly looser settings for embroidery than regular sewing.
Does temperature affect bobbin tension settings?
Yes, temperature does affect your bobbin tension.
Cold environments can tighten threads while heat loosens them.
You’ll notice this shift when sewing in different seasons, requiring minor adjustments to maintain perfect stitches.
Conclusion
Mastering how to adjust bobbin tension transforms your sewing projects from frustrating to flawless.
You’ll save time, thread, and sanity by developing this essential skill.
Remember: turn clockwise to tighten, counterclockwise to loosen, and always test on scrap fabric between adjustments.
With practice, you’ll instinctively recognize when tension needs tweaking, and your machine will thank you with beautiful, balanced stitches that elevate everything you create.
Now go show those stubborn bobbins who’s boss!

