This site is supported by our readers. We may earn a commission, at no cost to you, if you purchase through links.

Start small—adjust one thread tension at a time. For loops hanging off the edge, tighten the looper tension. Too tight? Loosen it.
If the needles are puckering fabric, ease their tension slightly. Always test adjustments on scrap fabric similar to your project.
Think of it like a team effort—each thread should pull evenly for smooth stitches. Patience pays off, so keep tweaking until it’s just right. Curious about looper tricks? Stay tuned!
Table Of Contents
Key Takeaways
- Test on scrap fabric first and adjust one tension dial at a time until threads balance perfectly along the fabric edge.
- Use distinct thread colors on test swatches to easily identify and fix looping or puckering issues during adjustments.
- Clean the serger regularly, especially around tension discs, to prevent lint and dust from disrupting stitch balance.
- Document your settings for different fabrics and threads to save time and maintain consistent stitch quality.
Serger Tension Basics
Getting perfect serger stitches starts with understanding thread tension basics. It’s like a tug-of-war, where all the threads need to play nice to keep your seams strong and neat.
Thread Tension Importance
Thread tension is the backbone of your serger’s stitch quality.
It controls thread distribution and guarantees seam strength and stability.
Without proper tension, you’ll face serger tension problems like uneven stitching or puckering.
A good serger tension guide helps you handle different fabric types effortlessly.
Adjusting serger tension keeps your seams neat and professional, so don’t skip this essential step to ensure seam strength.
Balanced Tension Benefits
Balanced serger stitches improve seam strength, stitch stability, and overall appearance.
Balanced stitches are the secret to strong seams, steady stitches, and a polished, professional finish every time.
Proper serger tension adjustment prevents puckering or loose threads, making your projects look polished and professional.
When the threads meet perfectly at the fabric’s edge, you get durability and fabric compatibility without compromise.
A consistent serger tension guide guarantees stitch quality that’s as reliable as your favorite comfy jeans—every time!
Regular maintenance can prevent common tension problems.
Tension Adjustment Needs
For perfect stitches, adjusting serger tension is a must. The right settings depend on fabric type, thread weight, and project goals.
Follow these steps for smooth sewing:
- Test on scrap fabric to analyze stitch appearance.
- Start adjustments with all dials at the default position.
- Tweak one tension dial at a time.
- Retest after each tweak.
Adjusting Serger Tension
Getting serger tension right can feel like threading a needle in a haystack, but it’s easier than it seems!
Start by matching your serger tension settings to your fabric weight and thread type. Test stitch appearance on scrap fabric, adjusting one tension dial at a time. Keep thread snug between tension disks, but not too tight.
Sergers are also known as overlockers in some regions, offering identical functionality.
Use these quick tips:
| Issue | What to Adjust |
|---|---|
| Loops on front | Loosen lower looper tension |
| Loops on back | Loosen upper looper tension |
| Puckering fabric | Loosen needle tension |
| Wavy stitches | Tighten looper tension |
| Uneven edges | Adjust stitch length |
Fine-tune until your stitches shine!
Identifying Tension Issues
When your serger stitches look messy or uneven, it’s a sign the tension needs a closer look.
Don’t worry, a quick inspection and a few tweaks can fix those frustrating loops or puckers in no time, which is a quick solution to improve your serger stitches.
Visual Inspection Methods
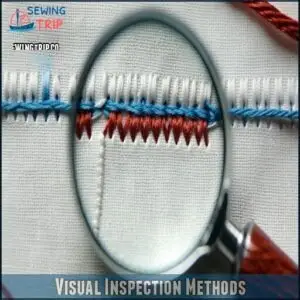
Take a close look at your stitches—this step will save you headaches.
Closely inspect your stitches—they’ll reveal tension issues and point you toward smooth, professional seams every time.
Proper serger tension starts with checking the stitch appearance.
Are the needle lines straight and even?
Look at thread alignment on both sides.
The upper and lower looper threads should meet neatly along the fabric edge—no edge looping or threads spilling over.
Watch for fabric puckering; it screams that serger tension settings are off.
Inspect closely for smooth, balanced stitches.
Using a serger magnifying glass can greatly assist with this detailed inspection.
This visual inspection is your secret weapon for ensuring high-quality serger stitch quality.
Troubleshooting Common Problems
Serger troubleshooting can feel like solving a mystery, but it’s all about checking a few key suspects.
Skipped stitches? Replace the needle or rethread.
Fabric puckering? Loosen the needle tension.
Thread breaks? Make sure the thread’s snug in the tension discs.
Looping issues or uneven seams? Adjust looper tensions gradually.
Test on scrap fabric for tweaks and verify serger tension settings.
Uneven stitches often point to tension problems.
Serger thread breakage often sneaks in if threads snag.
Keep things clean and properly oiled.
Consistent checks improve serger stitch quality and keep frustrations at bay.
Looper and Needle Tension
Getting your looper and needle tension just right can feel like tuning a guitar—you’ll know it’s off when the stitches don’t look or feel right.
By making small adjustments to each tension dial, you can create strong, smooth seams that hold up beautifully.
Upper Looper Tension Adjustment
If your serger looper tension feels off, adjusting the upper looper is the next step.
Too loose? Threads overhang. Too tight? Fabric tunneling happens, and the lower looper sneaks onto the right side.
Use the tension disks carefully, tweaking the dial for balance. Aim for threads meeting perfectly at the edge—no gaps or pull. Stitch appearance guides everything, and achieving the right balance is crucial for a professional finish, with threads that are perfectly aligned.
Lower Looper Tension Adjustment
When upper looper tension’s sorted, it’s time to tackle the lower looper.
To master serger looper tension:
- Verify the Looper Thread Path for proper threading—missteps wreak havoc.
- Regular Tension Disk Cleaning prevents jams and guarantees even stitching.
- Adjust looper tension incrementally for balanced Fabric Edge Control.
Remember, every stitch reflects your Stitch Formation Analysis!
Right Needle Tension Adjustment
Adjusting right needle tension keeps your stitches smooth and fabric puckering-free.
If thread loops show on the wrong side or the seam appearance feels off, tighten needle tension slightly. For thread slipping or fabric pulling, ease it instead.
A serger tension tutorial tip? Keep your presser foot down during adjustments to engage those tension discs properly. It’s that simple!
Left Needle Tension Adjustment
If uneven loops or visible threads pop up on your stitches, it’s time for a serger tension adjustment.
Tweak the serger tension dial for the left needle gently—avoid overdoing it.
Tight needle tension can cause seam disruption or stop looper catching.
Watch the stitch appearance closely and make small changes until everything looks smooth and balanced.
Practical Tension Adjustment Tips
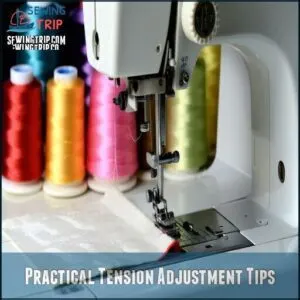
Getting your serger tension just right doesn’t have to be tricky if you know a few handy tricks.
With simple tips like using test swatches or jotting down settings, you’ll save time and avoid frustrating stitch mishaps, by following these simple tips.
Using Tension Swatches
Grab fabric scraps to reuse for quick tension testing.
Use distinct thread colors—they make spotting issues a breeze.
Stitch a test swatch, adjusting tensions till that perfect balance appears.
Many sewers find pre-made swatches helpful.
Save these tension swatches for reference later; they’re like study notes for your serger.
Consistency in adjustments saves headaches, and proper troubleshooting keeps every project running smoothly!
Recording Tension Settings
Once you’ve got your tension swatches dialed in, don’t let that hard work go to waste! Create a system for recording serger tension settings—it’s like a cheat sheet for your machine.
Here’s how:
- Use tension setting cards.
- Keep fabric thread logs.
- Note project-specific settings.
- Try digital record keeping.
- Stick to consistent documentation practices.
To streamline this, consider using pre-made tension references to help with serger tension settings and maintain a system for recording them.
Differential Feed Settings
Think of the differential feed as your serger’s magic wand for fabric feed control.
Adjusting the feed ratio prevents puckering or stretching fabrics. Want ruffles? Increase it. Need smooth seams? Lower it.
Test on scraps to master gathering adjustments and balance serger machine tension. Understanding serger tension explained through this feature transforms serger tension troubleshooting into easy, confident stitch perfection.
Consistent sewing requires proper feed dog maintenance, which is crucial for achieving smooth seams and maintaining overall serger performance.
Consistent Tension Adjustments
Consistency is key in the matter of serger tension adjustments.
Document your favorite settings for fabric consistency and thread matching—it’s like leaving breadcrumbs for future you!
Adjust frequently to maintain serger tension control across projects, ensuring smooth stitches every time.
Long-term settings save time, and tracking adjustments simplifies serger tension troubleshooting.
Balance it right to keep everything running like clockwork.
Frequently Asked Questions (FAQs)
How to troubleshoot Serger tension?
If your serger tension’s off, check threads meet at the fabric edge without looping or extending.
Use different colored threads, test on scraps, and adjust one dial at a time.
Patience wins perfect stitches!
How to adjust settings for heavier threads on a serger?
When working with heavier threads, dial tension lower for smoother stitches.
Thread should glide like butter—no snagging.
Verify threads sit deep in tension disks.
Test on scrap fabric, adjusting looper and needle tensions gradually.
How do I adjust the tension dials on my Serger or overlocker?
Turn each tension dial gently, focusing on one at a time.
Test stitches on scrap fabric after tweaks.
Adjust until threads balance perfectly—no loops hanging off edges or puckering.
Patience makes perfect, so don’t rush!
How do you use a flatlock Serger?
Feeling brave enough to wrestle fabric into submission?
Use a flatlock Serger by adjusting tension, folding fabric, and stitching the edge.
Pull it open to create flat seams—perfect for sportswear and no-bulk hems!
Why are my serger stitches so loose?
Loose stitches usually mean thread tension isn’t balanced.
Check each tension dial and tighten them slightly, testing after each tweak.
Also, rethread with care—skipping guides often causes this mischief.
Don’t forget to use scrap fabric!
How would you know if the tension was too loose?
If your serger tension’s too loose, it’s like holding a limp handshake—your stitches look floppy, with loops hanging off the fabric’s edge or messy threads running wild on the back.
Adjust for balance!
How does humidity affect serger tension settings?
Humidity messes with your thread tension by swelling or shrinking fibers slightly, especially natural threads.
This can make stitches too tight or loose.
Check tension often, and adjust when the weather feels extra sticky or dry, to prevent issues with your thread.
What is the impact of thread quality on tension?
Thread quality acts like the foundation of a house—weak thread leads to imbalanced tension, snapped stitches, and frustration.
Use consistent, high-quality thread that’s smooth and strong to avoid tangled messes and uneven results.
Can lint or dust disrupt proper tension balance?
Dust and lint can mess with your tension like sand in your shoe—it’s annoying and disruptive.
Clean your serger regularly, especially around the tension discs, to keep stitches smooth and fabric frustration-free.
How to identify tension differences for decorative threads?
Ever tried taming wild thread?
With decorative threads, uneven loops scream tension issues.
Test each tension dial, starting at a neutral setting, on scrap fabric.
Adjust gradually until those fancy stitches behave like perfect houseguests!
Conclusion
Getting perfect serger tension is like tuning a guitar—each thread needs just the right pull.
Focus on balance and take it one adjustment at a time. Tighten loose loops, ease puckered stitches, and test on scrap fabric until your stitches look flawless.
Don’t rush; patience and practice make all the difference. Keep track of what works and trust your eye.
With these tips, you’ll know how to adjust serger tension like a pro. Happy sewing!


