This site is supported by our readers. We may earn a commission, at no cost to you, if you purchase through links.
 Want to conquer those frustrating sewing machine tension issues?
You’ll find the tension dial or knob – usually on the side of your machine.
Turning it clockwise increases tension (tighter stitches), counterclockwise decreases it (looser stitches).
Test your adjustments on scrap fabric; look for loops on the top or bottom – they’re your tension tell-tales!
Remember, it’s a balancing act.
Getting it just right is the key to perfect stitches.
Don’t worry if it takes a few tries – even seasoned sewists have their moments!
But with a little practice, you’ll be a tension-adjusting pro in no time.
We’ll uncover more advanced techniques later…
Table Of Contents
Key Takeaways
- Find the tension dial on your sewing machine and adjust it; turn clockwise for tighter stitches and counterclockwise for looser ones. Always test your adjustments on scrap fabric.
- Ensure you’re using the right needle size and thread for your fabric to maintain balance in thread tension and avoid common tension issues like puckering or thread bunching.
- Regularly clean the bobbin area and check for correct threading to prevent tension problems. This helps maintain smooth and balanced stitching.
- Practice patience when adjusting tension, testing on similar fabric before starting your actual project. Small tweaks make a big difference in achieving perfect stitches.
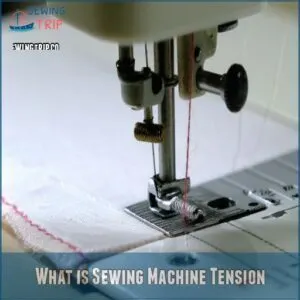
What is Sewing Machine Tension
Sewing machine tension is all about the balance between your top and bobbin threads.
Think of it as a tug-of-war where both sides need to pull equally to create a perfect stitch.
Getting this right means beautiful, even seams—no more frustrating puckering or loose threads!
Importance of Balanced Tension
When sewing, balanced tension is your ticket to perfect stitches and seam serenity.
When sewing machine tension is just right, both threads hug the fabric, avoiding puckers and ensuring a smooth stitch balance.
It’s like a duet where neither singer overshadows the other—resulting in consistent sewing and an ideal seam appearance.
Factors Affecting Tension
Balanced tension isn’t just about the machine; it’s a blend of fabric type, needle type, thread type, and stitch type.
Your sewing speed plays a part too!
Imagine your machine as an orchestra; if one instrument’s off, the harmony fails.
Adjust sewing tension, keep an eye on thread tension and bobbin tension to maintain stitch balance.
Identifying Tension Issues
Identifying tension issues in your sewing machine is like finding the right rhythm in a song.
- Puckering: Fabrics gathering or wrinkling.
- Loose stitches: Threads not pulled tight enough.
- Thread bunching: Messy clusters of thread.
- Skipped stitches: Missing threads in the pattern.
These signal adjustments in sewing machine tension are needed.
How to Adjust Sewing Machine Tension
Adjusting sewing machine tension might seem tricky at first, especially when dealing with signs of tension issues, but it’s all about finding the right balance.
By tweaking the top and bobbin thread tensions, and maybe using a second bobbin case, you’ll be stitching like a pro in no time.
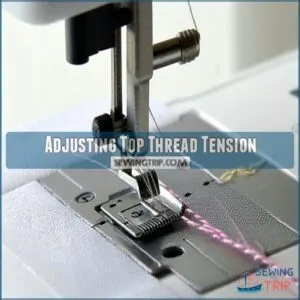
Adjusting Top Thread Tension
Adjusting the top thread tension is like tuning an instrument for harmony in your sewing.
Turn the top tension dial to find the sweet spot—tighten it if you’ve spotted loose stitches or dreaded uneven stitches.
Keep an eye on how thread type, needle size, and fabric affect the tension.
Taking the time to perform tension test methods can guarantee excellent results.
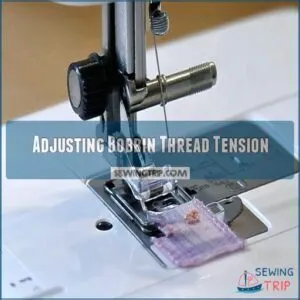
Adjusting Bobbin Thread Tension
Tweaking bobbin thread tension can feel like a dance.
Here’s how you glide through it:
- Locate the Screw: Find the tiny screw on the bobbin case and give it a gentle twist.
- Clockwise or Counterclockwise: Tighten or loosen to match the thread tension.
- Test Stitches: Sew a sample to check if the sewing machine tension is spot-on.
Using a Second Bobbin Case
Having a spare bobbin case is a lifesaver, especially when you need to adjust the bobbin tension without affecting the machine’s factory settings as you’d with a front-loading bobbin system.
Think of it as a safety net for your tension adjustments.
Proper bobbin case care means storing it safely when not in use.
This simple addition means you can easily return to those perfect, balanced stitches.
A spare bobbin case offers significant spare case benefits, protecting your original settings.
Identifying Tension Problems
When your sewing machine starts producing uneven stitches, it’s a clear sign of tension troubles.
You’ll know there’s an issue if your bobbin thread shows on top or your needle thread appears underneath, like a mischievous cat hiding from plain sight.
Signs of Unbalanced Tension
Spotting unbalanced tension can feel like battling a mischievous sewing gremlin.
If you’re seeing puckering, loose stitches, or thread breakage, your stitch tension might be off, often due to issues like improper bobbin adjustment or threading technique, as seen in common thread tension dial problems.
Uneven stitches and thread bunching can signal trouble too.
A quick adjustment of your sewing machine tension could be the key to smoother stitching and bringing harmony back to your sewing projects.
Bobbin Thread Showing on Top
Ever noticed that pesky bobbin thread sneaking up to the top of your fabric?
It’s likely a sign your top tension‘s too tight.
Check your sewing machine tension by loosening the top thread tension a bit.
Don’t forget to peek at the bobbin case for issues.
A needle mismatch or thread type can throw off that delicate thread balance too.
Needle Thread Showing on Bottom
When your sewing machine spits out needle thread on the bottom, it’s screaming for help.
Loose bobbin tension might be the sneaky culprit.
Check your bobbin case for issues, like a wayward screw, and make sure you’re using the right tools for adjusting bobbin tension devices.
Also, is your needle size right, and threading spot on?
Thread tension isn’t just a setting—it’s your stitch’s secret handshake.
Common Causes of Tension Issues
When your sewing machine throws a tantrum with messy stitches, it’s often due to common culprits like incorrect threading or a neglected bobbin area.
Keep an eye out for improperly wound bobbins, mismatched needle and thread types, or clogs that could be causing the chaos.
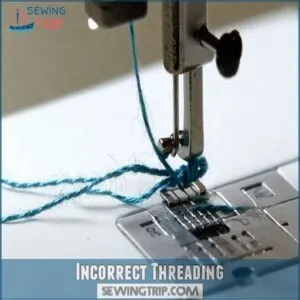
Incorrect Threading
A tangled mess greets you if incorrect threading’s your culprit. Follow the thread path carefully to avoid tension headaches.
First, check if the threading sequence adheres to the manual. Missteps here can impact those precious tension settings.
Watch out for:
- Missed thread guides
- Wrong tension disc
- Improper needle threading
- Loose spool cap
- Thread caught in guides
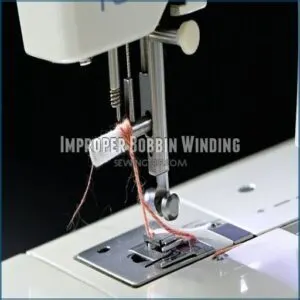
Improper Bobbin Winding
A poorly wound bobbin’s a recipe for disaster!
Uneven winding leads to bobbin tension issues; a loose bobbin can cause wobbling, affecting your stitches.
Check your bobbin size and make sure it’s compatible with your machine, you can find a wide range of bobbins here for your sewing needs.
Check your bobbin size; it needs to fit your machine perfectly.
Consistent, even winding is key to smooth sewing.
Remember, proper bobbin winding is a fundamental part of sewing machine adjustment – it’s a small detail with a big impact!
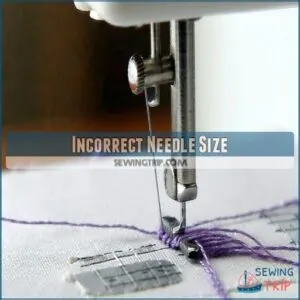
Incorrect Needle Size
Choosing the correct needle size can feel like picking the perfect spice for a dish—essential for success!
Incorrect tension settings can also lead to poor stitch quality, including skipped stitches, as discussed in the guide on how to adjust thick fabric tension. Mismatched needle size and fabric type can spark tension between your sewing machine’s threads.
This mismatch leads to uneven stitches and frustration.
Make sure needle size matches fabric and thread thickness to sidestep common sewing problems.
Master your sewing machine adjustments with precision!
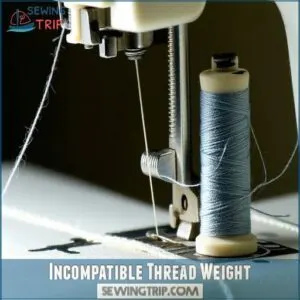
Incompatible Thread Weight
Incompatible thread weight can throw your sewing machine tension for a loop, much like using the wrong needle size. Ensuring the right thread tension balance is key to preventing this issue. Incompatible thread weight can throw your sewing machine tension for a loop, much like using the wrong needle size.
If your thread’s too heavy or too light for your fabric type, those stitches won’t sit pretty.
Adjust your thread tension and always match your thread weight to your project.
It’s like pairing shoes with an outfit—balance is key.
Dirty or Clogged Bobbin Area
A clogged bobbin area feels like a kitchen sink stuffed with old sponges—nothing flows smoothly.
Dirt clogs sewing machine tension, throwing balance out the window.
Regular sewing machine cleaning prevents this chaos.
To keep your machine in pristine condition, consider a thorough tutorial on cleaning a sewing machine.
Lift the bobbin case, whisk away lint that sneaks into crevices.
You’ll notice smoother stitches and fewer tension issues, ensuring seamless sewing sessions.
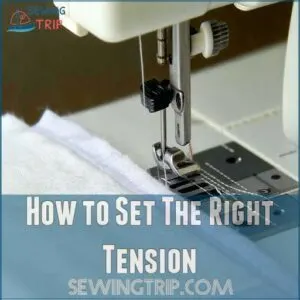
How to Set The Right Tension
To set the right tension on your sewing machine, start by checking the manual to make sure you’re using the correct needle and thread for your fabric.
A mismatched stitch type or improper stitch length can lead to frustrating results, so make adjustments until your stitches look just right.
Checking The Sewing Machine Manual
Your sewing machine manual isn’t just a doorstop—it’s your go-to guru for tension settings.
It will guide you on how to adjust tension, helping you understand specific thread guides and bobbin winding tips.
Navigate the intricate sewing machine parts with ease.
Embrace the manual; it’s like a treasure map for perfect stitches.
Selecting The Right Needle and Thread
Think of your sewing machine as a dance partner.
The right needle and thread are your dance shoes—vital for smooth moves.
Match needle size to fabric weight and thread type.
Heavier fabric needs a larger needle.
Align thread weight with needle size for perfect harmony.
This dance makes sure your thread tension stays balanced and prevents nasty snags or stitches.
Choosing The Right Stitch Type
Choosing the right stitch type is key to achieving those picture-perfect seams.
The stitch type you pick directly impacts your sewing machine tension, and issues with it can cause problems like puckered seams, looping on the underside of the fabric, or thread breakage, which can be solved by learning how to know what tension to use when sewing. The stitch type you pick directly impacts your sewing machine tension.
Here are four stitch types to check out:
- Straight stitch: Great for seams needing strength.
- Zigzag stitch: Perfect for stretchy fabrics.
- Overlock stitch: Prevents fraying on edges.
- Satin stitch: Ideal for decorative details.
Match your stitch type to your fabric and project for balanced stitches every time!
Adjusting Stitch Length and Width
Adjusting stitch length and width is like setting your cruise control on a road trip—get it just right, and you’ll glide smoothly!
Different fabrics and projects need specific settings.
Check your sewing machine manual for guidance on stitch length impact and width adjustments.
By tweaking these sewing machine settings, you’ll maintain perfect stitch tension, ensuring your projects look professional.
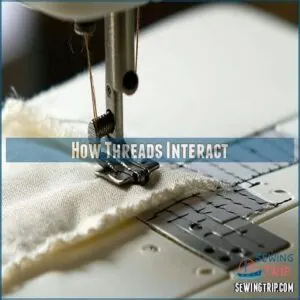
How Threads Interact
Understanding how threads interact in your sewing machine, such as the relationship between thread tension settings, is essential for creating flawless stitches.
Each stitch relies on a delicate balance between the top and bottom threads,
so mastering this harmony can mean the difference between a professional-looking seam and a frustrating tangle.
The Role of Top and Bottom Threads
Ever wonder how those top and bottom threads pull off the perfect stitch?
It’s all about thread tension balance. Here’s the scoop:
- Top tension adjustment keeps your stitches flat.
- Bobbin tension adjustment stops puckering.
- Even thread interaction makes for a smoother stitch appearance.
- Matching thread types prevents tangles.
Mastering these helps your sewing machine tension sing in harmony!
Effects of Imbalanced Tension
Imbalanced tension can mess with your sewing groove, causing puckering, loose stitches, and thread bunching.
When the bobbin tension is pulling too tight or too loose, things get wild, resulting in skipped stitches and uneven seam allowance.
Make sure you have a balanced tension by adjusting your sewing machine tension tools, which play a key role in achieving perfect stitches.
Check this out:
| Symptom | Likely Cause |
|---|---|
| Puckering | High thread tension |
| Loose Stitches | Low needle tension |
| Thread Bunching | Incorrect bobbin tension |
Achieving Invisible Stitches
Perfect invisible stitches are your sewing nirvana, where fabric choice, needle selection, and thread type unite seamlessly.
Think tension discs and bobbin thread tension as your tools for harmony.
Adjust stitch tension like a maestro, balancing practice with patience.
Remember, stitch selection plays its part in this dance; achieving those invisible stitches means marrying precision with a splash of sewing freedom!
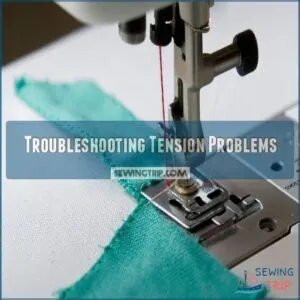
Troubleshooting Tension Problems
When tackling tension problems, make sure your sewing machine is set up correctly by following the manual’s threading instructions.
Test your adjustments with scrap fabric so you’re not turning your masterpiece into a stylish disaster.
Checking The Sewing Machine Setup
Before diving in, always carefully check your sewing machine setup. This often solves tension issues.
Carefully examine these key areas:
- Is your thread path correct? Consult your sewing machine parts diagram.
- Is the bobbin case correctly installed and clean?
- Is the correct needle type and size in use? A bent needle’s a common culprit.
Testing Stitches on a Scrap Fabric
With sewing machine tension, testing stitches on a scrap fabric is like a dress rehearsal.
Start with a fabric similar to your project.
Check stitch quality and tension balance by observing seam appearance.
Here’s a quick guide:
| Fabric Type | Stitch Quality | Tension Balance |
|---|---|---|
| Cotton | Even | Perfect |
| Denim | Tight | Strong |
| Silk | Loose | Gentle |
| Linen | Varied | Balanced |
Don’t rush—check carefully.
Making Adjustments and Re-Testing
Once you’ve tweaked the tension, grab that practice seam and give it another go.
Check the stitch quality like you’re inspecting a fresh batch of cookies—look for flat, even stitches.
If they’re not perfect, adjust tension and repeat.
Remember, sewing machine maintenance thrives on patience.
These sewing machine tips will make troubleshooting tension a breeze!
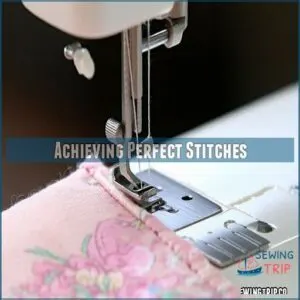
Achieving Perfect Stitches
To achieve perfect stitches, you’ll need to keep your sewing machine tension properly adjusted and the machine clean.
Don’t forget to use the right materials and techniques, unless you’re going for a new avant-garde style with frayed edges and dangling threads!
Maintaining Proper Tension
Consistency is key when you’re stitching. Keep tension stable with these tips:
- Match needle and thread: Balance is like a well-matched dance. Incompatible pairs can throw everything off.
- Regular checks: A quick glance at thread tension can save projects.
- Experiment with fabric: Each type needs its own setting.
- Log your settings: Forget a memory lapse and save time.
Regularly Cleaning The Sewing Machine
Keeping your machine’s tension in check isn’t just about tweaking screws.
A regular cleaning routine is your best buddy.
Dust off those lint bunnies with trusty cleaning tools and stick to a maintenance schedule.
A little oil here, a wipe there, and your sewing machine parts run smoother than a cat on a freshly oiled slide.
Using The Right Materials and Techniques
Dust off your machine, check your materials. Needle size and thread weight should match the fabric type like peanut butter and jelly. Here’s the scoop:
- Pick the right needle for your fabric.
- Match thread and fabric weights.
- Test with practice samples.
- Adjust sewing machine tension.
- Keep bobbin thread neat.
Achieving perfect stitches? Easier than pie!
Frequently Asked Questions (FAQs)
What is sewing machine tension adjustment?
Think of sewing tension as a tightrope walker’s balance.
Adjusting it means tweaking the top and bobbin threads to form perfect stitches.
Too loose or tight, and your fabric’s harmony falls apart like a wobbly tightrope.
How to adjust Tension in Sewing Machine?
Start by tweaking the top tension dial to find the sweet spot: tighter for a firm pull, looser for less grip.
If things still aren’t perfect, gently adjust the bobbin case screw—it’s delicate work!
How to fix a sewing machine stitch Tension Problem?
Fixing stitch tension is like fine-tuning a guitar.
First, check threading; then adjust top tension with small increments.
Clean the bobbin area and make sure you’re using the right needle and thread for smooth, balanced stitching.
How do I know if my sewing machine is tight?
If your sewing machine stitches look puckered or bobbin thread appears on the top, your tension‘s likely too tight.
Balance both top and bobbin threads to make stitches lie flat on the fabric, without visible knots.
How do I set the tension on my sewing machine?
Isn’t it funny how sewing machine tensions can unravel projects?
Turn the top tension dial to find balance; increase for tighter stitches, decrease for looser ones.
To perfect tension, test on scrap fabric before committing.
How to tell if sewing machine tension is right?
Perfect stitches look the same on both sides, lying flat with invisible knots.
Tension’s off! One thread pulling easily?
Check for puckering or visible threads on either side of the seam.
Why is my sewing machine looping underneath?
Looping underneath indicates insufficient top tension.
The needle thread isn’t pulled into the fabric correctly, leaving loose loops.
Check your top tension settings, and make sure you have correct threading and proper bobbin installation, then test adjustments.
How do I adjust the pressure on my sewing machine?
To adjust sewing machine pressure, locate the pressure adjustment dial or lever near the presser foot.
Turn it clockwise to increase pressure for thicker fabrics or counterclockwise for lighter ones.
Test on a fabric scrap to make sure you have the right balance.
Why does my sewing machine skip stitches?
Your sewing machine might skip stitches due to a dull needle, improper threading, or incorrect tension settings.
Make sure your needle is sharp and the machine is correctly threaded and adjusted.
Regular checks can prevent sewing hiccups.
How often should tension be checked?
Check your sewing machine tension at the start of every project or when changing fabrics.
It’s like tuning a guitar before a gig—prevents stitch issues and makes sure your masterpiece turns out just the way you imagined.
Can old threads cause tension problems?
Absolutely, old threads can lead to tension issues.
They might break easily or not glide smoothly, disrupting the stitch balance.
Try using fresh, high-quality thread to maintain consistent tension and prevent sewing headaches.
Does weather affect sewing machine tension?
It seems surprising, but weather can indeed affect sewing machine tension.
Humidity and temperature changes might cause thread to expand or contract, leading to tension issues.
Identify and resolve tension issues by checking for visible knots or loops at the end of each stitch, and learn how to fix sewing machine tension knob. Adjust your machine’s tension accordingly for smooth sewing.
How to maintain sewing machine tension parts?
Regularly clean your machine’s bobbin case and tension discs. Oil moving parts sparingly. Replace worn parts promptly. A well-maintained machine sews beautifully!
Conclusion
Achieving perfect stitches is like dancing to the rhythm, where balance and coordination matter.
Your sewing machine tension is the conductor of this performance.
By mastering how to adjust sewing machine tension, you prevent loose loops and breakage, ensuring that your projects shine with precision.
Tackle tension issues like a seasoned pro—test your setup, tweak those dials, and always practice on scrap fabric.
Keep at it, and soon, flawless stitches will be your signature move.

