This site is supported by our readers. We may earn a commission, at no cost to you, if you purchase through links.
To learn how to block sew, start by selecting your base pattern and deciding where you want color divisions—think shoulders, waistlines, or sleeves.
Cut your pattern pieces along these lines, adding seam allowances to each new edge. Choose fabrics with similar weights and care instructions to avoid puckering nightmares.
Sew the blocks together using precise seams, then press flat for crisp lines. The secret lies in careful planning and accurate cutting—one wonky line can turn your masterpiece into modern art gone wrong.
Table Of Contents
Key Takeaways
- Plan your color divisions carefully – You’ll get better results by sketching your design first and choosing logical seam lines, like shoulders or waistlines, before cutting any fabric.
- Match fabric weights and care instructions – You’ll avoid puckering and distortion by selecting fabrics with similar weights and washing requirements for each color block.
- Add seam allowances to new cut lines – You’ll need to add ¼" to ½" seam allowances where you’ve divided your pattern pieces to create clean, professional-looking joins.
- Press seams flat and consider topstitching – You’ll achieve crisp, store-bought results by pressing each seam after sewing and adding topstitching about ⅛" from the seam line.
Color Blocking Basics
Color blocking transforms basic sewing patterns into eye-catching garments by combining two or more contrasting fabrics in strategic sections.
You’ll discover how this beginner-friendly technique can turn fabric scraps into stylish statement pieces while adding visual interest to any wardrobe, using color blocking to create unique effects.
What is Color Blocking
Color blocking transforms ordinary patterns into eye-catching garments by combining two or more contrasting fabrics.
Turn simple patterns into statement pieces with strategic fabric combinations and bold color contrasts.
This accessible sewing technique divides your garment along straight seam lines, creating bold sections of different colors. You’ll sew fabric pieces together where they meet, adding visual interest without needing advanced skills.
Perfect for using fabric scraps efficiently while mastering fundamental garment design principles through strategic fabric choice and creative block patterns.
Understanding color harmony principles is essential to create visually appealing color blocking designs, and it helps in achieving a harmonious look.
Benefits of Color Blocking
Block sewing transforms your projects by maximizing fabric efficiency and creating stunning visual interest.
You’ll stretch your stash further while adding personalization that makes every garment uniquely yours. This technique turns simple patterns into eye-catching designs through strategic color contrast and style enhancement.
Here’s why color blocking works so well:
- Visual Interest – Contrasting fabrics create dynamic focal points that elevate basic patterns
- Fabric Efficiency – Use up scraps and smaller cuts instead of buying full yardage
- Style Enhancement – Transform plain garments into designer-looking pieces with strategic seam placement
- Color Contrast – Mix bold combinations or subtle tones to match your personal aesthetic
Suitable Garments for Color Blocking
When starting your colorblock sewing journey, you’ll find that certain garments work better than others.
Raglan tees and sweatshirts are perfect beginner choices because their natural seam lines create built-in color blocking opportunities.
Hoodies offer excellent canvas for creative fabric combinations, while simple dresses and pants provide larger surfaces for bold color contrasts.
Choose garments with straight seams initially—they’re more forgiving than curved designs and let you master basic sewing techniques before tackling complex patterns, allowing for a better understanding of sewing techniques and creative fabric combinations.
How to Block Sew
You’ll start by preparing your pattern pieces and deciding where to place your color block lines.
Next, you’ll cut your fabric pieces with proper seam allowances and sew them together to create your custom design.
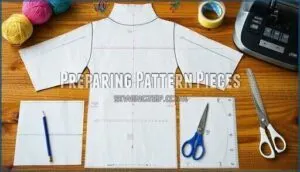
Preparing Pattern Pieces
Before you start cutting fabric, you’ll need to prep your pattern pieces properly.
First, print and assemble your pattern according to instructions, taping pieces together carefully. For fold-line pieces, tape extra paper to the fold side and trace the pattern to create a full piece—this pattern tracing step prevents wonky fabric cutting later.
Remove fold lines completely since block design requires precise piece modification. Label each section and double-check your seam allowance measurements before moving forward.
Accurate sewing also involves understanding sewing pattern pieces to guarantee a professional finish.
Designing Color Block Lines
Where will your creative vision take you? Design Planning starts with sketching your color block lines on paper before touching fabric.
Consider Color Theory when choosing contrasting or complementary fabrics—diagonal lines create movement, while horizontal lines widen.
Mark Seam Lines clearly on your pattern pieces, adding seam allowances to new cuts. Remember, your Fabric Choices should have similar weights for professional results.
This block sewing approach prevents costly mistakes. Understanding the basics of pattern making techniques is essential for achieving a perfect fit and professional-looking garments.
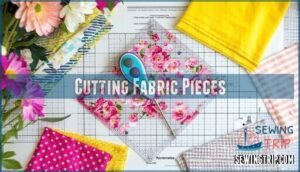
Cutting Fabric Pieces
Now you’ll cut your fabric pieces using your prepared pattern. Choose fabrics for each color block piece, then add seam allowance to your new seamline.
Cut the first fabric piece with proper seam allowance where blocks meet. Repeat for the second piece, ensuring fabric overlap at the joining edge.
Check your pattern verification notes for designer preferences. Proper cutting requires the right fabric cutting implements.
Mind grain direction when cutting—some pattern pieces might sit at unconventional angles for proper fabric alignment and require the use of the right fabric cutting tools to ensure a clean cut.
Sewing Color Blocks
Once you’ve prepared your pattern pieces and cut your fabric blocks, it’s time to bring them together with clean, professional seams.
The key to great color blocking lies in precise sewing and finishing techniques that’ll make your garment look store-bought.
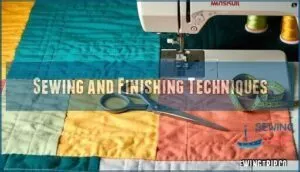
Sewing and Finishing Techniques
When you’re ready to sew blocks together, precise techniques make all the difference. Use straight stitching for durability, and consider matching thread colors to enhance your design’s visual impact.
- Seam allowances: Maintain consistent 1/4" seam allowances for professional results
- Pressing seams: Press after each step to set stitches and create crisp block junctions
- Topstitching tips: Add edgestitching 1/8" from seams for strength and visual appeal
- Fabric weights: Choose similar-weight fabrics to prevent pulling and distortion
Avoiding bulk at intersections keeps your garment smooth—trim seam allowances when necessary. These sewing blocking techniques guarantee your blocks lie flat and look polished.
Understanding color blocking fabric principles is essential for creating harmonious and visually appealing designs.
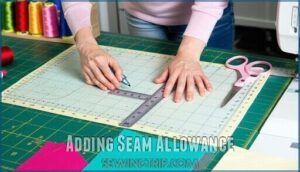
Adding Seam Allowance
Precision becomes your ally when adding seam allowance to color-blocked pieces. You’ll typically add ¼" to ½" seam allowances where pattern pieces meet, depending on your fabric weight and sewing experience.
| Fabric Weight | Seam Allowance | Best For |
|---|---|---|
| Lightweight | ¼" | Cotton, linen |
| Medium weight | ⅜" | Denim, canvas |
| Heavy weight | ½" | Fleece, wool |
Mark your seam allowances clearly on each pattern piece before fabric cutting. This sewing tip prevents confusion during block construction and guarantees your sew block tutorial runs smoothly when sewing blocks together.
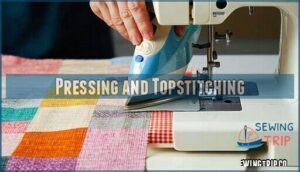
Pressing and Topstitching
After your seam allowances are perfectly positioned, pressing becomes your secret weapon for professional-looking results.
Press the seam to one side—don’t iron back and forth, just press down firmly. This flattens everything without stretching your fabric.
Next, topstitch about 1/8" from the seam line using matching thread. This topstitching technique locks everything in place while adding that polished, store-bought finish.
Your fabric pressing skills will make all the difference in garment finishing.
Advanced Color Blocking
Once you’ve mastered basic color blocking, you can tackle more ambitious projects using multiple fabrics and intricate design elements.
Advanced techniques let you create show-stopping garments that look like they came straight from a high-end boutique.
Using Multiple Fabrics
Once you’ve mastered basic color blocking, experimenting with multiple fabrics opens up endless creative possibilities.
Fabric selection becomes your playground—think cotton paired with jersey, or denim mixed with corduroy.
Color theory guides your choices, while texture mixing adds depth to your sewing fabric blocks.
Pattern mixing creates visual interest when you combine stripes with solids, and fabric blending techniques help you seamlessly integrate different weights and finishes.
Block sewing patterns work beautifully with three or more fabrics, letting you sew fabric blocks that tell a story through thoughtful color blocking combinations.
Creating Complex Designs
Three-fabric combinations reveal endless possibilities through strategic color mixing and fabric layering.
Start with geometric patterns—divide your pattern into triangular or rectangular sections for dynamic visual impact.
Seam manipulation becomes vital when joining multiple blocks; press seams open and grade them at intersections.
Pattern hacking transforms basic designs into showstoppers through textile blending techniques.
These block sewing patterns require precision cutting and careful planning to achieve professional results, utilizing textile blending techniques.
Tips for Successful Color Blocking
Smart fabric choice sets you up for color blocking success from the start. Choose fabrics with similar weight and care requirements to prevent pulling or distortion during wear and washing.
Smart fabric choice sets you up for color blocking success from the start.
- Embrace contrast boldly – pairing light and dark fabrics creates stunning visual impact that makes your garment pop
- Test your color theory – complementary colors on the color wheel create dynamic tension that draws admiring glances
- Match fabric weights perfectly – mixing lightweight cotton with heavy denim creates pulling that’ll frustrate you during construction
- Plan block placement strategically – positioning color changes at flattering body points enhances your silhouette beautifully
- Experiment with texture mixing – combining smooth cotton with textured knits adds depth that elevates your finished piece
Understanding fabric selection basics is essential for achieving professional results in color blocking.
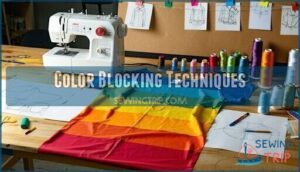
Color Blocking Techniques
Now you’re ready to master different color blocking techniques that’ll transform your sewing projects.
Whether you prefer clean straight lines or bold curved designs, these methods will help you create eye-catching garments that look professionally made.
Straight Line Color Blocking
Diagonal lines deliver stunning results with minimal effort in color block sewing.
Position your straight line seamline wherever you want the color shift—across the chest, waist, or hemline.
Mark your chosen seam lines on pattern pieces, then add seam allowance to both fabric pieces.
Smart fabric selection guarantees your color choices complement each other while maintaining similar weights.
This block sewing method works perfectly on most garment types.
Understanding basic block pattern making techniques is essential for creating well-fitted garments with color blocking using techniques such as those found at block pattern making.
Curved Line Color Blocking
Ready to tackle curved seams in your color blocking adventure? These graceful lines create stunning visual flow but require careful planning.
Start by sketching your curved block shapes on paper first—this prevents costly fabric mistakes. When cutting your pattern pieces apart along curved lines, add seam allowances to both edges.
Use fabric choice strategically; similar weights prevent puckering. Pin curved seams generously before sewing, easing any tension.
Remember, curved seams in color block sewing demand patience but deliver professional-looking results that’ll make your garments sing, with a focus on achieving professional-looking results.
Mixing and Matching Fabrics
Mastering fabric selection transforms your color blocking from amateur to artisan. Choose fabrics with similar weights to prevent pulling—cotton pairs beautifully with cotton blends, while mixing denim with chiffon spells disaster.
Test colorfastness before committing to prevent bleeding mishaps. Balance bold prints with solid anchors, following the rule of thirds for pleasing proportions.
Limit yourself to 2-4 fabric types to maintain design clarity and reduce bulk at seams.
Frequently Asked Questions (FAQs)
How do you sew a color blocking pattern?
Picture transforming a basic sweatshirt into a striking two-toned masterpiece.
First, cut your pattern pieces from different colored fabrics, adding quarter-inch seam allowances where they’ll meet.
Then sew the contrasting pieces together, press seams, and assemble normally, creating a masterpiece.
Can I use color blocking in my own sewing?
You can absolutely use color blocking in your own sewing projects.
It’s beginner-friendly and works with most patterns.
Simply cut different sections in contrasting fabrics, add seam allowances, and sew them together before assembling your garment.
What is a block in sewing?
A block in sewing refers to a fabric section that’s cut in one color and sewn to another contrasting fabric piece.
You’re basically creating distinct color zones within your garment for visual interest.
How can I color block a sewing pattern?
Cut the needle from the thread and modify your pattern pieces by adding seam allowances where you’ll join contrasting fabrics, then sew the blocks together before assembling your garment.
Can you make a sewing pattern with a block pattern?
You can absolutely create a sewing pattern using color blocking techniques.
Start by choosing your base pattern, then divide it into sections where you’ll use different colored fabrics.
Add seam allowances to new seamlines and sew the blocks together, following the pattern to ensure a cohesive final product with seam allowances.
How do you sew a block?
Threading colors together is like painting with fabric.
Pin your contrasting pieces right sides together, sew along the seamline with your chosen seam allowance.
Then press the seam flat for a crisp finish.
Do you block before or after sewing?
In color blocking, you’ll design and cut your fabric pieces first, then sew them together. The "blocking" happens during the planning and cutting phase, while sewing comes after.
Can you color block knit and woven fabrics together?
While technically possible, mixing knit and woven fabrics isn’t recommended.
Different stretch properties cause puckering, pulling, and distortion.
You’ll get better results sticking with similar fabric weights and stretch characteristics for professional-looking color blocking.
What interfacing works best for color blocked seams?
You’ll want lightweight fusible interfacing for color blocked seams – it stabilizes without adding bulk.
Apply it to the wrong side of your lighter-weight fabric piece before sewing to prevent puckering and guarantee clean, professional-looking seam lines.
How do you match plaids across color blocks?
Like a puzzle master aligning intricate pieces, you’ll create harmony by matching plaid lines at seam intersections.
Cut your blocks with extra seam allowance, then carefully align stripe patterns before pinning and sewing for seamless flow.
Conclusion
While complex patterns might intimidate beginners, learning how to block sew actually simplifies garment construction by breaking designs into manageable sections.
You’ve mastered the fundamentals—from planning color divisions to achieving crisp seam lines.
Remember that fabric choice matters as much as technique; matching weights prevents distortion.
Practice with simple designs before tackling intricate curves or multiple fabrics.
Your next project awaits, and with these color blocking skills, you’ll transform ordinary patterns into eye-catching fashion statements, making garment construction easier.

