This site is supported by our readers. We may earn a commission, at no cost to you, if you purchase through links.
 Changing thread on a serger in 3 minutes or less is like a magic trick—the key is preparation.
First, turn off the serger and lift the presser foot.
Snip the old threads near the cones.
Now, here’s the quirky part: tie each new thread to the old with a square knot, like connecting dots.
Lower the tension to zero and gently guide the threads through the tension discs and needles.
Keep your pedal steady as you hand-crank for a smooth feed.
Curious about nailing this every time with no thread breakage? Well, you’re about to uncover all the secrets!
Table Of Contents
Key Takeaways
- Turn off the serger, lift the presser foot, and snip old threads near the cones. Tie new threads to the old with a square knot to speed up the threading process.
- Lower the tension to zero and gently guide threads through the tension discs and needles. Hand-crank the serger for a smooth feed and adjust tension as needed.
- Familiarize yourself with the serger’s parts such as the loopers, needles, tension discs, and threading order to ensure seamless operation and prevent thread breakage.
- Practice and perfect the technique by using a timer to boost threading speed and efficiency, and keep your serger clean to avoid snags and jams.
Serger Threading Essentials
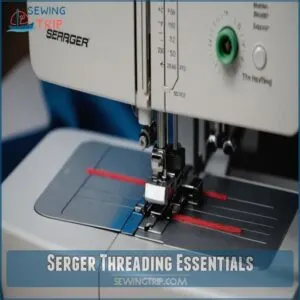
You’ll need to understand your serger’s key parts and threading sequence to change threads quickly.
Familiarize yourself with the tension discs, loopers, and needles, and follow the correct threading order for your specific model to guarantee smooth operation.
Serger Machine Parts and Functions
Before diving into thread changes, let’s familiarize ourselves with your serger’s key components.
The serger knife trims fabric edges, while tension dials control thread tightness.
Thread guides direct threads precisely, and the stitch plate supports fabric during sewing.
To automate the threading process and save time, consider using self-threading sergers, which feature automatic looper threading and air-supported threading.
The looper system creates those professional-looking stitches you love.
Understanding the proper threading order, such as threading a serger with regular spools, is crucial for smooth serger thread changes. Understanding these parts is essential for smooth serger thread changes and achieving the best serger thread tension.
Think of your serger as a well-oiled team, each part playing its role in creating perfect seams.
Threading Order and Best Practices
The key to quick serger threading lies in following the right order.
Start with the lower looper, move to the upper looper, then thread the right needle, and finally the left needle.
To master the art of threading, refer to the guide on how to thread a handheld sewing machine for a step-by-step walkthrough. Use your machine’s thread guide for smooth sailing.
Remember, proper thread tension is essential for perfect stitches.
If you’re facing issues, double-check your needle type and stitch selection.
With practice, you’ll be changing threads in a flash!
Preparing Your Serger for Thread Change
Before you swap threads on your serger, take a moment to set the stage for success.
You’ll need to raise the presser foot, lower the blade, lift the needles, and extend the thread stand to make sure a smooth changeover happens.
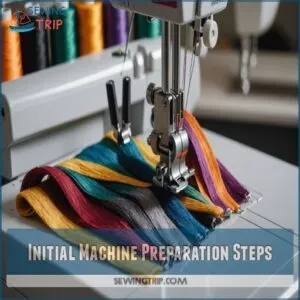
Initial Machine Preparation Steps
Now that you’ve got the threading basics down, let’s set the stage for your speedy thread change.
You’ll want to get your serger ready for action.
Here’s what you need to do:
- Open your machine’s front cover
- Make sure your workspace is well-lit
- Have your new thread colors at hand. You might find some helpful serger thread setup tips to help you get started.
Remember, a clean machine is a happy machine. Give it a quick once-over to remove any lint or stray threads.
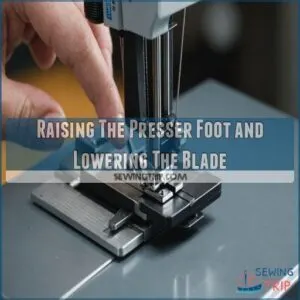
Raising The Presser Foot and Lowering The Blade
With your serger prepared, it’s time to tackle the presser foot and blade.
Lift the presser foot using the lever at the back – it’s like giving your serger a high-five.
Next, lower the blade by flipping the blade lever.
This step’s important for your safety and the machine’s wellbeing.
Remember, a sharp blade is your friend, but only when it’s out of the way.
You’re now set for the next threading steps.
Raising The Needles and Pulling Up The Thread Stand
Two key steps remain before you’re ready to change threads.
First, raise your needles to their highest position by turning the handwheel in your direction.
This helps keep the needles safe and in the right position.
Next, pull up the retractable thread stand to its full height.
This stand mechanism provides the best thread tension during serging.
With needles up and thread stand extended, you’re all set for a smooth thread replacement process.
Quick Thread Change Method
You’re about to discover a time-saving trick for changing serger thread colors without the usual hassle, especially when working with finer serger thread options.
This quick method involves tying new thread to existing thread tails and pulling them through.
This allows you to switch colors in just minutes.
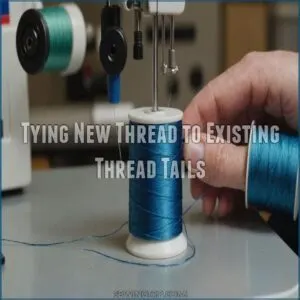
Tying New Thread to Existing Thread Tails
Ready to speed up your serger thread change? Here’s the trick: tie new thread to existing thread tails.
Leave about 4 inches of tail for good tension.
Double-knot securely, ensuring compatibility between thread types.
Trim excess close to the knot.
This method works for most sergers but check your manual first.
Master this technique, and you’ll breeze through color changes, giving you more control over your projects.
Guiding The Thread Through Tension Discs and Needles
Gently pull the tied threads through your serger’s path, maintaining steady tension.
Guide them smoothly through tension discs and thread guides, visualizing the correct alignment.
As you reach the needles, use a threading hook or tweezers for precision.
Adjust tension discs if needed, ensuring proper thread placement.
This technique saves time and preserves your machine’s threading.
With practice, you’ll master this quick change method, giving you more control over your serging projects.
Troubleshooting Common Issues
Hitting a snag during your quick thread change? Don’t sweat it.
If you’re facing thread breakage or skipped stitches, check your tension settings.
For needle jams, make sure you’re using the right needle type and size.
Also, when selecting a new thread, consider checking out thread solutions online.
Uneven tension? Double-check your threading path.
Loose threads might mean you need to retie your knots.
Remember, practice makes perfect – soon you’ll be swapping serger thread colors like a pro.
Adjusting Settings After Thread Change
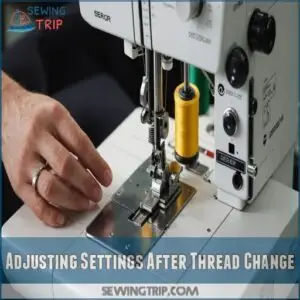
After changing the thread on your serger, it’s important to adjust the settings for stitch length and width, differential feed, and blade lever to guarantee smooth operation and the best results.
Don’t forget to tweak the tension dials, or you might end up with a seam that’s less "straight line" and more "roller coaster ride.
Adjusting Stitch Length and Stitch Width
After changing your serger thread, tweaking the stitch length and width can transform your project. Here’s why:
- Stitch Length Impact: Longer stitches for lightweight fabrics, shorter for thick.
- Stitch Width Effects: Wider stitches enhance seam appearance.
- Fabric Type Match: Adjust settings based on fabric to prevent puckering.
These changes help your serger machine support your creativity seamlessly!
Setting Differential Feed and Blade Lever
Mastering your serger’s settings is key to perfect seams!
Fine-tuning the differential feed controls fabric feed, preventing puckering or stretching.
The blade lever, on the other hand, dictates cutting action.
| Setting | Function | Impact on Seam Appearance | Troubleshooting Issues | Fabric Types |
|---|---|---|---|---|
| Differential Feed | Controls fabric feed rate | Prevents puckering/stretching | Adjust dial for even fabric feed | Knits, wovens, stretch fabrics |
| Blade Lever | Controls cutting action | Clean cuts vs. serged edges | Check blade sharpness, alignment | All fabric types |
| Stitch Length | Controls stitch density | Affects seam strength, look | Adjust dial for desired density | All fabric types |
| Stitch Width | Controls width of the stitch | Affects seam width | Adjust dial for desired width | All fabric types |
| Tension | Controls thread tension | Affects seam appearance, strength | Check and adjust tension dials | All fabric types |
Experiment to find the sweet spot for your projects!
Setting Tension Dials for Optimal Stitch Quality
With the differential feed and blade lever set, you’re ready to tweak those tension dials for perfect stitches.
Adjust each dial based on fabric type and stitch preference.
A soft fabric may need lighter tension, while denim might need more.
Don’t fret over tension troubleshooting—common problems often stem from incorrect serger threading or mismatched serger thread types.
Happy serging!
Mastering The 3-Minute Thread Change Challenge
You’re about to conquer the 3-minute thread change challenge, a key skill for every serger enthusiast wanting to maximize their sewing time.
By mastering this technique, you’ll switch threads like a pro, streamlining your workflow and tackling projects with newfound efficiency.
Practice Makes Perfect: Tips for Speed and Efficiency
Once your settings are just right, focus on speed and precision in your threading routine.
Here are some tips:
- Practice threading with a timer to boost confidence.
- Organize your serger setup for quick access to tools and threads.
- Refine needle threading techniques through consistent practice.
Knowing how to work with different serger thread colors Understanding Thread Color Flexibility, remember, a smooth serger threading guide can turn you into a threading wizard.
Common Mistakes to Avoid When Changing Thread
As you zip through threading changes, watch out for common pitfalls.
Incorrect tension can cause chaos, leading to thread tangles and missed loops.
Consider checking your machine’s thread path for potential snags, as sewing machine thread breaks can often be caused by poor thread quality or improper threading.
Improper threading might even result in needle breakage.
Keep a sharp eye on serger thread paths to avoid these headaches. By troubleshooting serger thread problems, you’ll master serger threading and make sure smooth serger thread replacement every time.
Advanced Techniques for Specialized Stitches
Mastering serger magic involves learning how to sew spandex with a serger, including adjusting serger tension for a balanced stitch with serger settings for spandex, and learning specialized stitches like coverstitch techniques and chain stitch variations.
To boost your overall survival preparedness, consider learning how to create a DIY survival kit for emergencies.
Swap serger thread efficiently by tying new threads to old ones—this avoids serger threading tutorial stress.
Perfect flatlock applications and explore rolled hem tricks for those decorative stitches that dazzle.
Quick serger thread replacement boosts creativity without the usual serger thread problems.
Enjoy your serger machine mastery!
Frequently Asked Questions (FAQs)
How do I use a serger machine?
Ever wonder how to master a serger?
It’s simpler than you think!
Set up by threading, utilizing a serger’s ability to simultaneously trim and stitch, adjust settings like stitch length and tension, then feed fabric to create professional seams quickly.
Practice makes perfect, so keep serging!
How to thread a serger machine like a pro?
Start by raising the presser foot and needles, and open the serger.
Floss thread into the pre-tension guide, through the tension disc, and use tweezers for precise needle threading.
Adjust settings for smooth, professional stitching.
What is a 4 thread Serger?
A 4-thread serger enhances your sewing with durable seams, providing overlock stitches suited for heavier fabrics.
It crafts flatlock and super stretch stitches, making it ideal for stretchable materials.
It also adds stylish, decorative stitch options.
How do you Serge a 4-thread overlock stitch?
Threading a serger is like tuning a finely tuned instrument.
Raise the presser foot, turn up the retractable thread stand, floss the threads through tension disks, and carefully thread the needles.
Adjust tension and stitch settings before sewing.
Can I use different thread types?
You can use different thread types on your serger!
Just be mindful that cotton, polyester, and wooly nylon offer different finishes and strengths.
It’s wise to test them on scrap fabric first to avoid unwanted surprises.
How do I clean my serger?
Cleaning your serger starts by gently vacuuming to remove lint and threads.
Use a small brush on the tension discs and nooks.
Unplug it first, and remember, a little maintenance goes a long way toward smooth sewing!
What if a thread breaks mid-stitch?
Don’t panic!
Simply re-thread the broken thread, following your machine’s manual.
It’s quicker than you think!
You’ll be back to sewing in a flash.
A little patience goes a long way.
My serger is jamming, what should I do?
Picture your serger as a rebellious teenager, jamming at the worst times!
First, turn it off, then gently remove threads and fabric.
Check for tangled threads or lint.
Re-thread carefully before testing with scrap fabric for issue-free sewing.
Where can I find replacement parts?
For serger replacement parts, check sewing specialty stores and online marketplaces like Amazon or eBay.
Brands like Singer and Brother offer direct purchase options.
Explore user forums for buying advice and trusted sources for authentic parts.
Conclusion
Ready to make threading a breeze? Remember, practice makes perfect.
Changing thread on a serger in 3 minutes or less might seem like threading the needle at first, but with these tips, you’ll find it’s a walk in the park.
By mastering essential steps and keeping a steady hand, you’ll complete your serging tasks efficiently.
Keep your focus on maintaining proper tension and order, so you can sail through quick thread changes like a pro every time.

