This site is supported by our readers. We may earn a commission, at no cost to you, if you purchase through links.

First, unplug your machine and raise the needle. Locate the release lever near the bobbin area and gently lift out the case – it’s like opening a tiny treasure chest.
Using a soft brush, remove any pesky threads and lint from both interior and exterior surfaces. Pay special attention to those often-overlooked tension springs.
For a thorough job, dampen a lint-free cloth with machine oil and wipe surfaces gently. A clean bobbin case isn’t just about maintenance; it’s your secret weapon against future tension troubles.
Table Of Contents
Key Takeaways
- You’ll need to unplug your machine and gather essential supplies like a soft brush, tweezers, and lint-free cloth before starting the cleaning process.
- You should locate the release lever near the bobbin area, gently lift out the case, and use your soft brush to remove any threads and lint from both interior and exterior surfaces.
- You’ll want to pay special attention to cleaning the tension springs, as they’re often overlooked but crucial for preventing future tension troubles.
- You must ensure proper alignment when reassembling the bobbin case – look for matching marks on the case and machine plate, and verify the tension by checking that the thread drops slowly with a gentle pull.
Preparing Sewing Machine
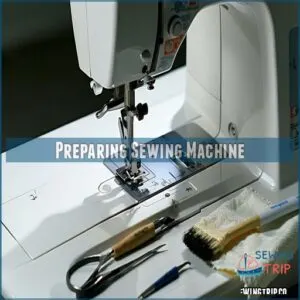
Before you start cleaning your sewing machine’s bobbin case, you’ll need to unplug the power cord and gather your cleaning supplies like a soft brush, tweezers, and lint-free cloth.
Just like preparing for surgery, you’ll want to raise both the needle and presser foot to get clear access to the bobbin area underneath.
Disconnecting Power Source
The first step in cleaning sewing machine parts is ensuring your safety through proper power disconnection. Before you begin any maintenance, follow these essential steps:
- Turn off the main power switch and wait 30 seconds for any residual charge to dissipate
- Carefully unplug the power cord, inspecting it for any wear or damage
- Check the voltage selector switch is in the correct position
- Remove any foot pedal connections
Always verify complete power disconnection before proceeding with your bobbin case cleaning routine. Think of it as giving your trusty sewing companion a safe spa day!
Using a power cord protector can help prevent damage to your sewing machine.
Gathering Cleaning Supplies
Now that your machine’s safely unplugged, let’s get your cleaning toolkit ready. You’ll need several items to tackle your bobbin case cleaning like a pro.
Here’s a handy guide to your essential supplies:
| Tool | Primary Use | Where to Find |
|---|---|---|
| Soft Brushes | Lint Removal | Sewing Kit |
| Lint-free Cloths | Dust Cleanup | Kitchen Supply |
| Tweezers | Thread Extraction | Craft Store |
| Cotton Swabs | Detail Cleaning | Drugstore |
Using proper sewing machine brushes is essential for effective cleaning, and you can find them at sewing machine brushes.
Keep these tools organized in a small container – you’ll be amazed how much cleaner your bobbin case gets with the right supplies!
Raising Needle and Presser Foot
Before diving into bobbin case cleaning, proper needle position and sewing preparation are essential for safety.
You’ll want to position your machine correctly:
- Rotate the handwheel toward you until the needle reaches its highest point
- Release any thread tension by lifting the presser foot lever
- Double-check that the needle’s completely raised
- Gently lift the presser foot until it clicks into place
This setup prevents tangling and makes bobbin case removal a breeze, ensuring a safe and efficient sewing experience with your machine, which is crucial for safety.
Cleaning Bobbin Case
Three simple steps will transform your grimy bobbin case into a pristine powerhouse of perfect stitching. Your bobbin case cleaning adventure starts with a soft brush to sweep away loose threads and debris that love to hide in those tiny crevices.
You’ll want to get up close and personal with your machine’s most significant component – carefully inspect the bobbin case’s interior and exterior surfaces for any sneaky bits of lint or thread. For stubborn buildup, dampen a lint-free cloth with sewing machine oil and gently wipe down all surfaces.
Don’t forget those often-overlooked tension springs! Thread tension issues often start with a dirty bobbin case, so pay extra attention to the grooves and edges where thread passes through. A thorough cleaning here will keep your stitches looking professional and prevent future headaches.
Regular maintenance involves understanding bobbin case cleaning to guarantee superior sewing performance.
Removing Bobbin Case
You’ll need to remove your bobbin case to get rid of those pesky thread bits and lint that love to hide in there.
Once you’ve unplugged your machine, simply locate the release lever near the bobbin area and gently lift the case out, just like removing a tiny treasure chest.
Locating Release Lever
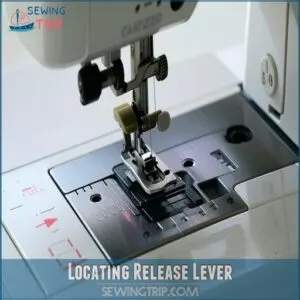
Now that you’ve prepped your workspace, let’s zero in on the release lever – your key to bobbin case access. You’ll spot this small metal or plastic tab near the bobbin area.
Simply place your index finger on the lever location and feel for a slight protrusion. Don’t worry if it takes a moment to find; every sewing machine model positions the release mechanism slightly differently.
Regular maintenance including sewing machine care is essential for superior performance.
Lifting Bobbin Case Cover
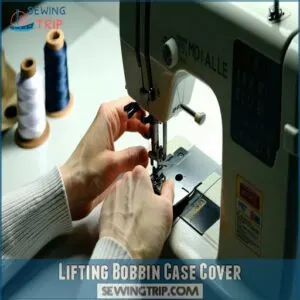
Once you’ve located the release lever, it’s time to lift the bobbin case cover with care.
Place your thumb and index finger on either side of the cover, then gently press the release mechanism.
The cover should smoothly slide or swing open, providing bobbin access.
Verify that the case lifting motion is steady to prevent any sudden movements that could damage the cover alignment, ensuring a smooth operation with the release mechanism.
Removing Bobbin and Debris
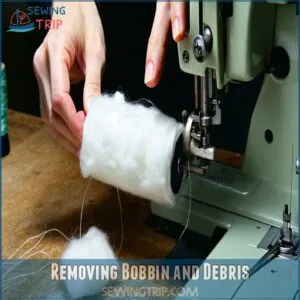
Once you’ve accessed the bobbin case, gently lift out the bobbin, being careful not to disturb any remaining thread.
Check for any thread tangles or lint buildup around the area. Use your cleaning brush to sweep away debris from both the bobbin and case.
For stubborn bits of lint, try using tweezers to carefully remove them without scratching the case’s surface.
Regular maintenance involves understanding bobbin case cleaning to prevent damage and guarantee smooth sewing operations.
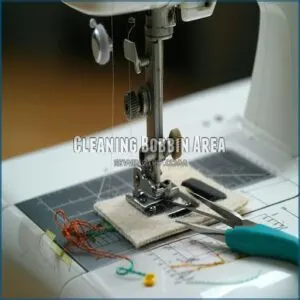
Cleaning Bobbin Area
You’ll need to clean the bobbinn area thoroughly to prevent those pesky thread nests that always seem to appear at the worst possible moment.
With your soft brush and tweezers ready, you can now remove any lint, loose threads, or debris that’s hiding in the bobbin race and surrounding areas.
Using Soft Brush and Tweezers
Now that you’ve removed the bobbin case, it’s time to tackle those pesky debris hiding spots. Take your soft brush and tweezers – they’re your best friends for this job.
Start by gently brushing away visible lint and loose threads, then use your tweezers for stubborn bits.
Regular bobbin case cleaning is essential for smooth machine operation.
- Use short, gentle strokes with your brush to avoid pushing debris deeper
- Hold tweezers at a 45-degree angle for better grip on tangled threads
- Work in a well-lit area to spot even the tiniest particles, and consider regular cleaning as part of your maintenance routine.
Inspecting for Obstructions and Damage
Every bobbin case needs a thorough inspection for potential problems.
It should be held up to a bright light and looked at closely for tiny obstructions or damage that could affect your stitching.
The tension spring should be checked for bent areas or debris buildup, and the case’s edges should be examined for nicks or burrs.
If you spot any damage, gently sand rough spots with fine-grit sandpaper, but don’t alter the case’s shape to ensure proper functioning and avoid further issues, and remember to address any problems found during the thorough inspection.
Cleaning With Lint-free Cloth and Isopropyl Alcohol
A spotless bobbin case is your sewing machine’s best friend. When cleaning your sewing machine bobbin case, reach for a pristine lint-free cloth and high-quality isopropyl alcohol.
Here’s what makes this cleaning solution work wonders:
- The alcohol’s quick-drying properties prevent rust formation
- A lint-free cloth leaves zero residue behind
- Gentle circular motions guarantee thorough bobbin sanitizing without damaging parts
Using lint free products is essential for effective cleaning.
Remember to let it dry completely before reassembly, ensuring a spotless bobbin case and allowing for high-quality performance.
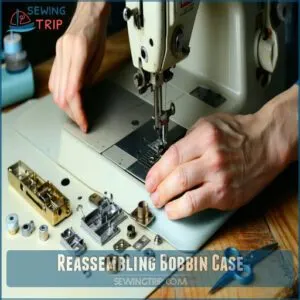
Reassembling Bobbin Case
You’ll want to take extra care during reassembly since a properly aligned bobbincase is essential for smooth stitching and preventing thread jams.
Now that you’ve cleaned all the parts, let’s put your bobbin case back together and get you sewing again.
Aligning Bobbin Case Mark
Most sewing machines have precise alignment marks that guide perfect bobbins case positioning. You’ll find small triangles or dots on both your bobbin case and machine plate – these are your alignment buddies.
Carefully line up these marks while installing the case. If they don’t match perfectly, your stitches might look like a roller coaster ride.
Double-check the mark positioning before proceeding to ensure that your sewing is accurate and of high quality with a perfect bobbin.
Securing Bobbin Case Cover
Now that you’ve aligned the case perfectly, it’s time to secure that bobbins case cover like a pro. Press down gently until you hear a satisfying click – that’s your signal it’s locked in place.
Don’t force it! The cover should glide smoothly into position. If you’re meeting resistance, double-check your bobbin placement and try again.
Think of it like closing a jewelry box – smooth and precise, to ensure everything is in place correctly with a satisfying click.
Checking for Proper Alignment and Tension
Now that you’ve secured the cover, it’s time to verify your bobbincase alignment and thread tension. Proper calibration prevents those pesky thread nests and skipped stitches that can drive any sewist crazy!
- Test the bobbin case tension by holding the thread tail – it should drop slowly with a gentle pull
- Check that the case sits flush against the hook race
- Look for any wobbling when you turn the handwheel
- Listen for unusual clicking sounds that might signal misalignment
A well-adjusted bobbin case should feel snug but not tight, much like a perfect-fitting shoe, and this adjustment is crucial for preventing issues like thread nests and skipped stitches that can be caused by misalignment.
Maintaining Sewing Machine
You’ll extend your sewing machine’s life and prevent costly repairs by maintaining a clean bobbins case, just like keeping your car’s engine oil fresh.
A well-maintained sewing machine runs smoother as well, and also helps you create perfect stitches every time, saving you from those frustrating thread nests and skipped stitches.
Regular Cleaning and Maintenance
Maintenance champions know that consistent bobbin care prevents costly repairs.
Keep your sewing machine humming smoothly with these essential routines:
| Task | Frequency | Tools Needed | Tips |
|---|---|---|---|
| Clean bobbin area | Every 8-10 hours | Soft brush, tweezers | Remove all visible lint |
| Oil application | Monthly | Machine oil | Use 1-2 drops only |
| Thread management | Each project | Scissors, brush | Trim thread tails |
| Tension check | Bi-weekly | Test fabric | Adjust if needed |
Remember to wipe down your machine after each session to prevent thread buildup and guarantee consistent stitching.
This routine will help ensure your sewing machine operates with smoothly and requires less costly repairs.
Storing in Clean and Dry Environment
Your clean bobbin case deserves a perfect home! Store your sewing machine in a room with controlled humidity to prevent rust and corrosion.
Cover it with a dust-protective case when not in use, and keep it away from direct sunlight or heat sources.
For the best storage solutions, place your machine in a clean room with good air circulation – it’ll thank you with years of reliable service.
Inspecting for Wear and Tear
After finding a cozy spot for your machine, you’ll want to keep an eye out for signs of bobbincase problems. Check for nicks or burrs that could cause thread breakage, and listen for unusual machine noise during operation.
If you notice sewing errors or uneven stitches, inspect the bobbinalignment carefully.
Run your finger along the case edges – they should feel smooth, not rough or damaged, to ensure proper machine operation.
Scheduling Professional Servicing
While you’ve been diligently checking for wear and tear, sometimes your sewing machine needs expert attention.
Professional servicing keeps your machine humming like new.
Schedule annual check-ups with qualified technicians who can:
- Perform deep cleaning beyond basic maintenance
- Calibrate tension settings precisely
- Address hidden bobbin case issues you can’t spot
- Replace worn parts before they cause problems
Regular maintenance is key to extending the lifespan, considering the service frequency guidelines for your machine.
Book appointments during slower seasons for better rates and faster service times to ensure your machine receives the care it needs.
Frequently Asked Questions (FAQs)
How do I clean the bobbin on my Kenmore sewing machine?
Like a surgeon prepping for operation, unplug your Kenmore first.
Remove the bobbins case, use a soft brush to clear debris, wipe with a lint-free cloth.
Reassemble carefully when finished.
How do I clean the inside of the bobbin?
You’ll want to use a soft brush to remove debris from your bobbin’s interior.
Gently wipe with a lint-free cloth, then use tweezers for stubborn bits.
Don’t forget to dry thoroughly before reinstalling.
How do I remove the bobbin case?
Just as a key opens a door, you’ll locate the bobbincase release lever, lift the cover, and gently pull the bobbin case out.
Make sure you’ve unplugged your machine first for safety.
How do you clean a sewing machine?
Unplug your machine and remove the needle plate.
Use a soft brush to clean lint from inner parts.
Wipe surfaces with a lint-free cloth.
Don’t forget to clean the bobbin area and feed dogs.
How do you remove a Burr from a bobbin case?
Just as a skilled jeweler polishes precious gems, you’ll need fine-grit sandpaper to gently smooth away any burrs.
Work in small circular motions, keeping the bobbin case steady.
Don’t apply excessive pressure.
How do you clean a bobbin ring?
Remove loose threads with tweezers, then gently brush the ring with a soft-bristled brush.
You’ll need to dampen a cotton swab with isopropyl alcohol, clean the ring thoroughly, and let it dry completely.
How to clean your bobbin case?
Clean your bobbin case with a soft brush to remove debris, then wipe with a lint-free cloth.
Don’t forget to check for thread bits in the tension spring.
You’ll need isopropyl alcohol for stubborn dirt.
How do you get thread out of a bobbin case?
Take your tweezers and gently pull tangled threads from the bobbin case’s grooves.
You’ll also want to use a soft brush to sweep away any stubborn bits stuck in the tension spring.
How to clean a bobbin tension spring?
Like a delicate spider’s web needing care, use a small brush dipped in isopropyl alcohol to gently clean under and around the tension spring.
Dry thoroughly with a lint-free cloth before reassembling.
Can you use WD-40 to clean a sewing machine?
Never use WD-40 on your sewing machine.
It’s not designed for delicate mechanisms and can damage your machine.
You’ll want to stick with proper sewing machine oil for maintenance and cleaning.
Conclusion
Now that you know how to clean your sewing machine bobbin case, you’re armed with a skill that’s worth its weight in gold.
Regular maintenance is like giving your trusty machine a spa day – it’ll thank you with smooth, trouble-free operation.
Remember to check and clean the bobbin case every few projects, and you’ll avoid those frustrating tension issues.
With these simple steps, you’re well on your way to keeping your sewing projects running like clockwork with trouble-free operation.
- https://archaicarcane.com/model-99-and-66-bobbin-case-and-feed-dog-cleaning/
- http://shesasewingmachinemechanic.blogspot.com/p/how-to-clean-and-oil-bobbin-and-feed-dog.html
- https://thestitchsharer.com/2013/05/28/cleaning-my-singer-sewing-machine/
- http://www.simplysewingmag.com/how-to-sew/skills-boost-how-to-clean-your-sewing-machine/
- https://sewing.wonderhowto.com/how-to/fix-and-clean-bobbin-case-area-your-own-sewing-machine-420797/

