This site is supported by our readers. We may earn a commission, at no cost to you, if you purchase through links.
 When you need to count sewing tape, you’re basically learning to read precise measurements. Start by identifying the main inch marks – they’re the longest lines on your tape.
Between each inch, you’ll find smaller divisions: half-inches, quarter-inches, eighths, and sixteenths. Count from zero to your desired measurement, noting each fraction.
For example, if you need 2¾ inches, count two full inches, then find the three-quarter mark. Most sewing tapes show both inches and centimeters, so pick one system and stick with it for consistency.
The secret lies in understanding that each tiny mark represents a specific fraction. This understanding is key to accurately measuring with sewing tape, and it helps to know that you’re working with a reliable system.
Table Of Contents
- Key Takeaways
- Top 3 Sewing Tape Measures for Accurate Counting
- Understanding The Basics of a Sewing Tape Measure
- How to Read a Sewing Measuring Tape
- Tips for Buying The Right Measuring Tape for Sewing
- Exploring Different Types of Measuring Tapes Used in Sewing
- How to Fix and Maintain a Sewing Tape Measure
- How to Make Bias Tape for Sewing
- Common Mistakes to Avoid When Measuring With a Sewing Tape Measure
- Frequently Asked Questions (FAQs)
- Conclusion
Key Takeaways
- Start with whole inches first – You’ll identify the longest lines with numbers on your tape, then count the smaller fractional marks between them for precise measurements
- Choose quality materials that won’t stretch – You’ll want reinforced polyester or fiberglass tape measures that maintain accuracy over time, avoiding cheap plastic options that compromise your measurements
- Master both measurement systems – You’ll need to read both metric (millimeters and centimeters) and imperial (inches with 16th-inch markings) scales depending on your pattern requirements
- Store and maintain your tape properly – You’ll keep your measuring tape flat, clean it regularly, and replace it when markings fade to ensure consistent accuracy across all your sewing projects
Top 3 Sewing Tape Measures for Accurate Counting
You’ll need reliable tape measures that deliver consistent, accurate readings for precise sewing projects.
The right measuring tool makes all the difference between professional-quality results and frustrating measurement errors that can ruin your fabric work, with accurate readings being crucial.
Sew Tape Measure Dual Sided Metric Imperial Polyester Fabric
This German-manufactured measuring tape delivers precision through its dual-sided design, featuring white imperial markings on one side and yellow metric conversions on the other.
The polyester fabric construction guarantees flexible tape durability without stretching over time, maintaining accurate measurements for years.
Built to last, this tape measure resists stretching so your measurements stay spot-on year after year.
At 60 inches long, it handles most sewing projects while the dual-sided accuracy eliminates guesswork when switching between the metric system and imperial system.
The fabric material resists wear better than plastic alternatives, making this sewing tape measure a reliable choice for serious sewers who need consistent results across different measurement systems.
Many sewers find that a dual-sided tape measure is essential for working with different patterns.
Tape Measure Plush Ruler Sewing Tool
The YEQIN Tape Quality brings playful charm to your measuring toolkit with its Plush Ruler Design featuring delightful motifs like frogs and strawberries.
This Kids Sewing Tool combines function with fun, making it perfect for introducing young crafters to sewing measurement techniques.
- Charming Tape Features: The soft, cloth-like material provides comfortable grip while delivering precise measurements for your sewing projects
- Gentle Use Cases: Lightweight construction makes it ideal for delicate fabrics and teaching children proper measuring tape reading skills
- Creative Design: Removable covers add versatility, though some users report occasional retraction issues with the spring mechanism
This sewing tape measure transforms routine measurements into an enjoyable experience, proving that sewing measurement tools don’t have to be boring to be effective.
These tools often feature a 1.5 meters length for versatile use.
Peel Stick Removable Ruler Tape Green
For projects requiring temporary measurement guides, you’ll find this Green Tape Precision tool transforms your workspace.
The Peel Stick Crafting solution delivers 10 yards of adhesive-backed measuring tape that’s perfect for DIY Ruler Application needs.
You can apply this sewing tape measure to fabric, wood, or metal surfaces without worrying about residue.
Its Removable Tape Durability allows multiple repositioning attempts until the adhesive wears off.
The tape features both imperial and metric markings with 1/8-inch increments, making it ideal for precise sewing measurements.
Perforated at 12-inch intervals, you can tear segments as needed.
This versatile measuring tool supports quilting, crafting, and home decor projects while maintaining accurate Adhesive Ruler Uses across various surfaces and applications.
Understanding The Basics of a Sewing Tape Measure
Now that you’ve selected quality sewing tape measures, let’s understand what makes these measuring tools work effectively in your sewing projects.
Your sewing tape measure is a flexible strip with linear measurement markings, typically crafted from reinforced polyester or fiberglass. These tape materials resist stretching over time, ensuring consistent accuracy for your fabric measurements.
Most standard tapes measure 60 inches (152 cm) long, though longer versions reach 100 or 120 inches for larger projects.
The dual-sided design displays both metric and imperial units – you’ll find centimeters and millimeters on one edge, inches and fractions on the other. This feature simplifies unit conversions when working with international patterns or switching between measurement systems.
Reading scales accurately depends on understanding the markings. Larger lines indicate whole units, while smaller marks show fractions or subdivisions. The 5/8-inch width matches common seam allowances, making it a practical reference tool.
For ideal tape lifespan, store your measuring tape flat and avoid excessive bending at the same spots. To get accurate results, remove bulky clothing before measuring. Quality sewing tools like your tape measure become more reliable with proper care, maintaining their precision through countless sewing measurements.
How to Read a Sewing Measuring Tape
Reading your sewing tape measure correctly is essential for accurate project results and professional-looking finished pieces.
You’ll need to understand both metric and imperial markings, plus how to interpret the various line lengths that indicate different measurement increments, to achieve professional-looking finished pieces.
How to Read a Tape Measure in Millimeters
Reading millimeter markings becomes second nature when you understand the metric system’s logic. Each centimeter divides into ten equal millimeters, creating precise increments for accurate measurements.
Look for the main centimeter divisions first, then count the smaller tick marks between them. These millimeter markings provide decimal usage precision that’s essential for metric sewing measurements.
Practice reading scales by identifying whole centimeters, then adding millimeter values. For metric conversion needs, remember that inch to millimeter conversion requires multiplying by 25.4.
This millimeter precision guarantees your sewing projects achieve professional results every time, ensuring that your work is accurate and of high quality due to the understanding of millimeter markings.
How to Read a Sewing Tape Measure in Inches
Understanding your sewing tape measure in inches becomes second nature with practice.
The Imperial System divides each inch into fractions, typically marked as 1/8 or 1/16 increments.
Start by locating the main inch markings – these are the longest lines with numbers.
Between each inch, you’ll find smaller marks representing fractions.
Finding Half-Inches is straightforward – they’re the second-longest marks between whole inches.
Identifying Quarter-Inches requires spotting the medium-length marks that divide each half-inch section.
For precise work, you’ll need to read the shortest marks for 16th-inch markings.
When reading, count from the last whole inch to your measurement point.
If you’re at 3 inches plus 5 small marks, you’re measuring 3 5/16 inches.
To guarantee accuracy, use a flexible measuring tape no wider than 1 cm.
Different tape measure brands may vary slightly in marking styles, so always double-check your imperial measurement markings for accuracy in your sewing projects.
How to Read a Tape Measure in 16ths
Moving beyond whole inch markings, mastering 16th-inch readings takes your sewing tape measure skills to the next level. Each inch divides into 16 equal parts, creating the smallest markings on your tape measure reading scale. These fractional markings appear as tiny lines between larger divisions.
To count 16ths accurately, start at any whole inch marking and count the small lines forward. If you measure 4 inches plus 5 small marks, you’ve got 4 5/16 inches. The 16th inch markings are your secret weapon for precision measuring and accurate seams.
Here’s what sixteenths explained means for your projects:
- Perfect fit guarantee – No more loose or tight garments
- Professional-quality results – Your work rivals store-bought items
- Confidence boost – You’ll tackle complex patterns fearlessly
- Time savings – Fewer mistakes mean less rework
Practice counting 16ths on scrap fabric first. This fractional inches system transforms good sewers into great ones.
Tips for Buying The Right Measuring Tape for Sewing
Your tape-measure purchase shouldn’t be a shot in the dark when precision matters most. Smart shoppers know that the right measuring tape can make or break their sewing projects, so you’ll want to examine these key factors before making your investment.
Here are four essential criteria for selecting the best measuring tape for your sewing needs:
- Material Quality – Choose reinforced polyester or fiberglass construction that won’t stretch over time, ensuring your accurate sewing measurements remain consistent project after project.
- Length Needed – Standard 60-inch tapes work for most garments, but you’ll need 100-120 inch versions for curtains, quilts, and home décor projects.
- Retractability – Decide between flexible cloth tapes for body measurements or retractable cases for convenience and storage protection.
- Unit Display – Look for dual-sided sewing tools with clear markings clarity, featuring both metric and imperial units to match your pattern requirements.
Consider markings clarity and whether you prefer starting measurements from both ends for versatility.
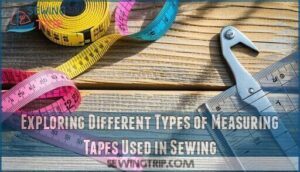
Exploring Different Types of Measuring Tapes Used in Sewing
You’ll encounter several specialized tape measures designed for specific sewing tasks, each offering unique advantages for different projects.
Understanding these distinct types helps you choose the right tool for accurate measurements and professional results.
The Regular Measuring Tape
You’ll find regular measuring tape is your go-to sewing tool for most projects.
These flexible strips, made from reinforced polyester or fiberglass, won’t stretch over time – that’s where accuracy matters most.
Standard length runs 60 inches, though you can grab 120-inch versions for larger work.
The material composition guarantees durability while maintaining flexibility around curves.
Most feature 5/8-inch tape width, matching common seam allowances.
Unit versatility shines with dual-sided markings showing both metric and imperial measurements.
For a wide selection, consider purchasing measuring tape online.
Handle your measuring tape gently to maintain sewing precision and avoid damage from snapping back, ensuring you preserve the flexibility and accuracy of your measurements.
Cutter Practical Guide Tape
Professional tailors have long relied on the cutter practical guide tape for systematic garment construction.
This specialized sewing tape measure combines multiple measuring tools into one compact unit, featuring elastic tape, twill tape, and drawing rulers attached to a plastic base.
The elastic integration allows for stretch measurements on knits, while twill tape features provide stability for woven fabrics.
Drawing ruler uses include pattern drafting and seam allowances.
These dressmaking applications make it perfect for professional tailoring work.
The guide tape uses both metric measurement markings and imperial measurement markings, ensuring versatility across different measuring tape guide systems for precise garment fitting.
You can find a cutter practical guide online.
Trouser Tape
While cutter practical guide tape handles general marking needs, trouser tape serves a specialized purpose for achieving perfect Inseam Accuracy in pants construction.
This measuring tape guide features a distinctive Curved Top design that conforms naturally to your body’s contours, making it indispensable for Professional Use in tailoring.
Here’s what makes trouser tape your go-to tool for precise Pant Lengths:
- Twill Durability – Built to withstand repeated measurements without stretching
- 45-inch length – Perfect for most inseam measurements
- Curved design – Follows your natural body shape for accurate readings
- Clear markings – Easy-to-read measurements prevent costly mistakes
- Professional quality – Trusted by tailors worldwide for consistent results
When measuring inseams, position the curved end at your waist and let the tape follow your leg’s natural line. You can find a variety of options online. This sewing tape measure eliminates guesswork, ensuring your trousers fit perfectly every time.
Drawing Rulers
Looking beyond trouser tapes, drawing rulers bring precision to your sewing projects through their unique L-shaped design.
These L-Square Uses include creating perfect 90-degree angles for pattern making and guaranteeing accurate corner measurements.
You’ll find clear acrylic or plastic construction offers excellent Acrylic Durability while maintaining transparency for pattern work.
Most drawing rulers feature Grid Markings that help you measure Curved Lines with surprising accuracy.
The grid system transforms complex curve measurements into manageable segments, making intricate patterns achievable.
When working with your sewing tape measure, these rulers complement flexible measuring tape by providing rigid reference points.
A clear ruler is also essential for precise measurements.
For Angle Measurement tasks, drawing rulers excel where standard measuring tape falls short.
The L-square design locks in perfect corners, while the ruler’s markings align with your sewing ruler guide requirements.
This combination guarantees your patterns translate accurately from design to fabric, giving you professional results every time.
How to Fix and Maintain a Sewing Tape Measure
Every sewing tape measure needs proper care to maintain accurate markings and smooth retraction issues. Regular maintenance prevents costly replacements and guarantees measuring tape precision for years.
- Cleaning Tape: Wipe your sewing tape measure with a damp cloth to remove dust and fabric fibers that affect accuracy.
- Storage Solutions: Store measuring tapes flat in a drawer or rolled loosely to prevent creasing and material deterioration.
- Retraction Issues: Check retractable mechanisms monthly and lubricate springs lightly if they stick or jam.
- Replacing Tape: Replace worn tapes when markings fade or edges fray, as damaged tools compromise sewing measurement accuracy.
- Accurate Markings: Compare your tape against a ruler periodically to verify sewing measurement precision and reliability.
How to Make Bias Tape for Sewing
While proper measurement keeps your sewing projects precise, you’ll often need custom bias tape to achieve professional-looking seam finishes. Creating your own bias tape gives you complete control over fabric choices and bias widths.
Start by understanding fabric grain direction. The bias runs at a 45-degree angle to your fabric’s straight grain, creating the stretch needed for curved bias applications. Use your sewing tape measure to mark cutting angles accurately on your chosen fabric.
Cut strips at the proper width for your project. Standard bias tape requires strips four times the finished width. For example, 1/2-inch finished tape needs 2-inch strips. This accounts for the folding process.
Essential bias tape making steps:
- Cut strips on the true bias for maximum flexibility
- Join strips with diagonal seams to eliminate bulk
- Press folds consistently using a bias tape maker tool
Fold strips in half lengthwise, wrong sides together, then press. This creates double-fold bias tape perfect for binding edges and creating smooth seam finishes around curves and corners.
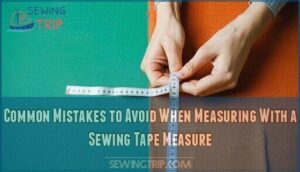
Common Mistakes to Avoid When Measuring With a Sewing Tape Measure
Accuracy becomes your greatest ally when you master proper measuring techniques.
Many sewers unknowingly sabotage their projects through simple oversights that compound into major fitting disasters. Pre-washing fabric is essential to avoid shrinkage.
| Mistake Type | Common Error | Quick Fix |
|---|---|---|
| Tape stretching | Pulling too hard on fabric measurement | Hold tape gently, let it rest naturally |
| Misreading markings | Confusing 1/8" with 1/16" lines | Use good lighting, read at eye level |
| Incorrect placement | Starting measurement mid-tape | Always begin at zero mark |
Watch for parallax error when reading your sewing tape measure at an angle.
Keep the measuring tape flat against your fabric, avoiding the temptation to curve around edges.
Ignoring width considerations throws off seam allowances, while rushed measurements lead to costly mistakes.
These sewing measurement tips guarantee your fabric measurement accuracy every time.
Frequently Asked Questions (FAQs)
How do you use a sewing tape measure?
Hold the tape measure against your starting point, then stretch it along the item you’re measuring. Read the number where the tape ends for your measurement.
Which sewing tape measures are accurate?
Finding a rock-solid measuring tape is like striking gold in your sewing toolkit.
Look for reinforced polyester or fiberglass tapes that won’t stretch over time, ensuring your measurements stay true and your projects turn out perfectly.
How do you measure fabric with a tape measure?
Place your tape measure flat against the fabric’s edge, ensuring it’s straight and taut. Read the measurement where the fabric ends, aligning your eye directly above the marking for accuracy.
What are the different types of sewing tape measures?
Most sewers use 60-inch tape measures, but you’ve got options.
Regular flexible tapes handle body measurements, while 120-inch versions tackle large projects.
Retractable types offer portability, trouser tapes curve for inseams, and dual-sided versions display both metric and imperial units, making them useful for trouser measurements.
Can fabric tape measure be used for sewing?
Yes, fabric tape measures are specifically designed for sewing and are the preferred choice.
They are flexible and accurate, and dual-sided with both metric and imperial measurements.
This makes them perfect for taking body measurements and drafting patterns.
How do you measure a person with a tape measure?
Position the flexible tape measure around the person’s body at specific measurement points.
Keep the tape snug but not tight, ensuring it lies flat against their skin or clothing for accurate readings.
How to calculate tape measurement?
To calculate tape measurements, you’ll read the markings where your fabric or item ends. Add whole inches to fractions—like 4 inches plus 3/8 equals 4 3/8 inches total.
How many inches is 1 meter in tailor tape?
Like unraveling a mystery, converting meters to inches on your tailor tape requires simple math.
One meter equals exactly 37 inches, so you’ll count nearly forty inches when measuring a full meter.
How do you calibrate a sewing tape measure?
You’ll need to compare your tape measure against a known accurate standard ruler or measuring device.
Check multiple points along the tape, especially at common measurements like 12, 24, and 36 inches for consistency and accuracy.
Whats the difference between tailor tape and regular tape?
Tailor tape measures are specifically designed for sewing and body measurements, featuring flexible polyester or fiberglass construction.
Regular tape measures are typically rigid, retractable tools meant for carpentry, construction, and general measuring tasks around your home, which is a different purpose than that of tailor tape measures.
Conclusion
Mastering how to count sewing tape transforms your projects from guesswork into precision craftsmanship.
You’ve learned to identify measurement marks, read fractions accurately, and choose the right tools for your needs.
Practice makes perfect when reading both metric and imperial systems.
Remember to maintain your measuring tape properly and avoid common measuring mistakes.
With these skills, you’ll achieve professional-quality results every time you measure fabric or create patterns for your sewing projects, ensuring complete concepts are applied accurately.
- https://www.ageberry.com/tape-measure-for-sewing/
- https://www.youtube.com/watch?v=IIdSi07y_3E
- https://www.reddit.com/r/sewing/comments/140r02s/lpt_check_how_wide_your_measuring_tape_is_most/
- https://www.johnsonlevel.com/News/TapeMeasure
- https://www.wawak.com/cutting-measuring/measuring-tools/sewing-tape-measures/

