This site is supported by our readers. We may earn a commission, at no cost to you, if you purchase through links.
Are you looking to give your outfit a unique, stylish twist? Cutting and tying the sides of a shirt is an easy way to transform any baggy top into something more fashionable. With just some scissors and fabric tabs or horizontal slits — depending on the look you’re going for — you’ll have created an eye-catching piece in no time.
This technique can be used on different types of shirts, like t-shirts, sleeveless tops, and tank tops. In this article, we’ll show you how it’s done step by step, so even beginners can pick up this skill easily.
Table Of Contents
Things You Will Need

Grab a baggy shirt and some fabric scissors – let’s get started! Experiment with different types of shirts – t-shirts, sleeveless shirts, tank tops or woolen fabrics. Consider cotton, linen, polyester, velvet or silk.
Cut each side of the shirt up to the armholes, then make vertical cuts down the side seams, stopping 1 inch below them. Cut 1 inch slits every 1 inch down both sides, making sure the front and back are directly on top of each other. Hold them together tightly while cutting horizontal slits through both sides from top to bottom, at equal distances apart. This creates one-inch tabs in between, which should be knotted together using a double knot for better fitment adjustment if needed.
When done with all pairs at once, use a full length mirror for convenience and trim extra material off around the hemline. Cut 3 inches vertically up either side, then tie the loose ends. This completes the desired pattern matching effect perfectly!
Choosing the Right Type of Baggy Shirt
Choose a lightweight, baggy shirt to create the perfect look for any occasion – from beach days to casual catch-ups with your friends. Tailoring basics such as fabric options and hemming techniques can help you choose the right type.
Experiment with different fabrics like cotton, linen, polyester, velvet and silk. They’re easy to knot without unraveling or fraying. Avoid woolen shirts – they don’t have enough elasticity when knotted tightly.
T-shirts and sleeveless shirts are versatile. Tank tops are ideal for summer months when some skin is desired to keep cool.
Accessories trends such as knotting techniques should be used when tying each side of the shirt. Create vertical slits 1 inch apart from one another down both sides of the garment, up to an inch below the armholes. Then cut horizontally over these slits every 1 inch downward. Adjust tightness accordingly – make knots tighter if gaps between ties aren’t even or looser if you want more skin revealed through openings.
Measuring and Cutting the Shirt
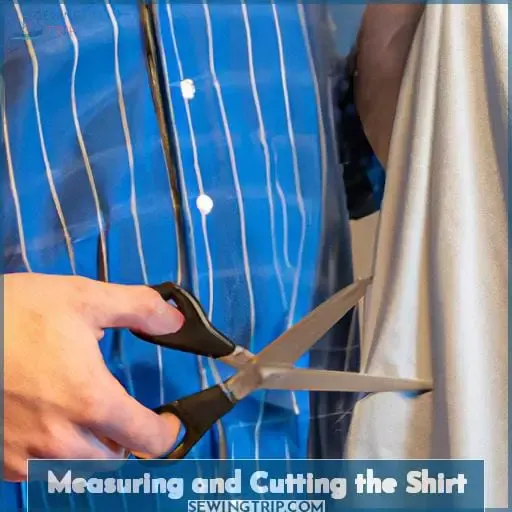
Measure and mark the fabric of your shirt, then snip each side up to the armholes. Use tailoring basics like vertical cuts to create tabs that can be knotted together. Use fabric scissors and make sure both sides of your shirt are lying directly on top of each other.
Refer to this table for key hemming techniques:
| Hemming Techniques | Description |
|---|---|
| Blind Stitching | Sew two pieces of fabric together without visible stitches from the outside. Great for hems or sleeves to create a clean finish. |
Start at the top of the cut and work your way down to ensure even spacing before knotting each pair of tabs together. Pull sides of the shirt tight if you don’t want skin exposed, or leave loose for a revealing look. Trim and knot both sides to give it a fitted look. If there are buttons at the front, leave bottom three buttoned for added structure. Grip bottom five inches of top with hands, double-knot in front, and you’re ready to step out in style.
Creating the Knots
Creating knots on the sides of a shirt is an easy way to give it a fitted look. Experiment with different types of shirts: t-shirts, sleeveless shirts, and tank tops.
Create two techniques: pair of tabs and horizontal slits. For the first one, make vertical cuts up to armholes then tie each pair together. For the second one, cut 1 slits down both sides, hold fabric together and make 1 horizontal slits through both sides every 1 from top to bottom before knotting them together.
Technique 1: Pair of Tabs
Get creative with your shirt! Tie the fabric tabs together for an on-trend look. Experiment with different fashion trends, fabric options, hem lengths and color combos for a unique style.
Lay the front and back of your baggy shirt directly on top of each other. Make horizontal slits every 1 inch from the top to bottom.
Tie each pair of tabs together or knot them at the end. This will create gaps between fabrics, revealing your skin.
Accessorize with jewelry or colorful scarves for a complete summer ensemble.
Technique 2: Horizontal Slits
Try creating horizontal slits on your baggy shirt for a unique look; this technique has been viewed over 35,000 times! To create the desired effect, make vertical cuts up the sides of your shirt stopping an inch below the armholes. Cut one-inch slits every inch down both sides, creating one-inch tabs. Hold both sides together and make horizontal slits at one-inch intervals from top to bottom, then knot each pair of tabs together.
Vary this style further by experimenting with different materials like cotton or silk, incorporating fashion trends like alternative knots and creative cuts. Thrift shop often to find interesting designs begging for alteration.
Adjust the tightness when tying off either side at the back or front hemlines. Make sure it’s not too loose or skin will show, or too tight where the ribcage shows through the gaps between ties under the arms. Use a mirror if necessary until you’re satisfied. Trim excess fabric and double-knot the ends securely.
You can also try cutting three or five inches vertically up each side before tying two loose ends together horizontally across the hips/waistline area. That way you have chic new casual wear ready-to-go wherever life takes you next!
Styling Tips
Try these fun and stylish ways to knot the sides of your shirt for a variety of occasions. To start, experiment with different fabrics such as cotton, linen or polyester that work best for this activity. Avoid using woolen shirts since they may not hold up well when you tie them together at the ends.
For a low-rise waistband look, try cutting 1 inch vertical slits every 1 inch down each side seam from just below armholes to bottom hemline of the shirt. Create even tabs by making horizontal cuts through both layers of fabric every 1 inch from top to bottom while ensuring that front and back are lying directly on top each other before doing so!
Then take two tops tabs on one side and double-knot them together; continue all way down until all knots are made in same manner yet make sure fabric is pulled tight if gaps between ties aren’t desired!
If looking for more colorful patterns or distressed fabric styles involving cropped fit with oversized fit options – colorfully patterned silk velvet tank tops can be used instead followed by tying loose ends either at front or back depending upon preference.
WikiHow’s content management team provides detailed instructions along with photos which makes it easier than ever before!
Frequently Asked Questions (FAQs)
How do I know which type of shirt is best for this activity?
When it comes to choosing the best type of shirt for this activity, mixing patterns and selecting complementary colors can help you create an eye-catching look. Fabric selection is key – experiment with different fabrics like cotton, linen, polyester velvet and silk to get the perfect fit. Match any accessories you pair with your outfit in order to complete a layered look that perfectly complements your style!
Contractions can help to make your description sound more natural. Try using them when appropriate.
What is the best way to create even cuts?
To achieve an even, layered look for your shirt, start by making vertical cuts up the side seams and stop 1 inch below the armholes. Then make 1-inch horizontal slits through both sides of the shirt every inch from top to bottom. Double-knot each pair of tabs together or knot them at either end to create a tailored fit.
If you want more layering, cut 3-inch vertical lines up each side of your shirt and double-knot them. For a high low hem effect, try knotting one side on front or back and pull it towards one hip for a fun look. Mix fabrics like cotton with velvet or polyester with silk for interesting combinations that complete this effortless style!
How do I make sure the knots are secure?
To make sure your knots are secure, choose a fabric that fits the look you’re going for; cotton, linen, polyester or velvet may be best. Use sewing tools like fabric scissors to cut even slits on each side of the shirt and knot each pair together.
Try tying knots at the front or back of your shirt as well as varying lengths from 3 inches to 5 inches when cutting vertical lines up either side of it.
Finish with double-knotting both sides for extra security and adjust tightness if necessary. Use a full-length mirror so you can see how everything looks from all angles!
How do I make sure the knots are even?
Securing threads, identifying lengths and working with fabrics are essential when tying knots in clothing. To make sure your knots are even, experiment with different types of shirts like t-shirts or tank tops, and use a variety of fabrics like cotton, linen or polyester. Cut each side of the shirt up to the armholes, avoiding woolen materials. Make vertical cuts up the sideseams, then 1 inch slits every 1 inch down both sides. This will create tabs for knotting together. Hold the tabs tightly so gaps don’t reveal skin. Alternatively, you can loosen them if desired. Trim off excess material and choose patterns for an on-trend look.
Are there any other ways to style the shirt?
Whether you’re going out for a casual day or attending an event, there are plenty of ways to style your baggy shirt. Try mismatched patterns by pairing it with another patterned item like shorts or pants. Add some color blocking by wearing different colored items together. Accessorize the look with jewelry and other accessories. Use textured fabrics to give the outfit more depth and interest. Try layering techniques such as adding a lightweight jacket over top of your shirt.
With these tips, you can create unique looks that show off your personal style!
Conclusion
Your newly tied-up shirt’s the perfect addition to any summer wardrobe. Whether you’re headed to the beach or just hangin’ with friends, your baggy shirt will make you look stylish and unique. Take Sarah for example. She wanted to make a statement with her baggy shirt. So, she cut and tied the sides in a knot at the front. The result? A trendy, fitted look that complemented her summer outfit perfectly.
It’s easy to create a fashionable, one-of-a-kind look with your baggy shirt. Just follow these simple steps: Cut and tie the sides of your shirt in a knot at the front.
And there you have it!


