This site is supported by our readers. We may earn a commission, at no cost to you, if you purchase through links.
 Want to know how to make a kimono? It’s easier than you think!
First, choose your fabric – silk’s luxurious, but cotton’s comfy.
Next, measure and cut your fabric into the right shapes.
Don’t worry about messing up; even experienced sewers have their "oops" moments!
Then, sew the pieces together, paying attention to those iconic wide sleeves.
Remember to carefully hem the edges for a professional look.
It’s all about precision and patience, creating something truly unique.
Believe it or not, mastering the simple steps opens up a world of creative freedom.
Ready to learn some pro tips and tricks?
Table Of Contents
Key Takeaways
- Choose lightweight fabrics like silk or chiffon for comfort and elegance. Decide between solid colors or prints to express your personal style.
- Measure and mark your fabric with precision, ensuring your cuts for sleeves and kimono openings are accurate.
- Sew your kimono by pinning the fabric, stitching sleeves and sides, and hemming raw edges to give it a polished look.
- Turn your kimono right-side out, check for any finishing touches, and ensure it fits comfortably to flaunt your creation.
Choosing The Right Fabric
Choosing the right fabric for your kimono is like picking ice cream flavors—each type brings its own style and feel.
Lightweight options like chiffon or silk are a great choice.
Decide if you want a solid color or a fun print to showcase your personality.
Types of Fabric for Kimono
Choosing fabric for a kimono is like picking the perfect partner; you want just the right blend of texture and drape.
Experiment with different fabric weights, and don’t shy away from a splash of color or interesting patterns.
Your fabric’s vibe should match your style.
Remember, a kimono isn’t just clothing—it’s a canvas reflecting your personality!
Lightweight Fabric Options
For a lightweight feel, consider choosing cotton or silk satin as your fabric option, both of which are perfect for everyday comfort and special occasions, as shown in the ultimate DIY kimono guide. Let’s talk lightweight fabric options that make your kimono feel like a gentle breeze. You want:
- Chiffon: Flowy and sheer, it adds elegance.
- Silk: Luxurious with a fantastic drape.
- Light Cotton: Breathable, perfect for all seasons.
- Knit Blend: Offers a comfy stretch.
Remember, these fabrics vary in care instructions and eco-friendliness, so choose wisely!
Solid Color or Printed Fabric
When picking your kimono’s style, fabric patterns are your playground.
Solid colors offer a timeless elegance, while print styles can inject personality into your wear.
Consider color matching with your wardrobe and the fabric weight for comfort.
If adventurous, explore dyeing techniques to craft a unique piece.
Just remember, your kimono should reflect you!
Measuring and Marking The Fabric
Now that you’ve chosen your fabric, it’s time to get measuring!
Grab your tape measure and carefully mark your fabric according to the pattern instructions – don’t worry, it’s easier than it sounds, and soon you’ll be well on your way to a gorgeous kimono.
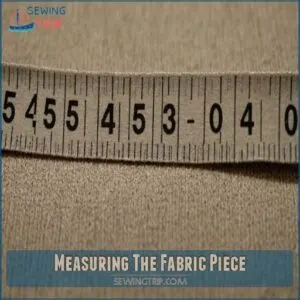
Measuring The Fabric Piece
Think of fabric dimensions as your guiding compass.
For a hip-length kimono, you’ll need a piece that’s 40 inches by 55 inches.
Want longer sleeves? Boost the width to 48 inches.
Adjusting these dimensions helps you craft the perfect sleeve length and kimono length, ensuring the right fabric weight keeps it comfortable and stylish.
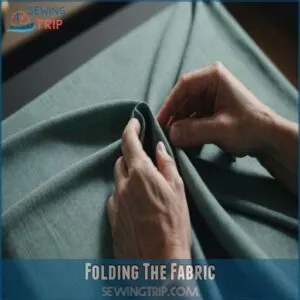
Folding The Fabric
To start creating your kimono, line up the fabric edges and fold it in half with "wrong sides" facing out.
This helps reveal the fabric grain and makes sure the fold direction stays true.
Here’s how to keep it smooth:
- Smooth out any wrinkles.
- Align the center fold carefully.
- Double-check both sides are even.
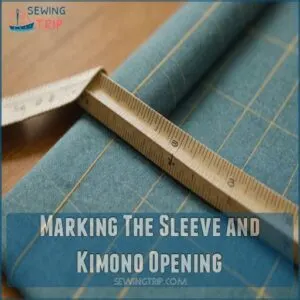
Marking The Sleeve and Kimono Opening
Starting with the fabric folded, picture the masterpiece you’re creating.
Mark 10 inches from the top fold to craft your sleeves with precision cutting.
At 6 inches in, you’ve got the spot to draw a guiding line, establishing the sleeve placement.
Draw a line down the center fold for the kimono opening—your neckline design’s awaiting attention!
Cutting The Fabric
Now that your fabric is measured and marked, it’s time to cut out the shapes that will bring your kimono to life.
Don’t worry if your scissors feel like they’re on a mission of their own; with a little focus, you’ll soon have the perfect "L" shape for sleeves and a crisp cut-down center for the kimono’s opening.
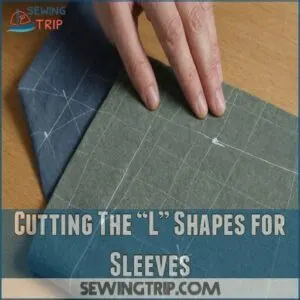
Cutting The “L” Shapes for Sleeves
Let’s take a look at cutting the “L” shapes for your kimono sleeves.
Here’s how you nail it:
- Fold the fabric with wrong sides out.
- Mark 10 inches from the top fold and 6 inches in.
- Draw an “L” connecting your marks for accuracy.
- Cut along lines for precise sleeve length.
Accuracy here sets the stage for stylish sleeves!
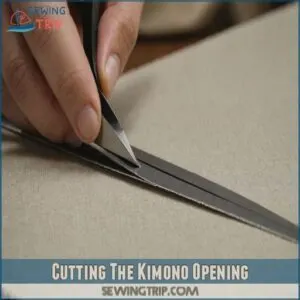
Cutting The Kimono Opening
You’ve marked the center? Great. Now, to prevent knit fabric unraveling, it’s important to use the right tools and techniques, such as those described in how to cut knit fabric without unraveling.
It’s time to turn that fabric into your kimono masterpiece.
Cut along the center fold, only through one layer for the kimono opening.
Choose your favorite cutting tools; it’s like sculpting your fabric canvas.
Check this handy guide:
| Aspect | Details |
|---|---|
| Opening Size | Customizable |
| Fabric Layers | Single layer cut |
| Tools | Scissors, rotary cutter |
| Shape | Straight line |
| Precision | Essential for success |
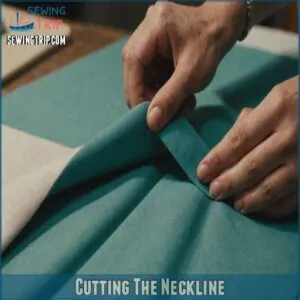
Cutting The Neckline
For a softer look, try a curved neckline.
Carefully cut two gentle curves from 2 inches below the top fold.
Remember, only cut through one layer of fabric.
This creates a pretty neckline shape.
Experiment with the depth—a deeper curve means a lower neckline.
You can add embellishments later!
Neatly finish the edges to prevent fraying.
It’s a simple touch that makes a big difference.
Sewing The Kimono
You’ve made it this far, so it’s time to bring your kimono to life by pinning the fabric and stitching the sleeves and sides.
Don’t forget to hem those raw edges to keep everything neat—otherwise, your kimono might just unravel like last week’s surprise quiz!
Pinning The Fabric
After cutting the fabric, it’s time to pin everything together.
Carefully layer your fabric, keeping the wrong sides out.
Use proper pinning techniques to secure the material with sharp pins in the right spots.
Remember, well-placed pins guarantee straight seams later.
Imagine the fabric as a canvas, each pin a brushstroke setting up for your masterpiece.
Sewing The Sleeves and Sides
Now that you’re all pinned up, it’s time to stitch those sleeves and sides.
Keep your fabric aligned and sew a straight line along the edges.
When sewing sleeves, it’s important to understand the basics of different sleeve types and styles, including set-in, shirt, and raglan sleeves.
- Pin Placement: Double-check it’s secure.
- Sewing Techniques: Choosing the right sewing machine for beginners, such as those with step regulation for easier operation Choosing the Right Sewing Machine, can make a big difference. Use a steady hand.
- Stitch Length: Set it short for strength.
- Fabric Alignment: Keep it true.
- Seam Allowance: Mind the margin.
Hemming The Raw Edges
Your kimono’s nearly done, but raw edges need hemming to stop fraying.
Think of it as sealing the deal on your creation.
Fold over 1/2 inch, pin, then sew 1/4 inch from the edge.
A sewing machine speeds up the process, though hand-sewing works too.
Remember, a neat hem makes your kimono look polished and professional.
Creating The Sleeves
Creating the sleeves is where your kimono magic happens—after all, they’re the wings of your style statement.
Just fold and sew carefully to make sure they’re functional but also fabulous, hinting at your budding talent in DIY fashion.
Folding The Sleeves
Folding the sleeves involves lining up your fabric layers for just the right sleeve length.
Imagine you’re wrapping a gift—precision matters here!
Smooth out any wrinkles, then use a pinning technique to hold those folds in place.
It’s like ensuring a perfect crease in origami.
This small step is vital for sewing precision and achieving professional-looking sleeve folds.
Sewing The Sleeves
How will you sew those sleeves perfectly?
Carefully pin the sleeve edges, matching seams.
Use a straight stitch with a 1/2-inch seam allowance.
For longer sleeves, simply adjust your fabric measurements beforehand.
Remember consistent pinning for a neat finish.
A serger makes quick work of it, but a sewing machine, which uses a needle and thread to stitch fabric together, as explained in the mechanics of how does a sewing machine work, works just fine too!
Trim excess threads for a professional look.
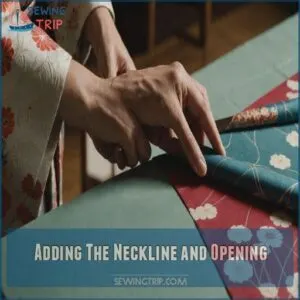
Adding The Neckline and Opening
Align your fabric for the kimono opening like a puzzle piece ready to reveal its secrets. Here’s how you make the neckline and opening magic happen:
- Neckline Shapes: Decide if you want a soft curve or a straight line for style.
- Measure Opening Size: Carefully measure down the center for a precise fit.
- Fabric Layers: Separate and fold the fabric like a pro, being sure to cut only through one layer.
- Stitching Techniques: Use neat stitches for a strong and stylish finish.
Let the kimono opening be your canvas—each snip and stitch bringing you closer to a masterpiece of both comfort and flair. Embrace the rhythm of sewing and create something truly you!
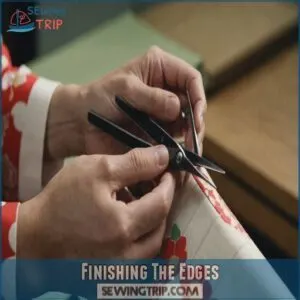
Finishing The Edges
You’re almost at the finish line, and it’s time to give your kimono a polished look by hemming those edges neatly.
Don’t forget to snip away any loose threads—it’s like giving your kimono a quick haircut before stepping out in style!
Hemming The Edges
Your kimono’s almost ready, but don’t let it fray at the edges.
Grab your Kimono Hemming Tools and stitch about 1/4 inch from the edge.
This keeps fabric fraying away, ensuring neatness.
Mind the hem length, aiming for uniformity.
Avoid common hemming mistakes—sloppy hems spell trouble!
Soon, your kimono will be fabulous and ready to flaunt.
Trimming Excess Threads
After hemming, it’s time to snip excess threads for a polished look.
Think of this as giving your kimono a haircut.
To prevent fraying and give your seams a professional finish, consider finishing raw edges of fabric without a serger.
Grab your scissors and follow these steps:
- Clip closely to avoid fraying.
- Discard threads responsibly.
- Inspect each seam for missed bits.
- Keep edges clean for that professional finish.
- Add a final touch by smoothing out any rough patches.
Turning The Kimono Right-Side Out
One small but satisfying step remains: turning your kimono right-side out.
Imagine revealing a masterpiece from its cocoon—magic, right?
As you gently flip your creation, check for smooth seams and any sneaky threads that might be peeking out.
If you’re unsure about the quality of your seams or want to add a professional touch, consider investing in a Kimono Sewing Kit.
It’s kind of like smoothing out a map before a big adventure.
Once everything’s looking crisp and tidy, don your kimono for a quick wear test.
Feel the fabric, check the drape, and make sure it feels like the perfect fit.
This inside-out check is your chance to make any final adjustments before stepping out in style.
Your kimono’s ready for its debut, embodying comfort and flair, while celebrating your journey from fabric to fashion.
Adding Final Touches
Now that your kimono is turned right-side out, let’s add those final touches to make sure it’s both stylish and sturdy.
Whether you’re speeding through with a sewing machine or going old-school with a needle and thread, keep your stitches secure to avoid any accidental wardrobe malfunctions!
Using a Sewing Machine
A sewing machine speeds things up.
You can find various models at online marketplaces like Kimono sewing machine.
Choose from various sewing machine types, like a basic model or a more advanced one.
Before you start, remember to regularly clean and oil your machine, check out these sewing machine maintenance tips and tricks, before you start, remember these machine maintenance tips:
- Clean the bobbin area.
- Check the needle for damage.
- Select the right needle for your fabric.
- Use the correct foot attachment.
Experiment with different stitch types for a unique finish.
Hand-Sewing The Kimono
Hand-sewing your kimono? It’s like a slow dance with fabric—grab a comfy spot, your favorite needle size, and a thread color that sings.
Consider using a sharp, fine needle like a size 60/8 or 70/10 for silk fabric hand sewing.
Use basic stitch types for durability.
Think of each stitch as a step to mastery, a calming routine.
Sewing tips: Don’t rush, enjoy the rhythm, and soon, you’ll feel the satisfying closeness of your handmade creation.
Essential Supplies and Tools
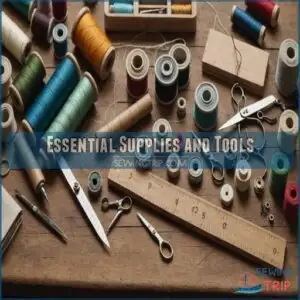
You’re about to start a crafty adventure, and like any great journey, you’ll need the right gear: fabric, thread, a sewing machine, or even a serger if you’re feeling fancy.
Grab your measuring tape and scissors, because these tools are your trusty sidekicks in turning plain fabric into a fabulous kimono!
Fabric and Thread
Now that you’re ready to get rolling, let’s look at fabric and thread.
For a flowing kimono, lightweight fabrics like silk or chiffon are perfect.
Consider choosing the right fabric weight for the season and occasion you plan to wear it.
Pick a thread that matches your fabric in color and quality.
Remember, a little whimsy in your choices adds personality.
Sustainable pick? Organic cotton’s your friend.
Keep colors cohesive for a chic touch!
Sewing Machine and Serger
When working on a garment like a kimono, it’s essential to understand the difference between a sewing machine and a serger, as the latter can provide professional finishes. When your fabric and thread are ready, it’s time to meet your trusty sewing companions: the sewing machine and the serger. Think of them as your sewing sidekicks—they make the magic happen!
- Sewing Machine Types: Familiarize yourself with various sewing machine foot types explained, which can help you choose the right presser foot for your DIY kimono project sewing machine foot types. Choose what’s comfy.
- Serger Benefits: Neat edges, high speed.
- Machine Maintenance: Keep ’em smooth!
Measuring Tape and Scissors
Grabbing your trusty measuring tape and scissors, you’re set for kimono-making magic.
Picture these tools as your sewing sidekicks, ensuring each cut is precise and each measurement accurate.
Without them, achieving the right dimensions would be tricky.
With safety in mind, keep your fingers clear—those scissors are sharp!
Choose your tools wisely; they’re essential companions in this DIY adventure.
Frequently Asked Questions (FAQs)
How much fabric do I need for a kimono?
To make a kimono, picture yourself wrapping in comfort.
You’ll need around 5 to 2 meters of lightweight fabric like silk or cotton.
Choose solid or prints, and get ready to stitch your style adventure!
How is a Japanese kimono made?
Making a Japanese kimono involves careful sewing techniques and traditional materials like silk.
You’ll create detailed patterns, cut fabric precisely, and use hand-stitching to assemble pieces for a garment that blends elegance with cultural history.
What fabric do they use for kimonos?
You want a kimono that flows like a breeze?
Go for lightweight fabrics like silk, chiffon, or cotton.
They drape beautifully and feel comfortable.
Printed or solid colors can turn heads at any casual outing!
What makes a kimono expensive?
A kimono gets pricey due to luxurious fabrics like silk, intricate patterns, and skilled craftsmanship.
Think of it as wearing a piece of art.
It’s the expert handiwork and premium materials that hike up the price.
Can I make a kimono without a sewing machine?
Think of sewing a kimono like wrestling an octopus—tricky but doable without a machine.
Just use a needle and thread, take your time, and sew securely to prevent unraveling.
Your patience will pay off beautifully!
How do I choose the right kimono color?
Kimono colors are totally up to you! Bold hues show off your confidence, while softer shades offer a serene vibe. Match it to your mood—or your favorite outfit!
What are some styling ideas for kimonos?
Jazz up your kimono with skinny jeans and heels for a chic look, or pair it with a simple dress for boho vibes.
Add a belt for structure, and don’t shy away from bold accessories!
Is it easy to adjust kimono size?
Adjusting kimono size is a breeze!
Just tweak the fabric measurements to suit your style—shorten for a chic, cropped look or extend for extra drama.
With a bit of sewing magic, you’ll fit perfectly!
Can I use patterned fabric for a kimono?
Did you know? Patterns can elevate your kimono from simple to stunning!
Using printed fabric is a fantastic choice, adding personality and flair.
Just make sure the fabric’s lightweight for comfort.
It’s like wearing art you create!
Conclusion
Afraid it’s too complicated? Relax! You’ve got the skills to conquer this project.
With this how to make a kimono guide, you can create a wearable piece of art.
Picking the right fabric, measuring carefully, and sewing with patience are the keys.
Don’t rush—let your creativity shine through each stitch.
Even if things aren’t perfect at first, every "oops" moment is a step in the direction of mastering your unique style.
Enjoy the process and the beautiful kimono you’ll craft!

