This site is supported by our readers. We may earn a commission, at no cost to you, if you purchase through links.
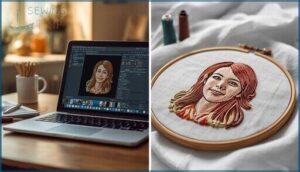
Turning a photograph into embroidery isn’t as simple as hitting “print”—it’s more like translating a language. The camera captures light and shadow in millions of pixels, but your embroidery machine speaks in stitches, angles, and thread tension. Miss a step in that translation, and you’ll end up with a muddy mess instead of a crisp, recognizable image.
The secret lies in how you digitize photos for embroidery: choosing the right source image, preparing it properly, and converting it into a file your machine can actually execute. High contrast matters more than high detail, and sometimes removing information creates better results than preserving it.
Once you understand what embroidery can and can’t reproduce, you’ll know exactly how to prepare your photos for stitching success.
Table Of Contents
Key Takeaways
- High-contrast images with strong edges at 300 DPI work best for embroidery—sharp boundaries let your machine trace clean stitch paths while blurry backgrounds just waste thread and cause puckering.
- Stripping away the background and simplifying your color palette to 8–12 shades cuts stitch counts by 20–40%, giving you faster sewing times and crisper details without overloading the fabric.
- Auto-digitizing handles simple logos in minutes, but complex photos need manual tweaking of stitch angles and density to avoid that muddy, over-stitched look that ruins the design.
- Matching your stabilizer weight to both fabric stretch and stitch density prevents most embroidery disasters—cut-away for knits, tear-away for wovens, and always test your setup before committing to the final piece.
Choosing The Best Photo for Embroidery
The photo you choose sets the stage for everything that comes after—it’s the foundation your embroidery machine will rely on to create clean, recognizable stitches.
Not every image works well for embroidery, so knowing what to look for saves you time, thread, and frustration.
Let’s walk through the key factors that make a photo embroidery-ready.
Selecting High-Resolution Images
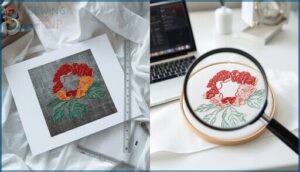
A clear photo starts with resolution—aim for at least 300 DPI to preserve detail preservation and image quality. For a 4-inch design, you’ll need roughly 1,200 pixels across. Resizing effects can blur edges and create jagged stitches, so choose a good photo at the right size from the start.
When possible, vector conversion beats stretching low-resolution images, keeping your high-resolution images crisp during image preparation. Professional services guarantee optimal stitch paths and density.
Ensuring Strong Contrast and Defined Edges
Resolution matters, but sharpness means nothing if your subject blends into the background. Luminance contrast—the difference between light and dark areas—drives accurate edge detection during digitizing. Aim for at least a 3:1 ratio so auto-tracing algorithms can lock onto your subject’s outline.
Why strong edges matter for stitch quality:
- Fewer manual fixes: Crisp boundaries reduce time spent redrawing contours
- Smoother stitch paths: Well-defined edges prevent jagged, stepped lines
- Cleaner fills: Algorithm considerations improve when software can “see” where one area ends
- Better background removal: Contrast stretching and edge simplification separate subject from surroundings
- Professional finish: Image preparation with photo editing techniques yields tighter, more vibrant results
Thresholding converts subtle gradients into bold outlines, simplifying color reduction without losing important detail. Understanding the embroidery digitization process is key for achieving high-quality results. That clarity translates directly into image quality once your machine starts sewing.
Cropping and Editing for Focus
Once you’ve nailed contrast and edges, subject isolation through tight cropping becomes your next power move. Fill 70–80% of the frame with your main subject—background removal can cut stitch counts by 20–30% and keep the focus razor-sharp. Match the aspect ratio to your hoop size, then tweak brightness and contrast in the cropped area.
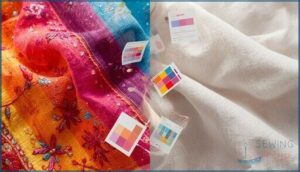
Color simplification comes next, reducing your palette to 8–12 shades so the stitch area stays clean and manageable.
Preparing Photos for Digitizing
Once you’ve picked your photo, you can’t just toss it straight into the embroidery software and hope for the best. A bit of prep work makes all the difference between a design that stitches beautifully and one that looks muddy or overcomplicated.
Let’s walk through the key steps to get your image ready for digitizing.
Removing Backgrounds for Cleaner Designs
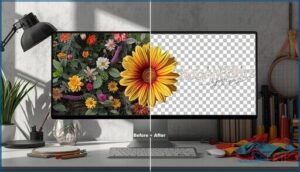
Think of removing the background as peeling away everything that isn’t the star of your show—a step that sharpens edge definition and delivers visual clarity.
Removing the background peels away distractions and sharpens your subject’s edges for cleaner, more focused embroidery
Software workflows like remove.bg or Hatch 3 turn complex photos into transparent PNGs, cutting stitch reduction by 20–40% while improving fabric interaction.
When you digitize a photo without its backdrop, you’re choosing cleaner stitching and less frustration:
- Less thread buildup means your design won’t buckle or pucker
- Faster sewing saves you minutes per piece on multi-head machines
- Clearer outlines let auto-digitizing tools trace edges without confusion
- Lower costs keep complex designs out of premium pricing brackets
- Better detail ensures fine features stay crisp at normal viewing distances
Image editing before embroidery isn’t optional—it’s your secret weapon for preparing photos that translate beautifully to thread.
Adjusting Size and Resolution
Before you digitize, you need to match your photo’s pixel count to the finished embroidery design size. A 4 in × 4 in patch demands at least 1200 × 1200 pixels to hold crisp edges, while a 10 in piece requires around 3000 × 3000 to preserve facial features and lettering.
| Design Size | Minimum Pixels | Image DPI |
|---|---|---|
| 4 in × 4 in | 1200 × 1200 | 300 |
| 6 in × 6 in | 1800 × 1800 | 300 |
| 10 in × 10 in | 3000 × 3000 | 300 |
Resizing effects hit hard if you stretch a 300 DPI raster image without adding pixels—your resolution drops to 150 DPI and edges turn blocky. For significant scaling, vector artwork (SVG, AI) saves the day because vectors scale cleanly before conversion, whereas raster images lose detail when pushed beyond roughly 20–30 percent of the original dimensions.
Always adjust stitch density when you resize: enlarge a design and spread stitches to avoid puckering, shrink it and tighten density for solid coverage. High-resolution images meet fabric constraints better—heavier fabrics tolerate dense detail, while stretch materials call for lower density and strategic stabilizers so your design doesn’t distort mid-sew.
Simplifying Details and Color Palettes
Before you feed your photo into digitizing software, you need to flatten complexity. Start by applying color reduction—most embroidery machines struggle past 7–10 thread colors, so merge similar hues into solid blocks using built-in tools in Embird or Wilcom.
Next, remove tiny details that won’t survive at stitch resolution, boost contrast to sharpen edges, and convert soft gradients into discrete tonal steps for cleaner fills.
Methods to Digitize Photos for Embroidery
Once you’ve got your photo ready, it’s time to turn it into something your embroidery machine can actually stitch. There are several ways to make this happen, from using specialized software to hiring someone who does it professionally.
Let’s look at your main options so you can choose the approach that fits your skill level and budget.
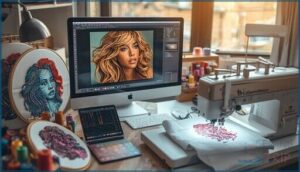
Using Embroidery Digitizing Software
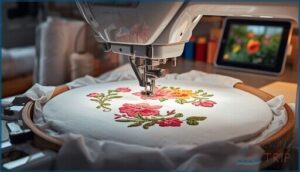
Software selection is where your embroidery digitizing journey really takes off. Most digitizing software accepts common raster formats like JPEG, PNG, and BMP, then converts them into stitch-ready files compatible with your machine.
You’ll find automation features that handle color reduction, editing tools for tweaking parameters, and learning resources built right in. The digitizing process becomes straightforward once you’re familiar with your software’s features and file compatibility options.
Auto-Digitizing Vs. Manual Digitizing
You’ve got two paths when digitizing photos for embroidery: auto-digitizing and manual digitizing. Auto-digitizing converts images in 1-5 minutes, cutting conversion time by up to 90%—ideal for simple logos where speed beats precision. Manual digitizing demands hours but delivers greater control over stitch angles and density.
Hybrid workflows balance cost-effectiveness with quality, combining auto-digitizing’s skill accessibility for basic elements with manual refinement for design complexity.
Free and Paid Digitizing Tools
Choosing embroidery digitizing software means balancing your budget against your needs. Free software like Ink/Stitch or Embroidermodder manages basic conversions and simple edits, but expect steeper learning curves and limited AutoDigitize features. Paid suites—Hatch, Embird, Embrilliance—offer auto-digitizing, stitch optimization, and 3D puff capabilities with 30-day trial periods.
Trial periods let you digitize a photo and evaluate full-featured workflows before committing.
- Open-source tools support format conversion between DST, PES, and other machine files
- Free online converters generally allow 5 conversions monthly after registration
- Paid programs include automatic density control and underlay generation
- User reviews highlight stability and automation in commercial suites
- Cost comparison shows modular pricing reduces entry barriers for hobbyists
Professional Digitizing Services
When you lack software or time, professional digitizing services handle everything from tracing to stitch-file export. About 80% of embroidery shops outsource this work, citing faster turnaround—usually 24 hours for logos—and predictable pricing, often $10–$50 per design.
Quality assurance includes format flexibility (DST, PES), manual digitizing refinements, and free minor edits, ensuring embroidery design quality that stitches cleanly every time.
Converting Images to Embroidery Files
Once you’ve prepared your photo and chosen your digitizing method, it’s time to transform that image into something your embroidery machine can actually read.
This conversion process involves several key steps that determine how well your final design will stitch out.
Let’s walk through importing your image, setting up the technical details, and exporting a file your machine will understand.
Importing Images Into Software
Before you digitize a photo, the software needs that digital photograph loaded in. Most programs accept JPG files and other common formats—PNG and BMP work too. Here’s how image conversion starts:
- Open your embroidery software and click File > Import (or drag the image file directly in).
- Choose your prepared photo from your computer’s folders.
- Check the resolution considerations—300 DPI minimum keeps edges sharp.
- Notice vector vs raster options if your software offers both pathways.
- Confirm color palette limits so the import workflow matches your machine’s thread capacity.
Once imported, your image appears ready for the next step.
Setting Stitch Parameters and Thread Colors
Now that your image is loaded, you’ll set stitch parameters that bring it to life. Start with stitch density—aim for around 0.4 mm to 0.45 mm spacing for most fabrics.
Adjust underlay settings to stabilize your design, then use color conversion tools to map your design parameters to actual thread colors.
Balance these choices with your fabric’s weight, ensuring thread tension won’t cause puckering or thread breaks.
Previewing and Editing The Embroidery Design
Once your parameters are set, stitch simulation lets you catch problems before thread touches fabric. Modern editing tools reveal uneven density, awkward color transitions, and inefficient path optimization right on screen.
You’ll improve stitch order, curves, and smooth travel paths—eliminating jump stitches that waste time.
Test stitching embroidery designs digitally speeds up collaboration approvals and ensures your final design sews exactly as you envisioned.
Exporting in Machine-Compatible Formats
After you’ve polished your design, it’s time to export the right stitch file for your machine. Brother users need PES embroidery files, while commercial setups rely on DST format.
Format compatibility matters—some machines handle rich color preservation better than others. Check your machine limitations before converting, since stitch density and thread data can shift during embroidery file exporting.
Always save your native file first for future edits.
Tips for Successful Photo Embroidery
You’ve done the hard work of digitizing your photo, but getting it to stitch beautifully takes a bit more know-how. The right materials and troubleshooting skills can make the difference between a design that puckers or one that looks polished.
Let’s cover the essentials that’ll help you avoid common pitfalls and get professional results every time.
Choosing Stabilizers and Fabrics
Picking the right combo of fabric and stabilizer is like building a foundation—get it wrong, and everything shifts. Your fabric weight and its stretch guide stabilizer weight: stretchy knits need cut-away, stable wovens pair with tear-away. Stitch density matters too—denser designs demand heavier backing.
- Match needle selection to fabric and thread: 75/11–80/12 works for most medium-weight fabrics
- Hooping tension should keep fabric taut without distortion or slack
- Fabric preparation for embroidery includes stabilizing fabric properly to prevent puckering
Troubleshooting Common Embroidery Issues
When your test sewout goes sideways, don’t panic—most issues trace back to a handful of causes. Thread breakage often signals tension problems or a dull needle. Puckering fabric? Check stabilizer weight against stitch density. Birdnesting issues generally mean incorrect threading or bobbin tension. Skipped stitches point to needle wear or incorrect insertion.
Addressing common issues means methodically checking each variable—hooping tension, design quality, and machine settings—until embroidery design quality improves.
| Problem | Most Common Fix |
|---|---|
| Thread breaks | Check tension (110–150g polyester); replace needle after 25–40 hours |
| Puckering fabric | Use heavier stabilizer; reduce design density on light fabrics |
| Birdnesting issues | Rethread machine; adjust upper and bobbin tension until balanced |
| Skipped stitches | Replace dull needle; match needle size to thread weight |
| Tension problems | Verify threading path; reset to manufacturer’s recommended settings |
Enhancing Finished Embroidered Photos
Once your photo embroidery stitch out is complete, thoughtful finishing touches can dramatically boost visual quality. Trim loose threads carefully, then consider protective backings like Sulky Tender Touch to cover the reverse and reduce friction. Display methods matter—choose UV-filtering glass and avoid direct sunlight to preserve thread colors. Adjust lighting effects to minimize glare, and test sewout cleaning techniques with cold water and air drying to maintain embroidery quality over time.
- Trim jump threads and secure loose ends for a crisp surface
- Apply soft backing material to protect stitches and reduce abrasion
- Frame under UV-filtering glass to slow color fading
- Display away from heat sources and rotate pieces periodically
- Wash gently in cold water, inside out, to preserve stitch definition
Frequently Asked Questions (FAQs)
How to digitize a photo for use in embroidery?
Converting photos to embroidery designs starts with selecting software that imports standard formats like JPEG or PNG. You’ll adjust stitch density, reduce colors, preview the pattern, then export in your machine’s file format before test stitching.
How to digitize a digital photo?
Converting photos to embroidery designs begins with Resolution Matters—use at least 300 DPI. Guarantee Contrast Clarity through defined edges.
Software Selection, Stitch Density adjustments, and File Formats complete the digitizing methods when weaving digitizing images into machine-ready patterns.
What is embroidery digitizing?
Embroidery digitizing is the technical process of converting artwork into stitch-ready files that machines read.
This digitizing images method uses embroidery digitizing software to map directions, densities, and thread colors, transforming designs into precise embroidery patterns.
How to make an embroidery design with a photo?
Start by choosing a good photo with clear details and strong contrast, then use embroidery digitizing software to convert images to embroidery files—adjusting stitch density and thread colors before testing your photo embroidery design.
What is the app that turns photos into embroidery patterns?
Several apps help you digitize a photo into embroidery patterns. EmbroideryDesigns.com’s app features automatic digitizing with solid user reviews, while Stitch Fiddle and SuperMaker AI offer free AI accuracy for converting images to embroidery, though cost comparison varies by stitch quality needs.
How much does it cost to digitize an image for embroidery?
A small business owner discovered that a simple left-chest logo ran $15, while her detailed portrait cost $85—that’s the reality of digitizing.
Basic designs start around $10 to $20, but complexity, stitch count, and rush order fees push costs higher.
How to design images for embroidery?
To design images for embroidery, focus on image resolution between 300–600 DPI, contrast enhancement for edge definition, detail simplification, and color reduction.
Preparing photos for embroidery requires choosing the right photo with strong contrast and converting the photo into a pattern by selecting thread colors strategically.
How do you transfer an image onto fabric for embroidery?
You can transfer your image onto fabric using lightbox tracing, printable transfer papers, fabric markers, or carbon transfer methods.
Choose based on your fabric type and wash requirements for best results.
How long does the digitizing process usually take?
Think of digitizing time as a sliding scale—simple logos auto-digitize in 8–12 minutes with embroidery digitizing software, while complex designs need 2–3 hours of manual embroidery digitizing.
Professional service turnaround generally spans 12–24 hours standard, with rush options delivering in 2–12 hours.
Can I digitize a photo for embroidery on any fabric?
You can digitize photos for most fabrics, but fabric weight and weave affect stitch density and stabilizer types needed.
Knit fabrics require careful stabilizing, while tightly woven materials support finer detail and better thread tension.
Conclusion
Most embroidery designs use fewer than 15,000 stitches, yet photo conversions routinely generate 40,000 or more—taxing machines and degrading quality. That’s the trap of over-digitizing.
When you learn how to digitize photos for embroidery strategically, you’re not just converting images; you’re making deliberate choices about what to emphasize and what to sacrifice. Your machine can only execute what you’ve thoughtfully prepared. Master the translation, and every photo becomes a stitched portrait worth framing.
- https://www.truedigitizing.com/blog/best-way-to-digitize-photos
- https://www.digitizingusa.com/showblog/digitize-photos-for-embroidery
- https://datahorizzonresearch.com/embroidery-design-software-market-44332
- https://dataintelo.com/report/embroidery-software-market
- https://www.relidy.com/popups-062012/gear/Embroidery-Stitch-Calculator.php

