This site is supported by our readers. We may earn a commission, at no cost to you, if you purchase through links.
Secure a wig cap over the braids, then sew hair wefts onto the braided base using a curved needle and strong thread, working from the nape upward, and leave space at your hairline for the bang piece.
Measure and cut your desired bang length, then carefully sew the bang weft to the front section, ensuring proper tension to avoid puckering.
The magic happens when you master the spacing between wefts—too tight creates bumps, too loose leaves gaps that’ll have you looking like you’re wearing a helmet instead of gorgeous hair.
Blend the seams by gently pulling hair over attachment points to finalize the look and ensure a natural finish with your new hair wefts.
Table Of Contents
Key Takeaways
- Choose quality hair and measure accurately – You’ll get better results by selecting virgin or Remy hair that matches your texture, then measuring your head circumference precisely to ensure a proper fit and natural blending.
- Master the cornrow foundation – You’ll need to create straight-back braiding patterns that lie flat against your scalp, providing a secure base that won’t show through your extensions or cause bumps.
- Control weft spacing and tension – You’ll avoid a helmet-like appearance by maintaining consistent 1-2 inch spacing between wefts and using proper stitching tension that’s secure without being too tight.
- Take time with bang placement and blending – You’ll achieve professional results by carefully measuring your desired bang length, sewing from the innermost hairline outward, and using edge control to seamlessly blend the bangs with your natural hairline.
Preparing Sew In
Proper preparation sets the foundation for a flawless sew-in installation that’ll last for weeks.
You’ll need to select the right hair texture, measure your head accurately, and choose a bang style that complements your face shape before you even touch a needle.
Choosing Hair Type
Selecting the right hair type for your full sew in weave determines your style’s success and longevity.
Virgin Hair offers the best investment since it’s chemically untreated and accepts any styling.
Human Hair provides natural movement, while Synthetic Fibers cost less but limit heat styling options.
- Virgin Hair – unprocessed, most versatile for styling
- Remy Hair – cuticles aligned, reduces tangling substantially
- Human Hair – natural texture blends seamlessly with your hair
- Synthetic Fibers – budget-friendly but requires gentle handling
For ideal results, consider the best hair options when choosing your weave to ensure a long-lasting and natural-looking style with versatile styling options and seamless blending.
Measuring Head Size
Once you’ve chosen your hair type, grab your measurement tools to map your head circumference accurately.
Use a flexible measuring tape positioned one inch above your eyebrows, wrapping around your head’s widest point.
Record this head circumference measurement – most heads measure 21-24 inches.
Note your head shape and hair density variations during this scalp mapping process, as these factors determine proper wig cap sizing for your full sew in weave installation.
To guarantee accurate measurements, consider using proper body measuring techniques for the best results, ensuring a proper fit and accurate measurements.
Selecting Bang Style
Now you’ll choose your bangs hair style that complements your face shape and hair texture.
The right fringe types can make or break your sew in hair with bangs look.
- Bangs Length: Measure from your hairline to desired length – typically eyebrow level or just above
- Face Shape: Round faces suit side-swept bangs; square faces work with soft, wispy styles
- Hair Texture: Fine hair needs blunt cuts for fullness; thick hair handles layered, textured bangs
- Styling Options: Consider maintenance – blunt bangs require frequent trims, while side-swept are forgiving
- Fringe Types: Choose from blunt, curtain, micro, or baby bangs based on your hair sew in tutorial goals
Doing Full Sew In
Once you’ve prepared your materials, it’s time to master the art of creating your full sew in hair extensions. This process requires patience and precision to achieve that coveted full coverage look.
Start by sectioning your braided hair into horizontal rows, typically 1-2 inches apart. Thread your curved needle with matching thread, then begin sewing the weft along each braid track. Use a blanket stitch or running stitch pattern, ensuring each pass goes through both the weft and braid securely.
| Hair Texture | Sewing Tools Needed | Hair Density Level |
|---|---|---|
| Straight/Relaxed | Curved needle, C-needle | Light to Medium |
| Wavy/Curly | Straight needle preferred | Medium to Heavy |
| Coily/Kinky | Heavy-duty thread essential | Heavy coverage |
| Mixed textures | Multiple needle sizes | Variable density |
Understanding the sew in basics is vital for a successful installation. Work systematically from the nape upward, maintaining consistent sewing patterns throughout. Double-knot each weft end to prevent slippage. Your full sew in method should create seamless layers that move naturally with your hair sew in method, building the foundation for adding bangs later.
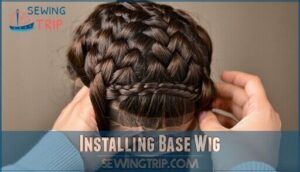
Installing Base Wig
Now you’re ready to create the foundation that’ll support your sew-in hairstyle perfectly.
Installing the base wig requires precise braiding patterns, proper cap securing, and careful lace trimming to achieve that seamless, natural look you’re after.
This process involves achieving a natural look, which is the ultimate goal of the hairstyle.
Braiding Hair Pattern
Your braiding foundation determines everything. Start with clean, detangled hair and section it based on your chosen Pattern Designs. For sew in with bangs, straight-back cornrows work best, creating flat rows that won’t show through your hair sew in method.
Understanding braid pattern ideas is essential for a secure and natural-looking sew-in.
- Straight-back pattern: Creates the flattest base for full sew in hair installations
- Medium-sized sections: Prevents excessive tension while ensuring secure track placement
- Consistent spacing: Maintains even weight distribution across your scalp
- Tight but comfortable: Secures hair sew in extensions without causing damage
Securing Wig Cap
Several fundamental techniques guarantee your wig cap stays put during the full hair sew process. Start with proper cap tightening around your hairline, then apply quality wig adhesives along the perimeter. Position hair anchors at strategic points for maximum grip.
This secure fit prevents slipping while you work on your sew in weave technique. To achieve a secure fit, using the right wig cap tape is vital for preventing slippage and ensuring a natural look.
| Step | Technique | Purpose |
|---|---|---|
| Position | Center cap on braided base | Creates foundation alignment |
| Stretch | Pull cap edges taut | Eliminates wrinkles and bubbles |
| Anchor | Pin at temples and nape | Establishes secure attachment points |
| Adjust | Check fit around hairline | Ensures natural appearance |
| Test | Gently tug all edges | Confirms cap construction stability |
Cutting Excess Lace
Precision becomes your ally when mastering lace trimming on your sew in weave technique.
Using sharp fabric scissors, carefully cut excess lace along the hairline, leaving quarter-inch for secure attachment.
This hair finishing step prevents lifting and guarantees your hair with bangs style looks natural.
Excess removal requires steady hands—take your time with lace cutting for professional sewing techniques results.
Adding Bangs Piece
Now you’ll learn how to attach your bangs piece to complete the natural look you’ve been working toward.
This step requires precision with your needle and thread to guarantee the bangs blend seamlessly with your base wig.
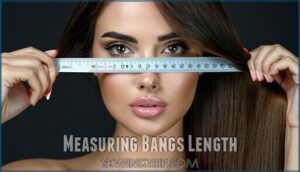
Measuring Bangs Length
Getting bangs measurement right makes the difference between hair perfection and a styling disaster.
Start by determining your face shape to choose the ideal bangs style that complements your features.
Measure from your hairline to where you want the fringe cutting line, typically between your eyebrows and eyelashes.
Use a ruler for precise hair length measurements during your hair sew in process to guarantee your hair with bangs style looks natural and flattering.
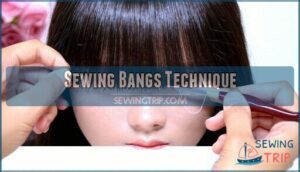
Sewing Bangs Technique
After achieving the perfect bangs length, your sew in hair technique becomes critical for professional results. Start sewing from the innermost hairline section, working outward for proper layering. Double-thread your needle to prevent unraveling during the hair sew in process.
Here’s your step-by-step approach:
- Maintain consistent tension – Keep stitches flat against your scalp using edge control for bangs alignment and smooth hair texture integration
- Position stitches strategically – Place each stitch directly along your parted line to hide weft knots under natural hair
- Secure each row – Knot thread after completing each section to prevent loosening during future styling of your sew in hair style
Your sewing tools should include curved needles for comfortable scalp access and nylon thread matching your hair with sew in color. This bangs style foundation guarantees durability. To achieve a natural look, consider using high-quality sew in hair products that match your hair type and color.
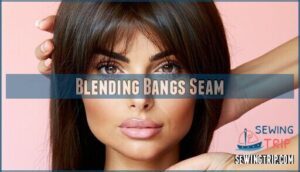
Blending Bangs Seam
Once you’ve sewn your bangs piece securely, focus on bangs alignment and seam conceal techniques.
Use edge control to smooth flyaways along the hairline while working on hair blending.
Apply gentle pressure when lace merging with your natural hair. This sew in hair tutorial step guarantees your full hair extension looks seamless.
Professional hair with sew in requires patience during this hair extension sew process for natural results.
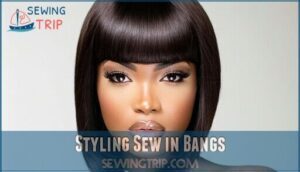
Styling Sew in Bangs
After installing your bangs piece, you’ll need to style and maintain your new look for a professional finish.
Proper styling techniques and regular care will keep your sew-in bangs looking fresh and natural for weeks.
Setting Hair Style
Your hair’s transformation begins when you master the art of setting your new style.
After completing your full hair extension sew in hair tutorial, it’s time to shape your bangs and overall look.
- Assess Hair Texture – Feel your extensions to determine if they’re straight, wavy, or curly for proper styling approach
- Evaluate Style Options – Consider face shape compatibility with different bang cuts and overall hair styling preferences
- Measure Bangs Length – Use a ruler to mark desired length, typically 1-2 inches above eyebrows for flattering results
- Check Hair Volume – Determine if you need to thin or add bulk to achieve balanced proportions
- Prepare Styling Tools – Gather scissors, comb, clips, and blow dryer for precise cutting and shaping work
To achieve the desired look, understanding sew in styles is vital for a polished finish.
Using Hair Products
Choose your hair products wisely for long-lasting results.
Hair Oil nourishes your natural hair underneath, while Hair Serum adds shine to synthetic strands.
Apply Hair Gel sparingly to edges for control without stiffness. Hair Wax works perfectly for piece-y definition.
Finish with light Hair Spray for hold. Quality hair products protect your investment and keep everything looking fresh with the right application of Hair Oil.
Maintaining Hair Health
Regular maintenance keeps your sew-in looking fresh while protecting your natural hair underneath.
Cleanse your scalp every 1-2 weeks with diluted shampoo to prevent buildup and maintain scalp health. Apply lightweight leave-in conditioners along braid lines using a nozzle applicator for targeted hair care.
Don’t neglect damage control—remove your sew-in every 6-8 weeks to prevent split ends and promote healthy hair growth.
Frequently Asked Questions (FAQs)
Can sew-ins have bangs?
Absolutely, you can create stunning bangs with sew-in extensions! Simply cut your preferred fringe style after installation, blend seamlessly with your natural hairline, and style as desired for flawless results.
How long does a full sew in last?
While some think sew-ins are temporary fixes, they’re actually durable protective styles.
Your full sew-in typically lasts 6-8 weeks with proper care, maintenance appointments, and gentle handling of your natural hair underneath.
Can you wash hair with sew in bangs?
You can wash your hair with sew-in bangs, but use gentle techniques.
Dilute shampoo with water, focus on your scalp, and avoid tugging the extensions.
Pat dry gently to maintain your style’s longevity.
What thread works best for sewing bangs?
While regular thread frays easily, polyester thread provides superior strength and durability for sewing bangs.
You’ll want cotton-wrapped polyester or 100% polyester thread—it won’t break under tension and matches hair texture perfectly.
How much does professional sew in cost?
Professional sew-in installations typically cost $150-$400 depending on your stylist’s experience, location, and hair length. You’ll pay more in major cities and upscale salons, while newer stylists often charge less.
Can you sleep comfortably with sew in?
Picture yourself sinking into your pillow after a long day, your fresh sew-in extensions cascading smoothly around you.
You’ll sleep comfortably with proper preparation—use a silk pillowcase, wrap hair loosely, and avoid tight positioning that creates tension on your scalp, ensuring a restful night’s sleep with proper care.
Conclusion
Mastering how to do a full sew in with bangs transforms your hair game from amateur hour to salon-worthy perfection.
You’ve learned the essential techniques—proper cornrow patterns, strategic weft placement, and precise bang installation.
Remember, practice makes perfect when achieving that seamless blend between your natural hairline and extensions.
Take your time with each step, maintain proper tension throughout the process, and don’t rush the final styling phase, as patience will reward you with stunning, natural-looking results that’ll have everyone asking for your stylist’s number.

