This site is supported by our readers. We may earn a commission, at no cost to you, if you purchase through links.
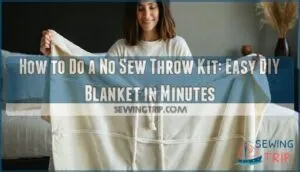
Start with fleece or flannel fabric cut to your desired size. Place pieces together, trim corners at 45-degree angles, then cut 1-inch wide strips about 4 inches deep around all edges.
Tie corresponding strips from both layers together using simple double knots. Work systematically around the entire perimeter, keeping knots tight and evenly spaced.
This technique creates a cozy, professional-looking blanket without any sewing skills required. The secret lies in choosing the right fabric combination and mastering the corner technique.
Table Of Contents
Key Takeaways
- Choose anti-pill fleece or flannel – You’ll get the best results with medium-weight fabric that resists fraying and stays soft after washing
- Cut precise 1-inch strips 4-5 inches deep – You’ll create professional-looking fringe by measuring carefully and cutting through both fabric layers simultaneously
- Tie double knots systematically around the perimeter – You’ll ensure durability by working your way around all edges with consistent spacing and tight knots
- Trim corners at 45-degree angles before cutting strips – You’ll prevent bulky bunching by removing small corner squares, which creates cleaner knots and a polished finish
Choose Right Fabric
The right fabric makes all the difference in creating a cozy, professional-looking throw blanket.
You’ll want to choose materials that are soft, durable, and easy to work with for the best results.
Selecting Fabric Type
Fleece remains your best material choice for no sew throw blankets.
Anti-pill fleece provides superior durability and maintains softness after washing, while blizzard fleece offers affordability.
Looking at the content’s friendly, informative tone about fabric selection for DIY projects, here’s a short blockquote:
Anti-pill fleece beats regular fleece every time – it stays soft wash after wash while saving you money.
Both fabric types resist fraying, making them perfect for DIY home decor projects.
Choose medium-weight options for easy tying – heavy fabrics create bulky knots.
Your fabric throw kit succeeds when you prioritize texture over thread count for comfortable results.
For a successful project, consider the fleece blanket benefits when selecting your materials to ensure a successful and comfortable throw blanket.
Considering Print and Color
With your fabric type chosen, you’ll want colors and patterns that speak to your style.
Bold patterns make statement pieces, while subtle prints offer versatility.
Consider your room’s existing color schemes and how this no sew throw will complement your DIY home decor.
When selecting a throw blanket kit, consider the overall throw blanket design to guarantee it matches your room’s aesthetic.
- Match colors to your room’s palette for cohesive textile design
- Mix patterns carefully – stripes with florals can work beautifully
- Consider fabric dyeing if you can’t find perfect print styles
- Choose timeless designs over trendy ones for lasting appeal
- Test how patterns align when creating your throw blanket kit
Measuring Fabric Size
Most throw blanket kits provide pre-cut fabric pieces, but double-check dimensions before starting.
Standard throw blankets measure 50×60 inches.
Use a measuring tape to verify your fabric kit contains accurate yardage calculation.
Measurement errors can affect your finished project’s drape and coverage.
Compare both fabric pieces to confirm they’re identical in size.
This simple fabric measurement step prevents frustrating surprises during assembly, ensuring a successful project with proper coverage.
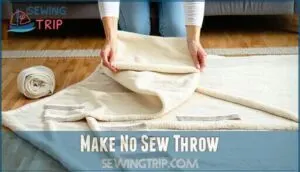
Make No Sew Throw
Ready to transform your chosen fabric into a cozy masterpiece? Let’s enter the exciting world of DIY crafts and create your no sew throw blanket without touching a single needle.
Start by laying out your fabric selection on a clean, flat surface where you’ll have plenty of room to work. This throw size project gives you complete control over your blanket material choices and sewing alternatives.
Whether you’re crafting a no sew decor piece for your living room or exploring throw blanket ideas for gifts, your throw kit contains everything needed. The beauty of this DIY throw pillow-friendly technique lies in its simplicity.
You’ll create professional-looking results in minutes, not hours. Position your fabrics with right sides facing each other, ensuring edges align perfectly. This foundation step determines your blanket’s final appearance and durability, setting you up for success.
Understanding the fleece blanket benefits is essential for making informed decisions about your DIY project, and will help you achieve a professional-looking result with your no sew throw blanket.
Prepare Fabric Pieces
Now you’re ready to transform your fabric pieces into a cozy throw blanket.
The next step involves aligning your two fabric layers perfectly and making precise cuts to create the signature no-sew fringe edge.
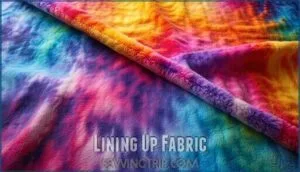
Lining Up Fabric
Perfect positioning sets your no sew blanket project up for success. You’ll want both fleece pieces aligned with right sides facing outward for maximum softness and print clarity.
- Lay base fabric flat – Smooth out wrinkles on large surface for stability
- Position top layer carefully – Match grain lines and fabric stretch direction
- Align one edge perfectly – Start with selvage edges for pattern matching
- Pin corners temporarily – Secure fabric alignment with clips or pins
- Check seam allowance spacing – Confirm consistent borders around entire throw blanket DIY
This fabric alignment step prevents shifting during fringe cutting. Your DIY throw pillow technique relies on proper positioning now.
Take time getting both pieces square – it’ll save headaches later when creating your no sew throw kit masterpiece. To achieve a professional finish, consider following a fleece blanket guide for detailed instructions.
Trimming Fabric Edges
Once you’ve lined up your fabric pieces, it’s time to verify those edges are perfectly even.
Use sharp fabric scissors to trim away any uneven spots along the perimeter. This edge finishing step prevents fraying and creates clean lines for your no sew throw.
Focus on maintaining consistent seam allowance while removing excess material. Proper fabric cutting now saves time later in your DIY home projects.
To achieve professional results, consider using high-quality fabric cutting tools for all your sewing needs, which involves sharp fabric scissors and attention to clean lines.
Cutting Corners
Corners need special attention to prevent bulky bunches when tying your no sew throw.
Cut a small square from each corner, about 1-2 inches wide.
This corner trick eliminates excess fabric that would create lumpy knots.
Your DIY home projects will look professional with this simple fabric hack.
These shortcut ideas make sewing tips unnecessary for beautiful throw blankets.
Mastering precise seam allowance techniques can also enhance the overall quality of your DIY projects, using a simple yet effective fabric hack.
Create Fringe Effect
Now you’re ready to create the signature look of your no-sew throw.
This step transforms your basic fabric pieces into a cozy blanket with that classic fringed border that makes these throws so appealing.
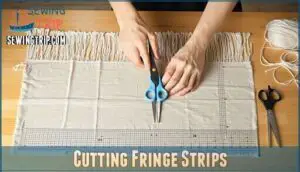
Cutting Fringe Strips
Now measure and mark your fabric for precise strips.
Use a ruler to mark lines every 1-1.5 inches across each edge, creating your cutting guide.
Sharp fabric scissors work best for clean cuts through both fabric layers simultaneously.
Cut straight down following your marks to create uniform fringe strips about 4-5 inches deep.
This systematic approach guarantees professional-looking edge finishing for your no sew throw.
To achieve accurate cuts, understanding fabric grain lines is vital for maintaining the integrity of the fabric, and ensuring a uniform finish.
Tying Knots
Once you’ve prepared your fringe strips, it’s time to tie them together.
Take one strip from the top fabric and match it with the corresponding strip from the bottom fabric.
Create a simple overhand knot by looping the strips through each other and pulling tight.
This knot technique guarantees your no sew throw stays secure while creating that perfect decorative throw appearance you’re after.
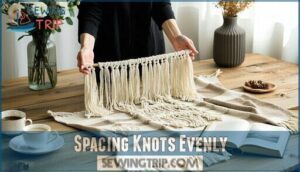
Spacing Knots Evenly
Once you’ve tied each knot, maintain consistent spacing between them for a professional finish.
Use spacing tools like a ruler to measure equal distances—typically 1-2 inches apart works perfectly for most throw pillow kits.
Check your thread tension and knot size as you work around the no sew throw perimeter.
Consistent fringe length creates that polished DIY decor kit look you’re after, with a focus on achieving a professional finish.
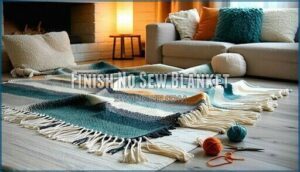
Finish No Sew Blanket
You’re almost done with your cozy masterpiece!
After creating all those perfectly spaced fringe knots around the edges, it’s time to add the finishing touches that’ll make your no-sew blanket look professionally made.
Tying Final Knots
Complete your easy throw blanket by double-checking each knot around the perimeter. Pull gently on every tied section to guarantee secure fastening using proper knot techniques.
These binding methods prevent your DIY decor kit from unraveling during use. Focus on consistent tension throughout your sew free throw project.
Well-executed fringe styles depend on uniform knots that won’t loosen over time. To achieve a professional finish, understanding fleece material selection is vital for a durable and cozy blanket.
Trimming Excess Thread
Everything you’ve worked for deserves a clean finish.
Carefully snip away any loose threads hanging from your no sew throw using sharp fabric scissors.
Focus on thread management by cutting close to each knot without damaging the fringe.
This yarn trimming step transforms your throw blanket from homemade to professional-looking.
Clean edges make all the difference in your final result.
Inspecting Blanket Quality
Give your finished blanket a thorough once-over to guarantee exceptional blanket quality.
Check fabric softness and material durability by running your hands across both layers.
Examine thread count and weave density for consistent thickness.
Test color fastness by gently rubbing a damp cloth on corners.
Your completed throw kit should pass this final inspection before joining your home decor ideas collection, ensuring it meets your standards of exceptional quality.
Frequently Asked Questions (FAQs)
How do you make a no-sew throw?
Cut your fleece fabric into squares, leaving fringe around edges. Tie each fringe piece together tightly, creating a cozy blanket without any sewing required whatsoever.
How many yards of fabric should you get for a no-sew blanket?
Like threading a needle with purpose, you’ll need 2-3 yards of fleece fabric for a standard throw blanket.
This generous amount guarantees you’ve got enough material to create cozy fringe edges while accommodating any cutting mistakes along the way.
How long does it take to do a no-sew blanket?
You’ll typically finish a no-sew blanket in just 2-4 hours! The time depends on your blanket’s size and how quickly you tie those fleece strips together.
How long does making a no-sew throw take?
Making a no-sew throw is like baking cookies – quick and satisfying.
You’ll finish this cozy project in just 30-45 minutes.
Simply tie knots around the blanket’s edges, and you’re done creating warmth.
Whats the best room temperature for working?
You’ll work best in a comfortable 68-72°F room. This temperature keeps your hands nimble for handling fabric without getting sweaty or stiff. Good ventilation helps too!
Can children safely help with this project?
Yes, children can safely help.
They’ll love tying knots and choosing colors.
Just supervise younger kids with scissors if cutting fringe is needed, and let them handle the fun tying parts independently.
How do you wash a finished throw?
Your amazing no-sew throw deserves royal treatment!
Machine wash cold on gentle cycle with mild detergent. Skip fabric softener—it’ll weaken the fibers.
Air dry flat or tumble dry low heat for fluffy perfection.
What if my fabric frays excessively?
Try using pinking shears to cut fraying edges, or apply clear nail polish along cut lines. You can also fold edges twice and hand-stitch for a clean finish that’ll last.
Conclusion
Congratulations—you’ve just discovered the world’s easiest blanket-making secret!
Learning how to do a no sew throw kit transforms you into a crafting genius without touching a needle.
You’ve created something beautiful and functional in minutes, not hours.
Your friends will be amazed when you tell them this cozy masterpiece required zero sewing skills.
The simple tie-and-knot technique proves that the best DIY projects are often the simplest ones.
Now you can make personalized gifts for everyone!
- https://abeautifulmess.com/easy-no-sew-fleece-tie-blanket/
- https://www.instructables.com/No-Sew-Fleece-Blanket-1/
- https://happiestcamper.com/how-to-make-a-no-sew-fleece-blanket/
- https://www.walmart.com/c/kp/no-sew-throw-kit
- https://www.confessionsofahomeschooler.com/blog/2011/12/no-sew-fleece-tie-blanket-tutorial.html

