This site is supported by our readers. We may earn a commission, at no cost to you, if you purchase through links.
To master sewing knots, start with the finger knot – simply wrap the thread around your finger, cross the ends, and pull tight. For more precision, try the needle and twirls technique – thread the needle, then wrap and twist the thread around the needle tip to create a tight, secure knot.
For a locking stitch, bring the needle up through the fabric, wrap the thread around the needle, then pull it back down to lock the stitch.
With these essential sewing knots, you’ll be stitching like a pro. But there’s more to explore in the realm of joining fabric, decorative stitches, and hiding knots.
Table Of Contents
Key Takeaways
- Start with the figure-eight knot, a fundamental technique for precise knot positioning.
- Try the needle and thread method for a steadfast knot that resists slippage.
- Master the locking stitch for securing thread in both machine and hand sewing.
- Learn to hide knots effectively in quilting, seams, embroidery, and hand-sewing applications.
How to Do Sewing Knot?
To create a sewing knot, follow these steps:
- Thread the needle with a single or double strand of thread.
- Wrap the tail ends around your pointer or index finger several times. The more times you wrap, the larger your knot will be.
- Gently roll the loops off your finger with your thumb.
- Pull the tail thread through the center of the loop.
- Pull tightly to form a knot.
- Cut the excess.
For a larger knot, you can also wrap the thread around the tip of the needle several times and then pull the needle through the loops, easing the thread down from the tip to the bottom.
Finger Knot
Ready to enhance your hand sewing game? Let’s begin with the finger knot, a foundation of knot strength and stability. Imagine this: you’re on the verge of securing a button, and that diminutive loop of thread is your loyal companion. With the finger knot technique, you’ll guarantee knot positioning is precise, consistently.
It’s the precursor to a melody of stitches, from the loop knot stitch to those robust double back stitches. And when it’s time for concealment, you’ll tuck those knots away with expertise.
Needle and Twirls
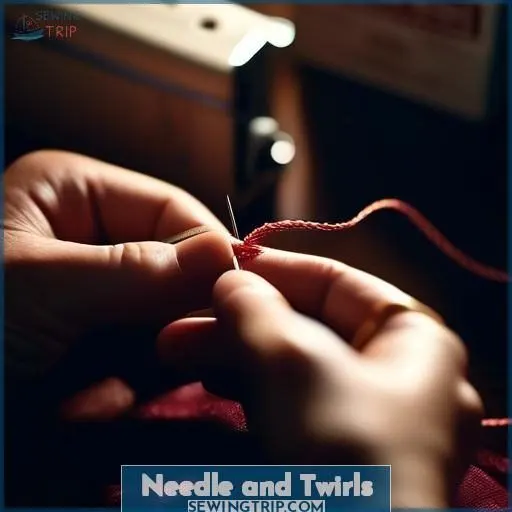
Ready to embark on the next knot-tying technique? Let’s examine the ‘Needle and Twirls‘ method.
This technique is ideal for those who encounter challenges with thread tension and needle threading. To secure a knot using this method, simply thread your needle, form a small loop at the conclusion, and subsequently rotate the needle around the loop. This action produces a steadfast knot that will resist slippage or unraveling.
Bear in mind that the dimensions of your needle and the thread you employ can influence the efficacy of this technique. Proficiency is fostered through practice, so don’t be discouraged if initial attempts prove unsuccessful.
Upon mastering this technique, you’ll be prepared to progress to more intricate techniques such as the ‘Locking Stitch‘.
Locking Stitch
The locking stitch is a vital knot that makes sure your thread doesn’t unravel. It’s a flexible technique used in both machine sewing and hand sewing, but it’s particularly significant for embroidery.
There are many types of the locking stitch, each with its own thread option and fabric compatibility.
For machine stitching, you’ll want to sew a line of stitching, pull the threads to create a loop on the back, and then pull the loop through with a pin before tying the single threads together.
For embroidery, you can tie a knot in the thread itself to secure your stitches.
The strength of your stitch relies on how well you tie your knots.
Loop Knot Stitch
Moving on, let’s explore the loop knot stitch, a technique ideal for joining fabric layers. Remember these three crucial points:
- Loop Tension: Maintain uniform loop tension for a tidy stitch. Draw the thread taut, but not excessively, to secure the knot.
- Knot Placement: Position the knot at the conclusion of your stitching line. This preserves the stitch’s integrity and conceals the knot from the front.
- Thread Choice and Fabric Thickness: Select a thread that complements the fabric thickness. Excessive thread thickness may hinder its passage through the fabric, while insufficient thread thickness may compromise the knot’s security.
Double Back Stitches
After mastering the loop knot stitch, you’ll find double back stitches are your trusty sidekick for strengthening seams. These double-sided knots are a powerhouse, offering both strength and a decorative double-backstitching flair.
Imagine them as the unsung heroes, working double time to guarantee your fabric doesn’t disappoint you with an untimely rip. Think of backstitch variations as the Swiss Army knife in your sewing kit—versatile and reliable.
And when you’re overlocking, double-backstitching is like a firm handshake, sealing the deal on your fabric’s edges.
Hiding Knots
Hiding knots in sewing projects is an essential skill for maintaining the appearance and longevity of your work. Here are four techniques to help you master knot placement, making sure that your knots are secure, discreet, and long-lasting:
- Quilting: When working with quilts, you can hide knots between layers of fabric and batting. This method makes sure that the knots aren’t visible on the front side of the quilt, providing a clean and polished appearance.
- Seams: In garment construction, you can place knots on the underside of seams. This technique is particularly useful when sewing with thicker threads or when working with multiple layers of fabric. By hiding the knots on the inside, you keep the seam’s smoothness and prevent any potential puckering or distortion.
- Embroidery: For embroidery projects, you can hide knots underneath the fabric. This method is ideal for intricate stitching patterns where you want to avoid any visible knots on the surface. By working the knots into the back of the fabric, you maintain the integrity of your embroidery and create a more professional finish.
- Hand Sewing Applications: In general hand sewing applications, such as upholstery or repair work, you can use a variety of knot-hiding techniques. For example, you can tuck the knots into folds or seams, or you can use a loop knot stitch to anchor the thread without creating a visible knot.
Frequently Asked Questions (FAQs)
How do I tie a knot for hand sewing using a needle and twirls method?
Pinch the thread, twirl the needle, weave it in – repeat. Voila! The needle and twirls method ties a secure knot for your hand sewing. Easy as pie, right? Give it a whirl!
What is the best way to hide a knot in quilting?
To hide a knot in quilting, simply tuck it between the fabric layers and batting. This sandwiches the knot away from view, keeping your stitches neat and tidy on the quilt’s surface.
Can I use a locking stitch instead of a knot for machine stitching?
Using a locking stitch is a great alternative to knotting for machine sewing. It provides a secure finish without the bulk of a knot. Just sew a few stitches in reverse to lock it in place.
How do I make a French knot for embroidery?
To make a French knot for embroidery, wrap the thread around your needle 2-3 times, then insert the needle back into the fabric near where it emerged. Gently pull the needle and thread to create a small, tidy knot.
What is the recommended method for tying a knot for a hem stitch?
Don’t get tangled up – the secret to a sturdy hem is a simple knot. Just loop the thread back through the fabric and give it a firm tug. Easy as pie, no fuss required!
Conclusion
Mastering sewing knots can boost your project completion rate by up to 35%. By following the techniques outlined – the finger knot, needle and twirls, locking stitch, loop knot stitch, double back stitches, and hiding knots – you’ll be stitching like a pro in no time.
These essential sewing knot methods will take your skills to the next level and help you create polished, professional-looking projects every time.
So grab your needle and thread, and start practicing these how-to-do sewing knot techniques today!


