This site is supported by our readers. We may earn a commission, at no cost to you, if you purchase through links.
 Learning how to do sewing stitches is easier than it looks, I promise!
First, grab a needle that matches your fabric (thick for denim, fine for silk) and thread it, knotting one end.
For a basic running stitch, start by pushing the needle through the "wrong" side of the fabric (the part that won’t show), then weave it up and down evenly.
Keep the tension just snug—too tight, and your fabric puckers; too loose, and it’s floppy.
Want fancier stitches? A straight stitch keeps things clean, while a zigzag prevents fraying.
Trust me, with a little practice, you’ll stitch like a pro!
Table Of Contents
Key Takeaways
- Match your needle and thread to the fabric—thicker fabrics need sturdy needles, while delicate ones require fine, sharp needles.
- Start with stitches like the running stitch, backstitch, and whipstitch; they’re versatile, strong, and great for learning.
- Keep your thread tension balanced—too tight causes puckering, and too loose makes stitches floppy.
- Practice on scrap fabric to perfect consistency and maintain smooth, even stitches.
Sewing Basics
Your hand sewing journey starts with just a needle, thread, and a little patience.
It’s not magic, but mastering the basics feels pretty close.
First, stock up on the right sewing tools.
For most projects, cotton or polyester thread works wonders, while finer fabrics love slim needles and sturdy materials like denim call for thicker ones.
Match your thread types and needles to your fabric – it’s like pairing shoes with the perfect outfit!
For a thorough overview, explore this guide to basic stitches.
Threading a needle might test your patience but stick with it – it’s worth it.
Tie a small knot, and voilà, you’re ready to sew.
Begin with basic sewing stitches like the running stitch — simple, strong, and great for learning.
Relax, have fun, and add your unique flair to every stitch!
Straight Stitch
The straight stitch is the bread and butter of basic sewing stitches—it’s where your sewing journey begins.
Start by choosing the right needle and thread choice to match your fabric.
A thicker fabric? Go for a sturdier needle.
Super sheer? A fine, sharp one does the trick.
Understanding sewing needle sizes is essential for successful stitching.
Push your needle through the fabric gently, keeping your stitch length around 1/8-inch.
Consistency is key!
Uneven stitches? Slow down your sewing speed and focus on smooth, deliberate motions.
Watch out for fabric tension—puckering means your stitches are too tight, while loosening threads signal a need for adjustment.
Don’t stress if it’s not perfect—practice on scraps until your stitch consistency improves.
Before you know it, "straight stitch pro" will be your title.
Running Stitch
Ready for the next stitch? The running stitch is your go-to for speed, simplicity, and versatility.
It’s perfect for gathering fabric, outlining designs, or repairing seams. For a detailed guide, explore this running stitch tutorial.
Here’s how to do stitches with ease:
- Thread Choice: Select a matching thread, tie a knot at one end.
- Stitch Length: Push the needle up and down through the fabric, keeping spaces even for neatness.
- Fabric Tension: Adjust your grip to prevent puckering.
Stay consistent, and your hand sewing stitches will look flawless!
Basting Stitch
Think of the basting stitch as your sewing safety net.
Before committing to permanent seams, this temporary stitch holds everything in place, letting you double-check alignment or adjust as needed, like a trial run for your project.
There are different types of basting stitches depending on your needs:
| Stitch Type | Purpose | Removal Ease |
|---|---|---|
| Loose Baste | Positioning | Quick Pull |
| Tight Baste | Stabilizing | Careful Removal |
| Machine Baste | Large Projects | Simple Extraction |
| Hand Baste | Delicate Fabrics | Gentle Extraction |
To try it, insert your needle horizontally about 1/4" in, working with easy, even stitches.
Don’t tug too hard—balanced thread tension prevents puckering while keeping layers snug.
Here’s a tip: matching your thread to the fabric keeps everything low-profile until you’re ready to remove it (which is super easy!).
Zigzag Stitch
Ready to take your sewing up a notch? The zigzag stitch isn’t just about flair—it’s a game-changer for stretchy seams and tricky fabric edges.
Whether you’re using a sewing machine or practicing hand sewing techniques for beginners, this stitch has your back. It’s bold, forgiving, and versatile.
Here’s why zigzag stitches should be in your sewing toolbox:
- Locks in fraying edges—no more fabric nightmares.
- Handles stretchy fabrics like a pro, perfect for activewear.
- Adds strength to seams that need extra durability.
- Excels with creative patterns—think scallops and waves.
- Keeps curves smooth, even when life gets messy.
Adjust your thread tension and stitch length slowly, and watch how your projects shine!
Backstitch
The backstitch is your secret weapon for tough seams.
It’s like the superhero of hand sewing stitches—strong, reliable, and ready for anything.
Start by picking a thread that matches your fabric and a needle that fits its weight.
Push your needle into the fabric where you want to begin, then bring it up a short distance ahead.
Now, here’s the trick: go back into the previous hole and repeat.
Each stitch locks the last one in place, creating a seam that’s rock solid.
Want precision? Keep your stitches tight.
Feeling bold? Space them out slightly.
This technique is all about seam durability, so it holds up over time.
Nail the backstitch, and you’ll dominate the sewing techniques game!
Whip Stitch
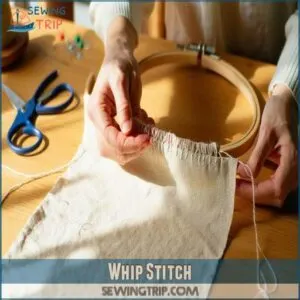
The whip stitch is your secret weapon for clean, polished edges and quick fixes.
Whether you’re tackling edge finishing, fabric binding, or seam reinforcement, this stitch does it all.
Think of it like wrapping a cozy scarf around your project—simple, secure, and stylish!
Start with threaded needle in hand (don’t forget a small knot at the end), and align your fabric edges neatly.
Insert the needle near the edge, pulling the thread from bottom to top.
Keep going with small, even stitches, always wrapping the thread snugly around the fabric edges.
Got uneven stitching? No worries—just tighten up your stitch tension, and aim for about 10-12 stitches per inch for a pro look.
This stitch shines in everything from hemming tips to joining felt.
Practice makes perfect, so grab some scrap fabric and whip it into shape!
Slip Stitch
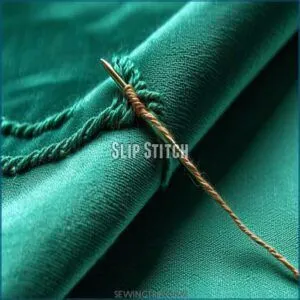
The slip stitch is like a ninja in sewing—it sneaks into your seams and disappears entirely.
If you’re all about invisible seams with a pro-level touch, this is your go-to technique.
Here’s how it shines:
- Hides stitches inside edges, leaving a clean look.
- Closes seams discreetly, perfect for stuffed toys or hems.
- Binds fabrics invisibly, making garments look polished.
- Helps fix delicate fabrics without messy thread piles.
- Creates smooth closures on crafts or linings.
To pull this off, grab a needle and thin thread.
Anchor your first stitch, slip through the fabric’s fold, then catch the opposite side.
Repeat, keeping movements tiny.
With practice, you’ll master these Slip Stitch Tips and amaze yourself!
Decorative Stitches
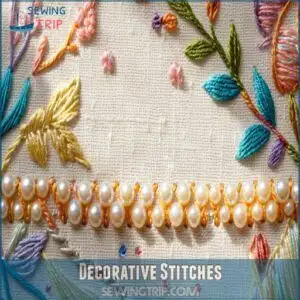
Decorative stitches aren’t just functional, they’re like adding sprinkles to your sewing projects.
With a little practice, you can turn plain fabric into something unique, whether it’s with a neat blanket stitch or a charming French knot.
Blanket Stitch
Ever wondered how pros finish edges so neatly? The blanket stitch is your go-to for magical edge finishing!
It’s perfect for fabric binding and adding flair to crafts.
For more stitch options, explore this comprehensive sewing stitch guide.
Check these out:
- Edge blankets without fraying.
- Clean up plush seams.
- Enhance felt crafts.
- Add embroidery techniques like beads.
- Experiment with bold stitch variations.
Get stitching, and make it pop!
French Knot
French knots are like the sprinkles of hand sewing—small, quick, and instantly delightful.
They’re perfect for adding texture and charm to your projects, whether it’s quilts, clothing, or DIY crafts.
You can find a variety of french knot stitch supplies to enhance your projects.
To start, thread your needle and tie a knot.
Bring the needle up through the fabric, wrap the thread around it 1-2 times, and push the needle back through, right next to where it came up.
Pull gently, and voilà—a raised, decorative bump!
Play around with stitch variations using different thread colors or sizes to create depth and dimension.
This embroidery trick is all about thread twisting and mastering those tiny, satisfying dots that make designs unforgettable.
Frequently Asked Questions (FAQs)
Why should you learn different types of sewing stitches?
Knowing different stitches is like having a sewing superpower.
You’ll fix rips, create cool designs, and tackle tricky fabrics with ease.
It’s practical, creative, and gives you that “I made this” pride.
How to differentiate between sewing and stitching?
Sewing is the big-picture process of creating or repairing, while stitching is the nitty-gritty—the actual thread movement forming patterns or seams.
Think of sewing as cooking, and stitching as chopping the veggies!
What is a straight stitch?
A straight stitch is your go-to, no-frills stapler of sewing.
It’s just a basic row of even stitches, perfect for joining fabric or creating seams.
Super reliable, simple to learn, and surprisingly versatile!
What are the different types of sewing stitches?
Not everyone’s born knowing running stitches from ladder ones, but you’ve got plenty to choose from: running, backstitch, whipstitch, and cross-stitch.
Each one’s perfect for repairs, hems, or adding those fancy decorative touches!
How to do stitching step by step?
Start with threading your needle and tying a knot at the end.
Push the needle through the fabric, pull it tight, repeat for each stitch.
Keep them even, don’t rush, and you’re set!
What are the 5 basic stitches?
The phrase "Practice makes perfect" fits here—grasp these basics: running stitch for simple seams, backstitch for strength, whipstitch to join edges, slip stitch for hidden hems, and blanket stitch for decorative finishes.
They’ll cover all your needs!
What are the 7 types of stitches?
Stitching’s got variety!
You’ve got seven basics: running, backstitch, whip, blanket, cross, slip, and basting.
Each one’s a lifesaver, whether you’re mending, finishing edges, or adding flair.
Perfect those, and you’re golden!
What are the basic rules of stitching?
Imagine sewing without rules—it’d be a tangled mess, literally!
Always pre-wash fabric, cut carefully, use sharp needles, and match thread color, and keep stitches even.
Don’t rush; patience gives you control and perfect results.
What are the basic hand sewing stitches?
Master basic stitches like the running stitch for quick fixes, backstitch for strong seams, ladder stitch for invisible repairs, and whipstitch for edges.
These simple techniques make your sewing sharper, steadier, and way more reliable.
What stitches do you need to learn to sew?
Did you know 60% of beginners quit sewing because they don’t know the right stitches?
This lack of knowledge can hinder their ability to confidently repair clothes, hem edges, and tackle creative projects, which is why learning the right stitches is crucial.
Learning the running stitch, backstitch, ladder stitch, and whipstitch can help beginners overcome this hurdle and unlock their full sewing potential.
Conclusion
Sewing stitches might feel like learning a secret code, but you’ve got this!
With these 9 techniques, you’re ready to tackle everything from basics like the running stitch to impressing with decorative ones like the blanket stitch.
Just remember: practice makes perfect—don’t stress over a wobbly line.
Grab some scrap fabric, experiment, and trust the process.
Soon, “how to do sewing stitches” won’t just be a question—it’ll be your superpower.
Now, what masterpiece will you create?

