This site is supported by our readers. We may earn a commission, at no cost to you, if you purchase through links.
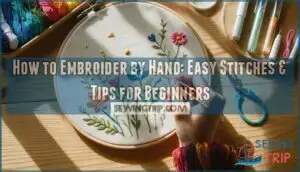
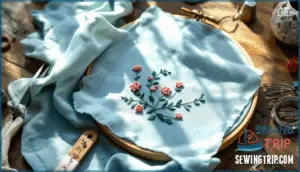
Start with basic tools: an embroidery hoop to hold your fabric taut, a needle, embroidery floss, and fabric like cotton or linen.
Draw your design lightly with a water-soluble marker. Begin with simple stitches like the running stitch, backstitch, or French knot.
Hold your thread snug but not tight, letting the needle glide smoothly. Mistakes? Don’t sweat them—they add charm!
With practice, your skills will blossom, and soon you’ll create designs that feel uniquely yours. Curious about advanced stitches? Stay tuned!
Table Of Contents
Key Takeaways
- Set yourself up with an embroidery hoop, needle, floss, fabric, and a marker to get started easily.
- Practice basic stitches like running stitch, backstitch, and French knot for clean designs.
- Use cotton or linen fabric for a smoother experience, and keep your hoop’s fabric taut to avoid puckering.
- Don’t fret over mistakes—they add charm while helping you learn and improve.
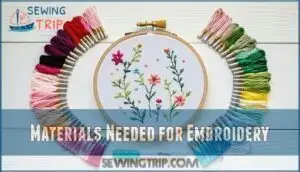
Materials Needed for Embroidery
To get started with hand embroidery, you’ll need a few essential tools like a hoop, fabric, floss, needles, and a marker.
Embroidery begins with the right tools—hoop, fabric, floss, needles, and marker—for smooth stitching and endless creativity.
Each material plays an important role in making your stitching smooth and enjoyable.
Hoop
An embroidery hoop is essential for hand embroidery. It keeps your fabric taut and makes stitching easier.
Choose the right hoop size based on your design; larger hoops are ideal for intricate satin or stem stitches. Hoops typically come in wood or plastic, each securing fabric well.
Considering available hoop dimensions can further refine your choice.
To use, loosen the screw, place the fabric over the inner hoop, and lock it with the outer hoop. Adjust hoop tension to guarantee the fabric is drum-tight, avoiding slack.
Proper hoop storage prevents damage and keeps your tools organized. This ensures that your embroidery hoop remains in good condition and is ready for your next embroidery project.
Marker
A good marker is key for transferring your embroidery patterns onto fabric.
Fabric markers, particularly water-soluble or heat-erasable types, are ideal for design outlining. They let you sketch directly on the fabric, guaranteeing smooth design transfer.
For dark fabrics, choose light-colored chalk pencils or specialty markers to make lines visible.
Try these types of tracing supplies to refine your design transfer process:
- Water-Soluble Markers: Easily rinse out with water after stitching.
- Heat-Erasable Pens: Marks vanish with minimal heat, like ironing.
- Tailor’s Chalk: Great for temporary outlines on darker materials.
Test your marker on scrap fabric beforehand to confirm it doesn’t stain or bleed.
Fabric
Regarding choosing the best fabric for embroidery, focus on sturdy options that are lightweight and won’t fray as you stitch. Fabric selection depends on key factors like thread count, weave, and the design you’re planning.
Cotton and linen blends are excellent for beginners, thanks to their smooth and tightly woven surface. Exploring other fabric types, like canvas or even osnaburg, can spark creativity.
To choose the right material, think about the texture and strength needed for your project. Use the table below for a quick guide to embroidery fabric:
Fabric Type Thread Count Best For Color Choice
**Stabilizers Needed?
| ** | ||||
|---|---|---|---|---|
| Cotton | 28+ | Beginner-friendly designs | Versatile | Optional |
| Linen | 28+ | Fine, detailed work | Neutral shades | Recommended |
| Canvas | 24-28 | Bold, textured designs | Neutral or dark | Sometimes |
| Osnaburg | 20-24 | Rustic embroidery | Neutral tones | Optional |
| Light Denim | 20-25 | Large, bold stitches | Deep colors | Optional |
For diverse options, consider browsing a site that specializes in cotton embroidery materials. Start simple and explore fabric types slowly. Mastery takes time, so enjoy the process!
Floss
Think of embroidery floss as the paint for your needlework canvas. It’s versatile, vibrant, and available in endless varieties to suit any project.
Most beginners start with six-strand embroidery floss, which can be separated for delicate details or used whole for bold textures. Specialty floss, like metallic or variegated, adds sparkle and depth, making your designs truly unique.
When selecting embroidery floss colors, consider how they’ll blend together to create harmonious color palettes. Keep a mix of light, dark, and medium shades for contrast.
Staying organized is key—store floss skeins neatly to avoid tangles during projects. Many crafters find inspiration when exploring different floss options.
- Floss Types: Traditional, metallic, variegated, or satin.
- Color Palettes: Mix contrasting shades for dimension.
- Blending Floss: Combine threads for creative effects.
Needles
Let’s talk hand embroidery needles—tiny but mighty tools! Choosing the right embroidery needle size and type makes stitching smoother.
Sizes 3-9 work for most projects, while needle types like sharps (general use), betweens (fine details), and tapestry (for larger holes) cater to different tasks.
Threading needles? A needle with a larger eye helps with embroidery floss threading.
Store embroidery supplies safely by keeping needles in a case to prevent damage. Toss damaged needles to avoid snagging fabric and guarantee clean, precise stitches every time.
Using an Embroidery Hoop
An embroidery hoop helps maintain fabric tension, making hand embroidery easier and your stitches more precise.
To use it effectively:
- Pick the right hoop size and material: Choose a wooden or plastic hoop slightly smaller than your fabric piece.
- Secure the fabric: Place your fabric over the inner hoop, press the outer hoop down, and tighten the screw evenly. Adjust until it feels drum-tight.
To prevent fabric puckering, remember to pre-wash your fabrics.
- Position your design: Center your pattern before starting embroidery techniques using embroidery floss and needles. It’s all in the details!
Basic Embroidery Stitches
Mastering basic embroidery stitches is the first step to creating beautiful designs with confidence.
From the simple running stitch to the elegant satin stitch, each technique opens up unique possibilities for your projects.
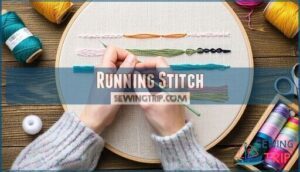
Running Stitch
The running stitch is one of the simplest embroidery stitches, making it perfect for beginners. It’s versatile and foundational, often used in borders, outlines, or adding texture.
To start, thread your needle with embroidery floss and knot the end. Choose a fabric with a tight weave—cotton or linen works great for most designs. Mark your design lightly using a water-soluble pen if needed.
Then, secure the fabric in your hoop, ensuring it’s taut like a drum. For stitch length, aim for even, small stitches; this keeps the pattern neat and balanced.
Insert your needle through the underside and create a basic up-and-down motion along the design. Want a creative twist? Experiment with variations by spacing stitches farther apart or layering them for dimension. This simple technique is a beginner embroidery guide favorite, offering endless possibilities for design applications and practice, making it a great way to learn basic embroidery stitches.
Backstitch
The backstitch is your go-to for crisp, clean outlines and detailed hand embroidery. It’s versatile, perfect for curves, filling small areas, or adding texture.
Use it for embroidery stitches that stand out beautifully. It’s also used for stitching for outlines to create defined and durable lines.
- Ideal for outlines and text.
- Smoothly follows curves with precision.
- Creates solid, bold lines.
- Enhances texture with thread layering.
- Simple yet impactful hand embroidery technique for all skill levels, providing beautifully detailed results.
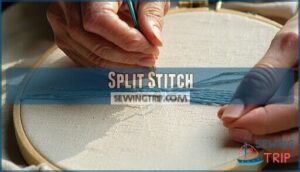
Split Stitch
Looking for stitching techniques with depth? The split stitch is perfect for adding texture and charm to your hand embroidery projects.
This embroidery tutorial staple creates a decorative, rope-like effect, ideal for split stitch outlines or textured designs.
Simply stitch forward, then bring the needle up through the middle of the previous stitch—it’s that easy!
Split stitch variations can be explored by using different thread weights or spacing for unique effects.
Practice steadily, and soon, your split stitch texture will enhance even the most advanced applications.
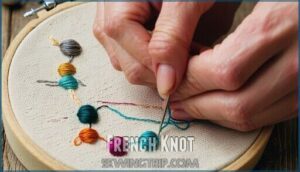
French Knot
The French knot adds elegance and texture to your embroidery, making designs pop with its small, raised finish.
It’s perfect for creating delicate eyes, flower centers, or decorative dots.
Start by threading your needle with embroidery floss and pulling it through the fabric.
Wrap the floss around the needle once or twice, depending on your desired knot size.
Gently push the needle back through the fabric near the previous exit point, keeping tension on the floss to secure the knot.
Here’s how to master the French knot:
- Knot Placement: Position knots precisely for balanced designs.
- Knot Size: Adjust by wrapping the floss more or fewer times.
- Secure Knots: Maintain tension for consistent results.
- Texture Creation: Layer knots creatively to add dimension.
- Knot Variations: Experiment with colors or thread types.
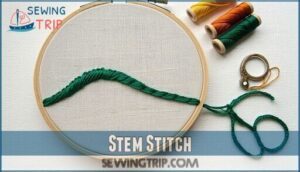
Stem Stitch
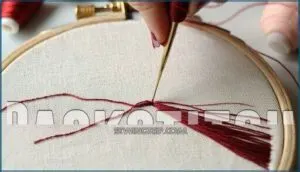
After mastering French knots, why not explore the elegant stem stitch? Perfect for curved lines and textured designs, this approach adds both charm and versatility to your hand embroidery.
Stem stitch creates a seamless, rope-like effect, making it a great outline alternative for floral stems or decorative uses. Start by threading your needle, knotting the floss end, and following your pattern.
Each stitch overlaps slightly, creating soft, flowing lines. Work along the design curve, keeping even tension for smooth aesthetics. Don’t rush—your patience brings the texture to life!
For further guidance, explore beginner tips in embroidery tutorials. Stem stitch is beginner-friendly, giving your embroidery stitches a polished yet handcrafted feel, with a unique rope-like effect.
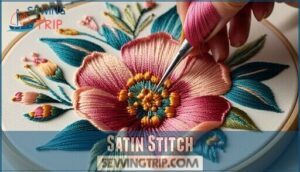
Satin Stitch
Satin stitch is a fantastic way to fill shapes with smooth, bold colors, adding depth and texture to your embroidery.
To get started, plan your satin stitch direction for clean, uniform coverage. Use short to medium satin stitch lengths to avoid slack.
For more dimension, try a padded satin stitch or long short stitch. Satin stitch variations can create stunning effects in hand embroidery.
- Start with a lightweight fabric and make certain it’s taut.
- Use embroidery tutorials for design clarity.
- Focus on neat, even coverage.
- Experiment with satin stitch variations.
Practice and Experimentation
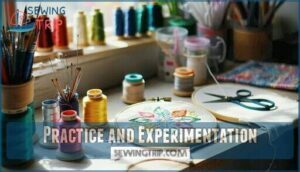
Practice makes perfect in hand embroidery, and a bit of experimentation goes a long way in sharpening your embroidery skills. Try stitch variations to understand texture and depth or explore color palettes for unique effects.
Focus on neat, even stitches while adjusting tension for a smooth finish. Design adaptation and mixed media also allow creative freedom.
- Use scrap fabric for embroidery practice.
- Test different hand embroidery techniques on small designs.
- Keep the needle and thread tension balanced.
- Learn through embroidery stitches tutorials to expand techniques, and remember that practice is key to mastering these skills.
Suitable Fabrics for Embroidery
Choosing the right embroidery fabric is like setting the stage for a masterpiece.
The right embroidery fabric sets the foundation for creativity, transforming simple stitches into stunning designs effortlessly.
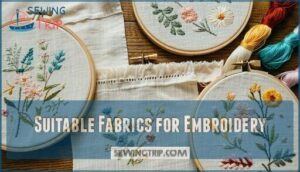
Opt for natural fibers like cotton or linen with a tight weave and medium fabric weight. High thread count guarantees smooth stitches, while lighter fabrics work well for delicate hand embroidery.
Don’t forget fiber content—natural options handle embroidery floss better. Wash and dry fabric first to prevent color bleeding, and stretch it drum-tight in your embroidery hoop.
Understanding how fabric properties matter can substantially improve your project’s outcome. Thoughtful choices here make stitching smoother and results stunning.
Advanced Embroidery Stitches
Once you’ve got the basics down, advanced stitches open a world of creativity.
Techniques like Thread Painting bring designs to life with vibrant, shaded details, while Stumpwork adds a three-dimensional flair. Goldwork creates stunning metallic accents for elegant motifs.
- Feather Stitch: Ideal for leaves or raindrop shapes, it adds texture and depth.
- Couching Stitch: Perfect for textured patterns using blended colors.
- Seed Stitch: Fills spaces creatively with overlapping or separated tiny stitches.
Explore an embroidery stitch dictionary to keep learning!
Embroidery Supplies and Kits
When starting embroidery, having the right supplies makes a big difference.
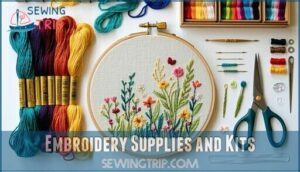
Embroidery kits are a great option, offering essentials like pre-printed fabric, hoops, floss, needles, and instructions.
Choose high-quality embroidery floss for vibrant results and invest in fabric stabilizers for delicate materials.
Keep tools organized with supply storage solutions to prevent tangling.
Needle sizes matter—opt for beginner-friendly options like size 5.
- Essentials to keep in mind:
- Embroidery hoops for steady stitching.
- Varied floss types for design flexibility.
- Proper embroidery needle sizes.
- Durable, fabric-friendly stabilizers.
Instagram Embroidery Community
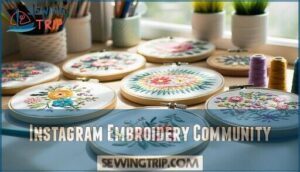
Social media makes finding embroidery inspiration easier than ever. On Instagram, connect with an embroidery community sharing hand embroidery projects, embroidery patterns, and embroidery tips.
Explore hashtags like #embroidery or #handmade to discover creative stitches and techniques. Many accounts promote skill sharing, shop promotion, and monthly community challenges where you can grow alongside others.
Engage in feedback culture by commenting on posts or joining exchanges to trade handmade creations. Following Instagram embroidery accounts encourages growth and sparks ideas for your next project!
Consider using a water-soluble pen for transferring patterns.
Frequently Asked Questions (FAQs)
What is the easiest embroidery technique?
Start with the running stitch—it’s simple, beginner-friendly, and versatile.
You’ll just weave the needle in and out of the fabric, creating a dotted line.
It’s perfect for outlines, practice, or adding texture.
Is embroidery a cheap hobby?
Embroidery is a needle in a haystack of affordable hobbies.
With basic tools like fabric, floss, needles, and a hoop, you can start inexpensively.
Over time, you’ll only invest in materials for specific designs.
How hard is it to hand embroider?
Hand embroidery isn’t as hard as it looks.
With patience, practice, and simple stitches like backstitch and running stitch, you’ll quickly get the hang of it.
Start small, embrace mistakes, and improve over time.
What type of fabric should I use for a beginner embroidery project?
When diving into embroidery, think of fabric as the canvas of your masterpiece.
Choose tightly woven cotton or linen blends; they’re forgiving and firm.
Avoid stretchy fabrics.
Light colors help your design shine clearly.
How should I clean and care for my embroidery hoop?
Keep your hoop clean by wiping it with a damp cloth after each use.
Avoid soaking wooden hoops to prevent warping.
For deep cleaning, gently sand rough spots and apply wood conditioner or oil.
Are there any online classes or tutorials for more advanced embroidery stitches?
Imagine stitching elegance into fabric.
Explore advanced embroidery through online platforms like Skillshare, Udemy, and YouTube.
These offer detailed tutorials on French knots, bullion stitches, and more, helping you level up your creativity and techniques.
Are there any local stitching events I can attend to learn more?
Check out community centers, craft stores, or local libraries—many host stitching meetups or embroidery workshops.
Search online for nearby sewing guilds or crafting clubs.
It’s a great way to meet passionate stitchers like you and enjoy stitching meetups!
How can I fix mistakes in embroidery?
To fix embroidery mistakes, gently cut stitches on the fabric’s back using small, sharp scissors.
Carefully pull the thread out without damaging the material, then re-stitch the area with a steady hand for cleaner results.
What is the best way to iron finished embroidery?
Imagine this: your embroidery masterpiece, crinkled after all that effort.
Gently place it face-down on a soft towel, use low heat, and press with a steam iron.
Avoid motions; lift and press carefully.
Done!
How do I store embroidery materials properly?
Store embroidery materials in clear containers or compartmentalized boxes.
Keep floss wrapped or in skeins to prevent tangling.
Use dry, cool places away from direct sunlight.
Label everything for easy access and quick organization.
Conclusion
Embroidery is like painting with thread, transforming plain fabric into beautiful artwork.
With a little patience and the right tools, learning how to embroider by hand becomes an enjoyable craft. Start small—master basic stitches and practice often.
Don’t worry about perfection; your unique touch makes each piece special. Over time, your confidence and creativity will grow, expanding into more intricate designs.
So pick up your hoop, thread, and needle, and begin stitching your story today.

