This site is supported by our readers. We may earn a commission, at no cost to you, if you purchase through links.
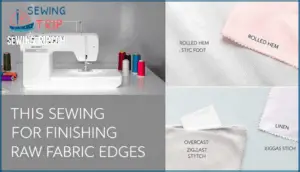
That’s not true. Your regular sewing machine can manage most edge finishing techniques that professional seamstresses use every day, and some methods don’t need a machine at all. Whether you’re working with delicate silk or sturdy denim, you’ll find a finishing method that keeps your seams secure, your garments durable, and your work looking polished inside and out.
Table Of Contents
Key Takeaways
- You can finish raw edges without a serger using multiple methods—pinking shears for quick cuts, zigzag stitches on your sewing machine, bias tape binding for curves and heavy fabrics, French seams for enclosed edges on delicate materials, or hand-sewing techniques like whip stitch and blanket stitch for small areas.
- Choosing the right edge-finishing technique depends on your fabric’s weight, weave tightness, and fraying tendency—lightweight sheers work best with French seams or narrow zigzag stitches, medium-weight wovens pair well with pinking shears or overcasting feet, and heavy structured fabrics need bias tape binding or Hong Kong binding.
- Professional finishes like French seams, bound edges, and Hong Kong binding take more time but fully encase raw edges for durability and a polished appearance, making them ideal for garments where both the inside and outside need to look store-bought quality.
- Proper edge finishing isn’t just cosmetic—it prevents unraveling during washing and wear, extends your garment’s lifespan by protecting the fabric’s weave integrity, and maintains seam strength so your hard work doesn’t fall apart after the first wash.
How to Finish Raw Edges Without a Serger
You don’t need a serger to keep your fabric edges from fraying and falling apart. There are several easy methods you can use with tools you probably already have.
Let’s look at why finishing raw edges matters, how to pick the right technique for your fabric, and what supplies you’ll need to get started.
Why Finish Raw Edges?
If you’ve ever watched a freshly sewn seam start to fray like an old rope, you know that finishing raw edges isn’t just about looks—it’s about making your project last. When you finish fabric edges, you’re protecting your work from unraveling and boosting garment quality. Here’s why seam finishing matters:
- Prevent unraveling during washing and wear
- Boost durability so seams stay strong over time
- Create a professional appearance inside and out
- Extend fabric longevity by protecting weave integrity
- Maintain structure on raw edges that want to fray
Without proper finishing, those loose threads multiply fast—and your hard work falls apart.
Choosing The Right Method for Your Fabric
Not all seam finishing techniques work with every fabric. Your fabric’s weight, structure, and fraying tendency will guide your choice. One key factor is the garment type and fabric when selecting a finish. Match the method to your material—and you’ll save time while protecting your work.
| Fabric Type | Best Seam Finishing Techniques |
|---|---|
| Lightweight & Sheer | French seams, narrow zigzag stitch |
| Medium-Weight Woven | Pinking shears, zigzag, overcasting foot |
| Heavy & Structured | Bias tape binding, Hong Kong binding |
| Loosely Woven | Flat-felled seams, French seams, bound edges |
| Knit & Stretch | Narrow zigzag, stretch stitches |
Your machine choice and project type also matter. Sewing without a serger means picking seam finishes that prevent fabric fraying without adding bulk or stiffness.
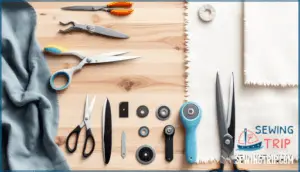
Tools and Materials Needed
Once you know which method fits your fabric, you’ll need a few basic supplies to finish those edges cleanly. Your sewing machine and quality thread are essential—choose thread that matches your fabric weight.
Bias tape works for bound edges, while pressing tools help create crisp folds. Shears vs rotary cutters offer different cutting styles depending on your seam allowance needs.
Some sewers keep fabric glue handy for stabilizing tricky spots before stitching.
Using Pinking Shears for Seam Finishing
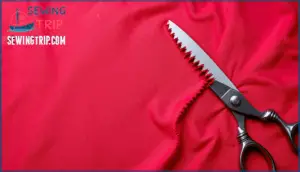
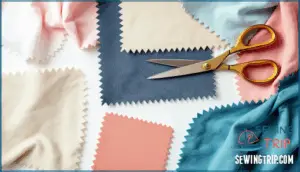
Pinking shears might look like fancy scissors, but they’re actually a simple workaround when you don’t have a serger. Those zigzag edges aren’t just for show—they slow down fraying and give your projects a cleaner finish inside.
Let’s walk through how they work, which fabrics love them, and how to use them the right way.
How Pinking Shears Prevent Fraying
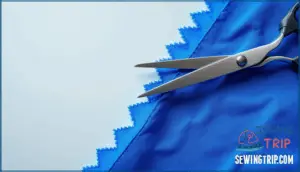
Pinking shears work like tiny armor for your fabric edges—those zigzag teeth interrupt the straight grain line where threads love to pull loose and fray. Instead of one long, continuous raw edge begging to unravel, pinking blades create multiple tiny points that halt fraying in its tracks.
Pinking shears create zigzag edges that interrupt the fabric’s grain line, slowing fraying by breaking up the straight edge where threads unravel
Each peak and valley slows down the warp and weft threads from pulling free, preventing fabric fraying noticeably better than a straight cut—though washing impact and pinking limitations mean it won’t last forever.
Best Fabrics for Pinking Shears
Tightly woven cottons, linen blends, and denim weights respond beautifully to pinking blades—their dense weave stays firm, keeping fraying minimal even after washing. Here’s where pinking shears shine:
- Cotton Weaves: Quilting cottons and home decor fabrics stay tidy with pinked edges, shedding fewer threads than loose weaves.
- Linen Types: Choose tight linen-cotton blends over loosely woven pure linen for better edge stability and preventing unraveling.
- Denim Weights: Heavy denim and canvas benefit from reduced bulk and flexible seams when you use pinking shears on woven fabrics.
- Synthetics: Felt, vinyl, and UltraSuede won’t fray at all—perfect candidates for decorative pinked finishes.
- Spandex Blends: Stretch-woven cotton blends with elastic content resist curling and maintain their shape beautifully after pinking.
Skip pinking on loosely woven or sheer fabric types—they’ll unravel despite those zigzag cuts. To further minimize fraying, consider that the shears cut a distinct zig-zag pattern.
Step-by-Step Guide to Pinking Edges
With just a few confident cuts, you can finish your seam edges using pinking shears—let me walk you through it step by step. First, sew your seam as usual, then press it flat. Trim away excess fabric, leaving a ¼-inch allowance.
Position your pinking shears at a comfortable angle and cut along the raw edges in long, smooth strokes—angle matters for clean zigzags. Keep your shears sharp through regular maintenance, preventing unraveling with crisp cuts every time.
Recommended Pinking Shears and Rotary Blades
Choosing the right pinking shears can mean the difference between sharp, clean zigzags and ragged edges that fray anyway. Look for durable stainless steel blades—they stay sharp longer when finishing raw edges. Comfortable grips reduce hand fatigue during lengthy projects.
Quality pinking shears work with everything from cotton to linen, while flimsy craft scissors struggle with multiple fabric layers and leave you frustrated.
Sewing Machine Techniques for Edge Finishing
Your sewing machine can finish edges just as well as a serger—you just need the right technique. Each method works a little differently, so you’ll want to pick the one that matches your fabric and how much time you’ve got.
Let’s look at three reliable ways to lock down those raw edges and keep your projects looking sharp.
Zigzag Stitch Method
The zigzag stitch is your sewing machine’s built-in safety net, giving raw edges a flexible finish that stops fraying without any special equipment. Set your stitch width between 3–5mm and adjust tension slightly looser for alternative seam finishes that move with your fabric.
You can zigzag each raw edge separately or catch both layers together, and decorative zigzag variations add personality while protecting woven fabrics from unraveling.
Overcasting Foot Technique
If you want a finish that looks like it came from a serger but never leaves your sewing machine, an overcasting foot is your shortcut to professional edges. This specialized foot guides fabric while you stitch, with a metal bar that prevents the overcast stitch from pulling raw edges tight.
Select the overcasting stitch setting on your sewing machine, adjust tension slightly looser than normal, and let the foot do the work of feeding fabric smoothly for serger-like results without the bulk.
Turn, Fold, and Stitch Method
Sometimes you just need a quick finish that barely adds any bulk—and turning raw edges under by ⅛ inch, pressing them flat, and stitching close to the fold does exactly that. This turning technique works beautifully on light to medium fabrics, keeping your seam allowance neat without extra weight.
Press carefully before you stitch—it’s the secret to a clean turn-stitch finish. Perfect for sewing without a serger when you want simple, effective results.
Adjusting Stitch Settings for Different Fabrics
Your sewing machine needs the right setup for each fabric’s personality. Adjust stitch length between 2.0 mm for lightweight fabrics and 3.5 mm for thick denim—it makes all the difference.
Pair that with needle selection: use a 70/10 for delicate material, 80/12 for everyday cotton, or 90/14 for heavier weaves. Don’t forget thread tension and foot pressure—they control how smoothly your fabric density moves through the machine.
Professional Seam Finishes Without a Serger
When your basic techniques aren’t enough, professional finishes step in to manage tricky fabrics and create garments that look store-bought inside and out.
These methods take a bit more time but they fully encase raw edges so fraying doesn’t stand a chance.
Here’s how to master the three main professional finishes you can do on a regular sewing machine.
French Seams for Enclosed Edges
For truly polished seams that hide every raw edge inside the garment itself, French seams are your go-to technique. This method creates encased seams with a clean finish that’s perfect for sheer fabrics and couture applications. Here’s how it works:
- Sew wrong sides together at ¼ inch seam allowance
- Trim and press the seam flat
- Fold right sides together, encasing raw edges
- Stitch at ⅜ inch following industrial standards
This sewing technique offers outstanding seam durability with bulk reduction, making delicate materials look professional inside and out.
Bound Edges With Bias Tape
When you need a more flexible finish that works on curves and heavier fabrics, bias tape wraps around those raw edges like a protective sleeve. Double folded bias tape is easiest for beginners—just sandwich the raw edge inside and topstitch. This method shines on curved edges and mitered corners where stability matters most.
| Bias Tape Types | Best Use |
|---|---|
| Single-fold | Lightweight fabrics |
| Double-fold | Quick seam finishing |
| Extra-wide (¾") | Heavy fabric binding |
| Contrasting colors | Decorative detail |
| Self-made strips | Perfect fabric matching |
Hong Kong Binding Method
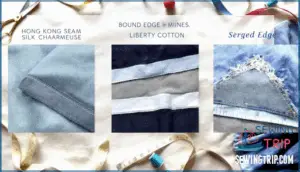
Hong Kong binding takes bias tape a step further—you cut your own bias strips from lightweight fabric and wrap them around each seam allowance separately for a clean, couture-level finish.
This bias preparation technique works beautifully on wool and velvet, where bound seams need extra refinement. You’ll stitch the bias strip to the raw edge, fold it over, and secure it—perfect for curved seams and cornering techniques that demand precision without a serger.
When to Use Each Professional Finish
Choosing among different seam finishes depends on fabric weight, garment type, and your skill level.
Use French seams on lightweight silks and sheers for enclosed edges with minimal bulk. Flat-felled seams strengthen high-stress areas in denim or workwear. Bias-bound edges suit unlined jackets where aesthetics matter. Hong Kong binding elevates wool coats with refined, professional garment finishes.
Match your sewing techniques to durability needs and the types of seams your project demands.
Hand Sewing Methods to Prevent Fraying
You don’t need a sewing machine to keep edges from fraying. Hand stitching gives you control and works beautifully on delicate fabrics or small areas.
Here are three methods that’ll help you finish raw edges by hand.
Whip Stitch for Raw Edges
If you’ve ever needed to hand-stitch a seam finish in a pinch, the whip stitch is your go-to friend. This simple hand sewing technique wraps thread diagonally over raw edges to prevent unraveling. You’ll work from right to left, spacing stitches about ⅛ inch apart with light, even tension.
Choose thread that matches your fabric weight—all-purpose thread works for most projects. The whip stitch secures edges on nearly any fabric without bulk, making it perfect when you want to finish seams without a serger.
Blanket Stitch for Added Strength
The blanket stitch locks down raw edges with an interlocking loop that creates both security and a decorative finish you can’t get from a plain whip stitch. This technique adds stitch strength that really fights fraying on fabrics prone to unraveling, and it’s especially helpful for corner detailing where edges take extra stress when sewing without a serger.
Work from left to right, spacing stitches evenly along your seam allowance.
Tips for Neat Hand-Finished Seams
Hand-finishing takes patience, but a few simple habits can turn wobbly stitches into professional-looking results.
Thread selection matters—match your thread weight to your fabric so invisible stitches blend right in. Keep tension control consistent by pulling gently after each stitch; tight yanks pucker fabric, while loose loops invite unraveling.
Secure each seam allowance with firm knot security at start and finish. Proper fabric control means supporting your work as you sew, preventing edges from stretching or distorting, especially on hand-washed delicates.
Frequently Asked Questions (FAQs)
How can I finish my edges without a serger?
You’ve got plenty of options! Pinking shears, zigzag stitch, overcasting feet, bound edges with bias tape, French seams—all sewing machine alternatives that deliver edge durability without a serger, keeping your seam allowance neat and your project polished.
How to finish raw edges of fabric by hand?
You can finish edges by hand using whip stitch or blanket stitch. Both methods secure raw edges and prevent fraying, especially for hand-washed garments.
Hand overcast provides edge stability with neat hand-finishing results.
How do you keep fabric from fraying without a serger?
Think your fabric can’t fray if you just ignore it? That’s one expensive fantasy.
You can keep fabric from fraying without a serger by using zigzag stitch, overcast stitch, pinking shears, or hand-finishing methods that secure raw edges and extend fabric longevity.
What can you use instead of a serger?
You can replace a serger with pinking shears, zigzag stitch, overcast stitch, bias tape binding, French seams, or hand stitching techniques—all work great for sewing without serger equipment.
What is the best method for finishing raw edges by hand?
When hand washing garments, you can’t beat a classic whip stitch or blanket stitch. Whip stitches work fast for light fabrics, while blanket stitches add strength and look beautiful on heavier edges.
Are there alternatives to using a serger for seam finishing?
Yes, you can finish seams without a serger using zigzag stitch, French seams, bound seams with bias tape, pinking shears, or hand-sewing methods. Each offers different cost, durability, and fabric suitability for professional-looking results.
How do I prevent fabric fraying without a serger?
You can stop fraying with a zigzag stitch along edges, pinking shears for quick cuts, or bound edges using bias tape.
Machine overcast stitches and hand finishing with tight stitch density also reinforce fabric choice effectively.
Can I use pinking shears on all fabric types?
Pinking shears work best on medium to heavy woven fabrics with moderate fraying tendency. They’re not ideal for all fabric types—lightweight or high-fray materials need more secure finishes.
Shear sharpness and washing frequency also affect edge durability and overall results.
What is the quickest method for finishing raw edges?
Like choosing between a sprint and a marathon, speed vs. durability shapes your choice. For pure speed, pinking shears win—just trim edges in seconds.
However, a zig zag stitch offers better durability with minimal extra time, especially using an overcasting foot for beginner friendliness across fabric types.
Can I finish knit fabric edges without a serger?
Knit fabric types stretch differently, so you’ll need to adjust your approach.
Use a zigzag or stretch stitch on your sewing machine to prevent runs while allowing edges to move naturally without breaking threads.
Conclusion
You could spend a thousand hours perfecting your sewing skills, but without proper edge finishing, your work won’t survive its first wash. The good news? Learning how to finish raw edges of fabric without a serger gives you full control over every seam.
You’ve just explored techniques—from pinking shears to French seams—that professionals use daily. Pick the method that matches your fabric and project, practice until it feels natural, and watch your handmade pieces last for years instead of months.
- https://poundfabrics.co.uk/blogs/sewing-resources/how-to-finish-a-seam-with-zig-zag-stitch
- https://sewgoth.com/how-to-finish-seams-without-a-serger/
- https://www.maggieframes.com/blogs/embroidery-blogs/zig-zag-stitch-mastery-techniques-applications-and-creative-uses
- http://article.sapub.org/10.5923.j.textile.20200901.04.html
- https://grainlinestudio.com/blogs/blog/a-guide-to-seam-finishes-for-woven-fabrics

