This site is supported by our readers. We may earn a commission, at no cost to you, if you purchase through links.
Whether your cherished sofa or favorite chair has fallen victim to your feline friend’s sharp claws, there’s no need to despair. From assessing the damage to applying the final finish, we’ll walk you through each step, ensuring you have the knowledge and confidence to tackle repairs head-on.
Embrace the challenge and transform those unsightly marks into mere memories, all while safeguarding your leather treasures against future mishaps. Let’s dive into the world of leather repair and reclaim the beauty of your belongings.
Yes, cat claw holes in leather can be fixed by trimming loose fibers, applying leather binder, sanding the area, and using filler and colorant to restore the surface.
Table Of Contents
Key Takeaways
- Identify Leather Type and Damage: Before attempting repairs, it’s crucial to determine the type of leather (porous or coated) and the extent of the damage (superficial or deep). This assessment will guide the choice of repair methods and materials.
- Prepare the Repair Area: Proper preparation is key to a successful repair. This includes cleaning the leather to remove dirt and oils, trimming any loose fibers to prevent further damage, applying a leather binder to strengthen the area, sanding to create a smooth surface, and cleaning off any dust post-sanding.
- Fill Damaged Areas: Use a heavy filler to fill in scratches, holes, and gouges. Apply the filler evenly with a palette knife, remove excess to maintain the leather’s texture, and allow it to dry thoroughly. Sand the area after the filler has dried to ensure a smooth finish before applying colorant.
- Prevent Future Damage: To avoid repeat incidents, consider offering alternative scratching surfaces for cats, keeping their claws trimmed, and regularly cleaning and conditioning the leather. Using cat deterrents like double-sided tape or aluminum foil can also help protect the leather from future scratches.
Identifying Leather Damage
When dealing with cat claw holes in leather, it’s essential to first assess the size of the scratch and determine the type of leather you’re working with.
You can test your leather’s finish by applying a drop of water in a hidden area; if the water soaks in, the leather is porous, but if it stays on the surface, the leather has a protective coating.
Once you’ve identified the leather type and the extent of the damage, you can choose the appropriate repair method, whether it’s a simple touch-up or a more extensive repair kit for larger scratches.
Assessing Scratch Size
When assessing the size of scratches on your leather treasures, it’s like being a detective in your own home.
- Scratch Visibility: First off, grab a magnifying glass (not literally, unless you want to) and examine the scratch closely. Is it just a surface scuff or a canyon in the landscape of your leather? This will determine your next steps.
- Leather Durability: Consider the leather’s age and type. Older, well-loved pieces might be more fragile, so tread lightly. Remember, leather is tough but not invincible.
- Repair Cost: Size matters in your wallet’s world. Smaller scratches might just need a dab of leather oil, while larger ones could send you on a quest for a leather repair kit. Choose your battle wisely.
- Leather Protection: Post-repair, think about guarding your leather against future cat-astrophes. A little prevention can save you from going through this rigmarole again.
Determining Leather Type
To suss out the type of leather you’re dealing with, a bit of leather testing is in order. Think of it as a detective game where your couch is the suspect and you’re the sleuth with specialized knowledge.
Start by playing a bit of splash and dash—rub a drop of water on a hidden spot. If it soaks in, you’ve got yourself porous leather; if it beads up, there’s a protective coating playing goalie.
Not sure? Don’t wing it with DIY limitations. A quick chat with a pro can save your hide—literally. They’ve got the material compatibility charts, leather cleaner potions, and leather finish spells to turn your leather furniture repair into a leather restoration triumph.
Preparing the Repair Area
Before tackling cat claw holes in your leather items, it’s crucial to prepare the repair area properly to ensure a seamless and effective restoration.
Start by thoroughly cleaning the leather to remove any dirt, oils, or residues that could interfere with the repair process.
Next, carefully trim away any loose fibers around the holes using sharp scissors, making sure not to cause further damage to the surrounding leather.
This preparation sets a clean and smooth foundation for the subsequent repair steps, ensuring the best possible outcome for your leather items.
Cleaning the Leather
When it comes to fixing cat scratches on leather, the first step is choosing the right leather cleaner to kick off the repair process.
Imagine you’re a detective, and your mission is to degrease the damaged area, ensuring it’s squeaky clean and ready for action. You’ll need to be as precise as a surgeon, trimming any loose fibers with the finesse of a skilled barber.
Then, it’s time to bring in the heavy artillery: the leather binder and re-coloring balm. Think of applying multiple layers of these as layering up on a chilly day—each coat adds a bit more protection and restoration.
And just like waiting for your favorite cake to bake, patience is key. Allow each layer to dry thoroughly, using a hair dryer to speed up the process without rushing it. This meticulous preparation sets the foundation for a successful repair, transforming those cat scratches from eye-sores to non-issues, almost like magic.
Trimming Loose Fibers
Once you’ve given your leather a good cleaning, it’s time to get snippy—literally. Grab those sharp scissors and show those loose fibers who’s boss. Trim carefully, making sure not to cut into the leather itself.
Think of it as a haircut for your couch; you’re just removing the split ends to keep it looking its best. This step is crucial because any loose leather left unattended could lead to more damage down the road.
Plus, it sets the stage for a smoother repair, ensuring those cat claw holes in leather will soon be nothing but a memory.
Applying Leather Binder
When repairing cat claw holes in leather, the application of Leather Binder is a crucial step.
You’ll need to apply multiple coats of the binder to the damaged area, using a sponge and applying pressure to ensure deep penetration into the leather’s fibers.
It’s essential to allow each coat to dry thoroughly before applying the next, which can be expedited with a hairdryer.
This process not only strengthens the leather but also prepares it for subsequent filling and coloring steps, ensuring a durable and lasting repair.
Multiple Coats Application
After prepping the leather for repair, it’s time to apply the Leather Binder. Patience is key here; think of it as layering flavors in a gourmet dish—each coat adds depth.
Apply 8-10 coats, allowing ample drying time between each to avoid a sticky situation. Imagine you’re an artist, with each layer a stroke of your brush, building up to a masterpiece.
Sanding pressure should be just right—not too hard, not too soft—like Goldilocks’ porridge. And when it comes to color matching, it’s like finding the perfect pair of shoes to match your outfit; take your time to get it right.
Drying Time Between Coats
When applying Leather Binder, patience is key to ensure each layer bonds properly.
- Apply each coat with gusto, ensuring deep fiber penetration.
- Allow a good 30 minutes of drying time, or use a hairdryer to expedite the process.
- Keep the work area at an optimal temperature, between 8°C and 30°C, for the best results.
- After each coat, check for color matching and finish durability before proceeding.
Sanding the Area
When addressing cat claw holes in leather, the process of sanding the area is crucial for achieving a smooth surface for further repair steps.
After applying a leather binder to strengthen the damaged area, you’ll need to lightly sand it down using 1200 grit sandpaper. This fine grit ensures that you don’t cause further damage to the leather while smoothing out the surface.
Once the sanding is complete, it’s important to clean the area thoroughly to remove any dust or residue, setting the stage for the application of fillers or colorants.
Using 1200 Grit Sandpaper
After you’ve diligently applied the Leather Binder, it’s time to smooth things over—quite literally. Grab your 1200 grit sandpaper and let’s get down to business. You’re not just sanding; you’re setting the stage for a flawless comeback.
Think of it as gently coaxing the leather back to its former glory, one stroke at a time.
| Step | Feeling |
|---|---|
| Picking up the sandpaper | Anticipation |
| First gentle stroke | Trepidation |
| Seeing the surface smooth out | Satisfaction |
| Wiping away the dust | Accomplishment |
Cleaning After Sanding
After sanding your leather to smooth out those pesky cat scratches, it’s time to whisk away the dust and debris. Grab a soft cloth and give the area a once-over with a gentle touch—think of it as caressing the leather back to perfection.
Now, don’t just stop there; a quick wipe with an alcohol cleaner will ensure that no gritty particles are gatecrashing your repair party. This step is crucial for paving the way to a flawless finish, so don’t skimp on the elbow grease.
And remember, if you’re ever in doubt or the damage seems too daunting, a professional consultation can be your leather’s knight in shining armor. With the right cleaning solvents and a bit of tender loving care, you’re setting the stage for leather conditioning and scratch prevention that’ll make your couch thank you.
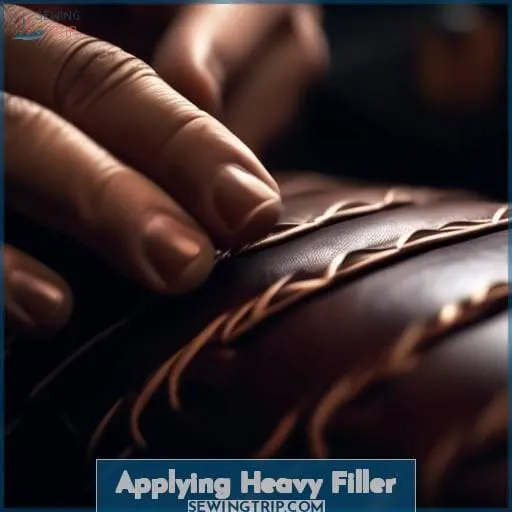
Applying Heavy Filler
After preparing the leather surface for repair, applying Heavy Filler is a crucial step in fixing cat claw holes. This process involves using a palette knife or similar tool to fill the damaged areas with Heavy Filler, ensuring to clean up any excess material to maintain the leather’s texture.
Once applied, the filler needs to dry thoroughly, which can be accelerated with a hair dryer, and then it can be sanded down to create a smooth, flush finish with the surrounding leather. This method provides a durable repair that blends seamlessly with the original leather, preparing it for subsequent re-coloring and finishing steps.
Sanding After Filler
After applying the heavy filler to those pesky cat claw holes in your leather, it’s time to get your hands on some fine-grit sandpaper. Think of it as giving your leather a spa treatment; you’re smoothing out the rough edges to bring back that sleek look.
Grab that 1200 grit sandpaper, the kind that whispers rather than shouts, and gently coax the filler into submission. You’re not just sanding; you’re sculpting, transforming those once glaring blemishes into mere memories.
So, take a deep breath, and let’s turn those scratches into a canvas for your restoration artistry. Sanding before the colorant isn’t just a step; it’s your secret weapon to ensure that finish is nothing short of flawless.
Wiping With Alcohol Cleaner
After sanding down the heavy filler, it’s time to get clinical with your cleaning—think of it as prepping for surgery on your beloved leather.
Grab your alcohol cleaner and douse a cloth with it. Now, with the precision of a ninja, wipe down the area. This isn’t just a clean sweep; it’s a crucial step to ensure no grime or old coatings play the villain in your restoration drama.
Safety first, though—handle the alcohol cleaner with care to avoid any oops moments that could turn your repair into a sticky situation.
Colorant Application
When addressing cat claw holes in leather, the application of colorant is a crucial step in the repair process.
You’ll start by applying the first coat of colorant with a sponge, ensuring it’s spread evenly across the damaged area. This initial layer is vital for restoring the leather’s original color and masking the repairs.
If you’re using a colorant kit, you’ll then proceed to spray on additional thin layers of colorant, allowing each layer to dry before applying the next. This method ensures a smooth, consistent finish that blends seamlessly with the surrounding leather, effectively concealing the claw holes and restoring the leather’s aesthetic appeal.
First Coat With Sponge
After prepping the leather and applying heavy filler, it’s time to bring color back to your leather with the first coat of colorant.
Dip your sponge into the dye, ensuring it’s not dripping wet, and gently apply it to the leather in a circular motion. This sponge application technique helps the colorant absorption evenly, avoiding streaks that brush alternatives might leave.
Patience is key; let the dye dry properly before adding another layer. Remember, Rome wasn’t built in a day, and neither is the perfect leather repair. Drying time is crucial between layers to ensure each coat bonds well, setting the stage for a flawless finish.
Keep layering techniques in mind; thin, even coats trump a single thick one any day.
Spraying Thin Layers
When it comes to repairing cat claw holes in leather, mastering the art of colorant application is akin to wielding a magic wand.
After laying down the first coat with a sponge, it’s time to switch gears and embrace the finesse of spray application techniques.
Imagine you’re an artist, and your leather is the canvas. The key here is to apply the colorant in whisper-thin layers, ensuring each is as light as a feather.
This isn’t a race; patience is your ally. Allow each layer to dry thoroughly, basking in the satisfaction of watching your leather transform before your eyes.
Aim for even coverage, as if you’re airbrushing the sunset’s gradient across the sky. Remember, the drying time between layers is your moment of zen, a pause that not only allows the colorant to set but also gives you a chance to reflect on the masterpiece unfolding.
With each spray, you’re not just repairing; you’re reviving, breathing life back into your beloved leather piece.
Applying Finish
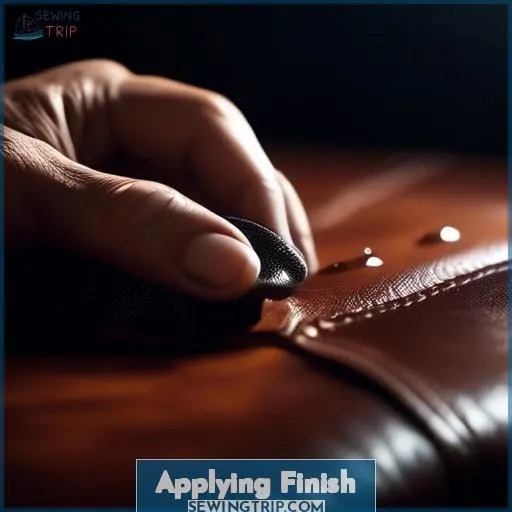
When addressing cat claw holes in leather, the finishing stage is crucial for achieving a professional and lasting repair.
You’ll start by applying Glossy Super Seal in 3-4 layers, ensuring each layer dries thoroughly before adding the next.
Following the Super Seal, you’ll apply Leather Finish in 4-5 layers, again allowing each coat to dry completely. This step not only protects the repair but also restores the leather’s aesthetic appeal.
Glossy Super Seal Layers
After you’ve masterfully applied the colorant, it’s time to seal the deal with a glossy finish that’ll make your leather look as good as new.
Enter the glossy Super Seal, your next best friend in this restoration saga. Think of it as the cape on a superhero’s costume—it’s what gives the final touch of invincibility.
You’ll want to apply this bad boy in 3-4 thin layers, each one a testament to your dedication to perfection. Remember, patience is a virtue here; let each layer dry thoroughly before moving on to the next.
This isn’t just about waiting; it’s about ensuring that each layer bonds perfectly, creating a shield that’s both flexible and tough as nails.
And when it comes to color matching, this step is crucial. The glossy finish not only protects but enhances the color you’ve so carefully chosen, making sure your leather looks vibrant and even.
So, take your time, apply those layers, and watch as your leather goes from battered to brilliant.
Leather Finish Layers
After your glossy super seal has set the stage, it’s time to bring on the leather finish layers.
- Apply the first layer of leather finish with precision, ensuring even coverage.
- Between each coat, respect the drying time; patience is key.
- After 4-5 layers, allow for the final curing time. This isn’t just paint drying; it’s your masterpiece finishing!
Drying and Curing
When addressing the drying and curing process for repairing cat claw holes in leather, it’s crucial to understand the importance of patience and environmental conditions.
After applying each coat of repair material or finish, allowing adequate drying time is essential before proceeding to the next step.
The final curing time, which ensures the repair is fully set and resistant to water or other elements, can vary significantly based on temperature and humidity levels.
For instance, a leather item left to cure in a warm, dry environment may be ready in a day, whereas in a humid climate, it could take several weeks to fully cure.
Time Between Coats
When tackling the drying and curing of your leather repair, patience is your best friend. Each coat of colorant or finish needs time to set, and rushing can lead to a less-than-stellar result.
Think of it like baking a cake; you wouldn’t crank up the oven to speed up the process, right? The same goes for leather repair. Drying time can be a quick affair or a drawn-out event, heavily influenced by the thickness of your application and the ambient temperature.
If you’re in a cooler or more humid environment, you might find yourself twiddling your thumbs a bit longer between coats. And remember, a thin coat is the secret sauce for a quicker cure; it’s like the difference between a quick-to-toast slice of bread versus a dense, doughy bagel.
So, apply sparingly and let each layer dry thoroughly before moving on to the next to avoid any sticky situations.
Final Curing Time
After meticulously applying each coat and patiently waiting for them to dry, you’re on the home stretch with the final curing time.
This isn’t the moment to rush; think of it as the grand finale of a well-orchestrated symphony. The optimal temperature and humidity considerations are your invisible conductors, ensuring that the curing process hits the right notes.
It’s like baking a cake—too hot or too humid, and it flops. So, give your repair the time it deserves to fully cure, and you’ll be set for some touch-up maintenance down the line, keeping your leather looking sharp and your feline friend none the wiser.
Preventing Future Scratches
To protect your leather furniture from future cat scratches, it’s essential to employ effective deterrents and maintain regular leather care.
Offering your cat alternative scratching surfaces, such as scratching posts, can redirect their natural scratching behavior away from your leather items. Additionally, keeping your cat’s claws trimmed will minimize the damage they can cause.
For the leather itself, routine cleaning and conditioning are crucial to preserve its durability and appearance, helping it withstand the occasional scratch.
Cat Deterrents
To keep your leather looking purr-fect and scratch-free, think like a cat! They love a good scratch, so give them an alternative they can’t resist.
Sprinkle some catnip on a scratching post to make it the main attraction. Toys can also distract those paws from your precious leather.
If they still sneak a scratch, double-sided tape or aluminum foil can be your secret weapon—cats aren’t fans of sticky paws or crinkly sounds.
Keep those claws in check, and your leather will thank you!
Regular Leather Maintenance
To keep your leather treasures looking sharp and to fend off the ravages of time, regular maintenance is your knight in shining armor.
- Leather care is like a spa day for your furniture; pamper it with a gentle cleaner and a touch of conditioner to keep it supple.
- Cleaning techniques are your secret weapon; wield them wisely to banish dirt without starting a war on the leather’s natural beauty.
- Material longevity is the prize, so treat your leather like royalty with maintenance frequency that’s more regular than your coffee breaks.
Professional Repair Consideration
When considering how to fix cat claw holes in leather, it’s crucial to weigh the options between DIY efforts and seeking professional help.
If you’re facing complex or extensive damage, professional repair services are worth considering due to their access to specialized tools and expertise.
Evaluating the costs is also essential; while DIY methods might seem more cost-effective initially, professional repairs ensure quality and durability, potentially saving money in the long run.
Ultimately, the decision should factor in the severity of the damage, the value of the item, and your budget to determine the most practical and effective solution.
When to Seek Professional Help
When your feline friend turns your leather couch into their personal scratch post, it’s time to weigh your options. If you’re facing a few minor scratches, you might be tempted to tackle the job with a DIY approach.
But let’s face it, sometimes the damage is more like a cat-astrophe, and that’s when you should consider calling in the pros.
Here’s a quick rundown of when to DIY and when to dial for help:
| DIY vs. Professional | Replacement Options | Cost Comparison |
|---|---|---|
| Minor scratches | DIY repair kits | DIY: $ $$ |
| Deep gouges | Professional filler | Professional: $$$$ |
| Color fading | Color matching | Replacement: $$$$$ |
| Extensive damage | Full replacement | |
| Time constraints | Quick fixes | Time = Money |
If you’re scratching your head over color matching or filler application, remember that professionals have the purr-fect touch for a seamless fix. And while DIY might save you some scratch initially, a botched job can lead to more expenses down the line.
So, if you’re not confident in your leather repair skills, it might be worth every penny to leave it to the experts.
In the battle of DIY vs. professional, consider the longevity of your beloved leather piece. A professional touch might just be the cat’s meow, ensuring your furniture lives to see another of its nine lives.
And when it comes to cost comparison, think of it as investing in your furniture’s future—sometimes, you’ve got to spend money to save money.
Evaluating DIY Vs. Professional Repair Costs
When weighing the options between DIY and professional leather repair, it’s crucial to consider the severity of the scratch and the cost comparison.
DIY methods can be a wallet-friendly choice for minor scratches, offering a sense of mastery as you restore your beloved leather items to their former glory. However, deeper scratches might call for the expertise of a professional, ensuring a seamless repair that’s worth every penny.
The decision hinges on the damage’s extent and your comfort level with the repair process. Opting for a professional could mean a higher upfront cost, but it’s a small price to pay for peace of mind and a repair that stands the test of time.
On the flip side, a successful DIY repair not only saves you money but also equips you with skills for future touch-ups, striking a balance between cost-effectiveness and personal satisfaction.
Frequently Asked Questions (FAQs)
How can I tell if the leather on my furniture is real or synthetic before attempting a repair?
To tell if your furniture’s leather is real or synthetic, give it the old touch and sniff test. Real leather boasts a unique, earthy smell and a texture that’s both grainy and supple.
If it feels too smooth, like plastic, and smells chemically, you’re likely dealing with a synthetic imposter. Genuine leather also shows natural imperfections and varies in grain, unlike its uniform faux counterparts.
So, go ahead, get up close and personal with your furniture—it’s the only way to really know what you’re sitting on.
What are the risks of using home remedies like olive oil or vinegar on different types of leather, and are there safer alternatives?
Nearly 90% of leather is tanned using toxic chemicals, making DIY remedies risky for your leather goods.
Olive oil, while a popular hack, can darken and stain leather, leading to more headaches than relief.
Safer bets? High-quality leather conditioners tailored to your item’s needs.
Can changes in humidity or temperature affect the repair process or the durability of the repair on leather furniture?
Yes, changes in humidity and temperature can significantly affect the repair process and the durability of repairs on leather furniture.
High humidity can cause leather to absorb moisture, making it prone to rot, while low humidity can dry out leather, leading to cracks.
Temperature fluctuations can also damage leather, causing it to expand or contract, which may weaken repairs or cause further damage.
To ensure the best results, maintain a stable environment during and after repairs.
How can I match the colorant to my leather’s exact color, especially if it’s an unusual or custom shade?
To nail that perfect color match for your leather, send a sample to a color matching service. They’ll whip up a custom blend that’s spot-on, making your repair seamless and your leather look like new.
What should I do if the leather repair causes a change in the texture or softness of the leather, making it feel different from the rest of the furniture?
If your leather repair journey leaves the surface feeling like a different chapter from the rest of your furniture saga, don’t fret.
It’s like seasoning a cast iron skillet; with time and a bit of elbow grease, harmony can be restored.
Start by gently massaging a quality leather conditioner into the treated area. This acts as a soothing balm, bridging the gap between the old and the new, ensuring your furniture’s story continues smoothly, without missing a beat.
Regular conditioning will help even out the texture and softness, making your leather piece feel whole again.
Conclusion
Armed with the knowledge and steps outlined in this guide, you’re now equipped to tackle the challenge of repairing cat claw holes in leather.
Like a sculptor turning a block of marble into a masterpiece, you have the power to transform your damaged leather items back to their former elegance. By carefully assessing the damage, preparing the repair area, and meticulously applying each treatment—from leather binder to colorant—you can breathe new life into your beloved leather pieces.
Don’t forget to implement preventive measures to protect your treasures from future feline adventures. Whether you choose to embark on this DIY journey or opt for professional assistance, the key is to act swiftly and with confidence.
Your leather treasures await their revival, and now, you know exactly how to fix cat claw holes in leather.

