This site is supported by our readers. We may earn a commission, at no cost to you, if you purchase through links.

Gently apply the glue to the back of each rhinestone, using a toothpick for precision if needed.
Press the rhinestone onto your fabric, using tweezers for exact placement.
Let the glue dry completely before flaunting your sparkling masterpiece.
Remember, patience is key!
You don’t want to rush this and end up with a disco disaster.
For those keen to learn more on securing rhinestones with style, keep an eye out for tips that’ll boost your bling game to expert level.
Table Of Contents
- Key Takeaways
- Choosing The Right Rhinestones
- Selecting The Best Fabric Glue
- Preparing Your Workspace
- Applying Glue to Rhinestones
- Attaching Rhinestones to Fabric
- Tips for Working With Rhinestones
- Common Mistakes to Avoid
- Alternative Methods for Attaching Rhinestones
- Caring for Rhinestone-Adorned Fabric
- Frequently Asked Questions (FAQs)
- Conclusion
Key Takeaways
- Choose the right adhesive like clear fabric glue, ensuring it dries clear and suits your fabric type for a secure bond.
- Apply a tiny amount of glue to each rhinestone and place it precisely using tweezers to avoid mess and ensure proper adhesion.
- Allow ample drying and curing time for the glue, as rushing can compromise the strength of the bond and the appearance of your design.
- For stretchy fabrics, opt for flexible glues like E6000, while heavy-duty fabrics benefit from stronger options like Gorilla Fabric Glue.
Choosing The Right Rhinestones
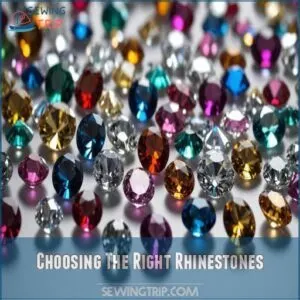
You’ll find a dazzling array of rhinestones to choose from, each with its own sparkle and charm.
Consider the type, shape, size, and color that’ll best suit your fabric project and make your design truly shine.
Types of Rhinestones
When choosing rhinestones, you have options that’ll make your fabric sparkle like a disco ball.
Crystal rhinestones offer excellent quality, while acrylic ones are budget-friendly.
Don’t forget about flatback and prong-set styles – each has its own flair, and it’s also important to match them with the right thread quality for sewing.
Here
Shapes and Sizes of Rhinestones
Now let’s talk about the fun part – shapes and sizes!
Rhinestones come in a dazzling array of options.
You’ve got your classics like round and oval, but don’t overlook stars, hearts, or even custom shapes for a unique touch.
Size-wise, think tiny 2mm sparklers to eye-catching 30mm stunners.
Mix and match to create depth and interest in your designs.
Remember, bigger isn’t always better – sometimes a mix of sizes creates the most striking look.
Colors of Rhinestones
Rainbow rhinestones are your ticket to a dazzling world of fabric embellishments.
You’ll find a spectrum of choices, from classic clear to bold metallics.
Neon hues add a pop of fun, while ombre effects create depth.
Consider color trends to keep your designs fresh.
Mix and match for unique patterns, or stick to a single shade for elegance.
Remember, your rhinestone color can make or break your fabric’s final look.
Selecting The Best Fabric Glue
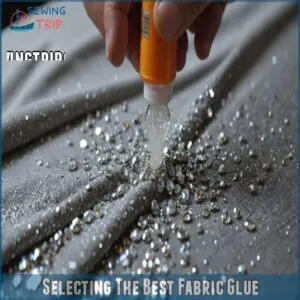
You’ll want to pick the right glue to make sure your rhinestones stick like they’re meant to be there forever.
Let’s look at what makes a great fabric glue for different types of material, from stretchy spandex to tough leather.
Factors to Consider When Choosing a Fabric Glue
You’ve got your rhinestones ready, but hold your horses!
Let’s talk glue.
The right adhesive can make or break your sparkly creation.
Look for fabric glue that dries clear and stands up to washing.
Consider drying time – you don’t want to be twiddling your thumbs all day.
Glue strength matters too; your rhinestones should stick like superglue on a mission.
Remember, different fabrics play nice with different adhesives, so choose wisely!
Stretchy Fabrics
Stretchy fabrics can be tricky customers for rhinestone application.
For these elastic materials, you’ll want a flexible fabric glue that moves with the fabric.
E6000 is your go-to adhesive here.
It dries clear, stays flexible, and can handle a good stretch without losing its grip.
Apply a thin layer, let it get tacky, then press your rhinestones in place.
Give it a full 24 hours to cure before wearing your blinged-out creation.
Heat-Resistant Fabrics
Tackling heat-resistant fabrics? Beacon Gem-Tac is your go-to glue.
It’s a permanent adhesive that actually gets stronger with heat.
Talk about a win-win! This non-toxic wonder dries clear and comes with a precision tip cap for easy application.
Plus, it’s machine washable and dryer safe, so your blinged-out creations can withstand the heat.
Just remember to give it ample drying time before putting it to the test.
Heavy-Duty Fabrics
For heavy-duty fabrics, you’ll want a glue that’s as tough as nails.
Gorilla Fabric Glue is your go-to here.
It’s thicker and sets quickly, perfect for less stretchy materials.
Just remember, a little goes a long way.
Apply it carefully to avoid mess.
This powerhouse adhesive will keep your rhinestones in place through thick and thin, even in the washer and dryer.
Leather and Suede
Leather and suede bring a touch of luxury to your rhinestone projects.
When working with these fabrics, you’ll need a special glue that can handle their unique textures.
Aleene’s Fabric Fusion is your go-to for a strong bond.
Here’s what makes it shine:
- Non-toxic formula
- Customizable tip for precise application
- Perfect for leather and suede
- Dry clean only – not washable
Remember, a little glue goes a long way.
You’ll be rocking those bedazzled leather jackets in no time!
Preparing Your Workspace
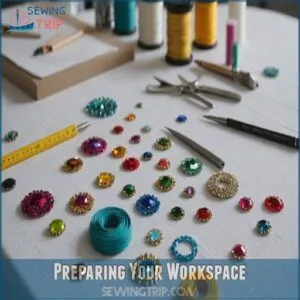
You’re about to transform your fabric into a glittering masterpiece, but first, let’s set the stage for success.
A well-prepared workspace is your secret weapon for achieving dazzling results, so gather your tools and clear a spot that’s as smooth as your finished project will be.
Ensuring a Flat and Stable Work Surface
Now that you’ve got your glue, let’s set the stage for your rhinestone masterpiece.
You’ll want a rock-solid foundation for your fabric embellishment.
Find a flat surface that’s as steady as a surgeon’s hand – consider investing in a dedicated rhinestone work surface rhinestone work tables to make your workflow easier.
A wobbly table
Protecting Your Work Surface From Glue Seepage
With your workspace sorted, let’s talk about keeping it clean.
You don’t want your masterpiece ruined by glue sneaking where it shouldn’t!
To avoid this, make sure to use the right fabric glue for your project by choosing the right glue.
Slip a piece of cardboard under your fabric – it’s your secret weapon against glue seepage.
For extra protection, layer newspaper or plastic
Using The Right Tools for Glue Application
Ever wondered how to get that perfect glue application for your rhinestones?
It’s all about precision tools.
Grab a syringe tip or fine-tipped glue bottle for spot-on control.
When choosing a fabric glue, consider factors like adhesive strength and drying times for fabrics, to ensure a secure and long-lasting bond. These nifty applicators let you place fabric glue for rhinestones exactly where you need it.
No more messy overflows or sad, droopy gems!
With the right rhinestone tools, you’ll be a pro at rhinestone application in no time.
It’s like having a magic wand for your crafting projects!
Applying Glue to Rhinestones
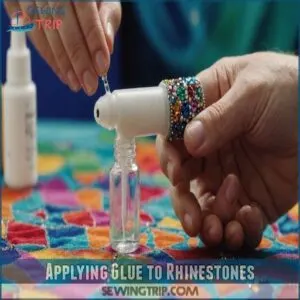
You’re about to become a rhinestone gluing pro! With the right tools and techniques, you’ll transform your fabric into a dazzling masterpiece that’ll make even disco balls jealous.
Using a Syringe for Precise Glue Application
Precision is key when gluing rhinestones.
Grab a small syringe with a fine needle tip for pinpoint control.
This can be paired with high-quality fabric glue from a fabric glue syringe.
Choose a syringe size that matches your glue’s viscosity – thinner glues need smaller syringes.
Clean your syringe thoroughly between uses to prevent clogging.
Applying Glue to The Rhinestone
For securing rhinestones to fabric, consider using a suitable rhinestone adhesive like Gem Tac, which bonds tightly in 60 seconds and remains flexible. Having mastered the syringe, apply a tiny amount of rhinestone adhesive directly to each rhinestone.
Don’t overdo it! Think less is more. Here’s why:
- Too much glue makes a mess.
- It increases drying time.
- It can even seep through the fabric.
Control the glue’s consistency for a perfect, dazzling result.
Enjoy the process!
Using Tweezers to Position The Rhinestone
Now that you’ve got the glue on the rhinestone, grab your tweezers!
With a proper grip and precision control, position that sparkling gem like a pro.
Tweezers come in various types, so choose one that suits your fine motor skills.
This helps in accurate rhinestone placement on the fabric.
It’s like picking stars for a perfect night sky!
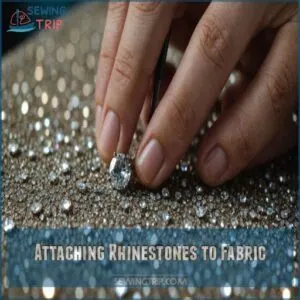
Attaching Rhinestones to Fabric
Ready to make your fabric sparkle? Let’s get those rhinestones securely attached by mastering the placement and ensuring the glue has enough time to dry and cure, similar to how you’d use a fabric adhesive guide to attach a patch, for dazzling results.
Placing The Rhinestone on The Fabric
Ever so gently, place the rhinestone onto the fabric with precision and stability in mind.
Imagine you’re centering a cherry atop a sundae; it needs that perfect pressure for flawless placement.
Using the best fabric glue for rhinestones, like a rhinestone glue, guarantees a secure attachment, allowing you to press it down confidently without worrying about slipping or misplacement.
Ensuring Proper Adhesion
Creating a dazzling masterpiece begins with some elbow grease.
Make sure the glue sticks well by preparing the surface thoroughly and keeping an eye on your glue consistency.
Aim for the right adhesive strength by choosing a strong fabric glue specifically for rhinestones.
Don’t rush; the bond’s in the details.
Store your materials in the best possible conditions for best results.
Allowing The Glue to Dry and Cure
You’ve dazzled your fabric with rhinestones, but now comes the tricky part: patience!
Allow the fabric glue to dry under ideal room temperature conditions for the specified drying time.
This isn’t the moment to rush; give it ample curing time.
A watched pot never boils, so let the rhinestones set and cure without peeking!
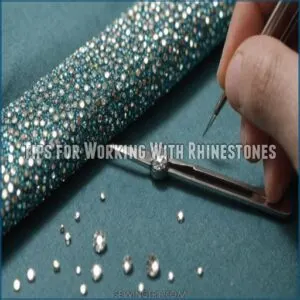
Tips for Working With Rhinestones
When you’re working with rhinestones, keeping the glue under control can make all the difference between a masterpiece and a mess.
Let’s face it, nobody wants rhinestones that look like they’re drowning in glue or covered in air bubbles, so grab your tools, and let’s keep those gems shining bright and secure!
Preventing Glue From Spreading Too Much
Now that your rhinestone’s perfectly placed, let’s keep that glue where it belongs!
Use a smaller glue tip or a toothpick for precise application.
Apply the best fabric glue for rhinestones sparingly; a little goes a long way.
Controlled pressure helps prevent messy spills.
Quick clean-up with a damp cloth is your secret weapon.
Remember, less is more for a dazzling result!
Using dry clear glue helps create a professional finish.
Avoiding Air Bubbles Under The Rhinestone
Fighting those pesky air bubbles is important when you’re aiming for a flawless sparkle.
Apply fabric glue evenly on a clean surface using a flat tool, ensuring no gaps.
A gentle pressure and slow application work like magic in avoiding bubbles during rhinestone attachment.
Choose the best fabric glue for rhinestones to keep them snugly in place, bubble-free!
Using a Sealant to Protect The Rhinestone
When adding rhinestones to fabric, using a sealant can be a real game-changer.
It enhances durability and keeps those sparkling gems intact.
Just like protecting acrylic art, a sealant can be important in extending the life of your rhinestone decorations.
Consider these tips:
- Sealant Types: Choose one suited to your project.
- Application Methods: Gently brush or
Common Mistakes to Avoid
When you’re adding a bit of sparkle to your fabric with rhinestones, steering clear of common blunders can set your project up for success.
Avoid mishaps like picking the wrong glue or applying too much, which could leave your masterpiece more sticky than stunning.
Using The Wrong Type of Glue
Choosing the wrong fabric glue can turn your rhinestone dream into a gluey nightmare.
A mismatched adhesive leads to glue failure, rhinestone detachment, or even fabric damage.
You can find reliable rhinestone glue options online at Rhinestone Glue Suppliers.
For sparkly success, skip cheap fixes and opt for reliable options like E6000 or Gem
Applying Too Much Glue
After making sure you have the right glue, let’s tackle excess glue.
Too much fabric glue might cause unsightly blobs and lengthen glue drying time.
It can sneak through fabric, becoming a magnet for lint and debris.
Use less; remember, a little dab’ll do ya!
Keep cleaning tools nearby to swiftly handle any drips and ensure your rhinestones stay sparkling.
Not Allowing The Glue to Dry and Cure Properly
Rushing to wear your rhinestone masterpiece? Hold your horses! Glue drying time is key.
To remove fabric glue safely, it’s essential to know the type of fabric glue you’re working with, such as permanent fabric glue types, which requires different removal methods. To remove fabric glue, we should avoid using heat methods on sensitive fabrics, and instead, use the appropriate method to remove the fabric glue.
When choosing a fabric glue, consider the compatibility and durability of options like Aleene’s leather glue products. Let that fabric glue work its magic and cure properly. Whether you’re using GemTac or a waterproof fabric glue, patience is your best friend.
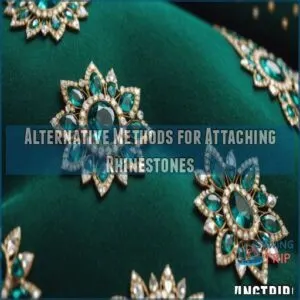
Alternative Methods for Attaching Rhinestones
Ready to explore some fun alternatives?
Let’s discover other ways to add those sparkly rhinestones to your fabric projects, including sewing, heat-fixing, and using pre-made hot-fix gems—because sometimes glue just isn’t enough!
Sewing Rhinestones
Sewing rhinestones onto fabric can be a creative adventure.
First, select sew-on rhinestones that complement your fabric type.
Here’s the quick rundown:
- Thread Selection: Use strong, matching thread for durability.
- Sewing Tools: Equip yourself with a needle that fits the holes.
- Sewing Techniques: Secure rhinestones by stitching through each hole.
It’s sew much fun!
Heat-Fixing Rhinestones
Imagine this: You’ve nailed sewing rhinestones onto fabric, but you’re yearning for speed and flair.
Heat-fixing rhinestones might just be your hero.
Use a heat gun for precision while keeping an eye on heat gun temperature to match your fabric.
Safety precautions are key—use a stable surface and avoid scorching.
Voilà, dazzling rhinestone placement achieved!
Using Hot-Fix Rhinestones
Tired of waiting for glue to dry? Try using hot-fix rhinestones for a speedy solution.
Harness the power of hot-fix tools to effortlessly attach rhinestones.
Here’s how:
- Prepare: Choose your rhinestone placement wisely.
- Heat-Set: Watch heat-fix safety while using your tool.
- Create: Let your DIY projects shine with unique design ideas.
Say goodbye to fabric glue hassles!
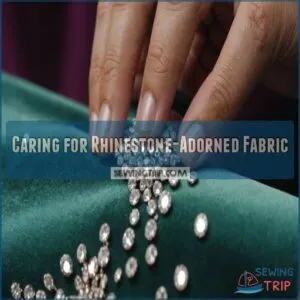
Caring for Rhinestone-Adorned Fabric
Taking care of your rhinestone-adorned fabric is essential to keep that sparkle as dazzling as ever.
With just a bit of care when washing, drying, and storing, you can keep your creations looking stunning.
You won’t have to feel like you’re prepping a precious artifact for a museum display.
Washing and Drying Instructions
With rhinestones gleaming on your latest project, understanding washing and drying is key.
Always choose the delicates cycle and a gentle, low drying temperature.
Hand-washing is a safer bet for rhinestones and fabric glue.
A well-cared-for piece lasts longer.
Here’s a quick guide:
| Washing Machine Types | Delicates Cycle |
|---|---|
| Hand-Washing | Safer for rhinestones |
| Standard Wash | Not recommended |
| Drying Temperature | Low |
| Ironing Precautions | Not applicable |
| Rhinestone Attachment | Secure before wash |
Ironing and Steaming Precautions
How do you keep your rhinestone fabrics dazzling? Simple: don’t ruin them with too much heat.
When painting on fabric, it’s crucial to wait at least 24 hours before heat setting. Adjust heat settings based on fabric types.
Use a cloth barrier when ironing to avoid rhinestone damage.
Steaming? Forget it, steam damage can be unforgiving.
Heat-fixing rhinestones stay put with a hotfix applicator but remember, safe practices keep your sparkles shining bright.
Storing Rhinestone-Adorned Fabric
Store your sparkly creations carefully.
For delicate items, use garment bags.
Flat storage’s great for preventing damage.
Hanging storage works well for less delicate pieces.
Remember, proper storage keeps your rhinestone crafts looking their best.
Following these storage tips will keep your creations dazzling for years to come.
Isn’t that awesome?
Frequently Asked Questions (FAQs)
Can rhinestones be glued on fabric?
Did you know rhinestones can elevate any outfit to dazzling heights?
To glue them onto fabric, you need the right adhesive.
Choose one that dries clear and suits your fabric type, ensuring a secure sparkle that lasts.
How do you decorate fabric with rhinestones?
Embellishing fabric with rhinestones transforms ordinary items into dazzling masterpieces.
Rhinestones can be attached using glue or a sew-on option.
Position rhinestones precisely and secure them.
Always let creativity sparkle while ensuring adhesion is strong for lasting shimmer.
How do rhinestones attach to fabric?
Rhinestones attach to fabric in three main ways: sewing, gluing, and heat-fixing.
Amazingly, hot-fix rhinestones bond with fabric at around 300°F, creating a lasting sparkle.
Choose the method that fits your project best for dazzling results!
How do you glue rhinestones?
Gluing rhinestones is a cinch!
Grab a clear-drying fabric glue and a fine applicator.
Apply a tiny drop to each rhinestone, then press it onto your fabric.
Give it time to dry, and voilà—sparkle achieved!
How do you attach rhinestones?
You’ve got options!
Sew them on, use fabric glue (choose one that’s right for your fabric!), or go for heat-fix rhinestones.
It’s all about finding the method that feels best and gives you the control you crave!
What kind of glue do you use to remove rhinestones?
Did you know 80% of people use acetone to remove rhinestones?
Applying a bit of acetone nail polish remover helps break down the glue’s bond.
Just dab it around the rhinestone, and soon enough, it’ll pop off!
Is it better to sew or glue rhinestones?
Choosing between sewing or gluing rhinestones depends on your project’s demands.
Sewing offers durability and is perfect for fabric that stretches or moves a lot.
Gluing provides ease and speed for intricate designs or temporary projects.
What is the best way to glue rhinestones on fabric?
Imagine a galaxy of sparkle on your fabric!
For the best results, use a glue like E
Apply with a syringe for precision, and place cardboard underneath to catch drips.
Keep everything steady, and voilà!
How to get gems to stay on fabric?
To keep gems securely on fabric, choose a glue that dries clear and suits your fabric type.
Apply carefully with a syringe, ensuring even coverage.
Protect the workspace with cardboard, and let your creativity and style shine!
How do you permanently put rhinestones on clothes?
Who knew glamorous clothes could resist rhinestones so well?
Use E6000 glue for stretchy fabrics, or try Beacon Gem-Tac for heat-resistant options.
They’ll stick like a clingy friend, ensuring your outfit shines brilliantly, wash after wash!
What storage solutions work best for rhinestones?
You’ll want to keep rhinestones organized using small, clear containers with adjustable dividers or pill organizers.
Label each compartment by size or color.
These nifty setups let you see everything at a glance, saving precious crafting time!
How to clean glued rhinestones properly?
Gently wipe glued rhinestones with a damp cloth. Avoid harsh scrubbing; that could damage them! For stubborn grime, try a soft-bristled brush. Let ’em air dry completely. You’re all set!
Are rhinestones safe for childrens clothing?
Think of rhinestones as tiny stars adding sparkle to kids’ clothing; they’re generally safe if securely attached.
Make sure they won’t easily detach, reducing choking risks.
Always supervise young children wearing rhinestone-adorned clothes to guarantee safety.
What tools help with rhinestone application precision?
Precision is key when applying rhinestones to fabric.
Use tweezers for exact placement.
Use a syringe or precision applicator for glue control.
Use a flat surface to prevent mishaps.
These tools help your sparkling designs shine just right!
Can rhinestones damage washing machines?
Yes, rhinestones can potentially harm your washing machine.
If they detach during washing, they might damage the drum or filter.
To prevent this, wash rhinestone-adorned items in garment bags or hand wash them instead.
Conclusion
Crafting dazzling designs with rhinestones is an art worth mastering.
Whether you’re bedazzling a costume or adding a touch of glam to everyday wear, knowing how to glue rhinestones onto fabric effectively guarantees long-lasting sparkle.
By choosing the right stones, glue, and tools, you’re well on your way to spectacular results.
Remember to avoid common blunders and practice patience for the best finish.
With dedication and these expert tips, your creations will surely shine bright!
- https://en.wikipedia.org/wiki/Adhesive
- https://www.firemountaingems.com/resources/encyclobeadia/charts/glues
- https://www.crystalandglassbeads.com/blog/2012/the-ultimate-adhesive-guide-for-swarovski-flat-backs-and-fabric.html
- https://www.instructables.com/Fabric-Glue/
- https://www.aleenes.com/aleenes-leather-and-suede-glue

