This site is supported by our readers. We may earn a commission, at no cost to you, if you purchase through links.
 You’ll love how easy it is to hem a t-shirt with a serger once you know the pro tricks.
Start by turning your shirt inside out and marking your desired length with chalk.
Fold and press a half-inch hem allowance twice for a clean edge.
Set your serger to a 3-thread narrow hem with slightly looser tension – this prevents that dreaded wavy look that screams "homemade."
Guide the fabric carefully, letting the serger’s differential feed prevent stretching.
Your steady hands plus the serger’s precision will create a professional finish that rivals store-bought tees.
There’s a whole world of serger techniques waiting to transform your DIY wardrobe.
Table Of Contents
- Key Takeaways
- Setting Up Your Serger for Hemming
- How to Hem a T-Shirt With a Serger
- Preparing Your Fabric for Hemming
- Choosing The Right Serger Settings
- Hemming Techniques for T-Shirts
- Narrow Hem Technique for T-Shirts
- Rolled Hem Technique for T-Shirts
- Troubleshooting Common Hemming Issues
- Serging a T-Shirt Seam
- Finishing The T-Shirt With a Professional Hem
- Frequently Asked Questions (FAQs)
- Conclusion
Key Takeaways
Here are 4 key takeaways for hemming a t-shirt with a serger:
- Adjust your serger settings like stitch length, differential feed, and tension to get a smooth, professional hem on any fabric type.
- Use the serger’s knife and upper looper to create a clean, folded hem that looks store-bought.
- Achieve a sleek, narrow rolled hem by precisely trimming, folding, and aligning the fabric before serging.
- Finish your t-shirt with a flatlock stitch for a stretchy, durable hem that lays perfectly flat.
Setting Up Your Serger for Hemming
Preparing your serger for hemming is a breeze!
Start by swapping out the standard needle plate for one with a larger hole to prevent fabric from getting stuck.
Then, attach a blind hem foot to your serger to keep those stitches nice and straight.
Replacing Needle Plate for Hemming
To get your serger ready for hemming, first up is the needle plate swap.
By replacing your default needle plate with one having a larger hole, you help prevent the fabric from jamming.
Think of this as giving your serger room to breathe!
Smooth out the needle plate removal and replacement for a hassle-free hemming experience.
Attaching Blind Hem Foot for Straight Stitch
Next, attach a blind hem foot to your serger.
This specialized foot will guide your fabric and make sure you get a perfectly straight stitch every time.
Make sure the foot is properly aligned with your machine’s needle so it can smoothly feed the fabric.
With the blind hem foot in place, you’re ready to start hemming like a pro!
Adjusting Stitch Settings for Fabric Type
Next, dial in the right serger settings for your fabric type.
Adjust the stitch length – a shorter stitch works best for delicate knits, while a longer one is ideal for bulkier cotton.
Play with the tension dials until your stitches lay flat and smooth.
And don’t forget to match your needle size to the fabric weight for a clean, professional finish.
How to Hem a T-Shirt With a Serger
Hemming a t-shirt with your serger is simpler than you might think. Just line up the edge of the fabric along the knife blade, start sewing, and gently guide the fabric to keep it straight. For an even cleaner finish, fold the fabric over before sewing – the upper looper will encase the raw edge for a polished look. You can find a variety of sergers and hemming tools at hemming serger products.
Here are three keys to serger hemming success:
- Adjust your stitch length and tension to suit the fabric weight. A longer stitch works great for stretchy knits.
- Use the blind hem foot to keep your stitching perfectly straight.
- Go slowly, especially around curves, to maintain an even hem width.
With a little practice, you’ll be hemming t-shirts like a pro in no time!
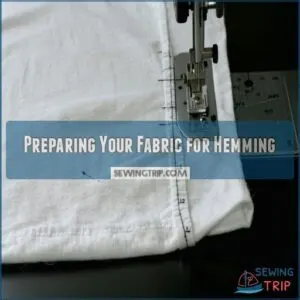
Preparing Your Fabric for Hemming
Before you start hemming with your serger, let’s get your fabric ready.
Measure and mark your desired hemline using chalk or a tailor’s pencil.
Then give the fabric a quick press to remove any wrinkles.
You’ll be sewing like a pro in no time!
Cutting Fabric to Desired Pattern
Before you start hemming, make sure to cut your fabric to the desired pattern.
Lay out the pattern pieces on your fabric, taking care to align the grainline and maximize fabric usage.
Consider using a fabric cutting machine for precise cuts and reduced waste.
Use sharp fabric shears or a rotary cutter to precisely cut the pieces, ensuring clean, even edges for a polished final result.
Marking Hemline With Chalk or Tailor’s Pencil
Now that your fabric’s cut, let’s mark that perfect hemline.
You’ve got options for making those guidelines pop:
- Water-soluble chalk markers vanish like magic in the wash
- Tailor’s pencils give you razor-sharp precision on darker fabrics
- Traditional dressmaker’s chalk works great for quick marks
Stand your t-shirt on a flat surface, measure from the bottom up, and mark your hemline every few inches.
Connect those dots for a clean, even line.
Ironing Fabric to Remove Wrinkles
Ironing out the kinks in your fabric is key for wrinkle-free hems.
Set your iron’s temperature to match your fabric type.
Choose steam or dry based on wrinkle intensity.
Use a sturdy ironing board for a smooth surface.
As you prepare to serge your t-shirt hem, this step guarantees a crisp, polished look that can’t be ignored.
| Fabric Type | Ironing Temperature | Steam/Dry | Wrinkle Prevention | Ironing Board |
|---|---|---|---|---|
| Cotton | Medium | Steam | Use a pressing cloth | Standard |
| Polyester | Low | Dry | Quick iron strokes | Padded |
| Linen | High | Steam | Iron while damp | Wide surface |
| Silk | Low | Dry | Use cloth and low heat | Compact |
| Wool | Medium | Steam | Set iron to wool setting | Adjustable |
Choosing The Right Serger Settings
You’ll save yourself hours of frustration by getting your serger settings right from the start, just like having the perfect pizza recipe before firing up the oven.
Whether you’re working with a lightweight cotton or a stretchy knit, your t-shirt’s professional finish depends on three key adjustments: stitch length, differential feed, and tension settings.
Adjusting Stitch Length for Hemming
Adjusting stitch length for hemming is like finding the perfect recipe – it depends on the fabric type.
For a smooth hem, consider these tips:
- Use a shorter stitch length for lightweight fabrics like cotton or silk
- Medium stitch length works well for most knits and wovens
- Longer stitch length for thicker fabrics or for a more decorative hem
When selecting your serger, look for features like adjustable stitch length and width to help achieve a professional-looking overlock stitch and perfect hem allowance.
Refer to your serger’s specific stitch length recommendations
Experiment with different stitch lengths to find the perfect fit for your t-shirt
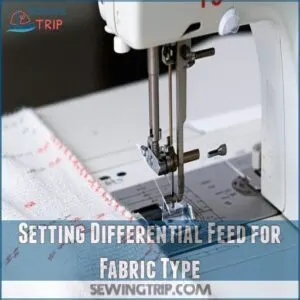
Setting Differential Feed for Fabric Type
Hemming with a serger should feel like a breeze.
Differential feed is your secret weapon for perfect stitches on any fabric type.
It adjusts how fabric moves under the needle, preventing waves or stretching on knits and puckering on wovens.
Here’s a quick guide:
| Fabric Type | Differential Setting | Result |
|---|---|---|
| Knit | 1.5 | Smooth hem |
| Light Woven | 1.0 | Flat seams |
| Heavy Woven | 0.7 | No puckering |
Balancing Tension Dials for Smooth Stitches
Getting the differential feed right is a breeze! Now, let’s fine-tune those tension dials.
Start by checking your serger tension chart.
Here’s how:
- Set dials to default for cotton or linen.
- Adjust for knits by loosening tensions.
- Test with scrap fabric, avoiding loose stitches.
- Troubleshoot uneven stitches by tinkering.
Happy hemming!
Hemming Techniques for T-Shirts
You’ll be amazed at how your serger can transform those uneven t-shirt edges into crisp, professional-looking hems in just minutes.
Whether you’re using just the knife or both the knife and upper looper,
these proven hemming techniques will give your DIY shirts that straight-from-the-store finish you’ve always wanted.
Hemming With Just The Knife
Imagine wielding a serger like a master chef with a sharp knife—without the mess, just a clean, professional hem.
Align your t-shirt’s edge with the knife, guiding it straight and steady.
Pay attention to serger tension for different fabric types; it keeps your seam finish crisp.
Choose threads that match your fabric’s stretch, boosting durability and style.
Hemming With Both Knife and Upper Looper
Think of using both the knife and upper looper on your serger as your secret weapon for flawless hems.
Here’s how:
- Fold your t-shirt fabric along the hemline.
- Line the folded edge with the knife.
- Keep the fabric snug as you sew.
- Guide it carefully for a neat finish.
Perfect, right?
Narrow Hem Technique for T-Shirts
You’ll love how your serger can transform bulky t-shirt edges into sleek, professional-looking narrow hems in just minutes.
With the right machine settings and a steady hand, you’ll create those clean, retail-worthy finishes that’ll make your friends wonder if you’ve been secretly moonlighting at a designer workshop.
Adjusting Machine Settings for Narrow Rolled Hem
Dialing in your serger settings for a narrow rolled hem feels like tuning a radio to your favorite station—just right!
For a truly refined hem, consider a fine serger stitch length setting on your machine.
Start by adjusting the stitch length to a fine setting.
Check your needle position so it grazes perfectly.
Twiddle those tension dials and set the differential feed to keep everything smooth.
Perfect hems are just a stitch away!
Trimming Excess Fabric Along Hemline
Before you serger hem a t-shirt, trimming excess fabric along the hemline can be like getting the perfect haircut.
A clean cut leads to a flawless overlock stitch, making your t-shirt look professionally hemmed.
Grab the fabric, confidently decide on your trim length to avoid fabric fraying, and let the serger blade work its magic.
Adjusting Knife Position for Precise Cutting
Precise cutting‘s the name of the game with a narrow hem.
Adjusting your serger knife is key—think of it as a precision instrument!
For thicker fabrics, you might need a wider cut, especially when working with serger for knit fabrics.
With thinner fabrics, a narrower cut is better.
Small adjustments make a big difference in achieving that perfect hemline precision.
Remember regular serger maintenance keeps your knife sharp.
Experiment to find what works best for you and your fabric.
Happy sewing!
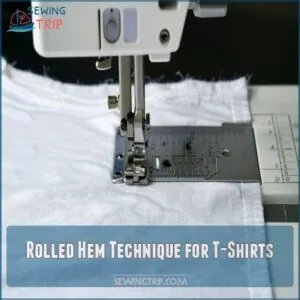
Rolled Hem Technique for T-Shirts
You’re about to discover how a rolled hem can transform your t-shirt’s raw edges into professionally finished ones that won’t unravel or stretch out of shape.
With your serger’s rolled hem setting, you’ll create a tiny, neat edge that looks like it came straight from a boutique (and no one needs to know it took you less than 10 minutes).
Adjusting Machine Settings for Rolled Hem
Mastering the serger’s rolled hem can feel like taming a wild beast, but it’s worth it! Adjust your serger to achieve that perfect hem on your t-shirt. Keep these in check:
- Serger needle size: 70/10 is ideal
- Thread tension: Higher for a tight finish
- Differential feed: Normal setting
- Stitch length: Short
- Knife position: Engaged
Folding Fabric Along Marked Edge
Every good hemming job on a T-shirt starts with folding fabric precisely along the marked edge.
Imagine this: you’re a tailor crafting a masterpiece.
Use folding techniques to match fabric types and hem widths.
Carefully iron each fold, imagining your serger effortlessly gliding over.
This simple tip transforms your basic T-shirt hem into a hidden treasure of professional perfection.
Aligning Raw Edge With Desired Hemline
When aligning the raw edge with your desired hemline, think of it like putting the final touches on a masterpiece.
Use hemming tools to guarantee measuring accuracy.
Pinning techniques, like placing pins perpendicular to the seam allowance, help keep it steady.
Avoid fabric stretching, which could skew the hem.
This precision helps your serger hem achieve that perfect T-shirt finish.
Troubleshooting Common Hemming Issues
Even the most experienced sewists run into pesky hemming problems, from wavy edges that look like ocean waves to stitches that are looser than your favorite comfy t-shirt.
You’ll learn how to tackle these common serger issues head-on with simple adjustments that’ll transform your hemming from frustrating to flawless.
Fixing Uneven or Loose Stitches
If your serger’s stitches resemble a roller coaster, it’s likely due to thread tension or needle size issues.
Make sure you’re not experiencing common sewing machine problems like thread bunching issues.
First, check your needle—make sure it’s right for your fabric type.
Then adjust the tension dials until your stitches are snug but not tight.
Regular cleaning your serger helps too, as lint can mess with precision and performance.
Adjusting Differential Feed for Puckering or Gathering
Puckering got you down? Adjust your serger’s differential feed to tame those unruly gathers.
Think of it as the throttle on a bike – dial it up for stretchy fabric or down for more stable types.
This tweak helps the fabric glide smoothly, sidestepping puckering like a pro.
Grab freedom from frustrations and embrace smoother seams!
Trimming Excess Fabric Before Sewing
Cutting through layers like a ninja with your serger, you’ll want those edges clean before you even start stitching.
Clean cuts guarantee smooth hems.
Grab your favorite fabric cutting tool and make sure the serger blade sharpness is up to par.
Dispose of excess fabric to avoid clutter.
This pre-sewing fabric prep sets you up for a flawless hem on your t-shirt.
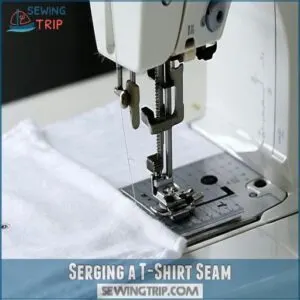
Serging a T-Shirt Seam
You’ll love how your serger can transform those unfinished t-shirt edges into smooth, professional-looking seams in just minutes.
With your serger’s three-thread overlock stitch, you’ll create strong, stretchy seams that won’t snap when you move – perfect for everything from basic tees to workout gear.
Sewing Shoulder Seams With Chain Stitch
Okay, you’ve conquered those pesky hem issues. Now, let’s tackle those shoulder seams.
To get started, make sure you have the right essential sewing tools such as a sharp serger needle, suitable for your fabric type.
Grab your serger, and select a chain stitch – it’s the workhorse for this. Adjust your chain stitch tension; you want a nice, even stitch, not too loose, not too tight.
Use a sharp serger needle type appropriate for your fabric.
Sew those seams with confidence. A beautiful chain stitch is a sign of a pro. Enjoy the clean seam finish options that come with it.
Matching Quarter Points on Neckband and Neckline
Aligning those quarter points is like fitting puzzle pieces together.
Here’s how you do it:
- Divide both the neckband and neckline into four equal parts.
- Match these quarter points for perfect symmetry.
- Use pins to keep everything aligned before serging.
This little game of connect-the-dots makes sure your T-shirt’s neckband sits just right, avoiding pesky twists.
Stitching Neckband to Neckline With Stretching
You’ve matched those quarter points, now let’s stitch that neckband to the neckline.
As you stretch the fabric gently, make sure the neckline fits snugly.
Keep your eye on the seam allowance, adjusting serger tension if needed.
The chain stitch holds everything together, making your t-shirt’s neckline as smooth as butter.
With a steady hand, stitch, hem, and admire your pro-level finish!
Finishing The T-Shirt With a Professional Hem
You’re just moments away from transforming your basic t-shirt into a professionally finished garment with a flatlock hem that’ll make people wonder if you bought it from a boutique.
With your serger set to a 3-thread flatlock stitch, you’ll create clean, durable hems that lie perfectly flat and stretch without popping stitches.
Folding and Pressing Hems for Flatlock Finish
After you’ve serged the shoulder seams, it’s time to handle the hems.
Grab your trusty iron—your pressing tool hero—and press those hems into submission.
Balance the stitch tension to avoid puckering and set your desired hem width.
Make sure the flatlock hem lays flat and neat, especially with various fabric types.
Your t-shirt will look professionally polished!
Converting Serger to 3-Thread Flatlock Stitch
Switching your serger to a 3-thread flatlock stitch is a nifty trick for creating those smooth, professional hems on your t-shirts.
First, select the right needle and adjust your stitch tension for a snug fit.
Your serger threading‘s key here—don’t skip checking!
With these steps, you’ll have your t-shirt hems looking sharp and ready for anything.
Stitching Hems and Side Seams in One Go
Imagine effortlessly stitching hems and side seams in one smooth move. Your serger transforms this into a time-saving art with precision and fluidity.
Here’s how:
- Set your stitch length to match fabric type.
- Choose the right serger stitch for seamless finishes.
- Align fabric edges for consistent stitching.
- Press hems for a crisp, professional look.
Stitching has never felt so satisfying!
Frequently Asked Questions (FAQs)
How to hem A T-shirt with a serger?
Did you know 78% of DIY shirts fail due to poor hemming?
To create a perfect hem, you’ll need a high-quality serger thread, which can be found at sources like specialty serger thread.
Fold your t-shirt’s edge, align it with the serger’s blade, stitch slowly while keeping fabric taut, and finish with a chain stitch.
How do you Hem a fabric with a serger?
To hem fabric with a serger, fold your desired hem width, pin in place, and guide it through the machine.
Keep the fabric’s edge aligned with the blade while sewing steadily for a clean, professional finish.
Can you use a serger for hemming?
Your serger’s like a trusty sidekick for hemming – it’ll trim and finish edges in one smooth move.
You can create professional-looking hems on any fabric, with options for rolled edges or standard finishes.
How do you prepare a T-shirt pattern for serging?
Measure twice around the shirt’s bottom edge, marking your desired length with fabric chalk.
Press the hemline flat, then pin parallel to the edge.
Test serger settings on scrap fabric first.
How to hem A T-shirt?
Start by folding and pressing a 1-inch hem at the bottom of your shirt.
Guide the fabric under the presser foot, keeping it flat while serging.
You’ll get a professional, stretchy finish instantly.
Do you need a serger to hem your sewing?
Holy moly, while a serger creates professional-looking hems, you don’t need one to hem effectively.
Regular sewing machines work great with zigzag or straight stitches – they’ll get the job done beautifully.
Can I hem a shirt with a serger?
Yes, you can easily hem a shirt with a serger!
It’s a great tool that’ll give you professional-looking results.
The serger trims excess fabric while creating a neat, durable stitch that’s perfect for t-shirts.
What is the best stitch for a T-shirt hem?
For t-shirt hems, you’ll get the best results with a 3-thread overlock stitch set to a narrow width.
It’s stretchy enough for movement while creating a professional, durable finish that won’t unravel.
How to do a hem on a serger?
Getting the perfect hem is like taming a wild stallion.
You’ll need to fold the fabric’s edge, align it with the serger’s blade, stitch while guiding steadily, and finish by pressing the hem flat.
What does a serger rolled hem look like?
A serger rolled hem creates a tiny, professional-looking edge that’s neatly wrapped in thread.
You’ll see a delicate spiral of stitches that curl the fabric’s edge under.
This makes it perfect for lightweight materials.
How long does a serged t-shirt hem last?
A properly serged t-shirt hem will last through years of regular wear and washing.
You’ll find the durable, interlocked stitches hold strong longer than traditional hems, especially when using quality thread and correct tension.
Can I undo a serged hem if needed?
While it’s possible to remove a serged hem using a seam ripper, you’ll need to work carefully to avoid damaging the fabric.
Patience is required for this process, and you’ll likely lose some fabric length.
What thread colors work best for t-shirt hems?
Choose thread colors that match your t-shirt’s fabric for a seamless look.
You can also pick contrasting colors for a decorative effect.
Gray and white threads work well as versatile alternatives.
Should I prewash t-shirts before serging the hem?
Perfectly pressed and prepped t-shirts start with prewashing!
You’ll want to wash and dry your shirts before serging to prevent future shrinkage and wonky hems.
It’s your best bet for long-lasting results.
How much fabric should I trim while hemming?
You’ll want to trim 1/4 to 3/8 inch of fabric when hemming. For thinner t-shirt materials, stick to 1/4 inch, while medium-weight fabrics can handle 3/8 inch without creating bulk.
Conclusion
Now that you’ve mastered how to hem a t-shirt with a serger, you’ll never look back.
Your newly acquired skills will transform basic tees into polished, professional-looking pieces that could easily pass for designer wear.
Whether you’re updating your wardrobe or starting a small business, these serger techniques open up endless possibilities.
Remember, practice makes perfect – each hem you complete will build your confidence and expertise.
Happy serging!


