This site is supported by our readers. We may earn a commission, at no cost to you, if you purchase through links.
Mark where each piece will sit, then sew the hook on with tight, even stitches. Directly opposite, stitch the eye so your closure lines up perfectly. Keep your stitches sturdy so nothing comes unraveled mid-wear.
Mastering how to install hook and eye sewing is a cinch—and once you’ve got the basics, pro tips for even stronger finishes are just around the corner.
Table Of Contents
- Key Takeaways
- Supplies for Installing Hook and Eye Sewing
- Step-by-Step Instructions for Installing Hook and Eye Sewing
- Techniques for Creating Thread Loops for Hook and Eye Sewing
- Alternative Fastenings for Hook and Eye Sewing
- Tips and Tricks for Installing Hook and Eye Sewing
- How to Install Hook and Eye Sewing With a Sewing Machine
- Frequently Asked Questions (FAQs)
- Conclusion
Key Takeaways
- Securely installing a hook and eye starts with careful marking, sturdy stitches, and matching the size and strength to your fabric. – Consistent thread tension, precise placement, and reinforced knots keep your closure durable and aligned. – Thread loops, snaps, buttons, Velcro, and zippers all offer alternative fastening options, with each suiting different garment needs and fabric types. – Using a sewing machine speeds up the process, but hand-sewing often gives better control, especially for delicate placement or leather.
Supplies for Installing Hook and Eye Sewing
Before you get started with installing a hook and eye, let’s run through what you’ll need by your side.
Select a hook and eye set matched to your fabric—consider hook materials and eye variations for strength and size.
Gather essential tools for sewing: a sharp needle (sizes 1–12), strong thread, scissors, and marking tools like tailor’s chalk or a removable pen.
Step-by-Step Instructions for Installing Hook and Eye Sewing
Putting in a hook and eye is simple, but taking your time with each step makes sure everything looks tidy and stays put.
Follow these steps, and you’ll have this classic closure neatly in place on any piece you’re working on.
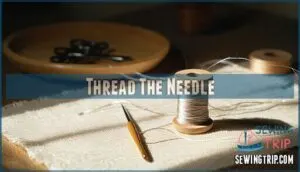
Thread The Needle
There’s something comforting about smoothing out your thread and needle—think of it as the quiet first step in any successful sewing project.
Choose a hand sewing needle size that suits your fabric, and pick a strong, waxed thread type for extra knot security. Measure out about 16–18 inches; matching the color blends your stitches, while the right thread length avoids annoying tangles.
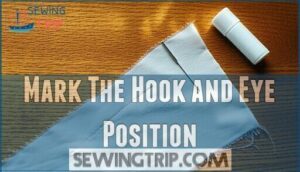
Mark The Hook and Eye Position
Once your needle is ready, it’s time to figure out exactly where your hook and eye should sit so everything fastens up just right.
Use alignment techniques suited to your fabric:
- Try tailor’s chalk or a fabric marker for precise placement
- Removable pen offers a neat marking tool
- Consider fabric stretch before marking
- Line up edges before attaching hook and eye closures
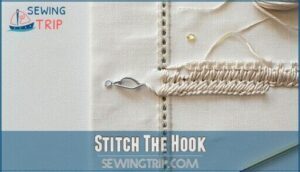
Stitch The Hook
Ready to anchor your closure? Let’s walk through how to secure the hook so it stays put—no slipping, shifting, or surprises down the line.
Set the hook snugly at your marked spot, holding it steady. Use small whip stitches or blanket stitches through each hook loop. Maintain even thread tension as you stitch for strong, neat results that prevent slippage.
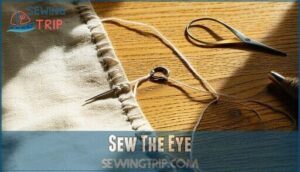
Sew The Eye
After your hook is in place, it’s time to give it a partner by sewing the eye right where the edges meet. Use a hand sewing needle, guiding it through each thread loop of the eye.
Pay attention to alignment tips so both pieces close securely. Consistent thread tension and tidy stitch types help keep the eye placement sturdy and reliable.
Techniques for Creating Thread Loops for Hook and Eye Sewing
Ever tried making your own thread loop and wondered if there’s a simple way to make it just as sturdy as a store-bought eye? The secret lies in a combination of careful Loop Stitching Methods and attention to Thread Thickness Choice. Start by choosing a strong, thick thread—this gives your sewing loops for Hook and Eyes more body and life. Next, focus on Loop Placement Accuracy; double-check the position so your closure lines up perfectly.
For reinforcing thread loops, use a blanket stitch, working diligently around the base until it feels firm and stable. Some sewists even experiment with Alternative Loop Materials, like fine cord or doubled embroidery floss, when they want extra durability.
- Always test your thread loop by gently tugging before finishing to catch weak spots early.
By weaving these practical touches into your process, your handmade loop becomes a professional detail.
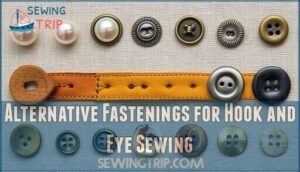
Alternative Fastenings for Hook and Eye Sewing
Hook and eye closures have that timeless charm, but they’re hardly the only option.
Snaps, buttons, Velcro, and even zippers can work just as well—sometimes even better—depending on what you’re making and the fabric you’re using.
What works best really comes down to what you’re making and the fabric you’ve chosen.
Snaps, Buttons, or Velcro for Overlapping Closures
Usually, when working with overlapping closures, you’ll weigh the closure strength, aesthetic appeal, and garment type before choosing snaps, buttons, or Velcro.
Snaps offer quick fastening and work well on everyday clothing. Buttons carry strong tradition and give visual interest, while Velcro prioritizes user accessibility and ease—especially in children’s wear or adaptive apparel.
Velcro’s invention by George de Mestral in the 1950s revolutionized fastening technology.
Always compare cost and durability before selecting.
Zippers for Non-overlapping Closures
When you’re facing a seam without overlap, a zipper becomes your go-to fastener. Invisible zippers offer a discreet finish, while closed-end types provide strong Zipper Durability in high-use areas.
Pay close attention to Zipper Materials—plastic for lightweight needs, metal for extra strength. For outerwear requiring complete separation, consider using separating zipper options.
When it comes to choosing the right zipper for a seam without overlap, there’s no single right answer—it takes a bit of trial and instinct.
Tips and Tricks for Installing Hook and Eye Sewing
Getting your hook and eye sewn in securely can make all the difference in comfort and durability.
With a few careful tricks, you can keep your fastener stable and perfectly placed every time.
Securing Stitches and Preventing Shifting
Nothing makes a closure feel more reliable than stitches that hold steady and refuse to budge, no matter how often you wear or wash your garment.
Reinforcement stitches near the hook’s curve anchor it, while a piece of tape can prevent shifting as you sew.
Secure each thread with a tight knot—this boosts knot security, fabric stability, and overall thread tension.
Proper Spacing and Placement for a Secure Closure
Getting the spacing and placement just right is the secret sauce that turns a hook and eye from an afterthought into a closure you can count on. For secure fastening, follow these steps:
- Select Closure Types—overlap or edge-to-edge.
- Mark Hook Placement—usually 1–1.5 inches apart for overlaps.
- Focus on Eye Alignment—keep both sides even.
- Factor in Fabric Considerations—so nothing pulls or puckers.
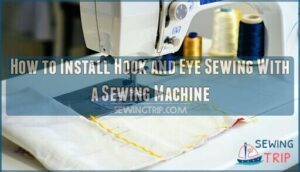
How to Install Hook and Eye Sewing With a Sewing Machine
If you’ve ever wondered how to give your closures a professional finish in no time, your sewing machine is about to become your best friend. For installing hook and eye with your machine, try this approach:
- Position the hook and eye on the fabric.
- Select a tight stitch—adjust tension control for strength.
- Sew slowly for accuracy.
- Trim threads neatly and press seams open.
Choose matching thread and stabilizing fabric for the best results!
Frequently Asked Questions (FAQs)
How do you sew a hook & eye?
Start by paying close attention to Hook Placement and Eye Alignment.
Thread your needle, choosing one that suits your Fabric Choice. Hand sewing needles and proper Thread Tension are key, as are steady hands and sharp sewing tools.
How do you attach a hook to a sewing machine?
Funnily enough, sewing machines aren’t set up for automatic hook attachment. You must use a sewing needle and thread by hand. Here’s a quick reference:
| Step | Tool Needed | Why It Matters |
|---|---|---|
| Mark spot | Fabric marker/chalk | Precise placement |
| Position | Hook, Accessories | Ensures secure hold |
| Stitch | Needle, Thread | Maintains Thread Tension |
| Finish | Scissors, Patience | Prevents unraveling |
How do you secure a hook and Eye Sewing Machine?
Steady your sewing machine for machine stability, then check thread tension before beginning. For sewing precision, align the hook and eye—each needs careful placement. Think of it as lining up dominoes: everything must fall into place smoothly.
- Stabilize your machine.
- Check thread tension.
- Align hook and eye precisely.
How do you sew hook & eye on leather?
Teasing your patience like a stubborn zipper, sewing hook and eye on leather calls for leather needles, sturdy thread, and careful stitch reinforcement.
Smooth leather preparation, strong thread selection, edge finishing, and leather conditioning guarantee lasting results.
Can you sew hooks and eyes by hand or machine?
Though handsewing remains the go-to method for most hook and eye applications, some sewists use specialized machine sewing techniques for speed.
Picking the right fastener and thread, along with a good tutorial, makes it much easier to get the hang of either method—hand or machine sewing.
How do I use a hook & eye?
Ever wondered how two tiny pieces of metal can keep a dress perfectly closed?
With precise Hook Placement and Eye Alignment, fastening a hook and eye delivers reliable Closure Security, subtly blending into Fabric Choice and time-tested Sewing Techniques.
What is the difference between a hook and eye and a snap?
Curious about the basics? A hook and eye uses a hook and loop for closure, relying on precise alignment. In contrast, snap fasteners feature two interlocking discs—one snaps into the other—offering a quick, almost automatic closure.
- Hook and eye: hook fits into loop, ideal for discreet closure
- Snap fasteners: metal discs snap together, faster to fasten
Can I use hook and eye sewing on stretchy fabric?
You can use hook and eye closures on stretchy fabric, but pay close attention to fabric tension and choose thread and sewing techniques that allow for stretch.
This helps create an elastic closure that won’t pop open unexpectedly.
How do I attach a hook and eye to a zipper?
After exploring stretchy fabrics, let’s talk zippers: For reliable closure reinforcement, attach the hook to the right side, aligning with your zipper, and secure the eye on the left. Proper zipper alignment and eye security keep things smooth.
- Imagine skipping garment gaps forever
- Feel that quiet confidence in every closure
How do I remove hook and eye sewing?
Sometimes, removing old hooks can feel like defusing a miniature bomb. Work carefully with a seam ripper or sharp needle to lift out each thread, minimizing damage.
Gentle steps help guarantee a clean, safe hook eye removal.
Conclusion
Worried that installing a hook and eye seems too tricky? Take comfort knowing that with a little patience and the right steps, you can master how to install hook and eye sewing for lasting, neat results.
By following the guidance here, you’ll create secure and professional closures every time. Don’t let doubt hold you back—confidence grows with practice. Soon, you’ll turn to this simple closure technique with ease, even for your most important projects.
- https://shoptailoredtrends.com/2025/01/14/all-about-the-hook-eye/
- https://fcs-hes.ca.uky.edu/sites/fcs-hes.ca.uky.edu/files/ct-mmb-029_0.pdf
- https://uark.pressbooks.pub/teachingappareldesign/chapter/hooks-and-eyes-teaching-apparel-production/
- https://madamsew.com/products/hook-eye-fastener-sets
- https://www.prymconsumerusa.com/products/90-67

