This site is supported by our readers. We may earn a commission, at no cost to you, if you purchase through links.
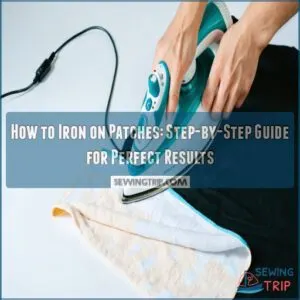 To iron on patches, start by placing the garment on a stable, heat-resistant surface like an ironing board. Make sure it’s clean, flat, and free of wrinkles—nobody wants a crooked patch!
Position the patch where you want it, adhesive side down. Cover it with a pressing cloth (a thin cotton towel works) to protect the fabric.
Set your iron to the appropriate heat based on the garment’s label—typically “cotton” with no steam. Press firmly for 20-30 seconds without sliding.
Flip the garment, iron the back for extra hold, and let it cool completely. Done right, your patch will stay put with a good adhesive and proper heat!
Table Of Contents
- Key Takeaways
- Essential Materials for Iron-on Patch Application
- Preparing for Iron-on Patch Application
- Step-by-Step Guide to Ironing on Patches
- Top 10 Tools and Accessories for Patch Application
- 1. Embroidered Patches
- 2. Cricut EasyPress Mini
- 3. Unbleached Parchment Paper
- 4. Black+Decker Vitessa Advanced Steam Iron
- 5. Amazon Basics Ceramic Steam Iron Gray
- 6. Singer Tape Measure 60 Inch
- 7. Coquimbo Sewing Kit Portable Supplies
- 8. Dritz Sheer Press Cloth 22×30
- 9. Red Heart Embroidered Iron Patch
- 10. Beautiful Flowers Patch Embroidered Applique
- Troubleshooting Common Issues
- Alternative Patch Attachment Methods
- Final Tips for Successful Patch Application
- Frequently Asked Questions (FAQs)
- Conclusion
Key Takeaways
- Place the patch adhesive side down, cover it with a pressing cloth, and use a dry iron with steady pressure for 20-30 seconds.
- Avoid steam when ironing, and let the garment cool completely before handling to ensure a strong bond.
- Flip the garment and iron the back of the patch for extra hold and durability.
- Stick to heat-resistant fabrics like cotton or denim, and skip delicate materials that can’t handle high temperatures.
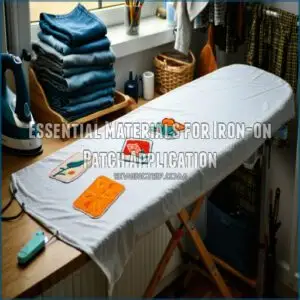
Essential Materials for Iron-on Patch Application
Before ironing on patches, gather essentials to guarantee success.
Start with high-quality iron-on patches featuring reliable adhesive. Select a sturdy iron with adjustable iron settings—turn off steam for proper bonding.
Use a stable ironing board or heat-resistant surface, and protect your fabric with a pressing cloth to prevent scorching. For best results, opt for durable materials like cotton or denim, as their heat resistance ensures strong adhesion.
Avoid heat-sensitive fabrics like silk or leather. Don’t forget scissors for trimming loose threads!
When choosing iron-on patches, consider the quality of patch adhesive materials for a lasting bond.
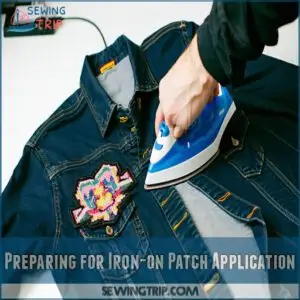
Preparing for Iron-on Patch Application
Preparation is key to making your iron-on patches last. Start with garment preparation—lay it flat, clean, and free from wrinkles. Check the fabric type: cotton and denim work great, but delicate fabrics can’t handle the heat.
Adjust iron settings based on the care label; turn off steam for better adhesive strength. Test patch placement for the perfect spot before committing.
- Clean and smooth your garment.
- Match iron temperature to fabric.
- Position the patch carefully.
- Avoid heat-sensitive fabrics.
These small steps guarantee perfect patch application!
Step-by-Step Guide to Ironing on Patches
Making sure your patch sticks properly requires just a few simple steps, and careful attention can make all the difference.
Follow this guide to position, protect, and secure your patch for a smooth, lasting finish.
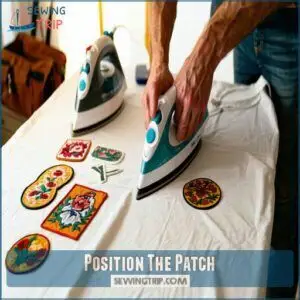
Position The Patch
Patch placement isn’t just about looks—it’s about precision and impact.
Start by choosing the perfect spot on the garment, checking Placement Guides or experimenting with alignment styles like centering or themed designs.
Keep Fabric Tension smooth to avoid puckering, and double-check edges for balance.
Patch Alignment plays a key role in Adhesive Strength, so avoid rushing.
Whether following iron on patch instructions or arranging creatively, thoughtful positioning guarantees your iron on patches application shines flawlessly.
Understanding proper patch placement guides is essential for a successful iron-on patch application with proper placement and smooth fabric tension.
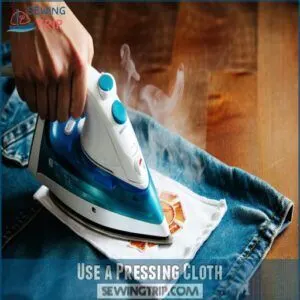
Use a Pressing Cloth
Worried about damaging your fabric or patch? A pressing cloth is your go-to for effortless ironing. Acting like a trusty shield, it prevents burns and helps evenly distribute heat, giving your patch the best chance to adhere properly.
Here’s how to make the most of it:
- Fabric Protection: Lay the pressing cloth directly over the patch and surrounding fabric. A cotton pillowcase, clean handkerchief, or actual pressing cloth works great.
- Heat Distribution: The cloth absorbs excess heat, protecting delicate fabrics from scorching while still activating the adhesive.
- Pressing Cloth Tips: Always turn off steam—moisture weakens the patch’s hold and complicates application.
Using a pressing cloth product can substantially improve ironing results. Think of the pressing cloth as peace of mind during patch ironing. Follow these simple steps, and you’ll save your garment while achieving professional results with ease.
Apply Heat
Don’t skip checking your iron temperature—it’s the backbone of great patch adhesion.
Set the heat settings according to your fabric, skipping the steam. Use steady pressure for 30 seconds to activate the adhesive fully.
For ideal results, consider consulting heat press settings to guarantee the best application.
Here’s a quick guide:
| Material | Heat Setting | Press Time |
|---|---|---|
| Cotton | High | 30 seconds |
| Polyester Blend | Medium | 25 seconds |
| Denim | High | 35 seconds |
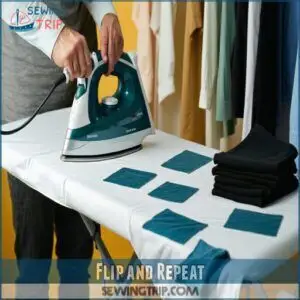
Flip and Repeat
Once you’ve applied heat to the front of the patch, it’s time to reinforce the bond.
Flip your garment inside out and lay it flat on the ironing board with the patch area facing up.
This step strengthens patch adhesion by sealing it from both sides.
Set your iron temperature according to the fabric’s care label.
With the backing of the patch aligned, press firmly on the reverse side for about 20-30 seconds.
Control the heat evenly to avoid scorching the fabric.
This repeat process solidifies the patch application, creating a durable hold.
Let the fabric cool completely before handling—it’s tempting, but patience guarantees lasting results.
If the edges lift, revisit the flip-and-press method.
Mastering this ironing technique keeps iron on patches firmly in place, even after everyday wear.
It’s all about perfecting heat control.
Top 10 Tools and Accessories for Patch Application
You’ll need the right tools and accessories to make sure your patches stick securely and look professional.
From reliable irons to essential pressing cloths, these items make the process easier and more effective, with reliable irons being a key component.
1. Embroidered Patches
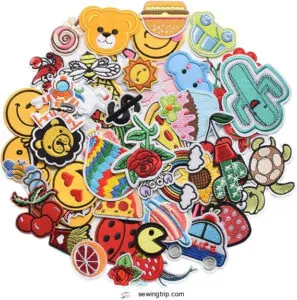
Embroidered patches are a simple way to add charm and personality to your belongings. Whether it’s a denim jacket, tote bag, or scarf, these patches highlight your individuality with bold designs and vibrant thread colors.
Opt for patches with durable adhesive strength for easy application or sew them on for lasting hold.
Here’s how to get the most out of embroidered patches:
- Experiment with fabric choices like denim or canvas for a smooth finish.
- Test different embroidery types to match the look you want.
- Consider thread colors that complement your style.
- Check adhesive backing to make sure strong bonding during patch application.
To keep them looking fresh, follow proper ironing techniques and care tips like washing inside out.
2. Cricut EasyPress Mini
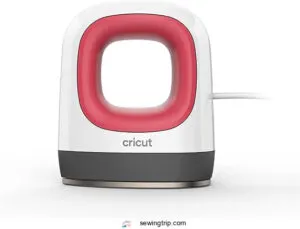
Tackling intricate patchwork has never been easier with the Cricut EasyPress Mini. This compact tool is a game-changer for applying iron on patches to small or curved surfaces like hats or stuffed animals.
Its three heat settings—low, medium, and high—simplify finding the perfect temperature for any fabric type, ensuring flawless patch adhesion every time.
| Temperature Setting | Fabric Type | Project Ideas |
|---|---|---|
| Low | Delicates | Small patches on hats |
| Medium | Cotton, Polyester | Embroidered patches |
| High | Denim | Large patches on jackets |
The precision tip and lightweight design give you total control for mini pressing and detailed applications. Compact and easy to store, the EasyPress Mini is a must-have for crafters.
Master ironing techniques and heat transfer projects by combining this tool with your go-to iron on patch instructions printable!
3. Unbleached Parchment Paper

When working with iron-on patches, unbleached parchment paper is your secret weapon for smooth results.
This heat-resistant paper (up to 440°F) protects your clothes, iron, and patch by creating a non-stick barrier during application.
It also prevents any adhesive from transferring to your iron, saving you cleanup headaches.
Cut it to fit your patch, place it between the iron and fabric, and enjoy reliable protection.
You’ll appreciate its eco-friendly perks too—durable and reusable.
Here’s why unbleached parchment paper is a game-changer:
- Heat Resistance: Keeps your iron and adhesives safe within high heat settings.
- Adhesive Protection: Stops glue from staining your iron or fabric.
- Simple Paper Uses: Works for various ironing patches tips beyond just patches.
Understanding sewing on paper techniques can also enhance your patch application skills.
4. Black+Decker Vitessa Advanced Steam Iron
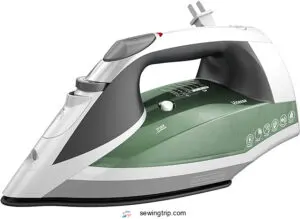
In the context of heat and fabric control, the Black+Decker Vitessa Advanced Steam Iron is a standout.
Its SmartSteam Technology guarantees perfect patch adhesion with precise heat settings, while the TrueGlide Nonstick Soleplate glides smoothly over fabric.
Use it confidently, knowing the auto-shutoff feature has your back.
Keep the soleplate clean for consistent performance, whether you’re applying iron-on patches or following detailed iron-on instructions, it’s reliable, easy to use, and a must-have tool for fabric safety.
5. Amazon Basics Ceramic Steam Iron Gray
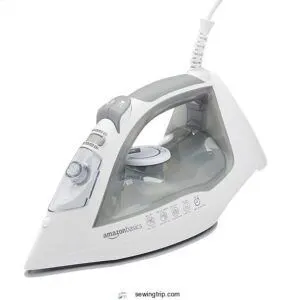
The Amazon Basics Ceramic Steam Iron Gray is your go-to tool for seamless patch application.
Its ceramic plate guarantees even heat distribution, making it easier to follow iron on instructions for a polished finish. The adjustable thermostat lets you set the ideal iron temperature for patches, while the steam settings offer extra moisture for tough fabrics like denim.
- Ceramic Plate: Glides smoothly for wrinkle-free fabric preparation.
- Steam Settings: Keeps patches steady during application.
- Adjustable Iron Temperature: Perfect for various fabric types.
For best results, use this iron on natural fabrics, check your iron on patch temperature chart, and avoid the steam settings for adhesives. Regular cleaning preserves its gray finish and performance.
6. Singer Tape Measure 60 Inch
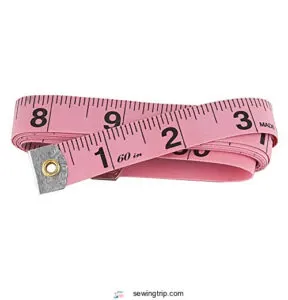
Precision is key when applying iron-on patches, and Singer’s 60-inch tape measure makes it simple.
This flexible fabric ruler helps you position patches perfectly, whether ironing patches on cotton or aligning multiple designs.
With its easy-to-read markings and compact design, it’s a must-have sewing aid in any sewing kit.
- Accurate measurements for precise patch placement.
- Flexible material works around curves and edges effortlessly.
- Compact size fits neatly into portable sewing tools.
- Durable construction guarantees reliable use for all projects.
For flawless application, this tape measure complements your sewing tools, saving time while ensuring perfect results!
7. Coquimbo Sewing Kit Portable Supplies
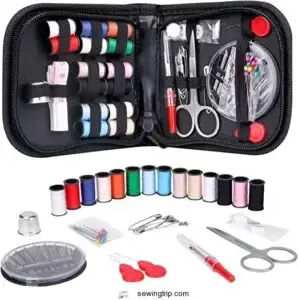
The Coquimbo Sewing Kit is your portable solution for handling emergency patch fixes and ensuring iron-on patches stay flawless.
Packed with essential sewing notions like needles, thread spools, scissors, and more, it’s perfect for mending loose seams or reinforcing iron-on patch adhesive with extra stitches.
Its compact size makes it ideal for travel or keeping in your crafting corner, ensuring you’re always ready for quick fabric care.
Whether you’re perfecting how to iron on patches or dealing with unexpected hiccups, this versatile kit keeps everything under control, offering a reliable backup to your iron-on patch instructions.
Always be prepared!
8. Dritz Sheer Press Cloth 22×30
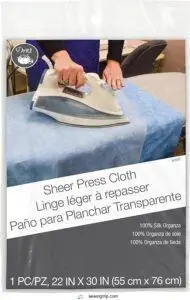
For effectively applying iron-on patches, the Dritz Sheer Press Cloth 22×30 is essential.
This lightweight cloth protects fabrics from scorching, ensuring smooth patch adhesion and flawless results. It’s especially handy for delicate materials or when experimenting with heat settings.
Why use a press cloth? Here are five key benefits:
- Prevents shiny spots on fabrics.
- Shields delicate materials from direct heat.
- Aids even heat distribution for better patch adhesive activation.
- Reduces the risk of patch or fabric scorching.
- Provides added control during ironing.
Simply place it between your patch and iron! Clean-up is easy—machine washable—and storing flat prevents wrinkles for hassle-free use.
9. Red Heart Embroidered Iron Patch

If you’re looking for a statement piece, the Red Heart Embroidered Iron Patch can add that perfect finishing touch.
Its bold red design isn’t just eye-catching—it’s a simple way to show love and creativity on jeans, jackets, or backpacks.
With its heat-activated adhesive, ironing on this patch is hassle-free.
Prefer extra strength? Sew it on after applying heat.
This heart-shaped gem works well with most fabrics.
Just double-check fabric compatibility and follow basic iron-on patch instructions for best results.
Keep it vibrant by washing inside-out and avoiding harsh detergents.
Here’s a quick breakdown:
| Feature | Details | Tip |
|---|---|---|
| Material | Durable embroidery | Ideal for cotton or denim |
| Adhesive Type | Heat-activated | Avoid steam settings |
| Care | Low-maintenance | Wash cold, tumble dry on low |
10. Beautiful Flowers Patch Embroidered Applique

The Beautiful Flowers Patch from The Rocking Planet is a standout choice for adding flair to your gear.
Its vibrant flower patch designs and detailed embroidery techniques make jackets, backpacks, and more truly pop.
Sized at 3.3 inches, it’s the ideal balance of charm and subtlety, crafted with durable polyester that’s washable and long-lasting.
Whether you’re exploring applique methods or following patch iron on instructions, this patch simplifies personalization.
Always check iron temperature and fabric selection for best results.
It’s a perfect option for mastering iron on appliques and creating unique designs effortlessly!
Troubleshooting Common Issues
Sometimes, ironing on patches doesn’t go as planned—but you can fix common issues with a bit of know-how.
Follow these tips to improve patch adhesion and avoid iron-on frustration. To achieve the best results, understanding iron on techniques is essential for a successful patch application.
- Peeling Edges: If corners start to lift, reapply heat using the tip of your iron. For extra hold, add fabric glue along the edges.
- Low Heat: Check your iron settings! Use the cotton temperature (350–370°F) without steam. If the patch still won’t stick, gradually increase the heat.
- Fabric Damage: For delicates, lay a pressing cloth over the patch before ironing to protect the material.
- Uneven Adhesion: Apply heat evenly across the patch. Break large designs into smaller sections for consistent pressure and heat distribution.
- Adhesive Failure: If the iron-on patch adhesive backing isn’t melting, flip the garment and iron the back. For extra durability, stitch or glue the patch.
Stay patient—perfection takes practice!
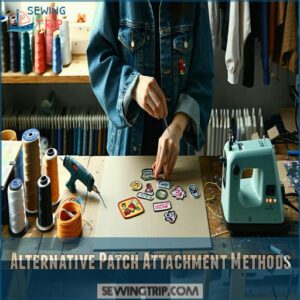
Alternative Patch Attachment Methods
When ironing on patches isn’t the right move, you’ve got other great options.
Some fabrics need creative solutions to keep patches secure and stylish.
- Sew On: Traditional yet sturdy, patch sewing keeps things in place long-term.
- Glue Guns: Perfect for quick fixes, offering strong bonds without heat.
- Tape Adhesives: Easy to peel and stick, ideal for quick projects.
- Stitch Fix: Combine stitching with adhesives for unbeatable strength.
- Fabric Bonding: Use fusible webbing or heat-press methods on low-heat fabrics.
Understanding adhesive properties is fundamental for a strong bond.
These methods let you skip ironing hassles!
Final Tips for Successful Patch Application
Perfecting patch adhesion comes down to careful preparation and technique.
Follow these steps to ensure success:
- Cooling is Key: Once applied, let the patch cool completely. This prevents weak adhesive bonds.
- Test Heat Settings: Always test your iron on scrap fabric to prevent scorching and ensure proper iron-on patches heat temp.
- Trim for Precision: Neatly trim patch edges beforehand to enhance bonding and reduce peeling.
Whether enhancing nylon or cotton, mastering these tips guarantees durable patches every time.
Understanding denim repair techniques is also important for achieving professional-looking results.
Frequently Asked Questions (FAQs)
Can you put iron on patches in the wash?
Think of patched garments like loyal teammates—they need care to stay strong.
You can wash iron-on patches, but always turn the garment inside out, use cold water, and avoid bleach or harsh detergents.
Can I iron a patch onto a luggage case?
You can iron a patch onto a luggage case if the material can handle heat.
Use a pressing cloth to protect it, apply firm pressure, and consider sewing the edges for extra durability.
Can you use a hair straightener to iron on a patch?
Sometimes life hands you a hair straightener instead of an iron.
Yes, you can use it!
Clamp the patch with steady heat and pressure, but make sure even contact for proper adhesion.
It’s surprisingly effective!
How do you apply iron-on patches?
Lay your garment flat, smooth out wrinkles, and check the care label.
Position the patch, cover it with a protective cloth, and firmly press with a hot iron for 30-60 seconds.
Let it cool!
How long do you apply heat to an iron on patch?
Apply heat for 30-60 seconds using firm, even pressure.
Cover the patch with a cloth to protect it, and check your garment’s care label to verify you’re using the right iron settings for the fabric.
How do you make iron-on patches stick better?
Press firmly with the iron, maintaining even heat and enough pressure.
Use a thin cloth for protection, avoid steam, and let it cool completely before handling.
These steps guarantee a secure, long-lasting bond.
Do you iron-on patches dry or steam?
Iron-on patches? Dry is your best bet, no steam allowed!
Steam’s like a wet blanket—it prevents proper adhesion.
Use firm pressure, steady heat, and watch your patch stick like magic for that polished, seamless look.
How long do you heat press an iron-on patch?
You’ll need to heat press an iron-on patch for about 30-60 seconds.
Use firm, even pressure, and check the garment’s care label for temperature limits to avoid damage.
Flip and heat the reverse side too.
Do you peel off the back of an iron-on patch?
Studies show iron-on patches are a favorite for quick fabric fixes.
They have built-in adhesive, so just position, heat, and press—no peeling necessary for ideal results, but don’t peel the back unless instructed.
Do you use water when ironing on a patch?
Skip the water when ironing on a patch.
Using steam prevents the adhesive from bonding properly to the fabric.
Stick with a dry iron, firm pressure, and the right temperature for a secure application.
Conclusion
Wondering if your patch will stay put? With the right preparation and tools, it’s easier than you think to master how to iron on patches.
Clean fabric, proper heat, and steady pressure are the keys to success. Don’t forget to press both sides for extra hold and let it cool completely before handling.
Follow these simple steps, and your patch will look perfect while staying secure for the long haul. Ready to show off your creativity?
- https://www.goodhousekeeping.com/beauty/fashion/a41446666/how-to-iron-on-patches/
- https://winksfordays.com/pages/iron-on-patch-instructions
- https://www.thestudio.com/blog/how-to-iron-patches-on-clothes-step-by-step-guide/
- https://www.reddit.com/r/sewhelp/comments/5l3d40/ironing_and_sewing_patches/
- https://www.thespruceeats.com/what-is-parchment-paper-3959179

