This site is supported by our readers. We may earn a commission, at no cost to you, if you purchase through links.
Your sewing machine needle takes a beating with every stitch, piercing through fabric hundreds of times per project, yet most sewers wait until something goes wrong to replace it. The truth is, a worn needle doesn’t always announce itself with dramatic failures—it often degrades gradually, compromising your stitch quality long before you notice the damage.
By the time you see skipped stitches or hear unusual noises, you’ve already been sewing with subpar results, and you may have even harmed your fabric or machine. Learning to recognize the early warning signs of needle wear, from subtle changes in sound to small imperfections in your seams, helps you maintain professional-quality work and avoid frustrating mid-project disasters.
Table Of Contents
Key Takeaways
- Replace your sewing machine needle every 6-8 hours of use or after completing about 8 projects to maintain professional stitch quality and prevent fabric damage before problems become visible.
- Watch for warning signs like skipped stitches, thread breakage, fabric puckering, or unusual clicking sounds, which indicate your needle has worn down and needs immediate replacement.
- Different fabrics wear needles at different rates—heavy materials like denim require replacement after just 3-6 hours, while cotton typically lasts 8-10 hours.
- A dull needle doesn’t just ruin your stitches; it can permanently damage delicate fabrics, increase wear on your machine’s feed dogs by 18%, and cause hand and wrist strain from the extra force required to push fabric through.
How to Know When to Change Your Sewing Machine Needle
You don’t need to wait for your needle to break before swapping it out. Knowing when to change your sewing machine needle can save you from frustration and keep your projects looking their best. Let’s look at the timing guidelines that help you stay ahead of problems.
Recommended Replacement Frequency
Generally, you should replace your sewing machine needle every 6-8 hours of usage or after completing about 8 projects. This needle replacement frequency keeps your sewing machine maintenance on track and prevents most stitching problems. Many professionals recommend project-based changes, swapping the needle before starting each major piece.
Replace your sewing machine needle every 6-8 hours of use or after completing about 8 projects to prevent stitching problems
Regular needle replacement saves you from recognizing signs of needle replacement too late, reducing maintenance cost savings by roughly 20%. Needle quality matters, especially when fabric type impact varies. Maintaining a consistent embroidery quality also depends on timely needle replacement.
Needle Lifespan for Different Fabrics
While 6-8 hours works as a baseline, fabric types greatly alter needle lifespan and needle wear patterns. Your choice of material creates different fabric wear impact scenarios:
- Cotton and linen: Universal needles generally last 8-10 hours, allowing you to complete two to three lightweight garments
- Denim and canvas: Heavy-duty needles need replacement after 3-6 hours, often just one major project
- Stretch fabrics: Ballpoint needles may last only one garment due to rapid tip rounding
- Silk and delicates: Microtex needles perform best for 6-8 hours before risking snags
Stitch density, sewing speed, and thread type also influence needle damage rates. To maintain optimal performance, refer to the needle replacement guidelines based on your usage.
Needle Replacement Before New Projects
Beyond tracking hours, your best defense against needle damage is changing needles before each new project. This simple habit prevents fabric damage and ensures consistent sewing results from the start.
Professional sewers report that machine wear reduction improves dramatically with fresh needles, while the ideal needle choice for your specific fabric eliminates hidden burrs or dullness that compromise project stitch quality.
Key Signs Your Needle Needs Replacing
Your sewing machine will usually tell you when it’s time for a fresh needle, but you need to know what to look for.
Sometimes the signs are obvious, like missed stitches or strange sounds, while other times they’re more subtle.
Let’s go through the most common warning signals that mean your needle has reached the end of its useful life.
Skipped Stitches and Uneven Stitching
When your machine starts leaving gaps or your stitches look like a bumpy road, the culprit is often a dull sewing machine needle that’s lost its edge. Needle sharpness directly affects stitching quality, and worn needles can’t form proper loops as fabric friction increases.
Watch for these telltale signs of needle issues:
- Thread skips appearing in regular patterns along your seam
- Uneven stitching with inconsistent stitch length, especially at fabric joins
- Stitch tension problems that seem to come from nowhere
- Increased resistance when sewing through layers, even with proper machine calibration and thread quality
Thread Breakage or Shredding
When your thread keeps snapping or looking like it’s been through a shredder, you’re dealing with needle issues that won’t fix themselves. Thread breakage often signals needle eye wear, burrs, or a fabric needle mismatch that’s creating excessive friction.
Poor needle installation can also throw off thread tension issues, causing the thread to pull unevenly. Good needle maintenance means catching these signs early before they damage your project.
Fabric Puckering or Damage
When your fabric starts puckering or showing damage, you’re likely dealing with a dull or incorrectly sized needle. Needle size and fabric type must match to prevent structural distortion. Here’s what to watch for:
- Wavy, puckered seams that won’t press flat
- Pulled or snagged threads in the fabric
- Holes larger than the thread itself
- Surface fiber damage or fraying
- Fabric pushing down before needle penetration
These signs mean it’s time for needle replacement.
Unusual Noises While Sewing
When your sewing machine starts making unusual clunking, grinding, or high-pitched squeaks, it’s often signaling needle issues. Studies show dull or bent needles can increase machine noise by 22 decibels.
These sounds come from needle performance problems like burrs, wear, or misalignment. Identifying needle issues through sound frequency analysis helps with troubleshooting sewing machine issues before they damage your fabric or machine, making needle replacement essential for machine noise reduction.
Visual and Physical Clues of Needle Wear
Sometimes the signs of needle trouble aren’t in your stitches—they’re on the needle itself. A quick visual check can tell you if it’s time for a replacement, saving you from frustration down the line.
Let’s look at three physical clues that signal your needle has reached the end of its useful life.
Dullness or Burrs on Needle Point
Your needle’s point reveals more than you might think. Identifying dullness and burr effects starts with careful inspection, which directly impacts needle performance and fabric quality. Here’s how to spot worn needle points and know when needle replacement is necessary:
- Run your fingernail gently across the needle tip to feel for roughness or burrs
- Listen for popping or thudding sounds that signal reduced sharpness
- Use a magnifying glass to check for microscopic irregularities on the point
- Test fabric penetration by observing whether the needle creates clean, even holes
These best practices for identifying needle issues help you maintain peak stitch quality and prevent fabric damage before it starts.
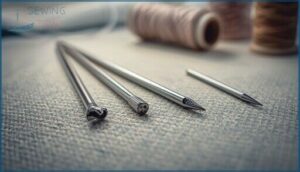
Bent or Damaged Needle Shaft
A bent shaft might look perfectly fine at first glance, but it’s one of the most dangerous forms of needle damage. Detecting bends requires more than a quick look—you need to place your sewing machine needle flat on a smooth surface and watch for rocking or gaps. Even a 15-degree bend causes skipped stitches and hook damage, threatening your machine’s longevity.
| Bend Type | Detection Method | Mechanical Consequences |
|---|---|---|
| Lateral bend | Visible rocking when flat | Mimics timing issues, skipped stitches |
| Front/back bend | Difficult to see, check clearance | Hook collisions, thread breakage |
| Severe bend | Obvious visual deformation | Fabric damage, costly repairs |
Shaft bending causes stem from sewing over pins, excessive thread tension, or loose clamp screws. Preventing damage starts with correct needle installation and regular inspection—identifying needle issues early protects both your fabric and machine from unnecessary wear, saving you from expensive hook repairs down the road.
Worn or Misshapen Needle Eye
You mightn’t notice it at first, but needle eye wear sneaks up on you. When your sewing machine needle’s eye fills more than 70% with thread, friction increases dramatically—grooves form, and thread breaks can jump by 80%.
That’s why identifying needle issues early matters for sewing efficiency. Check your worn needle eye regularly, and replace needles every 8-16 hours to prevent costly eye damage and maintain smooth stitching.
Consequences of Sewing With a Dull Needle
Continuing to sew with a dull needle isn’t just frustrating, it can actually set off a chain reaction of problems that affect your entire project. You might think you’re saving time by skipping a needle change, but the reality is quite different.
Let’s look at what happens when you push a worn needle past its prime.
Reduced Stitch Quality
When your sewing machine needle dulls, you’ll notice uneven seams and skipped stitches right away. Thread tension becomes unpredictable, and stitch consistency suffers noticeably.
After about eight to ten hours of use, thread breaks become more frequent, and your overall stitch quality drops by up to 30%. Regular needle replacement keeps your work looking professional and prevents frustrating do-overs.
Risk of Fabric and Machine Damage
Beyond poor stitches, a worn sewing machine needle can punch holes in delicate fabrics, raising damage risk by 40%. Needle heating at high speeds weakens seams by half, while thread breakage jumps 17–24% with needle wear.
Your machine itself suffers too—feed dogs wear 18% faster, and maintenance costs climb 12%. Regular needle replacement protects both your fabric types and your equipment from costly sewing errors.
Increased Hand and Wrist Strain
Machine damage isn’t the only cost—your body pays, too. Research shows that 30–45% of sewing workers develop hand and wrist pain from repetitive motion, and worn needles make it worse.
Dull points require more force, increasing penetration resistance and operator strain. That’s when needle replacement frequency matters most.
Regular changes, ergonomic sewing posture, needle lubrication, and break schedules protect against long-term injury from needle wear and hand strain.
Proper Steps for Changing a Sewing Machine Needle
Changing your sewing machine needle is a straightforward task that anyone can master with a little practice. The process involves a few simple steps to help you remove the old needle safely and install the new one correctly.
Let’s walk through each step so you can tackle this essential maintenance with confidence.
Safety Precautions Before Replacement
Before replacing a sewing machine needle, you need to protect yourself and set up properly. Safety isn’t just caution—it’s part of good craftsmanship. Unplugging your machine eliminates nearly all electrical hazards during needle replacement frequency checks.
- Unplug machine completely to prevent accidental pedal activation
- Workspace prep: clear clutter, add good lighting, and place paper beneath the presser foot
- PPE usage: wear safety glasses to shield eyes from flying debris
- Machine stability: verify your workspace is level and secure before starting
Removing The Old Needle
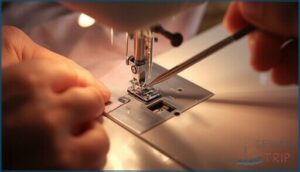
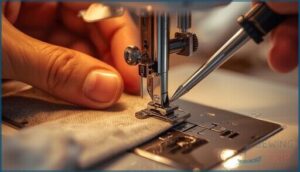
Once your machine is unplugged, raise the presser foot and turn the handwheel to lift the needle to its highest point. Locate the needle clamp screw near the top of the needle bar and turn it counterclockwise with your mini screwdriver. Hold the needle shank as you loosen the screw to prevent it from dropping into the machine plate.
Pull the old needle straight downward from the needle bar, gripping it by the shank. Inspect it for bends or burrs before wrapping it in paper for safe needle disposal. Common removal mistakes include forgetting to raise the needle first or over-tightening the screw. Required removal tools are minimal—just your machine’s screwdriver and perhaps tweezers if you have dexterity concerns. This careful needle bar removal protects both you and your equipment during needle installation.
| Step | Action |
|---|---|
| Locate screw | Find needle set screw on needle bar |
| Loosen carefully | Turn counterclockwise, hold needle shank |
| Remove needle | Pull straight down from needle bar |
| Inspect and dispose | Check for damage, use safe needle disposal |
Installing The New Needle Correctly
With the old needle removed, you’re ready for proper needle installation. Hold the new needle by its shank and slide it upward into the needle bar until it stops—needle height matters for stitch quality. Position the flat shank facing away from you, then tighten the needle set screw firmly. Lower your presser foot and run a test stitch on scrap fabric for error prevention.
- Align the flat side correctly to avoid skipped stitches
- Push needle upward fully before securing clamp tightness
- Tighten screw firmly without overtightening the assembly
- Conduct test stitch to confirm proper needle installation
Organizing and Storing Needles
After changing needles, good storage practices protect your investment and prevent costly mistakes. Organizing sewing needles by type and size in labeled needle cases prevents confusion during needle selection. Store each type in separate compartments or original packaging to maintain needle quality and avoid accidental pricks.
Choose storage container types that offer accessibility and convenience—magnetic holders attach to your machine for quick access, while needle cases keep backups organized by needle brands in your sewing area.
| Storage Container Types | Labeling Best Practices | Safety Storage Measures |
|---|---|---|
| Clear compartmentalized boxes | Mark by size (70/10, 90/14) | Keep in child-proof containers |
| Magnetic needle holders | Label by type (universal, ballpoint) | Store away from moisture |
| Vinyl sleeve organizers | Use color-coded systems | Secure lids tightly |
Frequently Asked Questions (FAQs)
How do I know when to change the needle on a sewing machine?
You’ll notice skipped stitches, thread breakage, fabric puckering, or unusual clicking sounds. These signs signal declining stitch quality and potential fabric damage.
Regular needle inspection prevents these issues and improves your user experience.
How often should you replace sewing machine needles?
Here’s the point: sewing frequency and fabric thickness dictate your needle’s lifespan. Replace it every 6–8 hours of active use, after each project type, or when stitches skip and threads break unexpectedly.
How to tell if your sewing machine needle is dull?
You can detect a dull needle through audible cues like popping sounds, tactile roughness on the point, visual inspection for burrs, declining stitch quality, and fabric damage.
Changing sewing machine needles prevents stitches skip and maintains needle sharpness.
What is the life of a sewing machine needle?
Your needle’s lifespan isn’t set in stone—fabric type, usage frequency, and needle quality influence how long it stays sharp.
Most universal needles perform well for six to eight hours before needing replacement.
What types of sewing machine needles are available?
You’ll find several needle types suited for different fabrics. Universal needles work for most projects, ballpoint needles handle knits, while specialty needles like denim or leather types tackle heavier materials with precision and durability.
How do needle sizes differ internationally?
Understanding needle sizing across borders is like learning a new dialect. Metric measurements reign in Europe and Asia, while the imperial system dominates America, with Japanese needles charting their own unique path entirely.
Which needle is best for stretch fabrics?
Stretch needles are your best choice for fabrics with over 5% Lycra content or spandex percentage.
Their medium ballpoint and deeper scarf preserve seam integrity, preventing skipped stitches better than standard needlepoint types.
What is the purpose of needle color coding?
Color coding on sewing machine needles allows quick identification of needle types and sizes, aids organization ease, reduces error, and helps with visual impairment.
Brand standardization across manufacturers like Schmetz ensures consistent needle selection.
How often should I oil my sewing machine?
Oil your machine every 7 to 8 hours for industrial models, or after 3 to 4 bobbin changes for home machines.
Heavy users should oil monthly, while proper oiling techniques prevent thread breaks and guarantee smooth performance.
Can I sharpen and reuse old sewing needles?
Sharpening techniques exist for sewing machine needles using fine stones at 30-degree angles, potentially extending reuse lifespan threefold. However, risks include thinning, breakage, and reduced stitch quality, making inspection practices critical before attempting economic impact savings.
Conclusion
Your machine runs smoothly when you listen to what it’s telling you, and coincidentally, the moment you start paying attention to needle condition is often the same moment your finished projects take a noticeable leap in quality.
Knowing how to know when it’s time to change the sewing machine needle transforms from guesswork into habit. Replace needles regularly, watch for warning signs, and inspect before each major project.
Your fabric, thread, and machine will all thank you with consistently beautiful stitches.
- https://klasseneedles.com/why-needles-break
- https://www.thehogring.com/2021/03/24/when-should-you-change-a-sewing-machine-needle/
- https://www.waynearthurgallery.com/what-happens-if-you-use-a-dull-sewing-machine-needle/
- https://pmc.ncbi.nlm.nih.gov/articles/PMC8706176/
- https://etcsupplies.com/blogs/help-centre/how-often-should-you-change-your-embroidery-machine-needle


