This site is supported by our readers. We may earn a commission, at no cost to you, if you purchase through links.

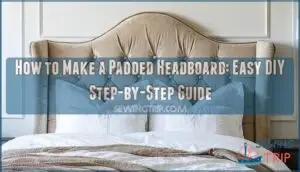
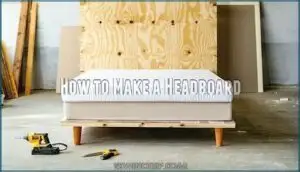
You’ll need plywood for your base, high-density foam for comfort, batting for smoothness, and upholstery fabric that matches your style. Cut your plywood to size, layer on foam and batting, then stretch fabric tight and secure with a staple gun.
The magic happens when you add tufting with buttons or decorative nailhead trim for that professional touch. With basic tools and weekend effort, you’ll create a custom focal point that rivals expensive store-bought options while perfectly matching your décor vision.
Table Of Contents
Key Takeaways
- Start with quality materials: plywood base, high-density foam (2-3 inches thick), batting for smoothness, and upholstery-weight fabric that won’t stretch or sag over time.
- Use proper construction techniques: cut plywood to size, layer foam and batting evenly, stretch fabric taut, and secure with a staple gun for professional results.
- Add finishing touches for custom appeal: create tufted patterns with buttons through pre-drilled holes, or apply decorative nailhead trim along edges for designer sophistication.
- Mount securely with basic hardware: skip expensive cleat systems and use simple L-brackets with wall anchors, ensuring your headboard stays level and damage-free.
A Reader Needs a Padded Headboard
Imagine this: you’re propped up in bed with your favorite book, but instead of leaning against a comfortable cushioned surface, you’re stuck with a hard wall or cold metal bed frame digging into your back. That’s exactly why you need a padded headboard—it transforms your bedroom into a cozy retreat while adding visual interest to your space.
Building your own padded headboard lets you pick exactly what you want—soft velvet, bold patterns, or whatever fabric speaks to you. You’ll also choose how much cushioning feels right for your back.
The best part? You can create something that looks expensive without the hefty price tag, and you’ll know it meets all the safety standards too.
How to Make a DIY Headboard
Building your own padded headboard isn’t just about saving money—it’s about creating a bedroom centerpiece that fits exactly what you want.
Pick the right fabric and padding, and you’ll end up with a custom upholstered headboard that looks as good as anything from a high-end store.
Start with a plywood base for strength, then let your creativity take over. The result? A DIY headboard that turns your bedroom into something special.
How to Make a Headboard
Making a padded headboard transforms your bedroom with custom comfort and style that fits your exact needs.
You’ll use simple materials like foam, fabric, and plywood to create a soft, luxurious focal point that costs less than store-bought options.
My Cheap DIY Headboard Uses Bed Foam
Who says you need to spend hundreds on a fancy headboard when a simple piece of bed foam can transform your bedroom for under fifty bucks?
High-density foam from your local mattress store provides excellent comfort and durability concerns are minimal with proper fabric choice.
This budget-friendly home decor approach uses basic padding techniques—just wrap your foam in batting, stretch your chosen fabric tight, and staple securely. The cost savings are significant compared to store-bought options.
Backside of Soft Headboard
The back of your headboard does all the heavy lifting behind the scenes. It’s not glamorous, but it’s what makes the whole thing look polished and hold together properly.
Your fabric backing acts as a dust cover while creating clean staple finish lines.
Focus on frame reinforcement by stretching material taut, then secure with D-rings or picture hangers for wall mounting.
This back reinforcement foundation ensures your headboard mounting techniques work flawlessly.
Save Money by Not Buying Cleat Attachments for The Wall
Skip those pricey wall cleat systems that can cost you $30 or more – there’s a much simpler way to mount your headboard that won’t break the bank.
Instead of French cleats or specialized hanging solutions, try basic wall anchors and screws for secure mounting.
These DIY installation tips save money while providing reliable headboard mounting techniques that work just as well as expensive alternatives.
Post Navigation
Once your beautiful padded headboard is complete, the real challenge begins: getting it securely mounted on your wall without creating a tilted disaster or damaging your masterpiece.
L-brackets work best here. Find your wall studs, screw the brackets in, then hang your headboard.
This Accessibility Options approach prevents damage while making sure your Bedroom decor stays perfectly level for years of comfortable use.
Decide on Your Headboard Shape
Your headboard’s shape sets the tone for your entire bedroom design, so take time to think about what works best with your space and style preferences.
Whether you choose a classic rectangular silhouette, elegant arched curves, or modern geometric angles, the shape you select will guide every subsequent step in your DIY project.
Drill Holes for Tufts
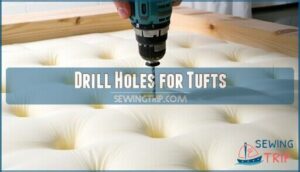
Tufting transforms your headboard from flat to fabulous, but it all starts with perfectly placed holes that’ll guide your fabric into those signature diamond patterns.
First, map out your tufting pattern by marking evenly spaced points across your foam padding—4-6 inches apart usually does the trick.
When it comes to drill bits, a 3/8-inch bit handles most upholstery jobs without any fuss.
Control your Hole Depth by drilling completely through both foam and backing board in one smooth motion. This precision ensures your Button tufting sits flush and your Fabric Tensioning Tips will pay off when you’re Securing Tufts Properly later.
Add Some Nailhead Bling
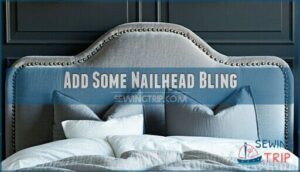
Want to turn your headboard from basic to striking in minutes? Nailhead trim is your secret weapon for instant sophistication. These decorative studs transform any DIY upholstered headboard into a designer masterpiece.
Choose from various sizes and finishes to match your bedroom’s vibe. Here’s what makes nailhead patterns so compelling:
- Creates stunning visual borders that frame your headboard perfectly
- Adds texture and dimension that catches light beautifully
- Gives your DIY headboard professional, high-end appeal
- Allows endless creativity with geometric or flowing designs
Space your headboard accents evenly using a ruler, then gently tap each stud with a small hammer. These bling designs work especially well along edges or creating diamond patterns across your upholstered surface.
Items You’ll Need to Make Your Own Headboard
Getting your hands on the right materials is like having all your ingredients prepped before cooking – it makes the whole project flow smoothly from start to finish.
You’ll need plywood for your base, high-density foam for comfort, batting materials for smoothness, and upholstery-weight fabric choices that match your style.
Don’t forget your staple gun and upholstery tools – they’re essential for professional DIY headboard results.
Frequently Asked Questions (FAQs)
How do I make a padded headboard without a sewing machine?
Without a sewing machine, your DIY padded headboard project becomes surprisingly simple. Apply fabric glue directly to your foam padding, press it firmly onto plywood, then wrap your upholstery fabric tightly around the edges and secure with a staple gun for professional no-sew results.
What is the best type of fabric to use for a padded headboard?
Your fabric choice makes or breaks a headboard project. Linen blends are workhorses—they last forever and clean up easily.
Cotton feels softer but weighs less, which can affect how the final piece looks.
Consider fabric drape for professional results—heavier upholstery materials create smoother finishes than lightweight options.
How do I prevent the fabric from stretching on my padded headboard?
Preventing fabric stretch starts with choosing upholstery-weight materials that resist distortion.
Apply spray adhesive to secure fabric tension against the plywood base, guaranteeing proper material selection and weaving stability for long-lasting headboard construction.
How do I clean a padded headboard?
After all that effort creating your perfect padded headboard, ironically the toughest challenge isn’t construction—it’s keeping it spotless. Regular headboard vacuuming with upholstery attachments removes dust buildup.
When stains happen, grab some mild soap and water to dab at fabric spots. Always test a hidden area first to make sure you won’t damage the material.
A good upholstery spray can keep things fresh and protected without wearing down the fabric.
What fabric weight works best for headboards?
Your headboard’s fabric weight determines durability and professional appearance. Upholstery weight fabric (12-16 oz) provides ideal drape and longevity, while lighter materials may sag or tear during stapling.
- Heavy-duty canvas or duck cloth – Withstands constant pressure and maintains crisp edges
- Medium-weight cotton blends – Balance affordability with decent fabric durability and texture
- Decorator-weight fabrics – Offer excellent material selection while securing proper fabric drape
How do you prevent fabric from wrinkling?
Steam your fabric before cutting to eliminate wrinkles, then maintain proper fabric tension during installation.
Choose heavier fabric weight for better drape and natural wrinkle resistance.
Iron seams flat before stretching.
Can you wash removable headboard covers?
Why wouldn’t removable headboard covers be washable? Most fabric covers designed for easy removal can be machine washed on gentle cycles, though delicate upholstery materials may require dry cleaning instead of standard washing instructions.
Whats the ideal foam thickness for comfort?
You’ll want at least 2 inches of thick foam padding for maximum comfort levels. Here’s what works best for headboard height and cushion thickness:
- 2-3 inches: Standard foam density providing balanced backing layers
- 1-inch foam mattress topper: Doubled over creates 2 inches of plywood thickness backing
- High-density foam: Better durability than standard foam padding options
- Memory foam: Conforms to head and shoulders for premium comfort
- Medium-firm density: Prevents excessive compression while maintaining cushioning
How do you fix sagging padding?
You’ll know it’s time to fix your headboard when three things happen. The padding starts feeling flat no matter how you fluff it. You notice dips and valleys where there used to be smooth cushioning. Or the whole thing just feels like you’re leaning against a board with fabric draped over it.
When foam gives up the ghost, you’ve got options. Swap out the dead sections, layer in some fresh batting, or stuff extra padding between the fabric and backing. A little strategic cushion work brings back that plush feeling you paid for.
| Problem | Quick Fix | Long-term Solution |
|---|---|---|
| Minor sagging | Add batting layer | Replace foam entirely |
| Uneven padding | Redistribute existing foam | Install firmer foam grade |
| Complete collapse | Temporary pillow insert | Full Headboard Refurb |
Conclusion
Think of your bedroom transformation like renovating a fixer-upper house – the smallest changes often yield the biggest impact. Learning how to make a padded headboard turns your sleeping space from basic to boutique with surprisingly little effort.
Learning how to make a padded headboard turns your bedroom from basic to boutique with surprisingly little effort
You’ve gained the skills to create custom comfort while saving hundreds compared to store prices. Your handcrafted headboard won’t just anchor your room’s design – it’ll remind you daily that beautiful, professional results come from your own capable hands.
- https://www.ashleyfurniture.com/c/furniture/bedroom/headboards/
- https://linwoodfabric.com/blogs/inspiration/upholstered-headboard
- https://inmyownstyle.com/diy-upholstered-headboard.html
- https://www.blissfulnights.com/blogs/news/are-upholstered-headboards-still-in-style
- https://www.thisoldhouse.com/furniture/21016543/diy-upholstered-headboard


