This site is supported by our readers. We may earn a commission, at no cost to you, if you purchase through links.
 If your shorts feel too loose around the legs, there are a few easy fixes.
Start by sewing a new seam along the inner or outer leg to take them in—just turn them inside out and try a test run with pins first. Don’t sew? Use iron-on fabric tape for a no-needle option!
For a quick hack, thread elastic through the hemline to cinch the fit. Still not snug enough? Washing them in hot water and tossing them in the dryer can shrink the fabric slightly.
A little tweaking can turn those baggy shorts into a perfectly polished fit.
Table Of Contents
Key Takeaways
- Turn your shorts inside out, mark tighter seam lines, and sew along the marks for a snug fit.
- Use elastic bands inside the hem to cinch the leg openings for a simple and adjustable fix.
- Shrink natural fabrics like cotton and denim by washing them in hot water and drying on high heat.
- Pin excess fabric on the legs, try on the shorts, and make adjustments before stitching for a custom fit.
Altering Shorts for a Smaller Fit
If your shorts feel too loose around the legs, there are simple methods to make them fit better.
From sewing new seams to using elastic bands, altering them is easier than you’d think.
Altering shorts is simpler than it seems—just a few tweaks can transform loose fits into perfectly tailored favorites!
Taking in The Waistband for a Snugger Fit
To fix a loose waistband, tailoring your shorts at home is simpler than it sounds.
Here’s how to nail that snug fit:
- Turn your shorts inside out and pinch extra fabric at the back seam.
- Use pins or chalk to mark the new waistline.
- Carefully remove stitches with a seam ripper.
- Stitch a new back seam along the marked line, tapering smoothly.
- Test the fit as you sew to avoid surprises.
For a crisp, polished look, remember to press seams thoroughly.
These steps, along with thoughtful darts placement, make waistband resizing a breeze—perfect for elongating wear without relying on belts!
Taking in The Sides for a More Fitted Silhouette
Looking to achieve a sleeker fit? Adjusting the side seams is your go-to. Start by turning your shorts inside out and pinching excess fabric along the outer seams.
Use chalk to mark your new seam lines. Sew carefully along these marks, reinforcing the stitches at both ends. This method is ideal for silhouette shaping while keeping the waist intact, especially if slimming thrifted finds.
To accurately mark alterations, consider using a specialized marking tool.
| Before | After | Heads-Up! |
|---|---|---|
| Baggy | Snug Fit | Match thread to fabric. |
| Loose Fit | Sleek Look | Practice stitching first. |
| Bulky Fabric | Streamlined | Use sharp scissors. |
When working on your project, remember to match thread to fabric and practice stitching first to ensure a professional finish. It’s also crucial to use sharp scissors for clean cuts. By following these tips, you can achieve a streamlined look with ease.
Using an Elastic Band for a Quick Fix
Got baggy shorts and need a quick fix? An elastic band is your best friend for tightening leg openings without hassle.
Here’s how you can master this simple DIY shorts alteration.
- Choose elastic band types that suit your style and comfort.
- Use placement techniques by threading elastic through hems with a safety pin.
- Focus on durability factors—secure ends with stitches or fabric glue.
Measure how snug you want the fit, cut the elastic to size, and thread it through a tiny opening in the hem. You can find a variety of elastic options available for this project.
Tightly knot or sew the ends for a secure hold. This method provides temporary adjustments while maintaining comfort considerations. It’s a fast solution to tighten shorts legs and perfect for on-the-go fixes!
Shrinking The Fabric for a Tighter Fit
When you need to tighten shorts legs without sewing, shrinking fabric with heat is a reliable trick.
Shrinking fabric with heat is a simple, sewing-free way to transform loose shorts into a perfectly snug fit.
Natural fibers like cotton, wool, and denim respond best to this method—because fabric type matters! Start with hot water washing and follow up with high-heat drying techniques to see up to a size reduction, also known as the Hot Water Shrink effect.
Need precision? Try a steam iron on the shorts’ legs for targeted tightening.
Remember, synthetic blends resist shrinking fabric, so check labels first. For a custom fit, pre-shrinking fabric also prevents unexpected shrinkage later.
A small effort can transform baggy shorts into perfectly narrow shorts legs fashioned to you, using the Hot Water Shrink effect for a reliable result with natural fibers.
Customizing Your Shorts Pattern
If your shorts feel too loose around the legs, tweaking the pattern can make all the difference.
It’s all about marking accurate measurements and sewing new seams to achieve a slim, polished fit.
Narrowing The Legs for a Slimmer Look
Tightening up baggy shorts for slimmer legs is surprisingly simple. Using basic tapering techniques, you can reshape your inseam for a streamlined look.
Here’s how to narrow the leg shape like a pro:
- Turn the shorts inside out and wear them.
- Pin excess fabric along the inseam or outseam for desired slim shorts legs.
- Use tailor’s chalk to mark your new seam line.
- Stitch along the marked line, tapering gradually.
- Trim the excess, finish edges neatly to prevent fraying.
With proper fabric choice and hem options, this shorts leg alteration gives you confidence and control over your fit!
Widening The Legs for a More Relaxed Fit
Want more room to breathe in your shorts? Adjust shorts legs for a relaxed fit by unpicking seams and adding fabric panels.
For stretchy materials, consider adding gussets for targeted comfort. Denim? Panel insertion works wonders. A seam release is perfect for cotton, offering extra space.
It’s all about smooth blending—no one wants jagged edges! Pattern adjustments guarantee precision, so measure twice.
These shorts leg alteration tricks guarantee stylish, breezy comfort without hassle. For expanding the waist, consider center back seam adjustments.
Adjusting The Pattern for a Perfect Fit
Creating a perfect fit starts with adjusting your shorts pattern for precision and comfort. Think of it as drafting your personal blueprint for flawless results.
Use these tips to refine your process and avoid missteps:
- Mark your changes directly on the pattern to visualize the updated design.
- Test adjustments with muslin fitting to catch issues before resizing your shorts legs.
- Use drafting techniques like ease allowance and grainline adjustments for flexibility and structure.
- Transfer successful tweaks to a permanent template for future projects.
These steps make tapering or resizing shorts legs less challenging. With careful attention to pattern scaling and consistent alterations, you’ll stop relying on luck and start enjoying truly custom-fit shorts!
Tips for Altering Shorts
Making your shorts fit perfectly doesn’t have to be a struggle.
With some simple adjustments like tightening seams or adding elastic, you’ll have them snug and stylish in no time, which can be achieved by following these simple adjustments.
Quick Fixes for a Tighter Fit
Sometimes, you just need quick fixes to adjust your shorts for a snugger fit—without a sewing machine.
These simple no-sew solutions are lifesavers:
- Use safety pin hacks to gather extra fabric along the sides or waistband.
- Try fabric tape tricks to taper shorts legs temporarily or secure rolled-up hems.
- Thread elastic hair ties or adjustable waist cords through loops to quickly reduce shorts width.
- For instant shorts leg adjustment, fold and pin edges for a DIY leg resizing look.
Using a Seam Ripper for Easy Alterations
A seam ripper might be small, but it’s a game-changer when you’re resizing shorts. Whether you’re adjusting legs or fixing uneven stitching, knowing how to use a seam ripper can save you time and frustration.
Start by choosing the right tool—sharp seam ripper types make clean cuts. Gently insert the pointed end under a stitch, then glide the U-shaped blade to slice the thread without tearing fabric.
Work in small sections to carefully remove seams without leaving jagged edges. A safety ball protects delicate fabrics from snags. This is especially handy for pocket alterations or when you need to take in shorts legs.
To avoid fabric damage, hold your shorts steady and keep your movements controlled. Once stitches are out, press the fabric flat with an iron before marking your new lines. Skillful stitch removal reduces alteration costs while ensuring a polished look.
Sewing New Seams for a Slimmer Fit
You’ve removed the old seams; now it’s time to reshape those legs like a pro. Turn your shorts inside out, put them on, and pinch any excess fabric where they feel baggy. This is where the magic of Inseam Adjustments and Outseam Alterations begins.
- Use pins to mark areas for a slimmer look along the leg.
- Choose a needle type suited for your fabric—denim needs a sturdy one!
- Test your Tapering Techniques on scrap fabric before starting.
- Set your sewing machine to a medium stitch length for lasting results.
Consider using specialized adjustment tools for a more precise fit. As you sew along the marks, maintain steady tension to avoid puckering. Keep Pocket Considerations in mind; bulky ones can interrupt sleek shorts leg resizing. Trim extra fabric afterward for a clean, polished finish.
Working With Elastic for a Comfortable Fit
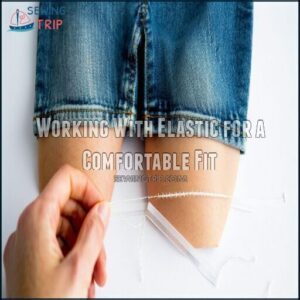
Ready to refine your shorts for both style and ease? Elastic bands are your secret weapon. After tweaking seams, elastic adds flexibility and comfort without sacrificing fit.
Here’s the game plan:
- Measure and cut accurately: Make the elastic two inches shorter than the leg opening for ideal tension.
- Pick the right type: Go for braided elastic for stability or knit elastic for stretchier fabrics.
- Integrate properly: Sew a comfortable casing inside the leg openings, keeping elasticity balanced by stretching the material evenly.
Hidden elastic guarantees your shorts stay snug, offering a comfortable fit that feels custom-made!
Common Challenges and Solutions
Sometimes, making shorts fit better comes with its fair share of challenges, like dealing with riding up or baggy legs.
Don’t worry, though—there are simple tricks and smart fixes to tackle these issues and get a snug, flattering fit.
How to Hide Big Thighs in Shorts
Darker washes and vertical stripes are your best friends for a thigh-slimming effect. A-line styles give breathing room without hugging or emphasizing.
Strategic pockets, placed at smart angles, subtly shift focus for a balanced look. Opt for lengths ending at a narrower part of your thigh—it’s a flattering trick.
High-waisted designs elongate your figure, helping you own your shape confidently. Whether you sew shorts legs or use alterations like darts, customizing shorts legs guarantees a perfect fit.
Remember, shorts leg modification is about comfort and style! For a more comfortable fit, consider wider leg openings to prevent tightness.
How to Keep Shorts From Riding Up
Nobody enjoys walking around tugging at their shorts all summer.
To keep them in place, try these tips:
- Use anti-ride products like Fearless Tape or clear silicone caulk for instant hold.
- Add thin elastic bands to the hem for better thigh control and ride-up prevention.
- Look for heavier fabrics or hem weights, which stay anchored as you move.
- Dust with body powder before wearing to reduce friction.
Simple fixes like these can transform your summer comfort!
How to Make Shorts Less Baggy
Baggy shorts ruining your style? Good news—you can make them slimmer with a few tweaks that don’t take hours or special skills.
Here’s how to fix the fit and take in legs like a pro:
- Take in side seams: Turn the shorts inside out, pin extra fabric along the sides, then sew new seams for a sleek, customized look. Start with small adjustments and tweak as needed.
- Adding darts: Stitch small folds (darts) along the waistband or back for a snugger fit while maintaining comfort.
- Elastic hems: Sew thin elastic bands inside the leg openings for a cuffed hem effect that hugs your legs, improving both fit and style! Accurate measurements are essential, and you should compare to patterns before making any adjustments.
How to Make Shorts a Size Smaller
Want to make your shorts a size smaller? Start with hot water shrinking—just wash them in hot water and dry on high heat to tighten natural fabrics.
For more precision, try the elastic waistband trick: add elastic inside the band for a snug fit. You can also sew new seams by pinning and resizing side seams or add darts for a customized look.
Need quick fixes? Hem folding or leg narrowing works for DIY alterations. Remember, shorts resizing is straightforward with these techniques—you’re just a few steps from perfect-fitting shorts!
Frequently Asked Questions (FAQs)
How to make shorts smaller around the legs?
Turn your shorts inside out, mark the desired fit with pins along the seams, and sew a new seamline.
Alternatively, add elastic bands or fabric tape for a quick, no-sew solution to tighten the legs.
How can I get a smaller waist?
To get a smaller waist, try adding elastic inside your waistband, sewing darts for a snug fit, or using a belt for a quick fix.
Wash shorts in hot water to shrink natural fabrics.
Can shorts make your legs look small?
Shorts can absolutely make your legs look slimmer! Opt for darker colors, vertical patterns, or custom fits.
High-waisted shorts elongate legs, while A-line cuts and strategic seams create a streamlined, flattering silhouette effortlessly.
How to slim down shorts near the legs?
Pinch excess fabric on the leg seams while wearing the shorts, mark the area, and sew a new seam.
For no-sew fixes, try elastic bands, fabric tape, or safety pins for a quick adjustment.
How do I make my thighs smaller in shorts?
Ever feel like your thighs are swimming in fabric?
Take control by sewing in side seams or adding darts.
You can also use elastic, fabric tape, or create cuffs for a snugger, fitted look.
How do I Make my Shorts smaller?
To make your shorts smaller, turn them inside out, mark the size change, and sew along new seams.
Use darts for a fitted fit or try hot water shrinking.
Measure often to guarantee perfection!
How to tighten shorts around the leg?
Flip your shorts inside out, mark tighter seam lines near the leg openings, then sew along the marks for a snug fit.
If sewing’s not your jam, try elastic bands or fabric tape for easy fixes.
How to reduce the size of shorts?
Sometimes, it’s like taming a wild fabric storm—turn shorts inside out, measure excess, and sew new seams for a snug fit.
Try elastic or darts for quick fixes, or hot water for natural fibers.
How to tighten shorts that are too big?
Pinch extra fabric along the side seams, mark with chalk, and sew a new seam for a sleeker fit.
Don’t overdo it—test as you go to keep things wearable and comfy!
How do you make shorts smaller around your legs?
Turning baggy shorts into sleek, leg-hugging perfection is easier than you’d think!
Sew new seams along the inside legs, add elastic bands, or use fabric tape for a snug fit without breaking a sweat.
Conclusion
Did you know the average person wears only 20% of their wardrobe regularly?
Don’t let ill-fitting shorts join the unused pile. Whether you’re sewing new seams, shrinking the fabric slightly, or threading elastic bands, you’ve got plenty of ways to make shorts smaller around the legs.
With simple alterations, you can achieve a slimmer, polished look without breaking a sweat. So grab those baggy shorts, give them some love, and enjoy a custom fit that works for you, with a pair that is now a perfect addition to your regularly worn 20% of their wardrobe.
- https://creators.yahoo.com/lifestyle/story/thick-thighs-are-still-saving-lives-how-i-rock-shorts-with-my-thick-legs-and-how-you-can-too-092557891.html
- https://undersummers.com/blogs/undersummers-about-us/the-perfect-fit-shorts-for-women-with-big-thighs?srsltid=AfmBOoq8RjSwbXAkTep_gXbQdxIfVxbg_MHjToSMykCl985T2DzHPBdK
- https://www.c-and-a.com/eu/en/shop/thigh-problem-area
- https://www.wikihow.com/Hide-Big-Hips-and-Thighs
- https://www.quora.com/Can-you-wear-shorts-if-you-have-big-thighs

