This site is supported by our readers. We may earn a commission, at no cost to you, if you purchase through links.
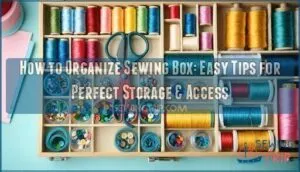 Start by emptying your entire sewing box and sorting items by category. Group threads together, separate needles by type, and collect buttons in one spot.
Use small containers or pill organizers to create designated homes for each item type. Keep frequently used tools like scissors and measuring tape in the top layer for easy access.
Secure pins with magnetic strips to prevent spills, and store delicate items like fabric markers in protective cases. Label each compartment so you’ll know exactly where everything belongs.
When you organize your sewing box this way, you’ll save time and reduce frustration during projects. Smart storage solutions can transform even the messiest craft space into an efficient workspace, providing easy access to your tools, and helping you stay organized with efficient use of space.
Table Of Contents
Key Takeaways
- Sort your supplies by category first – Empty everything out and group threads together, separate needles by type, and collect buttons in one spot before organizing them into containers.
- Use small containers and compartments – Repurpose pill organizers, clear plastic boxes, or vintage tins to create designated homes for each item type, making everything visible and accessible.
- Keep frequently used tools within easy reach – Store scissors and measuring tape in the top layer, and tape essential items like needle threaders inside the lid for instant access.
- Secure and protect your supplies – Use magnetic strips for pins to prevent spills, store delicate items like fabric markers in protective cases, and label each compartment so you will know exactly where everything belongs.
What is a Sewing Box?
A sewing box is your command center for creativity – a dedicated storage solution that keeps all your sewing supplies and tools organized in one accessible place.
Your sewing box transforms chaotic supplies into an organized system that actually inspires you to create.
Think of it as mission control for your crafting adventures.
The sewing box definition encompasses everything from vintage wooden chests to modern plastic organizers.
Box size matters tremendously when choosing your perfect match.
Consider your workspace and project scope before selecting from various kit types like portable cases, stackable drawer systems, or wall-mounted organizers.
Style selection depends on your sewing personality.
Quaint wooden boxes offer timeless charm, while clear plastic tackle boxes provide practical visibility.
Box construction should prioritize durability and compartmentalization.
A key feature is portable storage options that allow for crafting on the go.
Your sewing kit becomes a personalized toolkit containing essential sewing tools like scissors, needles, and measuring tape.
Quality sewing notions and supplies deserve proper homes where you can find them instantly.
The right sewing box transforms chaotic supplies into an organized system that actually inspires you to create.
How to Use a Sewing Box?
Getting the most from your sewing box starts with smart setup and thoughtful use.
Your sewing kit becomes a powerhouse when you match supplies to specific projects and situations.
Here are four essential Box Usage Tips to maximize your sewing experience:
- Store thread spools upright in small containers to prevent tangling and create instant visual inventory of your colors
- Arrange hand sewing needles and pins inside a magnetic pin holder for quick access and zero frustration when you’re in the creative zone
- Tape a small needle threader inside the lid so it’s always ready when you need it most – no more squinting or struggling
- Hang sharp fabric shears securely on the box edge to protect the blades and keep them dedicated to fabric cutting only
Whether you’re doing Travel Sewing repairs, Repairing Clothes on the go, or working on Project-Specific Storage solutions, an organized sewing box transforms chaos into creative freedom.
Your sewing supplies work harder when they’re properly arranged.
How to Organize a Sewing Box?
You’ve got all your sewing supplies, but now they’re scattered everywhere like confetti after a celebration.
Transform that chaotic mess into a perfectly organized system by using simple containers, clear labels, and smart placement strategies that’ll save you time and frustration on every project.
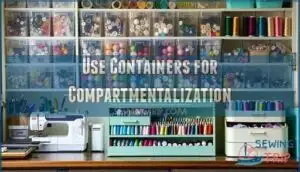
Use Containers for Compartmentalization
Transform your chaotic sewing box into an organized haven with smart compartmentalization.
Clear containers let you spot supplies instantly, while repurposed mint tins corral small notions perfectly.
Size matters when choosing sewing box containers – match container dimensions to your available space and specific items.
You can find durable storage solutions for organizing your sewing supplies.
| Container Types | Best For | Material Choice |
|---|---|---|
| Clear plastic boxes | Buttons, beads, small notions | Durable, see-through benefits |
| Vintage tins | Thread spools, bobbins | Charming, stackable design |
| Tackle boxes | Multiple supplies, custom dividers |
Adjustable sewing box compartments.
Smart sewing box organization starts with the right containers for seamless storage, utilizing durable storage solutions and a charming design to create an efficient space.
Label Storage Boxes
Labels turn chaos into calm when organizing your sewing box.
Clear identification saves precious time during creative moments. Different box materials require specific labeling methods for lasting results.
- Plastic containers – Use permanent markers or waterproof stickers that won’t peel off
- Fabric bins – Print decorative labels with readable font choices for professional appearance
- Metal tins – Apply masking tape strips for easy label placement and removal
- Glass jars – Try chalkboard paint for reusable, customizable sewing box labels
- Wooden boxes – Implement color coding systems with bright markers for instant sewing supplies recognition
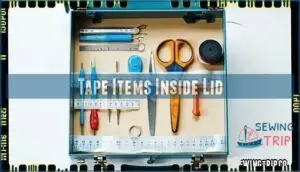
Tape Items Inside Lid
Your sewing box lid becomes prime real estate when you tape frequently-used tools there.
Position needle threaders, small scissors, and measuring tape using double-sided adhesive for instant lid tool access.
Magnetic tape options work perfectly for pins and needles, while strong adhesive guarantees everything stays put during transport.
| Tool Type | Best Placement | Adhesive Choice |
|---|---|---|
| Needle Threaders | Center lid area | Double-sided tape |
| Small Scissors | Side edge | Strong craft adhesive |
| Measuring Tape | Corner space | Velcro strips |
Examples of Sewing Boxes
When you’re hunting for the perfect sewing box, you’ll discover options that fit every space and style.
Portable sewing boxes work great for crafters on the go – think converted tackle boxes or vintage train cases with secure latches. Stacked drawer boxes offer multiple levels of organization, letting you separate threads from buttons and needles from measuring tools.
Wall organizer boxes maximize vertical space in small rooms while keeping supplies visible and accessible. Vintage sewing boxes bring charm with their ornate details and sturdy construction – old jewelry boxes and cigar boxes make excellent candidates for DIY conversions.
Creative sewing box ideas include repurposing sunglasses cases for small tools, using mason jars for button storage, and converting cookie tins into thread holders. The key is matching your sewing box style to your workflow. Whether you choose a compact portable option or an elaborate multi-tiered system, the right container keeps your supplies organized and your projects flowing smoothly. The goal is to find a sewing box that fits your needs, providing a perfect space for your sewing essentials, and helping you stay organized with your sewing supplies, making it easier to focus on your projects.
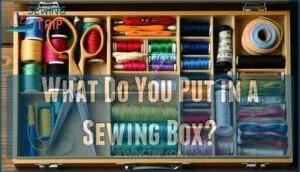
What Do You Put in a Sewing Box?
Your sewing box should contain the right mix of basic tools and specialty items that match your specific sewing projects and skill level.
You’ll want to start with must-have essentials like fabric scissors, needles, and thread, then add advanced tools as your skills grow and your projects become more complex.
Basic, Must-have Sewing Box Items
Now that you’ve explored different sewing box styles, let’s pack yours with the right sewing supplies.
Every sewing box needs these fundamental sewing tools to handle most projects successfully.
Start with these sewing box essentials:
- Quality Scissors – Invest in sharp fabric shears that cut cleanly through multiple layers
- Essential Needles – Stock hand-sewing needles in sizes 8-12 plus machine needles for your projects
- Thread Variety – Choose basic colors like black, white, navy, and beige for everyday repairs
Don’t forget your seam ripper for fixing mistakes and measuring tools like a tape measure.
You might also want to think about specialized sewing shears for specific tasks.
These sewing box items form your foundation.
6 Advanced Sewing Box Essentials
Once you’ve mastered the basics, upgrade your sewing box with these game-changing additions.
Specialty feet facilitate new techniques like blind hems and buttonholes. Silk organizers protect delicate fabrics from snags.
Add essential ironing tools – a mini iron and pressing cloth work wonders. Rotary cutters paired with cutting mats deliver precise cuts every time.
A basic sewing kit should include fabric scissors for cutting material. Don’t forget proper lighting options to reduce eye strain during detailed work, which is an essential part of having a well-rounded sewing experience.
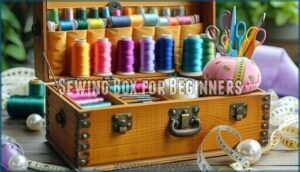
Sewing Box for Beginners
When you’re just starting out, choosing the right sewing box feels like picking your first car – exciting but overwhelming.
A medium-sized sewing kit works perfectly for beginners, giving you room to grow without breaking the bank.
Look for budget options that include essential tools like fabric scissors, hand needles, and colorful thread spools.
Kit types range from simple plastic containers to wooden boxes with compartments.
Box size matters – too small and you’ll outgrow it quickly, too large and supplies get lost.
Consider a wardrobe repair set for quick fixes.
Safety tips include storing rotary cutters with blade guards and keeping sharp scissors in protective sheaths.
Start with basic sewing supplies: pins, measuring tape, seam ripper, and a sturdy pincushion.
Your sewing tools collection will expand naturally as your skills develop.
Sewing Box for a Little Girl
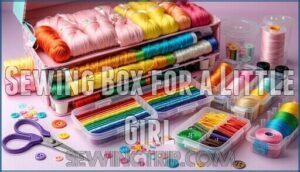
Your little girl’s sewing box should spark creativity while keeping her safe. Start with a colorful container that makes her excited to explore. Fill it with vibrant, colorful threads in every shade of the rainbow – these become her palette for imagination.
Safe scissors designed for children are essential. Look for blunt-tip versions that cut fabric but won’t cause injury. Store them in a protective case to prevent accidents.
Needle storage requires special attention. Use a magnetic pin cushion or secure container to keep needles organized and away from small fingers. Consider child-safe plastic needles for her first simple projects.
Add fun fabrics like felt squares, cotton scraps, and ribbon pieces. These materials are perfect for beginner-friendly crafts. Include large buttons for decoration and easy handling.
A sewing kit for little girls should inspire confidence. Organize supplies in clear containers so she can see her treasures. These portable sewing machines offer adjustable speed controls. This sewing box becomes her creative sanctuary where dreams take shape.
Sewing Box for Embroidery
Embroidery’s delicate artistry deserves specialized storage that keeps your creative treasures organized and accessible.
Your sewing box for embroidery becomes the command center for thread color palettes, needle organization, and pattern keeping that transforms chaotic supplies into an inspiring workspace.
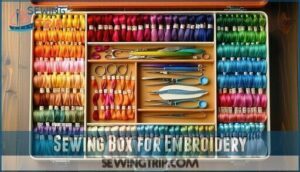
Smart embroidery floss storage starts with vintage tea tins or bobbin holders arranged by color families. Store needles in felt-lined compartments to prevent dulling, while hoop storage requires dedicated slots that won’t warp your frames.
Clear vinyl pockets attached inside your sewing kit lid display current patterns and instructions at eye level.
Essential organization strategies include:
- Washi tape labels that identify specialized tools like embroidery scissors and tweezers
- Zippered pouches for storing fabric scraps by project or color theme
- Magnetic strips that hold metal needles and small scissors securely
- Stackable trays with adjustable dividers for growing sewing supplies collections
- Secure latches protecting delicate sewing notions from workspace mishaps.
Your organized embroidery sanctuary eliminates frustrating supply hunts, letting creativity flow uninterrupted.
Frequently Asked Questions (FAQs)
How do I organize my sewing room?
Create dedicated zones for cutting, sewing, and pressing.
Use clear containers for threads and notions. Install pegboards for tools.
Label everything. Keep frequently used items within arm’s reach of your machine, especially frequently used items.
How do you organize a sewing box?
My grandmother always said her sewing box looked like a tornado hit it until she discovered the magic of small containers.
You’ll want to sort tools by type, use clear boxes for visibility, and keep frequently used items accessible in the lid.
How do you organize sewing supplies?
Sort your supplies by type in clear containers—threads together, needles grouped, buttons separated.
Use small boxes for compartments, tape frequently-used tools inside lids, and store thread spools upright to prevent tangling.
What are the best storage boxes for sewing supplies?
Clear containers, tackle boxes, and vintage tins work best.
You’ll want compartments for threads, magnetic strips for needles, and sturdy cases for scissors.
Choose boxes with secure latches—your supplies deserve protection.
How do I choose a sewing box?
Consider your sewing style and available space first.
You’ll want sturdy construction with secure latches, multiple compartments for organizing tools, and portable size if you’ll travel.
Test the handle strength and compartment accessibility before buying to ensure secure storage.
Why should you make DIY sewing organizers?
DIY sewing organizers let you customize storage for your specific needs while saving money.
You’ll create perfect-sized compartments, repurpose household items creatively, and build exactly what fits your space and sewing style best.
How to organize a sewing kit?
Group similar items together—needles with needles, thread with thread.
Use small containers or compartments to separate everything.
Keep frequently used tools like scissors and seam rippers within easy reach for quick access to ensure quick handling.
What does every sewing room need?
Just like your kitchen needs a good knife, your sewing room needs sharp fabric scissors, quality needles, measuring tape, seam ripper, iron, cutting mat, and proper lighting.
You’ll also want thread storage and comfortable seating.
How to organize and store sewing patterns?
Store patterns in magazine holders or file organizers for easy access.
Label each slot clearly.
Use large envelopes for filing individual patterns.
Keep them vertical on bookshelves to prevent damage and maintain visibility.
How often should I clean out my sewing box?
Like spring cleaning for your creative sanctuary, you should clean out your sewing box monthly.
This keeps supplies organized, prevents clutter from taking over, and guarantees you’ll find what you need when inspiration strikes.
Conclusion
Transform your chaotic sewing disaster into a masterpiece of organization! You’ve learned how to organize sewing box storage using containers, labels, and smart placement techniques.
These simple strategies will save you countless hours of searching through tangled threads and missing buttons. Your newly organized sewing box becomes your creative command center, where every tool has its perfect place.
Start implementing these tips today, and you’ll wonder how you ever survived the messy madness of your old system.


