This site is supported by our readers. We may earn a commission, at no cost to you, if you purchase through links.

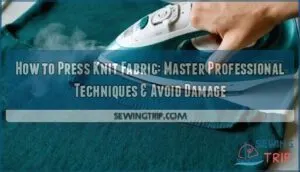
Place a pressing cloth or clean towel over your knit to create a protective barrier.
Here’s the key: lift and lower your iron instead of sliding it across the fabric.
This prevents stretching and keeps your knit’s shape intact.
Use gentle pressure and let steam do most of the work.
For stubborn wrinkles, hold the iron slightly above the fabric and let steam penetrate the fibers.
The secret lies in understanding your fabric’s specific needs and heat tolerance.
Table Of Contents
Key Takeaways
- Use low to medium heat settings and always test on fabric scraps first – You’ll prevent scorching and melting while finding the right temperature for your specific knit type.
- Lift and press down instead of sliding your iron across the fabric – You’ll avoid stretching and distortion by using vertical motions rather than dragging, which maintains your knit’s original shape.
- Place a pressing cloth between your iron and delicate knits – You’ll protect synthetic fabrics and prevent shine while still allowing steam to penetrate and remove wrinkles effectively.
- Let steam do most of the work by hovering your iron slightly above stubborn wrinkles – You’ll relax fibers naturally without direct contact, preventing damage while achieving professional-looking results.
Pressing Knit Fabric Basics
Pressing knit fabrics requires a gentler approach than woven materials, since you’ll need to prevent stretching while removing wrinkles and setting seams properly.
Master the gentle art of pressing knits—lift, don’t drag, and let steam work its magic.
You can achieve professional results by understanding the right temperature settings, using pressing cloths when needed, and mastering the lift-and-press technique that protects your fabric’s stretch and recovery.
Preparing Fabric for Pressing
Before pressing knit fabric, you’ll want to get your foundation right.
Start by pre-shrinking fabric through washing and drying to prevent future surprises.
Use sharp scissors for cutting techniques that won’t fray edges, then focus on marking hemlines with washable markers.
Test your pressing methods on scraps first—this fabric preparation step saves headaches later and guarantees your fabric care routine delivers professional results.
Choosing The Right Iron Temperature
Once your fabric’s ready, iron temperature knit settings make or break your project.
Cotton blends handle medium-high heat around 350°F, while synthetic fabrics need gentler 275°F temperatures.
Testing temperature on scraps prevents disasters—nobody wants melted spandex!
Iron type matters too; steam knit fabric works best with adjustable controls.
You can find a knit fabric iron suitable for these tasks.
Remember, pressing knit fabric requires patience over power when iron settings knit properly.
Using a Pressing Cloth for Delicates
Delicate knits like silk blends and synthetic fabrics need extra protection during pressing.
A thin cotton pressing cloth acts as your safety net, preventing shine and heat damage while allowing steam to penetrate.
Place the cloth between your iron and knit fabric, adjusting heat settings accordingly.
For specialized tools, consider options for delicate fabric care.
This simple barrier removes residue buildup and maintains your fabric’s original texture perfectly.
How to Press Knit Fabric
Ready hands make all the difference when you’re tackling knit fabric pressing. Start by positioning your fabric flat on the ironing board, wrong side facing up. Set your iron to the appropriate temperature for your specific knit type, then gently press down without sliding the iron across the surface.
This prevents stretching and distortion while removing stubborn wrinkles. Pressing cloths prevent shiny marks.
- Test iron temperature on fabric scraps before pressing your actual project
- Use vertical lifting motions instead of dragging to maintain fabric integrity
- Apply steam sparingly to avoid oversaturating delicate knit fibers
By following these steps, you can ensure that your knit fabric is pressed correctly and looks its best, making all the difference in the quality of your final sewing project.
Pressing Techniques for Knits
You’ll need to master three essential techniques to press knits like a professional: lifting the iron straight up and down instead of dragging it across the fabric, using controlled steam to relax fibers without over-wetting, and keeping tension minimal to prevent unwanted stretching.
These methods work together to create smooth, wrinkle-free results while preserving your knit fabric’s natural stretch and shape.
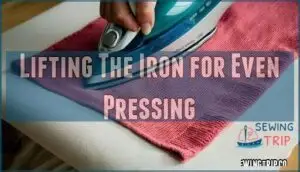
Lifting The Iron for Even Pressing
Like a butterfly landing on a flower, your iron should touch down gently on knit fabric.
Use gentle lifting motions instead of sliding across the surface, preventing stretching and avoiding marks.
Press down for several seconds, then lift straight up before moving to the next section.
Allow fabric cooling between presses for proper seam setting and professional knit fabric pressing results.
For intricate shapes, consider using a tailor’s ham for support to maintain the fabric’s natural curves, ensuring a smooth finish with gentle lifting motions and proper seam setting, which helps in achieving professional knit fabric pressing results with natural curves.
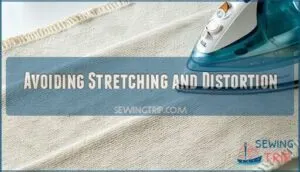
Avoiding Stretching and Distortion
Pressing knitwear requires a delicate touch to prevent stretching and avoid distortion. Gentle handling keeps your fabric’s original shape intact while you work.
Follow these essential pressing techniques for knits:
- Support the fabric completely on your ironing surface before pressing
- Lift and place the iron rather than dragging it across
- Use consistent stitching pressure without pulling the material
- Stabilize lightweight knits with proper backing when needed
- Pre-shrink fabric before pressing to prevent future distortion
Using Steam for Wrinkle Removal
Steam transforms stubborn knit fabric wrinkles into smooth perfection when you master the right approach. Your steam iron becomes your best friend for pressing knitwear, but timing matters. Hold the iron slightly above the fabric, letting steam penetrate fibers without direct contact.
Steam is your secret weapon—hover above the fabric and let moisture work its magic without touching down.
This prevents stretching while the moisture relaxes wrinkles naturally. Steam and fabric work together when you understand the balance. Steam vs. dry pressing depends on your knit’s composition—natural fibers love moisture while synthetics prefer gentler treatment.
| Steam Iron Settings | Fabric Type | Steam Level |
|---|---|---|
| Low Steam | Synthetic knits | Light mist |
| Medium Steam | Cotton blends | Moderate burst |
| High Steam | Natural fibers | Full steam |
| No Steam | Delicate synthetics | Dry heat only |
| Variable Steam | Mixed fabrics | Adjustable output |
Watch for steam and shrinkage issues by testing corners first. Steam and seams require extra care; hover your iron to avoid flattening textures. These knit fabric steaming techniques guarantee professional results every time, ensuring your knitwear looks perfect with the right steam iron approach.
Troubleshooting Pressing Issues
You’ll encounter occasional pressing mishaps with knit fabrics, but understanding the right solutions can save your project from permanent damage.
Master these troubleshooting techniques to handle scorching, heat marks, and fabric distortion while achieving professional-quality results every time.
Preventing Scorching and Marks
Behind every perfect knit project lies careful temperature control and protective measures.
Scorching happens faster than you’d think with delicate fabrics, but these simple steps keep your projects safe.
- Test iron temperature on fabric scraps before pressing your main piece
- Use pressing cloths for synthetic blends and delicate knit content
- Keep steam usage minimal to prevent fabric burning
- Check testing corners frequently for heat damage signs to ensure protective measures are in place and prevent scorching.
Adjusting Iron Heat for Fabric Types
Different knit fabrics demand specific iron heat settings to prevent damage.
Cotton knits handle high temperatures (150-200°C), while synthetic blends need medium heat (110-150°C).
Always test on fabric corners first—synthetic heat can melt polyester or nylon instantly.
Natural fibers like cotton withstand more heat than delicate blends.
Adjustable heat settings are essential for matching temperature to fabric.
Adjust your iron temperature based on the dominant fiber for safe knit fabric care and effective pressing.
Using The Right Needle for Sewing
After setting your iron temperature correctly, selecting proper sewing needles becomes your next priority for knit fabric success.
Ballpoint or stretch needles prevent fabric damage control by sliding between fibers rather than piercing them.
Match needle size guide recommendations to your thread compatibility – size 70/10 for lightweight knits, 90/14 for heavier materials.
This simple switch will prevent skipped stitches and guarantee smooth pressing cloth application.
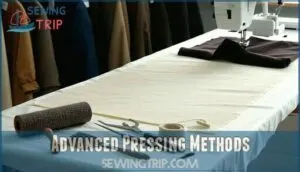
Advanced Pressing Methods
Once you’ve mastered basic pressing techniques, you’re ready to tackle specialized methods that’ll transform your knit projects from homemade to professional quality.
These advanced approaches, including walking foot techniques, twin needle applications, and curved seam pressing, require precision but deliver results that make the extra effort worthwhile, using techniques that are truly specialized.
Using a Walking Foot for Even Feeding
Your walking foot becomes your best friend when pressing knit fabric sections that need sewing.
Walking Foot Benefits include eliminating Fabric Feed Problems by moving both fabric layers at identical speeds.
This prevents the dreaded bunching that ruins Stitch Quality.
Adjust your Foot Pressure Settings lighter for stretchy knits, and you’ll notice Feed Dog Issues disappear completely.
Employing a Twin Needle for Professional Finish
A twin needle transforms your knit hems from homemade to store-bought quality.
Choose your needle selection based on fabric weight—lighter knits need smaller needles. Thread choice matters: use matching polyester threads in both needles.
Adjust stitch length to 3-4mm and reduce tension slightly. This professional finish creates parallel topstitches while maintaining stretch, perfect when you iron knit fabric afterward using a pressing cloth knit protection.
To further refine your technique, consider how adjusting tension guarantees smooth stitches.
Pressing Curved Seams With a Padded Ham
A padded ham transforms curved seam pressing from frustrating to flawless.
Position your knit fabric over the ham’s contours, matching the garment’s natural curves. The cotton knit and wooden construction provides stable support while you press.
Consider this padded pressing equipment for best results.
Use gentle lifting motions with your pressing cloth to avoid stretching. This specialized tool guarantees professional seam shaping results that flat surfaces simply can’t achieve, ensuring a flawless finish with gentle care.
Frequently Asked Questions (FAQs)
How do you press a knit?
Seventy percent of home sewers skip pressing knits, causing permanent puckering.
You’ll press knits using low heat with a pressing cloth, lifting the iron straight up and down rather than sliding it across the delicate fibers to avoid damage, which is a key step in handling delicate fibers.
How do you press a knit Hem?
Fold your knit hem, then gently press with a pressing cloth using medium heat.
Don’t drag the iron—lift and press down to avoid stretching.
Let it cool completely before moving for crisp results.
How do you press fabric?
Ironically, many sewers rush through pressing, yet it’s the secret to professional results.
You’ll lift your iron straight up and down—no sliding—using appropriate heat settings and a press cloth for delicate fabrics.
How do you stabilize a knit fabric?
Use lightweight fusible interfacing or knit stay tape along hemlines and seams.
Apply with gentle heat, avoiding overstretching.
A walking foot helps feed fabric evenly while sewing, preventing distortion and maintaining the knit’s natural stretch.
How do you Hem a knit fabric?
Unlike rigid woven fabrics that demand double-folded hems, knit fabrics need only a single fold.
You’ll stitch the raw edge with a wide zigzag stitch, maintaining stretch while creating a professional finish.
Do I need to wash a press cloth before pressing?
Yes, you should wash your press cloth before first use to remove manufacturing residues that could transfer onto your fabric.
Clean press cloths guarantee better heat distribution and won’t leave unwanted chemicals on delicate knits, which ensures a safer and more effective pressing process with delicate knits.
How to press seams on knit fabric?
Place your knit fabric wrong-side up on the ironing board.
Lift your iron straight down onto each seam, hold for several seconds, then lift straight up.
Don’t drag the iron—you’ll stretch the fabric.
Can you iron knitted fabric?
Knitted fabrics can be ironed, but you’ll need to use lower heat settings and gentle pressure.
Always test on a scrap first, use a pressing cloth, and avoid dragging the iron to prevent stretching, with gentle pressure.
How do you straight-stitch knit fabric?
You shouldn’t straight-stitch knit fabric because it lacks stretch and will break when the fabric moves.
Instead, use a zigzag stitch, stretch stitch, or twin needle to maintain the fabric’s elasticity.
What is the best sewing machine setting for knit fabric?
Ironically, knit fabric’s stretchy nature demands gentle handling—use a ballpoint needle, zigzag stitch (width 2-4, length 2-3), reduced presser foot pressure, and polyester thread for best results.
Conclusion
Practice makes perfect when mastering how to press knit fabric effectively.
You’ve learned essential techniques that’ll transform your pressing skills from amateur to professional.
Remember to use low heat, lift instead of slide, and let steam work its magic.
With these methods in your toolkit, you’ll confidently handle any knit project without fear of damage.
Your garments will look crisp, professional, and maintain their original shape for years to come.


