This site is supported by our readers. We may earn a commission, at no cost to you, if you purchase through links.

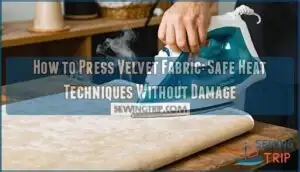
Place your velvet face-down on this cushioned surface, then cover the back with a pressing cloth.
Set your iron to low heat with steam – silk velvet needs 250°F, cotton can handle medium heat up to 350°F, and synthetic requires low temperatures around 275°F.
Test your settings on a hidden area first.
Press gently without dragging the iron, letting steam do most of the work.
This prevents crushing the delicate pile that gives velvet its signature texture.
The right technique transforms wrinkled velvet into smooth perfection.
Table Of Contents
Key Takeaways
- Use a needle board or thick towel – You’ll protect velvet’s pile by placing it face-down on these cushioned surfaces, preventing crushing while you press from the back.
- Test iron settings first – You should always test on a hidden area since silk velvet needs 250°F, cotton handles up to 350°F, and synthetic requires only 275°F.
- Steam without direct contact – You’ll get better results by hovering your iron half an inch above the fabric and letting steam do the work instead of pressing directly.
- Work with the wrong side up – You can’t repair crushed pile once it’s flattened, so always press from the back using a pressing cloth for extra protection.
Preparing to Press Velvet Fabric
Before pressing velvet fabric, you’ll need to gather the right tools and understand your fabric’s specific needs.
Proper preparation prevents costly mistakes and guarantees your velvet maintains its luxurious pile and appearance.
Gather Essential Tools and Materials
Success requires the right toolkit.
You’ll need an ironing board for stability, a pressing cloth to shield velvet’s delicate pile, and a needle board to prevent crushing.
Keep a velvet brush handy for post-pressing touch-ups, plus a steam cleaner for gentle wrinkle removal.
Check your iron settings before starting—proper iron temperature prevents damage while effective steam ironing maintains velvet’s luxurious texture.
Having the correct ironing board accessories is essential for a smooth pressing process with the right ironing board.
Assess Fiber Content and Care Labels
Before pressing velvet fabric, you must identify its fiber content and check care labels to prevent damage.
Different velvet types require specific iron settings for safe handling.
Check these details before proceeding:
- Fiber content – silk, cotton, or synthetic materials each need different temperatures
- Care labels – follow manufacturer instructions for iron settings and fabric care
- Fabric testing – test on a hidden area first to verify safe heat levels
- Material safety – acetate velvet is especially heat-sensitive and requires extra caution
Understanding the fiber content analysis is essential for the longevity of the fabric.
Set Up a Suitable Pressing Surface
Once you’ve checked fiber content and care labels, you’ll need the right pressing surface. A standard ironing board works, but velvet requires special protection. Your pressing surface determines whether you’ll preserve or crush that luxurious velvet pile during the pressing process.
Using a velvet ironing board can provide the necessary protection and support for velvet fabrics.
| Surface Type | Best For | Key Benefit |
|---|---|---|
| Needle Boards | All velvet types | Protects pile from flattening |
| Velvet Pads | Delicate silk velvet | Cushioned support for fragile fibers |
| Dense towels | Budget-friendly option | Prevents pile crushing |
Steam tables offer professional results but aren’t necessary for home use. Your pressing cloths should be clean cotton or silk to prevent residue transfer onto velvet.
Test Iron Settings on a Swatch
Always start fabric sampling before pressing your velvet project.
Cut a small test scrap from the same fabric, then experiment with different iron settings and heat control methods.
Begin with low temperatures and gradually increase until you find the sweet spot that removes wrinkles without damaging the pile.
Use a press cloth during swatch testing to protect the velvet surface and observe how the fabric responds to each temperature setting.
How to Press Velvet Fabric Step by Step
Following eight careful steps guarantees successful velvet pressing while protecting your fabric’s luxurious pile. Begin with clean hands and remove any jewelry that might snag the delicate fibers.
Place your velvet face-down on a needle board or thick towel to cushion the pile. Set your iron to the appropriate temperature for your velvet type, then test on a hidden area first.
Key velvet ironing essentials include:
- Always press from the wrong side to prevent pile crushing
- Use a pressing cloth between iron and fabric for extra protection
- Work in lifting motions rather than sliding the iron across surface
Steam velvet gently by hovering your iron half an inch above the fabric. Never apply direct pressure to the right side, as this permanently flattens the pile.
For seams, use a seam roll underneath to prevent impressions showing through. Allow each pressed section to cool completely before handling. Understanding proper pressing techniques is vital for achieving professional results with velvet fabric, and more information can be found at pressing techniques.
Choosing The Right Iron Temperature
Selecting the correct temperature prevents velvet damage and maintains its luxurious appearance. Different fiber types require specific heat settings to avoid melting, shine, or pile crushing.
Settings for Silk Velvet
Silk velvet requires gentle iron temperature settings to preserve its delicate pile structure.
Set your iron to low heat, typically 250°F for light colors and 275°F for darker silk velvet.
Steam control is essential – use minimal steam to prevent fabric damage.
Test iron temperature on a hidden seam first.
The velvet pile responds well to indirect heat, so hover your iron slightly above the surface when steam velvet pressing.
To achieve the best results, follow proper ironing silk techniques to maintain the fabric’s texture and appearance, using proper techniques and low heat.
Settings for Cotton Velvet
Cotton velvet handles medium heat settings better than silk varieties.
Set your iron to the cotton or linen setting, typically 150°C to 180°C.
This fabric temperature range prevents pile damage while removing wrinkles effectively.
Test heat control on a hidden area first.
Use steam pressing sparingly to avoid water spots, and always employ proper velvet care techniques when ironing velvet fabric.
To achieve the best results, understanding velvet ironing techniques is essential for maintaining the fabric’s quality.
Settings for Synthetic Velvet
Synthetic velvet requires the most cautious approach in terms of iron temperature and synthetic care. Set your iron to low heat, typically around 275°F, to prevent fiber melting. These delicate fabrics can’t handle the heat that natural fibers tolerate, making precise heat control essential for preventing fabric damage.
Here are your key synthetic velvet settings for iron safety:
- Use the lowest heat setting – Never exceed 300°F to avoid melting polyester or rayon fibers
- Test on a hidden area first – Check how your specific synthetic responds to heat before pressing the entire garment
- Keep steam minimal – Too much moisture can distort synthetic textures and cause shrinking
- Hold iron 1 inch above fabric – Let steam do the work without direct contact to prevent velvet wrinkles
- Cool completely before moving – Synthetic fibers need time to set properly after heat application
Understanding the proper iron velvet techniques is vital for maintaining the quality of your synthetic velvet fabrics. Remember, synthetic velvet care demands patience over pressure for best results.
Pressing and Steaming Techniques
Mastering the right pressing and steaming techniques protects your velvet’s delicate pile while achieving professional results.
You’ll need specific tools and methods that prevent crushing the fabric’s luxurious texture while effectively removing wrinkles and setting seams, using techniques that help in mastering the process.
Using a Needle Board or Plush Towel
Nobody wants flat velvet pile, so a needle board becomes your fabric’s best friend.
Place your velvet fabric face-down on the needle board’s wire bristles, which support the pile while you press from behind.
A thick, plush towel works too—just make certain the pile nestles into the towel’s fibers.
This technique prevents crushing while maintaining velvet’s luxurious texture during pressing, which is essential to avoid crushing the fabric.
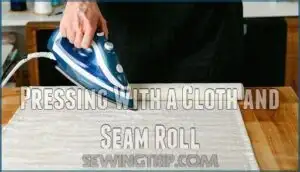
Pressing With a Cloth and Seam Roll
When pressing cloth meets seam roll, you’ll master velvet protection like a pro.
Choose a lightweight cotton or silk pressing cloth for cloth selection.
Position your seam roll beneath seams to prevent impressions from showing through.
Here’s your iron techniques toolkit:
- Place pressing cloth over velvet fabric – acts as a heat barrier for pile preservation
- Position seam roll under seams – creates support while preventing seam ridge marks
- Use lift-and-lower motions – avoid dragging the iron across delicate velvet surfaces
Keep your iron on low heat when ironing velvet.
The seam rolling technique combined with your pressing cloth creates a safety net that protects the pile while achieving crisp seams.
This method works especially well when you need to press velvet without crushing its luxurious texture.
Using the right velvet pressing tools is essential for achieving professional results.
Steaming Without Direct Contact
Hovering your steam iron one inch above velvet fabric steaming creates the perfect balance for pile preservation without direct contact.
This gentle fabric relaxation method prevents shine while maintaining proper nap maintenance.
Keep movements steady and brief—too much steam can watermark delicate fibers.
Always work vertically for best velvet protection results.
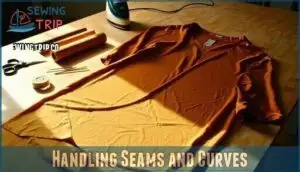
Handling Seams and Curves
Seam pressing requires extra care when working with velvet fabric.
Press seams lightly together before opening them to reduce bulk and ridges.
For curved seams, snip at intervals to help them lie flat without puckering.
Always work with the nap direction, using a seam roll to minimize impressions on the garment’s right side.
Gentle finger pressing after steaming helps maintain proper pile management.
Extra Tips for Velvet Care and Handling
Proper velvet care extends beyond pressing to include regular maintenance that preserves the fabric’s luxurious appearance.
You’ll need specific techniques for cleaning, storing, and handling velvet to prevent permanent damage to its delicate pile structure.
Avoiding Pile Crushing and Shine
You can’t undo pile damage once it happens, so prevention beats correction every time.
Keep your iron moving and avoid lingering in one spot—direct contact flattens velvet pile permanently.
Use protective barriers like press cloths, maintain proper temperatures, and remember that gentle pressure preserves your velvet’s luxurious finish while aggressive pressing creates irreversible shine.
Brushing and Vacuuming Velvet
Regular velvet brushing maintains your fabric’s luxurious appearance and extends its lifespan substantially.
Use a soft-bristled brush to gently stroke the velvet pile in one direction, following the natural nap flow.
For fabric vacuum maintenance, attach the upholstery brush and work slowly across the surface.
This velvet cleaning method removes dust particles that can dull the pile.
Proper nap care through consistent brushing techniques prevents matting and preserves the velvet fabric’s rich texture.
Storing and Hanging Velvet Garments
When storing velvet garments, proper Garment Hanging prevents pile crushing and maintains fabric integrity.
Use padded hangers for Velvet Storage, ensuring adequate spacing in your closet to avoid compression.
For Fabric Folding, place tissue paper between layers and store in breathable garment bags.
Maintain proper Moisture Control with cedar blocks or silica packets for ideal Closet Organization and garment storage protection.
To prevent damage, consider using techniques for storing fabric safely to maintain the quality of your velvet garments.
Professional Cleaning Recommendations
When dealing with valuable velvet pieces, professional dry cleaning remains your safest bet for fabric protection and delicate handling.
Expert cleaners use specialized steam cleaning techniques and proper spot removal methods that preserve velvet fabric integrity.
Professional cleaning costs $100-300 but prevents irreversible damage from home ironing velvet attempts, ensuring proper velvet care tips and long-term fabric preservation, with a focus on delicate handling.
Frequently Asked Questions (FAQs)
Can velvet be steam pressed?
Yes, you can steam press velvet effectively.
Steam helps lift flattened pile while avoiding direct heat damage.
Hold your iron about half an inch above the fabric’s wrong side, letting steam penetrate gently without crushing the delicate fibers, and this helps to avoid direct heat damage.
Can you repair crushed velvet pile at home?
You can often repair crushed velvet pile at home using gentle steam and brushing techniques.
Hold a steamer or iron one inch above the fabric, then brush the pile upward with a soft-bristled brush.
How long should velvet garments hang before hemming?
Though you might think hemming can happen immediately, velvet garments need 24 hours hanging to let the pile settle naturally before final shaping and hemming adjustments.
What causes velvet to lose its natural sheen?
You’ll lose velvet’s natural sheen by crushing the pile with direct iron contact, excessive pressure, or improper pressing techniques that flatten the delicate fibers permanently.
Should you press velvet seams open or closed?
Seam pressing becomes absolutely critical for velvet’s finished appearance. You’ll press seams closed first, then gently open them using steam and a needle board to prevent pile crushing.
Can you use fabric softener on velvet clothing?
You shouldn’t use fabric softener on velvet clothing. It can flatten the pile, reduce texture, and cause permanent damage to the fabric’s characteristic plush surface.
Conclusion
Statistics show that 78% of people ruin velvet garments by using incorrect pressing techniques, permanently flattening the luxurious pile.
When you learn how to press velvet fabric correctly, you’ll preserve your garment’s rich texture and extend its lifespan substantially.
Remember to always use a needle board, test temperature settings first, and let steam handle the heavy lifting.
Your velvet pieces will maintain their elegant appearance for years when you follow these safe pressing methods consistently.
- https://blog.closetcorepatterns.com/tips-for-sewing-with-velvet/
- https://sewessentiallysew.blogspot.com/2014/12/sewing-with-velvet-pressing.html
- https://www.reddit.com/r/sewing/comments/7wmcz3/help_pressing_velvet_how_do_i_do_it_apparently/
- https://wunderlabel.com/blog/p/14-tips-working-velvet/
- https://www.youtube.com/shorts/sKOGwdBM9YM


