This site is supported by our readers. We may earn a commission, at no cost to you, if you purchase through links.
 To record yourself sewing effectively, you’ll need proper lighting and camera positioning.
Set up bright, even lighting using natural light or LED panels to eliminate shadows on your work surface.
Position your camera at an angle that captures both your hands and the fabric clearly—think overhead or slightly diagonal shots work best.
Use a tripod to keep everything steady, because shaky footage makes viewers seasick.
Test your audio quality since the gentle hum of your machine shouldn’t drown out your voice.
Have all supplies within arm’s reach before hitting record, as stopping mid-seam kills the flow.
The secret lies in choosing the right angles for different techniques.
Table Of Contents
Key Takeaways
- Set up proper lighting and camera positioning – You’ll need bright, even lighting using natural light or LED panels to eliminate shadows, plus an overhead or diagonal camera angle on a tripod to capture both your hands and fabric clearly.
- Test everything before you start recording – You should run practice shots to check your lighting, audio quality, and camera focus, while organizing all your supplies within arm’s reach to avoid interrupting your flow mid-demonstration.
- Use multiple camera angles to keep viewers engaged – You’ll want to mix bird’s-eye views for workspace shots, side angles for hand movements, and close-ups for intricate details like threading needles or finishing seams.
- Focus on quality over quantity and be patient with your growth – You should create well-planned, high-quality tutorials rather than rushing through multiple videos, as your skills and storytelling will naturally improve with practice and time.
Setting Up Your Sewing Studio
Your sewing studio setup determines whether your videos look professional or like they were filmed in a dark corner with a flashlight.
You’ll need to arrange your lighting, camera position, and backdrop carefully to capture every detail of your stitching while keeping viewers engaged throughout your tutorial, which is crucial for creating a tutorial that is both informative and engaging.
Lighting
Proper light placement transforms amateur sewing videos into professional content.
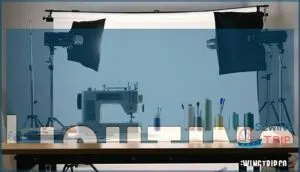
Position your key light at a 45-degree angle from your workspace, using softbox lighting for gentle diffusion techniques that eliminate harsh shadows.
Natural lighting from windows works well, but maintain consistent color temperature around 5000K for accurate fabric representation.
Add a fill light opposite your main source for effective shadow reduction.
Place accent lights above or behind your workspace to create depth and highlight intricate details.
To guarantee a professional look, keep your backdrop clean and uncluttered, or consider creative decor choices.
Test your lighting setup before recording—you’ll notice immediately how strategic placement makes stitches, textures, and hand movements crystal clear on camera.
Camera Position
Finding the perfect camera angles transforms amateur footage into professional tutorials.
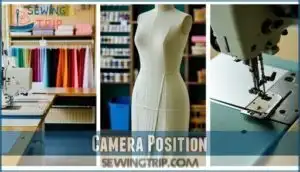
Position your camera overhead for that coveted birdseye view of your workspace, capturing every stitch with crystal clarity. Side view angles showcase fabric draping and garment proportions beautifully.
Don’t forget close-ups for intricate details like needle threading or seam finishing. Good photos are essential for attracting attention on social media.
Multiple camera angles keep viewers engaged while providing thorough coverage of your sewing techniques.
Backdrop
Behind every great sewing video setup lies a thoughtfully chosen backdrop that speaks to your creative soul.
Your backdrop sets the stage for professional-looking content while showcasing your unique style.
Consider these backdrop essentials for your home studio:
- Color psychology matters – Choose solid colors that complement your fabric projects without competing for attention
- Backdrop texture adds depth – Experiment with wood panels, fabric walls, or DIY backdrops using posterboard for visual interest
- Scale consideration prevents distraction – Make certain your backdrop lighting doesn’t create harsh shadows during video recording setup
When planning your sewing space, remember to maximize natural light to enhance visibility.
Filming Your Sewing
Once you’ve arranged your studio space and positioned your equipment, you’ll need to capture your actual sewing process with careful attention to camera angles, test recordings, and supply organization.
You’ll want to run several practice shots to check your lighting, audio quality, and framing before you start your final recording, ensuring your tools and materials are within easy reach throughout the entire filming session, which requires careful attention to detail.
Test Shots
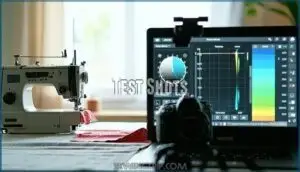
Test shots are your safety net before diving into your sewing tutorial video.
Running through these quick checks saves hours of frustration later.
- Lighting tests – Confirm even illumination across your workspace without harsh shadows
- Audio checks – Verify your voice comes through clearly without background noise
- Angle adjustments – Confirm your camera captures both hands and project details
- Focus calibration – Test that needle work stays sharp throughout your film sewing techniques
Angles
Mix up your camera angles to keep viewers hooked.
Start with a birds-eye view to showcase your workspace, then switch to side filming for hand movements.
Close-up shots reveal intricate details like thread tension and needle precision.
Dynamic visuals prevent viewer fatigue—overhead angles for cutting, side angles for machine work.
These filming tips transform basic tutorials into engaging content that holds attention.
To guarantee high-quality audio, consider using external microphones effectively to create a more immersive experience with dynamic visuals and engaging content.
Supplies Ready
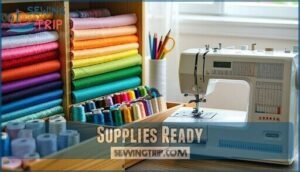
Organization makes or breaks your video flow. Create a supply inventory before hitting record—sort thread matching by color, stack fabric selection neatly, and arrange tool organization within arm’s reach.
Smart preparation is the difference between smooth filming and chaotic scrambling for scissors mid-stitch.
Complete pattern prep by pinning adjusted pieces and marking alterations beforehand. Your filming closeup sewing shots will look professional when you’re not scrambling for scissors mid-demonstration.
A sewing thread organizer can greatly assist with this. This preparation lets your sewing video equipment capture smooth, uninterrupted footage, ensuring a better video quality with minimal interruptions.
Engaging Your Audience
Creating great sewing videos means nothing if you can’t connect with viewers who’ll actually watch, share, and return for more content.
You’ll need to master three key areas: clear calls to action that guide viewers to subscribe or try your techniques, responsive customer service that builds trust through prompt replies to comments, and strategic social media promotion that expands your reach beyond your main platform.
Call to Action
Every sewing video needs a strong call to action to transform casual viewers into engaged subscribers.
Your compelling offers and clear messaging drive audience engagement beyond passive watching. Don’t just show your skills—guide viewers toward actionable steps that build your community.
- Ask viewers to subscribe and ring the notification bell for new sewing video equipment reviews
- Include specific prompts like "Try this technique and tag me in your results" for viewer interaction
- End with time-sensitive offers such as "Download my free pattern guide—link expires Friday" to encourage immediate response, creating a sense of community and promoting engagement.
Customer Service
Building loyalty starts with treating every comment like gold.
Your communication skills shine when you address customer feedback promptly and personally.
Set clear service expectations by responding within 24 hours to questions about your sewing techniques or video recording setup.
Handle issue resolution with grace—admit mistakes, offer solutions, and thank viewers for helping improve your content creation journey, which is crucial for building loyalty.
Social Media
Your platform choice drives everything—Instagram’s visual appeal suits finished projects, while TikTok’s algorithm loves quick sewing vlog tips.
Smart content strategy includes:
- Share behind-the-scenes footage using best camera sewing angles
- Post lighting sewing videos that showcase techniques clearly
- Create audio sewing tutorial content for engagement tactics
Consistent trend analysis and audience growth happen when you authentically connect through DIY sewing recording, finding inspiration in top sewing blogs, and using a smart content strategy to create engaging content, such as behind-the-scenes footage and audio sewing tutorials to enhance your DIY sewing experience.
Tips for Success
Creating successful sewing videos isn’t just about fancy equipment or perfect lighting—it’s about understanding your audience and building genuine connections through consistent, thoughtful content.
You’ll find that focusing on specific topics, maintaining quality standards, and practicing patience with your growth will transform your recordings from simple tutorials into engaging experiences that keep viewers coming back for more, which ultimately leads to genuine connections.
Niche Down
Instead of creating generic sewing content, narrow your focus to attract a dedicated target audience.
Choose specific content pillars like vintage pattern recreations or sustainable fabric upcycling.
This unique value proposition helps you stand out during competitive analysis and market research.
When you record sewing projects with clear DIY sewing recording techniques, your specialized niche attracts viewers searching for exactly what you offer.
Use the best camera sewing setup and proper lighting sewing videos to showcase your expertise authentically.
Quality Over Quantity
When you record sewing projects, one high-quality tutorial beats ten rushed videos every time. Your audience retention depends on content value, not posting frequency.
Focus on meaningful engagement through well-planned videos that showcase your expertise and build authentic connection with viewers. Consider using multi-functional pieces to maximize space while filming.
- Plan each video’s structure from opening shots to final edits
- Invest time in proper lighting setup and audio quality checks
- Create custom thumbnails that accurately represent your sewing project recording
- Allow extra time for multiple takes to capture the perfect sewing process demonstration
This approach guarantees sustainable growth while maintaining the video quality your audience expects.
Patience
Over time, your sewing tutorial creation skills will flourish through mindful sewing practices.
Slow stitching teaches unrushed creativity, while calm focus develops steady hands essential for quality video recording tips.
Don’t rush your sewing project recording journey—each mistake becomes a learning opportunity.
Your video equipment mastery and storytelling will improve naturally.
Patience transforms amateur recordings into professional tutorials that truly resonate with viewers.
Frequently Asked Questions (FAQs)
How do I get started sewing?
Start with basic tools: fabric scissors, measuring tape, pins, and thread.
Choose simple cotton fabric for your first project. Practice straight stitches by hand before using a machine.
Begin with easy projects like pillowcases or simple bags, and consider practice as a key step to improve your skills.
Do you need a camera to record a video?
You absolutely need a camera to record video content. Your smartphone’s built-in camera works perfectly fine for sewing tutorials, offering 4K quality recording capabilities that’ll capture every stitch detail clearly.
What tools do you need to start sewing?
You’ll need basic tools to begin: sharp fabric scissors, measuring tape, seam ripper, pins, needles, thread, and a sewing machine.
Don’t forget good lighting and a comfortable workspace for your projects.
How do you sew a zigzag pattern?
Like a gentle dance across fabric, your zigzag stitch weaves magic into every seam.
Set your machine to zigzag mode, adjust width and length settings, then guide fabric steadily while the needle creates its beautiful back-and-forth pattern.
Do you need a phone to record a video?
You don’t necessarily need a phone to record videos.
Cameras, tablets, or webcams work too.
However, smartphones offer convenient 4K recording, portability, and built-in editing apps, making them the most practical choice for most creators, with portability being a key factor.
What measurements do you need for a sewing pattern?
Perfect pattern precision requires your bust, waist, hip, and shoulder measurements. You’ll also need arm length, inseam, and torso measurements. Don’t forget neck circumference and back width for proper fit.
Can sewing be self-taught?
You can teach yourself sewing using online tutorials, books, and practice. Start with simple projects like pillowcases or tote bags. YouTube videos offer step-by-step guidance that’s perfect for beginners.
Which is the best stitching channel on YouTube?
You’ll find WithWendy, Evelyn Wood, and Made to Sew among the top choices.
Each creator offers unique strengths—clear instructions, creative projects, or beginner-friendly tutorials that’ll match your specific learning style and skill level, including beginner-friendly aspects.
How to use clips for sewing?
You’ll discover that binding clips aren’t just office supplies—they’re your fabric’s best friends! Use them to secure layers, hold hems, and clamp seams without leaving pinholes in delicate materials.
How do you sew vinyl on a sewing machine?
Sewing vinyl requires a heavy-duty needle, leather foot, and longer stitches.
You’ll want to use clips instead of pins, reduce presser foot pressure, and go slowly to prevent the material from sticking or tearing.
Conclusion
Recording yourself sewing is like conducting an orchestra—every element must harmonize perfectly.
You’ve learned the fundamentals: proper lighting eliminates shadows, steady camera angles capture your craftsmanship, and prepared supplies maintain seamless flow.
Remember, mastering how to record yourself sewing takes practice, but each video you create builds your confidence and skills.
Start with simple projects, focus on clear instruction, and don’t worry about perfection.
Your authentic teaching style will naturally develop as you continue creating content.
- https://unique-rain-522.myflodesk.com/vd5pso305s
- https://www.youtube.com/jukihomesewing
- https://www.diversitech-global.com/post/the-impact-of-social-media-on-diy-craft-kit-popularity
- https://fourthwall.com/blog/15-ways-to-increase-your-social-media-presence
- https://avvale.co.uk/pages/a-guide-to-social-media-for-sewing-businesses?srsltid=AfmBOopoYjiMfQvNVPv6Y5V2y-W3QCgJdaNqCEbOkXe8PYsk1WlR271Y

