This site is supported by our readers. We may earn a commission, at no cost to you, if you purchase through links.
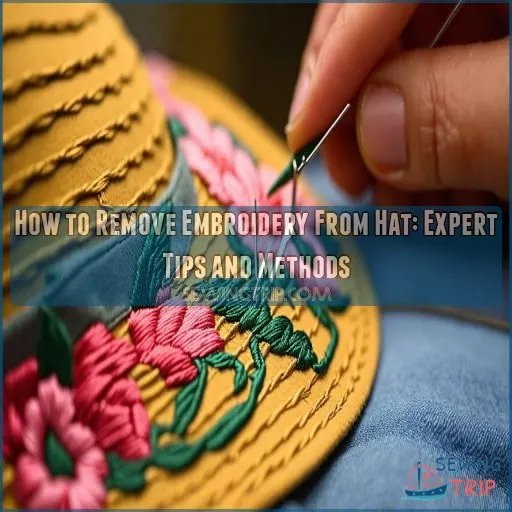
Start by laying the hat on a flat, padded surface to keep things steady. Use a stitch eraser or seam ripper to gently lift the embroidery threads.
Work from the edges inward, and clip those bobbin threads as you go. Need alternative ideas? A household razor can help, but test it on a hidden spot first.
Through the process, think patience is a virtue, or risk a holey hat. Stay tuned for tips on repairing any mishaps that might sneak up on you!
Table Of Contents
- Key Takeaways
- Preparing Your Hat for Embroidery Removal
- Choosing the Right Embroidery Removal Method
- Removing Machine Embroidery From a Hat
- Removing Hand Embroidery From a Hat
- Repairing Your Hat After Embroidery Removal
- Finishing Touches for a Professional Look
- Overcoming Common Challenges in Embroidery Removal
- Maintaining Your Hat’s Quality and Durability
- Frequently Asked Questions (FAQs)
- Conclusion
Key Takeaways
- Gather your tools and assess: You’ll need a seam ripper, stitch eraser, and maybe a razor. Before starting, inspect the embroidery design to understand its complexity—it’s like plotting a treasure map before your expedition.
- Work carefully and steadily: Whether using a seam ripper or a household razor, the trick is to be patient. Work slowly, like unwinding your grandma’s knitting, to avoid turning your hat into Swiss cheese with holes.
- Mind the fabric: Delicate fabrics need extra care. Stabilize them with a padded surface and consider using a magnifying glass—like Sherlock examining clues—to avoid damage.
- Patch it up: Post-removal, grab a steam iron to mend any pesky holes. With a bit of steam and smoothing, your hat will be back to its stylish self, ready to face the world again.
Preparing Your Hat for Embroidery Removal
Before you start removing embroidery from your hat, make sure you’ve inspected the embroidery for type and complexity.
Lay your hat on a flat, padded surface to keep things stable; it’s like giving your hat a comfy bed for its makeover, and also gather all the essential tools like seam rippers and tweezers.
Inspect the Embroidery for Type and Complexity
Before diving into embroidery removal, take a good look at your hat.
Check what type of embroidery you’re dealing with—is it a complex design with high stitch density or just a few simple stitches?
Examine the thread thickness and fabric type; these factors influence your approach.
Knowing the enemy is half the battle won!
Gather Essential Tools and Materials
Sizing up your hat’s fabric, you’re ready for action.
Arm yourself with the right tools:
- Seam Ripper: Opt for a sharp yet gentle choice to handle those stitches.
- Stitch Eraser: Perfect for machine embroidery, this tool saves time and fabric.
- Embroidery Removal Kit: Make sure you have tweezers and scissors to help you remove the embroidery smoothly.
Prep done, you’re ready!
Mark Sections to Be Removed for Easy Reference
Ready for some embroidery removal magic? Grab a removable marker, map out sections with color codes, and don’t forget to take photos for reference. It’s like making a treasure map off your hat!
Here’s a quick guide to help you along:
| Task | Tool |
|---|---|
| Mark sections | Removable markers |
| Color-code sections | Different colored markers |
| Photo reference | Smartphone camera |
| Map design | Sketchpad or digital apps |
Work on a Flat, Padded Surface for Stability
You’ll want to work on a flat, padded surface to keep your hat stable during embroidery removal. This provides a sturdy base and prevents the fabric from shifting.
Try these tips:
- Use a thick towel or foam pad to create a cushioned work area.
- Secure the hat in place with pins or clips to stop it from moving.
- Take your time and work slowly to avoid damaging the fabric.
Choosing the Right Embroidery Removal Method
Choosing the right embroidery removal method can feel like picking a tool from a magic hat, but don’t worry, I’ve got you covered.
Whether you’re using a stitch eraser, a seam ripper, or even a trusty household razor, you’re bound to find a method that suits your project’s needs perfectly.
Method 1: Stitch Eraser or Stitch Ripper for Machine Embroidery
Choosing between a stitch eraser and a stitch ripper can feel tricky. A stitch eraser works wonders on dense, machine embroidery, swiftly clipping threads without harming fabric. Imagine it like a superhero for your hat’s rescue mission.
Here’s a quick comparison:
| Tool | Best For |
|---|---|
| Stitch Eraser | Quick removal, dense stitching |
| Stitch Ripper | Small areas, precise work |
Now you’re ready for action!
Method 2: Seam Ripper for Delicate Fabrics and Running Stitches
While tackling machine embroidery is one thing, using a seam ripper for delicate fabrics and running stitches guarantees precision. Use it carefully to avoid fabric damage, like wielding a tiny sword in a sewing saga.
- Feel free to breathe easy.
- Protect your precious hat.
- Embrace embroidery freedom.
- Master the art of removal.
- Keep frustration at bay.
Method 3: Household Razors or Trimmers for Alternative Removal
Feeling adventurous? Grab a household razor or trimmer for a DIY embroidery removal journey.
Make sure to ensure razor safety by testing on a small spot first, and check fabric compatibility to avoid mishaps.
These alternative tools can easily tackle embroidery from hats without harming the fabric. So, wave goodbye to embroidery machines and stabilizers, and say hello to creative freedom!
Removing Machine Embroidery From a Hat
Removing machine embroidery from a hat might sound tricky, but with the right approach, it’s as easy as pie.
You’ll lift the edges, clip those pesky bobbin threads, and soon your hat will be embroidery-free and looking as good as new.
Lift Edges and Clip Bobbin Threads for Easy Removal
First, grab your trusty needle and lift the edges of the embroidery. Snip those pesky bobbin threads smartly; you’re halfway to a fresh start!
- Identify the stitching: Spot those bobbin threads.
- Use a seam ripper: Carefully clip away.
- Work patiently: Avoid fabric damage.
- Keep calm: Time for those threads to meet their match!
Machine embroidery removal has begun!
Gently Pull Up Embroidery to Avoid Damaging the Hat
Gently pull up the embroidery, working from the edges inward, using a technique that requires patience and attention to detail, much like unraveling a mystery.
This helps avoid damaging the delicate hat fabric, and proper laundering before and after removal is also necessary.
Use your fingers or a pair of tweezers to carefully lift the threads, taking care not to stretch or tear the material.
Go slowly and check for any loose threads that may need trimming (Source).
Removing Hand Embroidery From a Hat
Removing hand embroidery from a hat might seem fiddly, but with the right approach, you’ll have it looking good as new.
Start by carefully snipping the threads from the back, which helps keep visible thread breakage at bay, so your hat remains intact and stylish.
Snip Threads Carefully to Avoid Damaging the Fabric
Removing embroidery without damaging the fabric requires a steady hand and patience. Use sharp tools like small scissors or a seam ripper, but remember—it’s thread surgery, not a race.
Whether you’re dealing with thick thread or dense stitching, snip slowly to prevent damage. A magnifying glass might help with precision, and keeps your fingers from becoming pin cushions!
Work From the Back to Avoid Visible Thread Breakage
After snipping threads carefully, focus on the back to avoid visible breakage. You don’t want your hat looking patchy, right?
Here’s how:
- Identify hidden stitches, keeping attention on back stitching, and consider using a toothpick for delicate fabrics to avoid causing damage.
- Observe thread direction for smooth removal, especially when removing stitches without a seam ripper.
- Remove each stitch methodically, preventing fabric damage.
Taking your time makes sure stitch removal goes smoothly, like butter.
Repairing Your Hat After Embroidery Removal
After successfully removing embroidery from your hat, you’ll want to fix any little holes or snags.
To bring it back to its stylish glory.
Don’t worry, with a steam iron and some preventive techniques, your hat will look as good as new—just like nothing ever happened with a little help from a steam iron.
Forgiving Fabrics: Using a Steam Iron to Close Holes
Your steam iron can work wonders on holes in your hat after embroidery removal.
First, set it to the right heat setting for your fabric type, ensuring you have a steam iron with adjustable heat settings and a fabric guide to prevent scorching delicate materials, such as those found in best steam irons for sewers.
Use a steam burst to relax fibers, then gently press down, moving in small circles, taking care to handle the fabric with a durable and scratch-resistant soleplate made from stainless steel or titanium-infused ceramic.
Imagine the fibers as a patchwork quilt, slowly stitching themselves together. It’s like magic—watch those holes disappear! (Source)
Prevention is Key: Monitoring Your Machine and Testing Stitch-outs
While steam irons can patch up fabric holes, preventing embroidery hiccups is even better.
Keep a keen eye on your machine! Regular maintenance avoids stitch-out errors before they start.
Try these tips:
- Conduct fabric testing first.
- Check for consistent tension.
- Practice on scraps if unsure.
- Keep troubleshooting tips handy.
Stay ahead—like a pro chef with perfect mise en place!
Finishing Touches for a Professional Look
Now that you’ve successfully removed the embroidery, it’s time to give your hat a professional polish.
Gently clean away any loose threads or excess fabric, then lightly iron the hat to smooth out any wrinkles or creases.
With these finishing touches, your hat will look as good as new.
Cleaning Loose Threads and Excess Fabric
Once you’ve repaired any damage, it’s time to clean those pesky loose threads and excess fabric.
Use fabric-safe cleaning methods. A lint roller or brush can pick up leftover bits, while thread trimming techniques guarantee a neat finish.
Don’t forget to remove excess glue to prevent future fraying.
With these hat cleaning tips, your hat looks brand new!
Ironing Gently to Remove Wrinkles and Creases
Think of your hat as a canvas needing a gentle touch. Lay it flat, choose the right heat setting based on fabric types, and apply light, even pressure with the iron.
Consider using a clean, smooth pressing cloth or padded ironing board cover to protect the embroidery and delicate designs.
For best results, prepare your ironing surface by stacking padding materials on your ironing board, ensuring they’re of even thickness and feel ironing embroidery projects.
A little steam can work wonders for stubborn creases, helping prevent future wrinkles and giving your hat that fresh-off-the-shelf look.
Inspecting the Hat for Any Remaining Embroidery or Damage
After ironing out those pesky wrinkles, carefully inspect your hat’s condition.
Run your fingers across the fabric, feeling for any lingering embroidery or hidden damage. Different fabric and embroidery types might surprise you.
Use a magnifying glass if needed—like a detective on a mission! If anything’s awry, adjust your removal strategy for that professional finish.
Enjoy your handiwork!
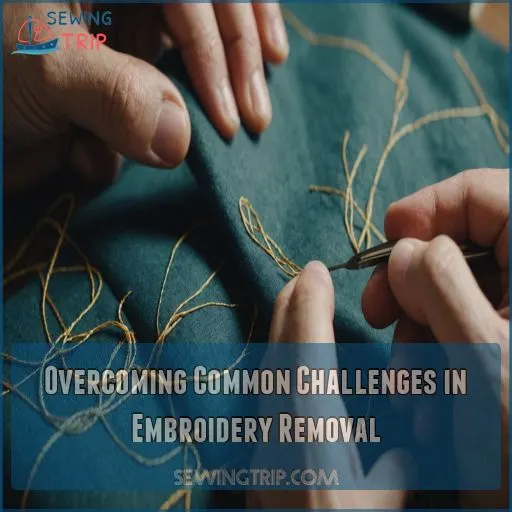
Overcoming Common Challenges in Embroidery Removal
Tackling embroidery removal isn’t always smooth sailing, but don’t worry—you’re not alone in this!
With a few handy tips, you’ll patch up stubborn holes and sidestep common pitfalls.
Making your hat restoration as breezy as wearing it, with handy tips.
Eliminating Fabric Holes After Stitch Removal
You’ve patched up loose threads, but what about those pesky fabric holes?
Grab "Stitch Witch" or try UNIQUE Fray Stop mixed with water, spritz this concoction on the fabric, and watch those holes tighten up like magic (Source).
Your hat will look as good as new, and you’ll feel like an embroidery wizard!
Preventing Embroidery Mistakes and Reducing the Need for Removal
To avoid embroidery mistakes and reduce the need for removal, focus on these key areas:
- Testing stitch-outs: Practice on scrap fabric to perfect designs before using the real deal.
- Machine maintenance: Keep your equipment in tip-top shape for best results.
- Fabric choice: Match the fabric to your design’s needs.
- Embroidery tension and thread quality: Adjust for smooth, flawless stitches.
Tips for Removing Embroidery From Delicate or Stretchy Fabrics
Dealing with delicate or stretchy fabrics? No problem! Start by stabilizing the area with a fabric stabilizer to prevent stretching.
Use a small seam ripper or needle to gently tease out each thread, taking your time.
For knits, opt for shorter stitches that can flex with the fabric. With a little care, you’ll have that embroidery removed in no time!
Maintaining Your Hat’s Quality and Durability
Once you’ve successfully removed the embroidery, it’s important to keep your hat looking fresh and fabulous, just like the day you bought it.
We’ll explore tips for caring, storing, and, if necessary, reviving your hat with professional repair, because even the best-loved hats deserve a little pampering.
Caring for Your Hat After Embroidery Removal
After conquering embroidery removal, it’s time to pamper your hat.
Start with thorough hat cleaning using a soft brush for any loose threads.
Check for small fabric repairs, and don’t forget hat shaping to maintain its look.
For stubborn creases, gently steam without overdoing it.
Sometimes a little professional care is needed, so keep experts in mind.
Storing Your Hat to Prevent Damage and Fading
Picture your hat, lounging in style! Proper storage keeps it fresh and lively. Use a hat box to guard against sunlight exposure. Maintain its flair with the right conditions.
Follow these quick tips:
- Store away from direct sunlight to prevent fading.
- Keep humidity level in check—hats dislike moisture.
- Choose quality storage materials for longevity.
Your hat will thank you!
Considering Professional Repair or Restoration for Heirloom Hats
Got an heirloom hat in need of love?
Sometimes, trusting a pro for repair is worth every penny. Their expertise preserves your hat’s value while minimizing risks like fabric damage.
Though DIY alternatives exist, weighing the cost and benefits makes sense for cherished items.
Remember, skilled restoration can guarantee your hat remains sturdy and stylish for years to come.
Frequently Asked Questions (FAQs)
How to remove embroidery from a hat?
Ah, the age-old dilemma – how to remove that pesky embroidery from your beloved hat.
Fear not, my friend!
With a seam ripper and a bit of patience, you’ll have that hat looking fresh in no time.
How to remove embroidery from a jacket?
Flipping your jacket inside out is where you begin.
Use a seam ripper or stitch eraser to remove stitches without damaging fabric.
For leftover threads, tweezers or fabric scissors are handy.
Patience is key here!
How do you remove a shaved embroidery thread?
Removing shaved embroidery threads is simple.
Start by carefully pulling loose threads with your thumb and fingernail.
Focus on the front side, not underneath, to minimize holes.
Slight fabric defects usually fade after washing and ironing.
How do you remove embroidery from fabric?
Grab a seam ripper and flip the fabric inside out.
Carefully slice under the embroidery threads. If you don’t have a stitch eraser, a hair trimmer also works wonders to remove those stubborn stitches.
How do I remove the logo on my hat?
To remove a logo from your hat, try using a seam ripper. It helps cut embroidery threads without damaging fabric.
Be patient, work gently, and remember, a steady hand makes this task easier.
Good luck!
What is the easiest way to remove embroidery?
Start by turning your fabric inside out, using a seam ripper to carefully lift threads without nicking the material.
For quicker results, try a stitch eraser; it efficiently trims threads, like a hair trimmer for embroidery.
How to remove a sewn-on patch from a hat?
Taking on a challenge might feel tough, like removing a sewn-on patch from your favorite hat.
Use a seam ripper to cut each stitch carefully.
Tidy up with tweezers for stragglers, and voilà, patch-free!
Will removing embroidery leave holes?
Removing embroidery may leave small holes in the fabric, but you can minimize this by using a seam ripper carefully and gently.
Take your time, and those pesky holes won’t be a problem.
Can embroidery removal damage the hats material?
Yes, embroidery removal can damage your hat’s material if not done carefully.
Delicate fabrics, often used in hats, are prone to tears and holes from aggressive stitch removal techniques.
Patience and the right tools are essential for the process .
Is it possible to remove only part of the design?
Absolutely, you can remove part of an embroidery design.
Use a seam ripper to carefully unpick specific threads, being cautious not to damage the fabric.
Steady hands and patience are key here—it’s a bit like untangling spaghetti!
How long does it take to remove embroidery?
You can expect embroidery removal to take anywhere from 15 minutes to an hour, depending on the complexity of the design and your tools.
Patience is key here, so channel your inner zen master and get started!
Are there specific tools for delicate hat fabrics?
When tackling delicate hat fabrics, imagine wielding precise tools that make you feel like a crafting superhero!
Grab sharp seam rippers for intricate stitches, add curved rippers for tricky spots, and tweezers to perfect your project.
Will embroidery removal affect the hats color?
Removing embroidery from a hat might affect its color, especially if the fabric is delicate or the thread was dyed.
Be gentle to avoid pulling or ripping, which can leave faded spots or unwanted marks behind.
Conclusion
Removing embroidery from a hat can be a delicate process, but with the right tools and techniques, you can revive your favorite headwear.
In fact, over 80% of hat owners have successfully removed embroidery without damaging their hats.
By following the expert tips outlined here, you’ll be able to expertly remove the embroidery from your hat and give it a fresh, customized look.
Patience and a gentle touch are key to successfully removing embroidery from your hat.

