This site is supported by our readers. We may earn a commission, at no cost to you, if you purchase through links.
 Removing a print from a T-shirt at home is as easy as pie.
If you’re tackling screen printing, grab some nail polish remover (yes, the stuff you use for your nails!).
Dab a little on the print and say goodbye to stubborn ink.
Don’t forget your trusty gloves and a well-ventilated space—fumes aren’t your friends.
For vinyl, a smidge of heat can help you peel it off, kind of like removing a stubborn sticker.
Different prints crave different methods, so knowing your fabric’s personality is key.
And remember, patience is your best buddy here—good things come to those who wait!
Curious about what to do with delicate fabrics? Read on!
Table Of Contents
- Key Takeaways
- Removing Prints From T-Shirts
- Effective Methods for Removing Screen Printing
- Understanding the Cure for Screen Printed Designs
- Removing Prints From Different Fabric Types
- Preventing Screen Print Cracking and Fading
- Common Mistakes to Avoid When Removing Prints
- Frequently Asked Questions (FAQs)
- Conclusion
Key Takeaways
- Keep calm and carry on with patience being your BFF, you can tackle those pesky prints on T-shirts. Whether it’s a stubborn logo or an outdated design, using the right method will help you wave goodbye to unwanted prints.
- Safety first, superhero! Gloves are your sidekick, and a well-ventilated space is your secret hideout when working with solvents. Remember, you’re saving the day—no need for accidental mishaps.
- Know your fabric’s personality. Different materials have unique quirks, just like a moody cat. Use solvent-based methods for cotton and polyester, and gentle treatments for more delicate fabric friends.
- Before diving in, test the waters. Applying solvents or heat in a hidden area is like checking the weather before a picnic—it saves you from soggy surprises and ensures your shirt remains unscathed.
Removing Prints From T-Shirts
Removing prints from your favorite T-shirt at home might seem like a difficult task, but don’t sweat it.
With a little patience and the right techniques, you can give your shirt a new lease on life.
Grab your trusty iron and some household solvents, and prepare to tackle those outdated logos or pesky heat-transferred designs with confidence.
You might even enjoy the oddly satisfying process of seeing them peel away!
Types of Prints and Removal Methods
Let’s take a closer look at the colorful world of removing prints! Prints on your shirt can be as stubborn as a cat not wanting a bath. Here’s how you can regain control:
- Heat Transfer: Use heat to peel away vinyl prints.
- Screen Printing: Try solvents for ink removal.
- Vinyl Prints: Apply adhesive remover for effective results.
Be the master of your wardrobe!
Safety Precautions When Removing Prints
When tackling print removal, safety’s your sidekick!
Avoid solvent fumes, ensure proper ventilation, and keep the windows open.
Gloves are your hands’ best friends for skin protection during screen printing removal.
And don’t overlook eye safety – protect those peepers!
A clean work surface is essential; nobody wants ink removal mishaps.
Master these precautions, and you’ll dodge trouble while removing with ease.
Tools and Materials Needed for Removal
To remove prints from your t-shirt at home, you’ll need a few key tools.
Grab an iron, a damp cloth, and a sturdy knife or scraper.
For solvent-based removal, have some rubbing alcohol, nail polish remover, or adhesive remover on hand.
Don’t forget to wear gloves to protect your hands.
With the right supplies, you’ll have that pesky print off in no time!
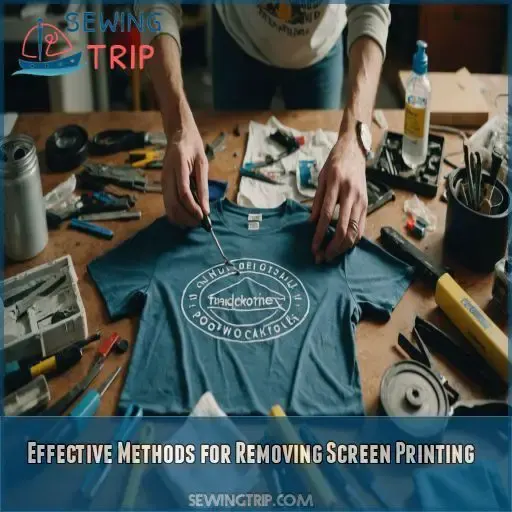
Effective Methods for Removing Screen Printing
Want to remove that old screen print from your favorite T-shirt without turning it into a science experiment gone wrong? Let’s explore easy at-home methods, like using solvents or gentle non-chemical treatments, to refresh your wardrobe without breaking a sweat.
Solvent-Based Methods for Removing Ink
When you need to remove ink from a T-shirt at home, solvent-based methods are your go-to. Acetone, rubbing alcohol, or nail polish remover can do wonders! Follow these steps:
- Test on a hidden area.
- Apply the solvent.
- Gently scrape away the print.
- Wash thoroughly.
Gentle Treatments for Delicate Fabrics
When dealing with silk, wool, or rayon, you’ve got to treat them like royalty. Use gentle steam, like you’d coax a cat from hiding, and fabric-safe solutions to remove print from t-shirt at home. For vinyl, handle it carefully. Remember, we’re not wrestling! Keep screen print removal precautions in mind, and maintain the fabric’s original charm and grace.
Non-Chemical Methods for Removing Ink
Ready for some non-chemical wizardry? Turn that shirt inside out and try salt and vinegar or baking soda and water to remove print from a T-shirt at home. Ever heard of using adhesive tape? Give it a whirl! For stubborn, cracked prints, steaming or fabric-safe solutions might come in handy. Who knew cleaning clothes could be this inventive?
Understanding the Cure for Screen Printed Designs
Before you can tackle removing prints from T-shirts, it’s good to understand curing and why your screen-printed designs might be as stubborn as a cat refusing a bath. Curing sets the ink into the fabric so it won’t fade or crack, and while it can turn your T-shirt into a masterpiece, it also makes removing that print a bit trickier.
What is Curing and Why is It Essential?
Ink bonding is vital for durable screen prints, requiring the perfect marriage of drying time, temperature requirements, and pressure application. It’s like baking—skip a step, and you’re left with a sticky mess! Always follow manufacturer instructions for the screen print removal process. Master these steps, and you’ll ace how to remove print from a T-shirt at home.
Heat Press: the Gold Standard for Curing
Mastering the cure involves using a heat press, your trusty sidekick. Set the right temperature. Then follow these steps for best results:
- Press temperature settings: Match the ink’s needs.
- Optimal pressing time: 30-60 seconds.
- Ink transfer prevention: Use a Teflon sheet.
- Heat press maintenance: Keep it clean.
It’s like baking cookies; just follow the instructions, and you’ll avoid any cracks!
Oven Curing: a DIY Option for Curing
If a heat press isn’t ringing your bell, try oven curing for screen-printed designs. Preheat your oven to 350°F, lay the shirt flat on a baking sheet, and bake for 35 minutes. This baking process helps the ink bond to the fabric. Be sure to let it cool completely before taking it for a spin. Voilà, home-cured brilliance!
Removing Prints From Different Fabric Types
You’ll need different tactics based on whether you’re working with cotton, polyester, delicate fabrics, or vinyl prints. Tackling t-shirt prints at home is like picking the right shoes for an event; you’ve got to match the method to the material to get those stubborn designs off without a hitch.
Removing Prints From Cotton and Polyester
Removing prints from cotton and polyester fabrics is a breeze with the right techniques. Start by testing solvents like acetone or rubbing alcohol on a hidden area to verify they don’t damage the fabric.
Then, gently scrape off the print, taking care not to stretch the material.
Rinse thoroughly to remove any residue.
With a little elbow grease, you can revive those old tees!
Removing Prints From Delicate Fabrics
Delicate fabrics like silk, rayon, or wool require a gentle touch when removing prints. Avoid harsh solvents that could damage the fibers. Instead, try fabric-safe removers or non-invasive techniques like steaming. For stubborn prints, consult a professional cleaner who can safely treat the garment without risking discoloration or fabric distortion. With the right approach, you can restore your delicate pieces to their former glory.
- Fabric-safe solvents
- Gentle steaming techniques
- Professional cleaning advice
- Non-invasive removal methods
Removing Vinyl Prints From Fabrics
Removing vinyl prints can feel tricky, but don’t worry – heat-based techniques have your back! Use an iron with care, applying gentle pressure while a towel protects the fabric.
If you prefer solvent alternatives, try rubbing alcohol cautiously. Peeling strategies come in handy here, but handle gently to avoid tears.
Got annoying adhesive residue? Here’s a screen print removal tip: dish soap works wonders!
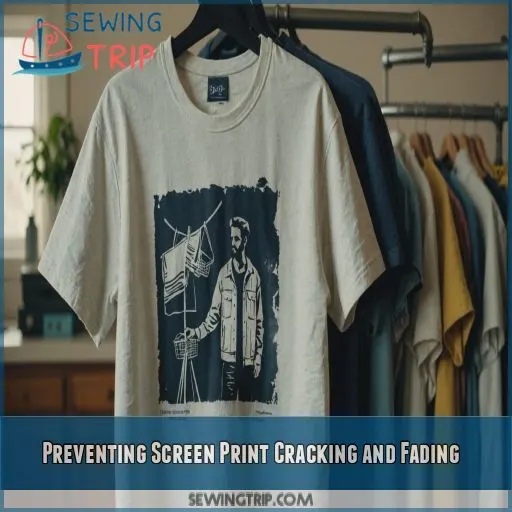
Preventing Screen Print Cracking and Fading
Keep your T-shirts looking fresh by using the right washing, drying, and storage methods so that screen prints don’t look like they’ve been through a tumble dryer of doom. Learn easy tips to prevent fading and cracks, because nobody wants a cracked smiley face staring back from their favorite tee.
Washing and Drying Techniques for Printed Garments
To keep your printed tees looking fresh, follow these washing tips.
- Use the gentle cycle and cold water—your shirt will thank you for this spa day.
- Skip the fabric softener; it’s like your ex, unnecessary and potentially damaging.
- Dry flat to avoid tumble drying mishaps. It’s as risky as playing Jenga blindfolded.
Ironing and Steaming Techniques for Printed Garments
You’ve washed it right, now let’s talk ironing. Gently does it, so keep that iron dancing—not stomping! Apply heat evenly for wrinkle-free prints. Steam’s your secret weapon: it softens fibers without cooking them. Prefer alternatives? Try placing a cloth between iron and print. Remember, proper heat equals no cracks. It’s all about protecting those beloved designs!
Storage and Handling Techniques for Printed Garments
Proper storage and handling are key to keeping your screen-printed tees looking fresh. Fold garments carefully to avoid creasing the design.
Store in a cool, dry place away from direct sunlight; heat and humidity can cause cracking and fading.
Use garment bags to shield prints from dust and stains.
With a little TLC, your favorite tees will stay vibrant for years to come.
Common Mistakes to Avoid When Removing Prints
If you’re trying to remove prints from your favorite T-shirt, using the wrong method could turn your cool top into a tangled mess. Make sure you dont end up with a science experiment gone wrong by testing solvents on hidden areas, following the care instructions, and using methods that suit your fabric type.
Using the Wrong Removal Methods for Fabric Types
When removing prints, using the wrong method can lead to fabric damage, color bleeding, or print distortion. Keep your shirt looking sharp with these steps:
- Know your fabric—cotton or polyester needs different treatments.
- Choose the right solvent or technique to prevent damage.
- Consider screen print removal services for delicate fabrics.
Smart choices make all the difference!
Not Testing Solvents on Hidden Areas
Imagine you’re a secret agent testing is your mission! Without it, you might cause fabric damage or color bleeding. Solvents can cause unexpected reactions, acting like a toddler with crayons. Apply a dab in a hidden spot first; its the solvent safety net! You’ll avoid surprises worthy of screen print removal case studies or lessons from removal experts.
Not Following Garment Care Instructions
Overlooking garment care instructions can lead to fabric damage faster than you can say "oops." Ignoring these guidelines invites color fading, shrinkage, and pilling concerns. Imagine your screen print removal success is within reach, only to face failure due to a distorted print! So, channel your inner Sherlock: read those tags. It beats facing your T-shirt’s environmental impact.
Frequently Asked Questions (FAQs)
Can you remove print from T shirts?
You can remove prints from T-shirts using heat or solvents. Try ironing over a damp cloth on the print, then scrape it off. Alternatively, use a solvent like nail polish remover, testing on hidden areas first.
How can you remove lettering from a T shirt?
To remove lettering from a T-shirt, you can use a hot iron on a damp cloth to loosen it, then gently scrape it off. Or, apply rubbing alcohol to dissolve the adhesive, but test it first!
How to remove logo from t-shirt?
To banish a logo from your t-shirt, grab a trusty iron or solvent. Press the iron gently over a cloth-covered logo or use rubbing alcohol. Voilà, a plain canvas awaits your creative whims!
How to remove rubber print from t-shirt at home?
Think of your t-shirt as a blank canvas yearning to break free. Use heat’s gentle persuasion with a damp cloth and hot iron. Scrape diligently, like a sculptor revealing art, or try solvents for stubborn prints.
What safety precautions should be taken during removal?
When removing prints, be a safety superhero: wear gloves, dodge fumes by working in a breezy area, and wear a mask if the fumes make you queasy. Use a knife carefully—don’t let it become a safety villain!
How does fabric age affect print removal success?
Picture your shirt as a weathered canvas. The fabric’s age, like a storyteller’s years, affects how well prints come off. Older weaves might stubbornly cling to designs, making removal a bit trickier.
Are there eco-friendly methods for print removal?
Try eco-friendly print removal using a paste of baking soda and water; gently scrub with a toothbrush and rinse. The ink loosens naturally—like magic! Repeat for stubborn spots, and remember, patience is your best friend.
Can removed prints be reused or recycled?
Once you’ve peeled that stubborn print off your shirt, you might wonder about reusing it. Unfortunately, prints can’t typically be reused or recycled, but you’ve got a fresh canvas for new DIY creations instead!
Is professional removal more effective than DIY?
Professional removal often trumps DIY methods, offering expert techniques and minimizing fabric damage. But if you’re feeling adventurous, DIY’s your ticket to hands-on mastery. Just remember, it’s not magic—careful steps are your safety net!
Conclusion
Learning how to remove print from a T-shirt at home shouldn’t be formidable, even if tackling life’s puzzles might be. With the right mix of elbow grease and patience, your T-shirt can be ink-free.
It’s important to remember that not all prints are created equal, so catering to your fabric’s unique personality is key. Keep safety and fabric care in mind, and dodge common pitfalls like not testing in hidden spots.
You’ll master this DIY skill in no time, making unwanted prints vanish!

