This site is supported by our readers. We may earn a commission, at no cost to you, if you purchase through links.
Set your serger to a 4-thread overlock stitch for secure seams that stretch with your fabric. The key is adjusting your differential feed to prevent wavy edges – typically set it between 1.2 and 1.5 for most knits.
Don’t pull the fabric through; let the machine do the work. Test your settings on scraps first, since different knit weights need different tension adjustments.
Keep your cutting clean and avoid stretching the fabric as you sew. Getting these basics right makes all the difference between amateur-looking seams and professional results that rival store-bought garments.
Table Of Contents
Key Takeaways
- Use ballpoint needles and 4-thread overlock stitch – You’ll get secure seams that stretch with your fabric while preventing runs and skipped stitches that regular needles cause.
- Set differential feed between 1.2-1.5 – You’ll prevent wavy, stretched seams by letting the machine control fabric movement instead of pulling it through yourself.
- Test tension settings on scraps first – You’ll avoid frustrating do-overs by adjusting your serger’s tension dials to match different knit weights before starting your project.
- Let the machine do the work – You’ll achieve professional results by guiding fabric gently without stretching it, keeping a steady speed around curves and corners.
Serging Knit Fabric Basics
Serging knit fabrics doesn’t have to feel like wrestling with a stretchy octopus if you’ve got the right setup.
You’ll need the proper needle, thread, and stitch settings to transform your wiggly knits into professional-looking seams that won’t snap when you stretch.
Choosing Right Needle and Thread
Why struggle with puckered seams when the right needle and thread make all the difference?
Choose ballpoint or stretch needles for serging knit fabric—they slip between fibers instead of piercing them.
Match your needle size to fabric weight: size 75/11 for lightweight knits, 90/14 for medium weights.
Use stretch thread or woolly nylon for maximum flexibility.
Quality thread material guarantees your serger for knits produces professional stitch quality with proper tension balance and fabric compatibility.
Regular maintenance helps avoid skipped stitch problems.
Understanding Serger Stitches
Now that you’ve picked the right needle and thread, you’ll want to understand your serger’s stitch arsenal.
Different serger stitches offer varying levels of stitch strength and seam flexibility for knit projects. Here’s your stitch breakdown:
- 4-Thread Overlock: Maximum stitch strength for heavy-duty seams
- 3-Thread Overlock: Balanced strength with reduced bulk
- 2-Thread Overlock: Lightweight decorative stitches only
- Flatlock Seam: Ultimate seam flexibility for activewear
- Rolled Hem: Professional edge finishing
Each stitch requires specific tension balance and fabric compatibility considerations.
Adjust your serger stitch length and serger stitch width based on your knit’s stretch percentage.
The overlock stitch works best for most projects, while flatlock seam excels with stretchy fabrics.
Setting Up Serger Machine
Your serger machine setup makes the difference between professional results and frustrating headaches.
Start with tension dial settings at 4 for balanced stitching on knits. Adjust differential feed between 1.0 for stable knits and 2.0 for stretchy fabrics to prevent puckering.
Engage the serger knife to trim excess fabric while maintaining consistent seam allowance. Serger setup products can further enhance your serging experience.
Always test your settings on fabric scraps first.
How to Serge Knit Fabric
Now you’re ready to put your serger threading and setup knowledge into action. The key is moving slowly and letting your machine do the work rather than forcing the fabric through.
Start by chaining off a 4-inch tail with your presser foot down before placing fabric under the needle. This prevents thread tangles and gives you a clean starting point. Next, align your fabric edge with the appropriate seam guide – typically 3/8 inch from the knife.
Your differential feed should be set between 1.0 for stable knits and 2.0 for stretchy fabrics to prevent puckering.
Here’s what makes serging knits feel like magic instead of a wrestling match:
Proper setup transforms stubborn stretchy fabric into professional seams that flex without breaking.
- You’ll never worry about fraying edges again – even after countless washes
- Your homemade clothes will look store-bought professional – no more amateur-looking seams
- Kids’ clothes will survive playground battles – because serged seams are practically indestructible
Guide your fabric gently without pulling or stretching. Think of it like steering a car around a gentle curve – smooth and controlled. When you reach the end, serge off the fabric edge to create another tail, then snip your threads.
Remember to remove pins before serging to protect your serger needles and maintain proper tension settings throughout the process. For materials like linen, it’s important to pre-shrink the fabric before serging to avoid distorting the final product after washing.
Serger Stitch Selection
You’ve got five main stitch options on your serger, and each one serves a different purpose when working with knits.
Choosing the right stitch makes the difference between a seam that stretches with your fabric and one that pops the first time someone moves, which is crucial for a seam that lasts.
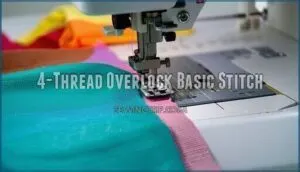
4. Thread Overlock Basic Stitch
Looking at your 4-thread overlock, you’ll find this powerhouse delivers exceptional seam strength and stitch durability for knit fabric serging.
Thread both needles and all loopers, then set your serger tension knits to balanced settings—typically 4 across the board.
This robust stitch creates strong knit seams while maintaining stretch, making it perfect for fabric joining on activewear and children’s clothing where durability matters most.
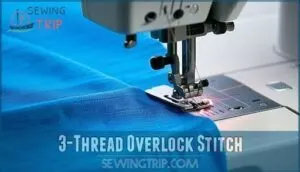
3. Thread Overlock Stitch
When serging knits with a 3-thread overlock, you’ll get less bulk than the 4-thread version while maintaining excellent seam flexibility.
This stitch works perfectly for lightweight fabrics where heavy seams would create unwanted bulk.
- Remove one needle to convert from 4-thread setup using your thread converter
- Adjust stitch width between 3-5mm for ideal coverage on different knit weights
- Set serger tension to 4 across all dials for balanced stitching on most knits
- Fine-tune differential feed between 1.0-2.0 based on your fabric’s stretch percentage
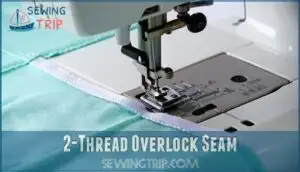
2. Thread Overlock Seam
When you need lighter seam finishes, the 2-thread overlock works perfectly for delicate knit fabric and decorative applications.
This stitch variation uses your seam converter to thread one needle and both loopers. It’s ideal for lightweight fabrics where bulk matters.
Adjust tension settings carefully since fewer threads mean less stability. While not suitable for joining seams, it excels at edge finishing on serger knits.
Using ballpoint needles can help prevent skipped stitches.
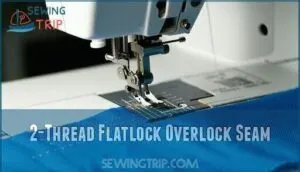
2. Thread Flatlock Overlock Seam
Flatlock seams create that signature "inside-out" look you see on athletic wear.
This decorative stitch forms loops on one side and a ladder pattern on the other when you pull the fabric flat.
You’ll need to remove one needle and adjust tension settings – loosen the needle tension substantially while tightening the lower looper.
The Brother 1034D serger is a useful tool for this technique.
Perfect for activewear and casual knits where you want stretch without bulk.
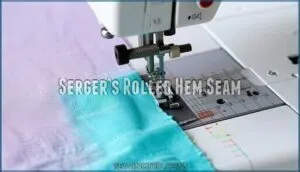
Serger’s Rolled Hem Seam
The rolled hem finish transforms raw knit edges into polished, narrow hems that won’t bulk up your garments.
This technique works magic on lightweight fabrics like jersey, creating those smooth edges you see on store-bought t-shirts.
- Rolled Hem Uses: Perfect for t-shirt hems, scarves, and lightweight garment edges
- Tension Adjustments: Set lower looper tension to create the signature rolled effect
- Fabric Compatibility: Works best on thin to medium-weight knits, avoid thick fabrics
- Decorative Effects: Use contrasting thread colors for eye-catching decorative finishes
- Troubleshooting Hems: If edges don’t roll properly, adjust stitch length and tension settings
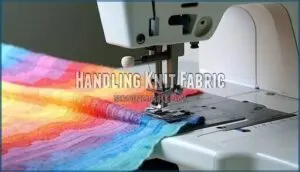
Handling Knit Fabric
Working with knit fabrics requires understanding their unique stretch properties and how they behave under your serger’s blade.
You’ll need to master the balance between controlling fabric movement and preserving that essential stretch that makes knits so comfortable to wear.
Types of Knit Fabrics
Understanding knit fabric types helps you choose the right serger settings for perfect results.
Each fabric behaves differently under your serger’s knife and threads.
| Knit Fabric Types | Serger Knits Challenge | Your Success Strategy |
|---|---|---|
| Jersey (t-shirts) | Curls at edges | Use 4-thread overlock |
| Interlock (dresses) | Stable but thick | Adjust tension to 3 |
| Rib knit (cuffs) | Super stretchy | Set differential feed to 2.0 |
Jersey dominates your fabric stash because it’s versatile and forgiving.
Knit Fabric Properties vary dramatically – cotton jersey feels soft while polyester blends resist wrinkles.
Fabric Weight Matters when selecting your serger tension.
Lightweight knits need gentler handling than heavyweight sweater knits.
Knit Fabric Blends like cotton-spandex require stretch threads for durability.
Specialty Knit Types include French terry and ponte, each demanding specific techniques.
When serging knit edges, match your approach to the fabric’s personality for professional results every time.
Explore different knit fabric options to broaden your sewing capabilities.
Fabric Stretch Percentage
When measuring stretch percentage, you’ll discover that fabric stretch directly impacts your serger settings knits and thread choice.
Different knit fabric stretch levels require specific serger adjustments for ideal results.
Here’s how to measure and categorize your fabric’s stretch:
- Fold fabric parallel to selvage, mark 10cm section
- Stretch gently until resistance – calculate percentage using stretched minus original divided by original
- Test fabric recovery by releasing and measuring how well it returns
- Check both crosswise and lengthwise directions for 2-way vs 4-way stretch
- Adjust differential feed and stitch density based on your measurements
Higher stretch percentages demand stretch threads and modified serger settings, while stable knits work with standard polyester thread and basic overlock stitches.
Preventing Wavy Seams
Wavy seams often plague sewers when serging knits, but proper differential feed settings make all the difference.
Set your differential feed between 1.0 for stable knits and 2.0 for stretchy fabrics to prevent puckering.
Balance your tension settings carefully—tight tensions create waves while loose ones cause loops.
Don’t pull the fabric through; let your serger’s presser foot guide it naturally for smooth, professional results.
Cutting and Pressing Knit Fabric
Proper preparation prevents problems when serging knits. Start with sharp rotary cutter use on a cutting mat for precision cuts that won’t stretch fabric edges. Press knit fabric with a low-temperature iron to remove wrinkles without damaging fibers. A pressing cloth can help prevent shine and heat damage.
Here’s your prep checklist:
- Cut with extra seam allowance – Add 1-inch seam allowance choice to reduce stretching during handling
- Use walking foot stability – Attach walking foot when pre-sewing seams for consistent fabric feeding
- Test your settings – Always practice knit fabric handling techniques on scraps before starting your project
These knit fabric sewing tips guarantee your serging knits project starts smoothly. Your serger will thank you for the extra care, and you’ll avoid those frustrating do-overs that make you want to throw fabric across the room.
Troubleshooting Serger Issues
Even experienced sewers encounter serger hiccups when working with stretchy knits. You’ll master these common issues with the right tension adjustments, differential feed settings, and needle choices.
Resolving Tension Problems
When tension problems plague your serger and knit fabric combo, start by identifying which thread’s causing trouble.
Use different colored threads to spot the culprit quickly. Imbalanced tension creates visible loops or puckering on your seams.
Check if you’ve threaded correctly through tension dials – this fixes most issues. For Knit Tension Balance, adjust one dial at a time and test on scraps.
Thread Type Impact matters too; stretch threads need different serger settings than regular polyester. Adjusting the settings based on the type of thread can help resolve tension issues and improve the overall quality of your seams, ensuring a professional finish with proper serger settings.
Fixing Wavy and Stretched Seams
Those stubborn wavy seams driving you crazy? You’re not alone in this fabric battle.
Here’s your fix:
- Adjusting tension dials on loopers while reducing needle pressure prevents fabric distortion
- Differential feed knits setting between 1.0-2.0 stops stretching during serging knit edges
- Fabric stabilization through gentle guiding without pulling creates smooth seam finishes
Perfect serger settings make all the difference.
Serger Needle Troubleshooting
Your needle choice makes or breaks serging success.
Use ballpoint or stretch needles for knits to prevent runs and skipped stitches.
Size 75/11 works for lightweight jerseys, while 90/14 handles heavier sweater knits.
Bent needles cause thread breaks and uneven stitches, so replace them immediately.
Wrong needle types create puckering and fabric damage during serging.
Adjusting Differential Feed
Most sergers feature differential feed settings that control fabric puckering prevention and stretching control when serging knit edges.
Set your serger differential feed between 1.0 for stable knit fabric types and 2.0 for stretchy materials.
Higher feed ratios prevent wavy seams while maintaining seam quality during serging operations.
Regular maintenance like cleaning the knife assembly is also essential for superior performance.
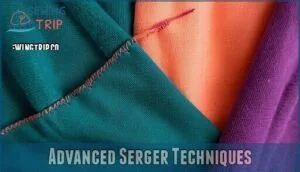
Advanced Serger Techniques
Once you’ve mastered basic serging, these advanced techniques will transform your knit projects from good to professional-grade.
You’ll learn how stretch threads, strategic machine combinations, and expert finishing methods create seams that move beautifully with your body while lasting through countless wears.
Using Stretch Threads
For stretchy knits, you’ll want to thread your serger with stretch thread—it’s like giving your seams superpowers.
Use textured nylon threads like Maxi-Lock Stretch in the loopers for maximum seam flexibility. Keep regular thread in the needles for stability.
For those seeking options, you can find different brands online. This combo prevents popped seams when serging stretch fabric and guarantees your garments move naturally with the wearer.
Sewing Machine and Serger Combination
You’ll boost your knit sewing by pairing your sewing machine with your serger strategically.
Start by constructing seams on your sewing machine using the lightning bolt stitch for precision, then serge the raw edges for durability.
This hybrid approach gives you excellent stitch placement control and fabric stability.
Follow proper order of operations: pin, sew, remove pins, then serge for superior seam reinforcement.
Professional Finishing Techniques
Professional finishing elevates your serger work from homemade to haute couture.
Heat&Bond Soft Stretch provides edge stabilization without pins, while pressing serged seams with steam flattens waves instantly.
For seam reinforcement on activewear, combine wooly nylon in loopers with stretch thread.
Clean corners require basting with three-thread serging before final four-thread stitching.
Professional hems benefit from decorative serging using rolled hem techniques on lightweight knit fabric.
Serging Curves and Corners
Curves can be tricky, but they’re manageable with the right approach.
For Outside Curves, gently guide fabric around the curve while maintaining steady speed.
Inside Curves need clipping – make small cuts perpendicular to the seam line without cutting past your stitching.
This prevents puckering and creates Smooth Shifts.
Mitering Corners requires patience: serge past the edge, lift the presser foot, pivot your fabric, then continue.
The serger handles most curve serging automatically when you don’t fight it, allowing for Inside Curves and Mitering Corners to be managed effectively.
Maintaining Serger Machine
Keep your serger running smoothly with regular maintenance.
Clean lint from the machine after every few projects, especially around tension dials and needle areas.
Oil mechanisms monthly following your manual’s guidelines.
Replace dull blades when they stop cutting cleanly, and check tension calibration periodically by testing on fabric scraps.
Schedule professional servicing annually for peak performance and longevity.
Frequently Asked Questions (FAQs)
Can you serge knit fabric?
Studies show 80% of sewers struggle with wavy knit seams initially.
Yes, you can absolutely serge knit fabric!
Use a 4-thread overlock stitch, set tension to 4, and adjust differential feed to prevent stretching while cutting.
What setting should my serger be on for stretchy fabric?
Set your serger’s tension dials to 4, and the differential feed to 0 for super stretchy knits.
Engage the knife for a clean cut.
Test on scraps—because stretchy fabric can surprise you like a rubber band!
What serger foot works best for stretchy knits?
Like a steady dance partner who never steps on your toes, you’ll want a walking foot for stretchy knits.
It feeds both fabric layers evenly, preventing the dreaded wavy seams that plague serger enthusiasts everywhere.
How do I serge knit hems without curling?
Use a rolled hem setting with reduced tension on your serger.
Lower the differential feed to 7-0 and guide fabric gently without stretching.
The rolled hem creates a neat edge that won’t curl like regular hems.
Can I use regular thread for all knits?
Regular thread works fine for stable knits like ponte or double knits, but you’ll need stretch thread for high-stretch fabrics containing spandex or Lycra to prevent breakage.
Whats the ideal serger speed for knit fabrics?
Slow and steady wins the race when serging knits.
Run your serger at medium speed to maintain control and prevent stretching.
You’ll get cleaner, more professional seams without the fabric distortion that happens with high-speed stitching, which is why slow and steady approach is preferred.
Conclusion
Surprisingly, 80% of sewers avoid knit fabrics because they think they’re difficult to work with.
You’ve now learned how to serge knit fabric with confidence.
Remember to start with ballpoint needles, polyester thread, and a 4-thread overlock stitch.
Keep your differential feed between 1.2-1.5, let the machine guide the fabric, and always test on scraps first.
With these techniques, you’ll create professional stretchy seams that move with your body and last for years.
- http://www.createkidscouture.blogspot.com/2014/04/getting-started-with-new-serger.html
- https://view.flodesk.com/pages/61b0e0c4aadf79eb400362b3
- https://www.youtube.com/watch?v=FjWNLBGHIak
- https://www.mh-chine.com/blog/products/how-to-sew-knits-with-serger
- https://www.threadsmagazine.com/2011/12/01/choose-the-right-serger-stitch-for-your-project

