This site is supported by our readers. We may earn a commission, at no cost to you, if you purchase through links.
Start by cleaning the damaged area and gathering heavy-duty thread, a leather needle, and strong adhesive.
For clean breaks, apply leather glue first, then reinforce with saddle stitching using a running backstitch pattern.
If the strap has torn completely, you’ll need to overlap the pieces by at least half an inch before stitching.
Use waxed thread for durability and make your stitches tight but not so tight they tear the leather.
The secret lies in understanding leather’s unique properties and choosing stitching techniques that actually strengthen the repair beyond the original construction.
Table Of Contents
Key Takeaways
- Clean and inspect your leather strap first so adhesives and stitches hold better and you catch hidden damage.
- Use a heavy-duty leather needle, waxed thread, and a saddle stitch for repairs that are stronger than the original.
- Trim damaged sections cleanly, pre-punch stitching holes with an awl, and overlap strap ends for extra strength.
- Condition and inspect your repaired strap regularly to keep it supple and catch small issues before they become big problems.
Assessing Leather Damage
Before you start fixing that broken purse strap, you’ll need to figure out exactly what’s wrong with it.
A quick inspection will show you whether you’re dealing with a clean break, frayed edges, or worn-out stitching that needs different repair approaches.
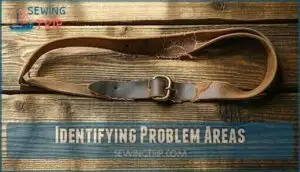
Identifying Problem Areas
Start by examining your strap like a detective hunting for clues.
Check stress point analysis around hardware where metal meets leather—that’s where most breaks begin.
Look for wear patterns, frayed edges, and loose stitching that screams "fix me now!"
Don’t miss hidden damage underneath buckles or clasps; these sneaky spots often need attention before your broken strap fix becomes a bigger headache, requiring a more thorough broken strap fix.
Cleaning The Strap
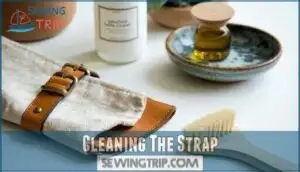
Now that you’ve spotted the damaged areas, grab a clean cloth and give your strap a good wipe-down. This isn’t just about making it pretty—dirt can interfere with your leather purse repair work.
Here’s your leather cleaning game plan:
- Remove surface dirt with a damp cloth, working gently
- Target stain removal using appropriate cleaning products
- Clean metal hardware cleaning with a soft brush
- Let everything dry completely before starting your broken strap fix
- Plan for conditioning after to restore suppleness
Clean leather accepts adhesives and thread better, making your sew leather strap project much smoother.
Preparing for Repair
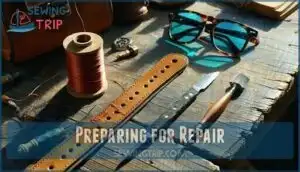
Once you’ve cleaned your leather strap, gather your tools for damage assessment.
Set up your workspace with good lighting and lay out your leather needle, leather thread, and leather awl within reach.
Choose materials that match your strap’s thickness and color.
Take safety measures by wearing protective eyewear when using sharp tools.
This tool preparation and material selection sets you up for successful leather stitching techniques.
Sewing Broken Leather Straps
Once you’ve figured out what’s wrong with your leather strap, it’s time to get down to business with some good old-fashioned sewing. Think of this as leather surgery – you’re bringing that broken strap back to life, one stitch at a time.
The key to successful leather stitching techniques starts with choosing the right approach. A saddle stitch works best for leather strap repair because it’s incredibly strong and won’t come undone even if one thread breaks.
You’ll want to use a heavy-duty leather needle paired with waxed leather thread – this combo can handle thick leather like a champ. Before you start sewing leather, grab your trusty sewing awl to pre-punch clean holes.
This prevents the leather from tearing and gives you perfectly aligned stitches. Remember to regulate adjusting thread tension for superior results. Pay attention to your thread tension – too tight and you’ll pucker the leather, too loose and your repair won’t hold.
The right needle size matters too; go too small and you’ll struggle, too big and you’ll damage the material. Proper seam finishes guarantee your repair looks professional and lasts for years.
Gathering Repair Materials
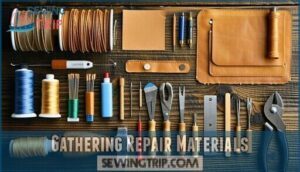
Before you start sewing, you’ll need to gather the right tools and materials for a professional-looking repair.
Having everything ready beforehand saves you from scrambling around mid-project when your hands are covered in leather glue, which is a key aspect of working efficiently with leather glue.
Essential Tools for Leather Repair
Getting your repair toolkit right saves headaches later.
You’ll need precision tools that handle leather’s tough nature without damaging delicate areas during restoration work. Early artisans relied on natural tanning methods using materials like fats and urine.
Essential items include:
- Heavy-duty leather snips – Cut through thick straps cleanly without fraying edges
- Stitching awls and Glover needles – Create precise holes and guide waxed thread through tough leather
- Pliers variety (needle-nose and flat-nose) – Grip hardware, bend metal fasteners, and manipulate small components safely
Adhesives and Reinforcement Materials
Beyond your trusty tools, you’ll need the right glue types and reinforcement materials to make lasting repairs.
Leather adhesive like contact cement creates flexible bonds that won’t crack with daily use. Leather patches work great for covering larger tears, while fabric ribbon can wrap around damaged areas for extra support.
Nail reinforcement adds serious strength to broken sections. Don’t forget about color matching – mixing different shades helps your repair blend seamlessly with the original strap.
It’s also important to address loose stitching issues to prevent further damage.
Thread and Needle Selection
Selecting the right thread and needle combo is like choosing the perfect dance partner – they need to work together seamlessly. Your thread strength should handle daily wear while your needle size matches both thread thickness and leather weight for clean penetration.
- Thread Strength: Choose waxed thread (0.8-1.0mm) for durability and smooth handstitching
- Needle Size: Match diamond-point needles (size 0-2) to your thread thickness
- Color Matching: Test thread colors against your strap for seamless repairs
- Material Compatibility: Verify your sewing techniques work with both leather density and thread type
For superior results, consider sourcing specialized leather crafting threads designed for durability. Verify your sewing techniques work with both leather density and thread type
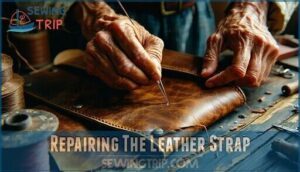
Repairing The Leather Strap
Now you’re ready to tackle the actual repair work, which requires patience and steady hands.
With your materials organized and the damage assessed, you can transform that broken strap into a sturdy, reliable piece that’ll serve you well for years to come, becoming a reliable piece.
Trimming and Preparing The Strap
Now that you’ve got your materials ready, it’s time to prep that damaged leather strap for repair. Start by using sharp scissors or snips to cut away frayed or torn sections, keeping your cutting techniques clean and straight.
Mark guidelines with a ruler to guarantee proper edge alignment – wonky cuts make repairs look amateur. If your leather feels thick or bulky around the damage, consider leather thinning with fine sandpaper.
Don’t forget beveling edges slightly for a professional finish that’ll make your handbag strap repair blend seamlessly, ensuring a professional finish and a repair that looks like it was done by a pro, with clean and straight cuts.
Securing The Strap Ends
After trimming your strap clean, you’ll want to lock those cut ends in place before stitching begins.
Apply a thin layer of leather adhesive to both surfaces, creating strong adhesive application that prevents fraying.
For hardware attachment, make certain metal components sit flush against the leather.
Consider adjusting the stitch length to accommodate the leather’s thickness.
Use overlap methods by folding the strap end over itself, creating natural knot security and stitch reinforcement zones for your upcoming handbag strap sewing work.
Sewing The Strap
Threading the needle marks the heart of purse strap repair—choose a heavy-duty leather needle and waxed thread for durability.
Whether you’re hand stitching or using a sewing machine, maintain consistent thread tension to prevent puckering.
The saddle stitch works best for leather stitching, creating strong, professional-looking seams that’ll outlast your favorite coffee shop’s Wi-Fi password, which is a testament to the durability of a well-made leather stitch.
Reinforcing The Stitching
Now that your stitching’s complete, it’s time to lock it down tight.
Double back over your stitch line for extra stitch durability – this backstitching technique prevents thread failure under stress.
Smart thread selection matters here: polyester outperforms cotton for leather stitching.
To further improve longevity, consider factors affecting overall stitch resistance.
Try cross-stitching at attachment points where your purse strap reinforcement needs maximum strength.
These reinforcement techniques turn good repairs into bulletproof ones.
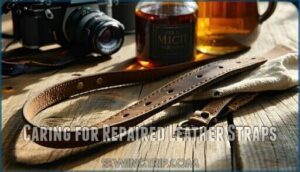
Caring for Repaired Leather Straps
After fixing your purse strap, proper care becomes your ticket to long-lasting repairs that won’t leave you scrambling for another quick fix.
You’ll want to treat that freshly sewn leather like the investment it is—with regular conditioning and smart storage habits that keep it looking good as new, which involves regular conditioning.
Maintaining Leather Suppleness
After your repair work, keeping that leather soft is like tending a garden – it needs regular attention.
Apply leather conditioner every 6-12 months using circular motions with a lint-free cloth.
Clean the strap first, then work conditioner into high-wear areas where bends occur.
Proper storage away from sunlight exposure prevents drying and cracking between treatments, ensuring the leather remains soft and supple.
Protecting From Water Damage
Water’s the enemy of leather, but you don’t have to panic when life gets messy.
Water might be leather’s worst enemy, but smart protection keeps your straps safe from unexpected downpours.
Apply waterproof sealants after your leather strap repair for solid protection. If rain catches you off-guard, immediate action saves the day – blot moisture gently, never rub.
Professional treatments offer bulletproof defense, while preventative measures like checking weather forecasts keep your handbag happy and dry, and taking such steps can lead to a happy and dry handbag.
Regular Inspection and Repair
Check your strap monthly—catching small cracks early prevents major handbag strap repair later.
Look for frayed edges, loose stitching, or worn spots where leather strap reinforcement might help. This wear prevention approach beats emergency fixes every time.
Understanding thread tension adjustments can prevent uneven stitching.
Quick damage control now means fewer trips to professionals and better cost analysis for your leather strap care routine.
Storage and Handling Best Practices
Smart leather strap storage keeps your repairs lasting longer.
Store purses in climate-controlled spaces between 60-75°F with 40-60% humidity—your leather will thank you for avoiding those temperature roller coasters that cause cracking.
- Avoid Sunlight: Keep bags in dark closets or use dust covers to prevent UV fading
- Moisture Control: Use breathable cotton bags, never plastic that traps dampness
- Hook Storage: Hang purses on padded hooks to maintain shape and reduce stress
- Conditioning Frequency: Apply leather conditioner every 3-6 months for maximum durability
Frequently Asked Questions (FAQs)
How to fix a broken purse strap?
About 85% of purse owners experience strap breakage during their bag’s lifetime.
You’ll need leather needle, waxed thread, and awl.
Cut damaged sections, punch holes with awl, then saddle stitch pieces together for maximum strength and durability.
How do you fix a leather purse strap?
You’ll need to cut away damaged sections, then either stitch the pieces back together using waxed thread and a leather needle, or reinforce with patches and adhesive for lasting results.
How do you fix a broken leather bag?
Don’t throw in the towel just yet! You’ll carefully assess the damage, then use leather adhesive, patches, or stitching to restore your bag’s functionality and appearance effectively.
How to cut a leather purse strap?
Use sharp scissors or leather shears to make clean, straight cuts. Mark your cutting line first, then cut decisively in one motion to avoid jagged edges that’ll fray later.
Do leather purse straps need to be repaired?
Yes, leather straps eventually need repairs.
Daily wear causes cracking, fraying, and hardware loosening that compromises both function and style.
Regular maintenance prevents major damage, but addressing issues early saves your favorite bag from becoming unusable, and this is crucial for daily wear and to prevent major damage.
How to repair a damaged purse?
Sarah’s vintage Coach bag started falling apart after years of daily use, but she saved hundreds by fixing it herself instead of buying new.
You can repair damaged purses by identifying problem areas first, then using appropriate techniques like stitching torn straps with waxed thread, patching holes with leather pieces, or applying edge kote to restore worn edges, which can help you repair damaged purses by using techniques like stitching.
How to fix a broken leather strap on a purse?
First, cut away damaged sections using sharp scissors.
Then, punch holes with an awl on both sides of the break.
Thread a heavy-duty needle with waxed thread and saddle stitch the pieces together for maximum strength and durability.
Can you sew leather straps?
Back in the days of horseback adventures, you can absolutely sew leather straps.
Grab heavy-duty needles, waxed thread, and an awl.
Pre-punch holes, use saddle stitching for strength, and you’ll have durable repairs.
Can you repair a cracked leather strap?
You can repair cracked leather straps with leather adhesive, patches, or stitching reinforcement.
Clean the crack first, apply leather filler or glue, then condition the area to restore flexibility and prevent future cracking, using methods like stitching reinforcement.
How much does professional leather strap repair cost?
Professional leather strap repair typically costs $30-80 at most cobblers, while custom-made strapping runs $100-150 per strap. You’ll pay more for luxury brands, but basic repairs offer solid value.
Conclusion
Ironically, something as simple as knowing how to sew a broken leather purse strap can save you from expensive replacements and countless shopping trips.
With proper technique and quality materials, your repair will outlast the original construction.
The key is patience—rushing leads to weak spots that’ll fail again.
Remember to maintain your repaired strap with regular conditioning and inspection.
You’ve now mastered a skill that’ll keep your favorite bags functional for years to come.
- https://www.weaverleathersupply.com/pages/how-to-hand-sew-leather
- https://tandyleather.com/blogs/tandy-blog/how-to-choose-the-right-thread-and-needle-size-for-hand-sewing-leather
- https://www.reddit.com/r/Leathercraft/comments/15uxicr/best_way_to_repair_torn_strap/
- https://www.handbagedgerepair.com/shop
- https://www.youtube.com/watch?v=A4RVr-wsirY

