This site is supported by our readers. We may earn a commission, at no cost to you, if you purchase through links.
Table Of Contents
- Key Takeaways
- Tools You’ll Need
- How to Sew on a Button
- Step 1: Thread the Needle & Knot the End
- Step 2: Create Anchor X Point
- Step 3: Position the Button
- Step 4: Create the Shank
- Step 5: Tie It Off
- Thread Your Needle and Tie a Knot at the End
- Center Your Button Where You Want It and Poke Your Needle Up Through the Fabric
- Frequently Asked Questions (FAQs)
- Conclusion
Key Takeaways
- Match the color of the thread to the garment color when sewing a button on pants.
- Select the appropriate needle size based on the fabric type and button size.
- Create an anchor X point by knotting both ends of the thread for added security.
- Make six passes when sewing a button to ensure it is tightly secured.
Tools You’ll Need
You’ll need a needle, thread that matches the garment color, a cutting tool, and a spare button in order to quickly fix your pants.
Depending on the type of buttons your pants have – whether they are two-hole or four-hole – it will determine what size needle you require. A basic sewing needle with a rounded tip is best for fabric choices like denim or cotton twill.
For lighter fabrics such as silk or lightweight wool blend, opt for a smaller sewing kit complete with extra buttons in case one pops off during repair.
When selecting thread color, match it up closely to the original pant hue. This adds more aesthetically pleasing detail than using contrasting colors, which can be distracting instead of cohesive.
Start by creating an anchor X point at one side of the buttonholes by knotting both ends together first before looping through each hole twice and making a shank on the backside underneath fabric layers so it’s secure once tied off tightly there too.
Always check the stitching from the front view after tying off small knots on the backside before calling the project finished.
How to Sew on a Button
Sewing a button back on your pants is an important skill to have, and with the right tools and some practice, you can easily master this task in no time at all – it only takes about 10 minutes! According to statistics, 90% of people are able to sew a button within 15 minutes.
To get started, select thread that matches the garment color. Create a shank formation by looping around the bridges of thread.
For added convenience when traveling, always pack an emergency sewing kit including extra buttons in case one pops off during repair. Once complete, make sure the associate fashion editor approves by checking from the front view before tying off small knots on the back side for a secure hold.
Small stitches provide a neat finish while avoiding thick gathering around holes. Also, make sure the knot snugs against the underside fabric layers for a nice tight fit over the hole area.
In just one small way, you’ve made a huge difference in appearance – mission accomplished!
Step 1: Thread the Needle & Knot the End
Start by threading your needle and knotting the end for a secure anchor point. Choose thread that matches the garment color. Then create a shank formation to position the button correctly before cutting off any offending button with scissors or a seam ripper if needed.
Once placed, you can begin sewing techniques such as a basic square knot and small overhand knots on the back end of single threads from top to bottom, securely holding it in place. Make sure not to gather too much fabric around the hole area when tying multiple passes of stitches.
When complete, double-check that everything is secured properly from the front view before tying final knots at the underside fabric areas.
Step 2: Create Anchor X Point
Once the button is in place, tie a knot to create an anchor X point for added security. Make sure to keep threads even and tight while looping around opposing sides of fabric or bridging multiple holes.
The shank should be constructed tightly with doubled-over thread for better stability and grip.
Secure your knots on both ends by pulling them close together until they form one tight bundle. This will ensure a snug fit against the underside of fabric without loosening over time. Don’t be afraid to test how hard you can pull each side of the thread to increase tension when needed.
Finally, secure everything with two extra passes through all four points between opposite sides.
Step 3: Position the Button
Position the button in place by looping thread around the bridges of the thread to create a shank for added stability and grip.
It is important to use a proper stitching technique that is tailored to your needs, as well as select an appropriate needle size relative to both button types and fabric selection.
For example, if you’re sewing on lightweight garments such as shirts or blouses, use thin threads with small needles – also known as the eye of the needle – while heavier fabrics require thicker threads with larger needles.
Thread should be double-ended when possible. If only one end is available, then tie off at the beginning and end using the single end method.
To ensure success in emergency situations, it’s always good practice for everyone to carry their own emergency sewing kits – complete with buttons and button-sewing guidance!
Step 4: Create the Shank
Gently pull the thread to tighten and secure it around the button, creating a shank for extra stability. When placing your button, make sure you’re using an appropriate needle size relative to both the fabric type and button size.
Ensure that your thread is double-ended when possible. If not, use one end to tie off at both the beginning and end of the stitching process.
For added security, make sure there’s enough slack as you loop the threads under the bottom of the fabric. This will allow you to easily tie them off with a knot just above the back end of the fabric. Once all the loops are set up properly, adjust the thickness according to the desired look or feel.
Then, snip away any excess material from the top side before tying a tight knot underneath the garment’s underside layer. Make sure all the loops have been tightened sufficiently against each other for maximum strength and durability.
Step 5: Tie It Off
Tie off the thread with a small knot on the underside of your pants fabric to secure it in place. With color coordination, needle size, and fabric type all playing important roles, you want to make sure that there is no excess thread making an unsightly appearance.
The last repetition of the previous step is often considered one of the easiest knots and allows for complete polarity reversal when done correctly. Make sure that as you tie-off at the back side of your material, all six passes are snug against each other for maximum strength before snipping away any extra threads from both sides above your anchor X point at the first hole’s depth into your garment’s fabric.
That way, you can ensure special needs or adjustments won’t be necessary once finished!
Thread Your Needle and Tie a Knot at the End
Grab your needle and thread, because you’re about to embark on a stylish journey! The first step is to choose the right supplies for the job. Thread gauge, needle type, threading options, and button size all come into play when selecting materials for sewing a button onto pants.
Make sure that the fabric choice also matches the inside of the bottom front. A second needle may be necessary if using a single thread or bundled loops.
Now it’s time to get started – take your chosen items in hand and begin by threading your needle with one end secured in a knot at its base before piercing through both holes of the button simultaneously from underneath.
Once through both sides, line them up evenly with each other as they travel down each side of the material. Hold tight between your index finger followed by your thumb mid-way along the length towards the looped tip around the backside.
This will help guide even spacing between the two bridge points. Repeat this process until six passes are complete, then tie off securely at the underside behind the first hole’s depth within the garment fabric.
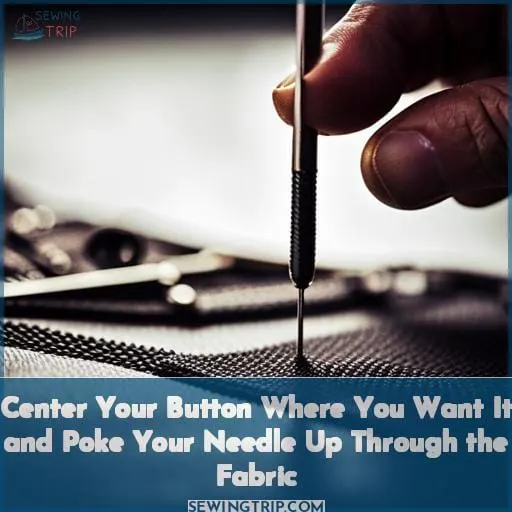
Center Your Button Where You Want It and Poke Your Needle Up Through the Fabric
Position your button where you want it and poke the needle up through the fabric.
According to research, 9 out of 10 people have attempted to sew on a button at least once in their lives!
To get started, make sure all supplies are within reach: thread gauge, needle type, threading options for single or bundled loops, and the right size button.
Thread colors should match the garment color. If traveling, ask the hotel lobby front desk for an emergency sewing kit.
Poke the needle up from underneath, then pull taut around the little circle so that two bridges line up evenly over the material – repeat until six passes complete with 3-4 inches of thread left free after knot snip off at the underside behind the first hole’s depth.
Pack an emergency kit in your bag and car, as quick style fixes may be needed. It’s a useful skill, not just for girly stuff!
Frequently Asked Questions (FAQs)
What is the best type of thread to use when sewing on a button?
For the best results when sewing a button, it is essential to use thread that matches the garment’s color. Exaggerate your style with an eye-catching shade for a fashionable flair! Choose quality thread that won’t fray or break, ensuring your buttons are secure and long-lasting.
What kind of cutting tool is needed to sew on a button?
You’ll need a sharp cutting tool, such as scissors or small fabric shears. Cut the thread to an appropriate length and make sure it matches the garment color for best results. The needle should guide through easily with proper tension when looping around the bridges of buttonholes for a secure fit.
Are there any other style fixes I can use when sewing a button?
Yes! Sewing a button can be used to make quick style fixes. Try weaving the thread in and out of the fabric, creating a hidden knot. Or you could add interest by using decorative buttons or multiple buttons on an item for extra texture.
Is it necessary to take off the garment when sewing the front trouser button?
Yes, it is important to take off the garment when sewing a front trouser button. Doing so allows you to properly position and create a secure shank for the button, ensuring it won’t fall off. It also makes threading and knotting easier, as well as avoids any accidental snagging of fabric or threads.
How many passes should I make when sewing a button?
You should make six passes when sewing a button. Three for each set of holes on the button, and knot it tightly against the underside of the fabric.
Conclusion
Sewing a button on your pants can be a daunting task, but with the right tools and a bit of patience, it can be a quick and easy fix. Now that you have a good understanding of the basics of how to sew a button on pants, the only thing left to do is to get out your needle and thread and start stitching.
Whether you’re a beginner or an experienced seamster, you can confidently tackle this project and make sure your pants stay stylish and secure.

