This site is supported by our readers. We may earn a commission, at no cost to you, if you purchase through links.
You can sew a buttonhole without a buttonhole foot by marking your fabric clearly with chalk or washable pen, then using your machine’s zigzag stitch.
First, sew down one side with a narrow zigzag, pivot at the end, and create a dense bar tack. Continue around the other side and finish with another bar tack.
Once you’ve sewn all four sides, carefully cut the opening with a seam ripper or sharp scissors.
Like riding a bike without training wheels, it takes a bit more concentration, but you’ll gain skills that make you a more versatile sewist.
Table Of Contents
Key Takeaways
- Mark your fabric clearly using chalk or a washable pen, then sew a zigzag stitch along the marked lines for each side of the buttonhole.
- Use interfacing to stabilize your fabric and prevent puckering while sewing.
- Adjust your sewing machine’s zigzag stitch width and length, and test on scrap fabric before sewing the actual buttonhole.
- When finishing, carefully cut the buttonhole opening with sharp scissors or a seam ripper, ensuring clean edges.
Preparing Buttonhole Sewing
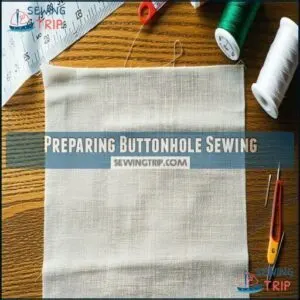
You’ll need to gather your fabric, thread, and basic tools before tackling a buttonhole without that fancy foot attachment your sewing machine manual insists you can’t live without.
Once you’ve applied some interfacing to stabilize your fabric (trust me, it’s like giving your buttonhole a sturdy backbone), you’re ready to mark your measurements.
You’re then ready to show that buttonhole who’s boss, with your basic tools and sturdy backbone in place to guide you through the process.
Choosing The Right Fabric and Thread
Wondering what fabric and thread will give you buttonhole success without a special foot? Start with stable fabrics that won’t shift during sewing.
For best results:
- Choose medium-weight fabric or add interfacing to lightweight materials
- Select polyester or cotton thread that matches or complements your fabric color
- Consider thread tension—slightly looser settings prevent puckering
Remember, the right materials are half the battle in mastering this essential sewing technique! Many sewers prefer this type of material for added stability.
Selecting The Correct Sewing Machine Settings
Dial in your sewing machine settings to create perfect buttonholes without a specialized foot. Set your machine to a zigzag stitch with a width of 2-3mm and short stitch length (around 0.3-0.4mm) for clean edges.
Adjust your thread tension slightly looser than normal—this prevents puckering. For ideal results, position your needle to start on the left side of your marked line.
Remember to take into account fabric weight and style when choosing settings. Test these settings on scrap fabric first to ensure ideal results and achieve clean edges.
Applying Fusible Interfacing for Stability
Now that you’ve got your machine settings dialed in, let’s stabilize your fabric. Fusible interfacing is your secret weapon for professional buttonholes without a buttonhole foot.
Apply interfacing based on your project’s needs:
- Light fabrics need medium-weight interfacing
- Medium fabrics work with lightweight interfacing
- Heavy fabrics might need minimal or no interfacing.
Cut interfacing slightly larger than your buttonhole area, then press with a hot iron until fully bonded. Consider the various interfacing weights available for different fabrics. No shifting means clean buttonhole edges!
Sewing Buttonhole Manually
Manual buttonhole creation is a true test of your sewing skills, but don’t worry—you’ve got this! Without a buttonhole foot, you’ll need to exercise careful manual stitch control throughout the process.
Mastering manual buttonholes challenges your skills, but the satisfaction of creating something precise and professional is worth every stitch!
Start by setting your machine to a zigzag stitch and practice on scrap fabric first. You’ll want to sew the sides with narrow zigzag alternatives and create bar tacks at each end with wider stitches.
Remember that tension adjustment tips make all the difference—slightly looser tension often works better for manual buttonholes. Use fabric stabilizers beneath your work to prevent puckering and guarantee clean lines.
For extra buttonhole reinforcement, consider sewing around twice. To prevent fabric from fraying, consider using Fray Check application.
The handmade buttonhole approach takes patience, but there’s something satisfying about mastering this technique. Many sewists find that a no buttonhole foot tutorial helps them understand their machines better—turning limitation into skill!
Marking Buttonhole Position
You’ll need to precisely mark your buttonhole position before you start sewing, just like how a chef wouldn’t chop veggies without first finding the cutting board.
Using your button as a guide, mark an "I" shape on your fabric with chalk or a fabric pencil, making sure it’s slightly longer than your button’s diameter for easy buttoning.
Measuring and Marking The Buttonhole Size
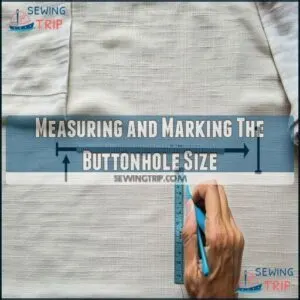
Now that you’ve set up for manual buttonhole creation, let’s tackle sizing. First, measure your button’s diameter and add a small allowance (about 2mm) for easy fastening.
Mark a straight line on your fabric using chalk or a pencil—this will be your buttonhole’s length. For precise marking, consider using a versatile seam gauge.
Then, draw two perpendicular lines at each end to create an "I" shape that’ll guide your stitching path perfectly.
Centering The Buttonhole for Symmetry
With your buttonhole size determined, proper centering creates that balanced appearance professionals achieve.
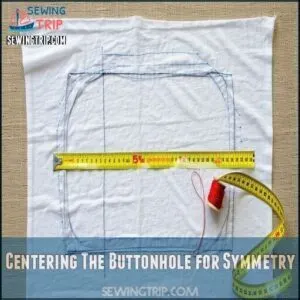
For garments that button, always place buttonholes on the center line – uneven placement throws off symmetry and fit.
Position your buttonhole 5/8" from the finished edge for standard buttons. Draw your marked rectangle precisely on the interfacing, then add a centered horizontal line through the middle.
Your sewing techniques will shine with this visual alignment, even without specialized attachments, and create a professional finish with proper centering.
Accounting for Buttonhole Orientation
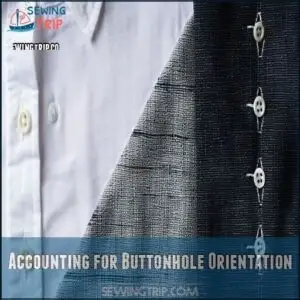
Two essential factors determine the correct buttonhole orientation: fabric grain and garment stress points.
When you’re sewing buttonholes without special attachments, proper orientation prevents unsightly stretching and tearing.
- For shirts and blouses, place horizontal buttonholes along center front areas
- Use vertical orientation on waistbands where stress runs up-and-down
- Consider design aesthetics by aligning buttonholes with garment lines
- Position buttonholes 1/4-inch from edges for functional button placement
- For diagonal buttonholes, follow the direction of maximum stress for durability and to prevent unsightly stretching, ensuring the garment stress points are properly considered.
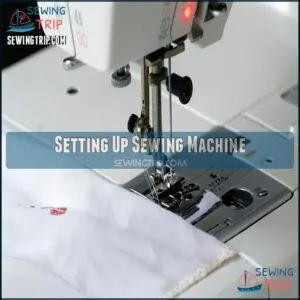
Setting Up Sewing Machine
You’ll need to prepare your sewing machine with the right settings before tackling that buttonhole, just like getting your coffee maker ready before that first morning cup.
Set your machine to a zigzag stitch with a width of about 5-7 and length near zero, then adjust your tension slightly looser than normal to prevent any puckering in your fabric.
Adjusting The Zigzag Stitch Width and Length
Before diving into your buttonhole project, you’ll need to adjust your zigzag stitch width and length for perfect results.
The width controls how far your needle swings side-to-side, while the length determines spacing between stitches.
| Setting | Best For | Recommendation |
|---|---|---|
| Wider Width (3.0) | Thicker fabrics | Provides stronger hold |
| Narrow Width (2.0) | Delicate fabrics | Creates elegant finish |
| Short Length (0.4) | Dense stitching | Prevents gaps |
| Medium Length (0.5) | General use | Balanced appearance |
| Long Length (0.6) | Heavier thread | Prevents puckering |
Remember, stitch density matters more than you think when sewing buttonholes without a buttonhole foot, and it’s crucial for achieving perfect results with your sewing project.
Fine-Tuning The Tension for Smooth Stitches
Thread tension can make or break your buttonhole. Start with your machine’s standard tension, then do a quick test on scrap fabric.
Thread tension is the unsung hero of buttonhole creation—get it right, and your stitches will sing in perfect harmony.
If you’re seeing fabric puckering or bobbin thread visibility on top, lower your tension by 1-2 numbers. Different thread types affect stitch density, so you’ll need to adjust accordingly.
Incorrect thread placement is a common cause of tension issues. When your stitches look smooth and even, you’re ready to sew your buttonhole successfully.
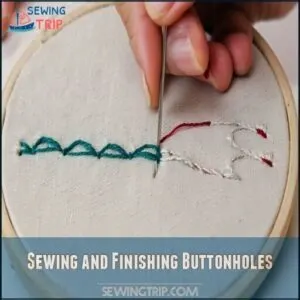
Sewing and Finishing Buttonholes
You’ll now tackle the most exciting part of the process where your buttonhole finally comes to life with careful stitching and precision cutting.
With your machine set up and fabric marked, you’re ready to create those clean zigzag edges and secure bar tacks that’ll make your buttonhole both functional and professional-looking.
You have these steps to create a buttonhole that is functional and visually appealing, and by following them carefully, you can achieve a professional finish.
Stitching Along The Marked Buttonhole Line
Now that you’ve marked your buttonhole, it’s time to start stitching along those lines with precision.
Position your needle at the start of your first line, ensuring proper needle alignment with the edge of your marking.
Maintain a consistent speed as you sew to achieve uniform stitch density.
Keep gentle control of your fabric feed while avoiding distortion – just like driving a car, steady hands make for straight paths in this DIY buttonhole tutorial with steady hands.
Creating Bar Tacks for Secure Ends
Why are bar tacks essential when sewing buttonholes? They prevent fraying and strengthen the ends of your buttonhole, acting as little guardians against wear and tear.
Here’s how to create them without special attachments:
- Set your machine to a very short stitch length (0-0.3mm) and wider width (4-5mm)
- Position fabric carefully at the buttonhole end
- Sew 5-6 tight zigzags in place to form the bartack
- Repeat at the opposite end for balanced reinforcement stitching
Using The Zigzag Stitch for Buttonhole Edges
Now that your bar tacks are in place, it’s time to create those clean buttonhole edges.
Set your sewing machine to a zigzag stitch with medium width and very short length for proper zigzag density.
Position your zigzag foot alongside your buttonhole guide and sew slowly—this isn’t a race.
Adjust tension slightly looser than normal for smooth stitches.
Always test your stitch settings on practice fabric first to perfect your technique.
Cutting The Buttonhole Opening With Precision
Once your buttonhole stitching is complete, you’ll need to create the actual opening with precision.
Grab sharp scissors or a specialized buttonhole chisel for clean cuts. Insert the seam ripper at the center and carefully work toward each end, stopping just before reaching the bar tacks.
Angle your cutting slightly inward to prevent fraying. For buttonhole creation without attachments, take your time—hasty cutting can ruin your careful sewing work.
A buttonhole chisel tool can provide a cleaner, more precise cut.
Reinforcing The Buttonhole With Additional Stitches
Durability is the secret to buttonhole success after cutting.
To prevent fraying and enhance buttonhole durability, try these reinforcement stitch types:
- Apply a whipstitch around the edges with thread that matches your fabric
- Create multiple stitch layers by sewing over the initial line twice
- Secure thread ends with tiny knots hidden between fabric layers
These simple techniques transform your hand sewing or machine sewing efforts into professional-looking results without fancy attachments.
Frequently Asked Questions (FAQs)
Can I make a buttonhole without a buttonhole foot?
Yes, you can! Nearly 80% of sewers have made buttonholes without specialized equipment at some point. You’ll need a ruler, marker, and your machine’s zigzag stitch to create perfectly functional buttonholes.
How to sew a button hole manually?
To sew a buttonhole manually, mark your button’s size on fabric.
Then, stitch around the outline with tight zigzag stitches.
Then carefully cut the opening with small scissors or a seam ripper.
Do you need a special foot for button holes?
Believe it or not, you don’t absolutely need a special foot.
While buttonhole feet make the job easier, you can create professional-looking buttonholes with your regular presser foot and the right machine settings.
What can I use instead of a buttonhole?
You can use loops, snaps, hooks and eyes, velcro, magnets, or even elastic loops as alternatives to buttonholes.
For a more traditional look, try bound or hand-sewn buttonhole techniques with regular presser feet.
Can you sew a buttonhole without a specialized foot?
Absolutely, you can create professional buttonholes without special equipment.
You’ll need to adjust your zigzag stitch settings (width at maximum, length near zero) and carefully mark your fabric with an "I" shape as your guide.
This process allows for precise control over the buttonhole creation, enabling you to achieve professional results.
Can I make a buttonhole without a foot?
Yes, you can definitely make a buttonhole without a foot!
You’ll need to use your machine’s zigzag stitch and carefully mark your fabric.
It’s totally doable with a bit of practice.
How do you sew a buttonhole on a sewing machine?
Measure your button, mark fabric with perpendicular lines, set your machine to zigzag stitch, and sew four sides in sequence: top bartack, right side, bottom bartack, left side.
You’ll cut the opening last.
Does a 4 step sewing machine have a buttonhole foot?
Many 4-step sewing machines don’t include a buttonhole foot in their standard accessories.
You’ll often need to purchase this attachment separately or use manual techniques to create buttonholes with your machine’s zigzag stitch.
What is a buttonhole foot?
A buttonhole foot is a specialized sewing machine attachment that guides your fabric through precise zigzag stitches, creating perfect buttonholes automatically.
You’ll find markings on it for consistent sizing and placement.
Can you make a buttonhole by hand?
You can create stunning buttonholes by hand with nothing but needle and thread.
It’s surprisingly simple—just mark your dimensions, use a tight blanket stitch around the edges, then carefully cut the opening.
Conclusion
Now you’re equipped with the most valuable skill in your sewing arsenal – knowing how to sew a buttonhole without a buttonhole foot.
With practice, you’ll create professional-looking buttonholes using just your machine’s zigzag stitch.
Don’t be afraid to test on scrap fabric first. Remember, precise marking and steady stitching are your best friends.
Whether your buttonhole foot is broken, missing, or you’re using a vintage machine, you’ll never be stuck on a project again!
- http://www.palindromedrygoods.com/2016/07/manualbuttonhole.html
- https://www.reddit.com/r/sewing/comments/1fe8isg/does_a_sewing_machine_exist_that_doesnt_require_a/
- https://blog.megannielsen.com/2017/09/sew-buttonholes-without-automatic-function/
- https://sosewenglishfabrics.com/blogs/news/buttonholes-without-a-buttonhole-foot
- https://www.youtube.com/watch?v=17SzwgBrL9k

