This site is supported by our readers. We may earn a commission, at no cost to you, if you purchase through links.
A circle skirt spins with you when you twirl and drapes like liquid when you walk. The secret lies in the physics of the pattern—cutting your fabric on the bias creates natural movement that rectangular panels can’t match.
But here’s what most beginners don’t expect: the math matters more than you think. Measure your waist wrong by just an inch and you’ll end up with a skirt that won’t zip or slides right off your hips.
The good news is that once you understand the formula behind drafting your pattern, you can create a perfect-fitting circle skirt in any length or fabric. This tutorial walks you through every measurement, cut, and stitch so your first circle skirt fits as beautifully as your tenth.
Table Of Contents
- Key Takeaways
- Essential Materials for Sewing a Circle Skirt
- Measuring and Drafting Your Circle Skirt Pattern
- Cutting and Preparing Your Fabric
- Assembling and Sewing The Skirt Panels
- Constructing The Waistband and Adding a Zipper
- Hemming and Finishing Techniques for Circle Skirts
- Frequently Asked Questions (FAQs)
- Conclusion
Key Takeaways
- The math behind your circle skirt matters more than most beginners expect—measure your waist wrong by just one inch and you’ll end up with a skirt that won’t zip or slides off your hips.
- Hanging your finished skirt for 24 to 72 hours before hemming prevents up to 4 cm of uneven stretching along the bias, which is the secret to avoiding wavy hems that ruin the drape.
- A full circle skirt uses one continuous piece of fabric cut around a calculated waist radius (your waist measurement divided by 6.28), while half and quarter circle patterns use multiple panels that change how the fabric moves and flows.
- Pressing every seam as you go—not just at the end—is what transforms a homemade circle skirt into one that looks store-bought, especially when you use the right iron temperature for your fabric type.
Essential Materials for Sewing a Circle Skirt
Before you start sewing your circle skirt, you’ll need the right materials close at hand. Each tool and supply plays a part in making the process run smoothly.
Here’s what you’ll want to have ready as you begin.
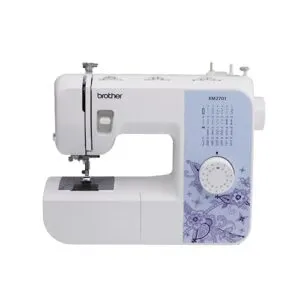
1. Brother Lightweight Sewing Machine Model
A dependable sewing machine lays the foundation for any circle skirt project. The Brother XM2701, celebrated for its lightweight design, stands out in sewing tutorials for its Model Portability.
With 27 built-in stitches, including specialty and stretch options, you’ll have ample Stitch Variety for creative sewing techniques. Its automatic features simplify setup, while strong Machine Durability keeps you sewing through trend after trend.
User Satisfaction scores high, too, making it a smart choice for jumping into new Market Trends or tackling your next Sewing Project.
Best For: Beginners and everyday sewing enthusiasts who want a portable, easy-to-use machine with a range of built-in stitches.
- Lightweight, compact, and easy to store or transport.
- Features 27 built-in stitches with automatic needle threading for convenience.
- Consistently high user satisfaction and great value for the price.
- Can be noisy, especially when sewing thick fabrics or multiple layers.
- Some users report issues with stitch quality, like skipping stitches.
- Only operates on 120 volts in the US; warranty voided if used elsewhere.
2. Triangle Tailor’s Chalk Sewing Notions Set
Once you’ve set your machine in place, reach for a reliable tailor’s chalk set to lay out your circle skirt pattern with confidence. Triangle tailor’s chalk, with its fine edges and varied colors, nails Marking Accuracy—even on slippery or dark fabrics common in skirt making.
Premium Chalk Composition means crisp lines that brush away cleanly. With multi-color Set Packaging, you can always pick the right shade.
Focus on Application Techniques—use the edge, sharpen often, and always test marks on scrap fabric first.
Best For: Sewists, quilters, and designers who want precise, visible, and easy-to-remove marks on fabric of any color or texture.
- Available in multiple colors for versatile use on light or dark fabrics.
- Creates sharp, crisp lines that are easy to brush or wash away.
- Triangle shape with fine edges enables precise and controlled marking.
- Brittle texture can cause pieces to break during use or shipping.
- May leave residue or be hard to remove from some delicate fabrics, such as silk.
- Packaging may not always protect against breakage in transit.
3. School Smart Wood Plain End Yardstick
After you’ve mapped your lines with tailor’s chalk, reach for the School Smart Wood Plain End Yardstick—your go-to for Wood Yardstick Accuracy in skirt making. Its detailed measurement markings make quick work of mapping an even hem, plus the straight edge is a classic in sewing supplies for a reason.
Durability and quality are built in, so you won’t find yourself hunting for a replacement mid-project. Classroom use cases abound, and the handy storage hole means it stays right where you need it.
Best For: Teachers, crafters, and sewing enthusiasts who need a dependable and accurate wooden yardstick for measuring, marking, and straight edges.
- Durable hardwood build with a clear lacquer finish resists wear and warping.
- Double-sided, easy-to-read markings in 1/8-inch increments for detailed accuracy.
- Includes a hanging hole for convenient storage in classrooms or studios.
- Some users report it can feel flimsy or break with heavy pressure.
- Wood quality may be variable, with occasional dents or warping out of the box.
- Not individually calibrated or certified for professional-grade precision.
4. Faux Leather Buffalo Black Fabric Yard
Now, bring your Circle Skirt vision to life with faux leather buffalo black by the yard. This vegan leather alternative combines impressive Faux Leather Durability with a sleek, modern finish—spot-on for statement pieces.
Cleaning faux leather is simple: just a quick wipe down or toss in a cold wash. While its low stretch means it keeps shape, this fabric ranks high in both style and practicality.
Expect a few sewing challenges with regular machines, but the results shine in so many faux leather applications.
Best For: DIY enthusiasts, beginner sewists, and home decorators looking for a durable, vegan-friendly fabric for modern projects.
- Machine washable and easy to clean for fuss-free care
- Durable, water- and stain-resistant—great for high-traffic or stylish spaces
- Affordable faux leather that’s easy to cut, sew, and shape for custom designs
- Not suitable for heavy-duty use or high-wear applications
- Can be tricky to sew on standard machines without special attachments
- Not biodegradable; synthetic material comes with long-term environmental concerns
5. Gingher 8 Inch Spring Action Shears
Every sewist needs a true heavy-hitter in their toolbox, and Gingher 8 Inch Spring Action Shears fit that role perfectly. The Ergonomic Design saves your hand on marathon cutting sessions, while their excellent Cutting Performance slices fabric layers with precision.
Blade Durability stands out—expect years before needing resharpening. Scissors like these aren’t just an expense; they’re an investment, making sense in any Cost Analysis.
For best results, regular cleaning and an occasional professional tune-up keep these sewing tools ready for any circle skirt project.
Best For: Sewists and tailors who want durable, comfortable, and precise shears for frequent or large-scale fabric cutting.
- Effort-saving spring-action design reduces hand fatigue during long sessions.
- Knife-edge blades stay sharp for years and handle multiple layers or thick fabrics.
- Full lifetime warranty with professional sharpening services available.
- Heavier than basic scissors, which some users may find tiring.
- Locking mechanism can be tricky or wear out over time.
- Higher upfront price compared to standard fabric scissors.
6. Lusata Black Knit Heavy Stretch Elastic
A sturdy waistband can make or break your circle skirt, and Lusata Black Knit Heavy Stretch Elastic pulls more than its own weight. Its Elastic Durability and reliable Stretch Recovery mean the band won’t give out after heavy wear or frequent washing.
With broad Waistband Applications, Lusata works well with Stretch Fabric and woven projects alike—think gathered skirt waists or cuffs. It shines in many Sewing Techniques, holding shape while staying soft and flexible. That’s real compatibility you’ll appreciate in every sewing project.
Best For: Home sewists, crafters, and garment makers who need a durable, stretchy elastic for waistbands, cuffs, and flexible DIY projects.
- Heavy stretch with excellent recovery holds its shape, even after frequent washing.
- Works well with both knit and woven fabrics for versatile sewing applications.
- Preshrunk, machine washable, and highly rated for reliable long-term performance.
- Only available in black, limiting color options for some projects.
- Not suitable for high-heat applications or fabrics that require pressing above 200°F.
- Quality and elasticity may vary slightly between batches or manufacturers.
7. Brother 1034DX Serger Overlock Machine
A trusted companion for clean seams, the Brother 1034DX Serger Overlock Machine takes the rough edges off any circle skirt. Its Serger Stitch Options handle curves with ease, giving your projects a crisp, store-bought look.
That Threading Guide System keeps set-up quick for beginners. You’ll love the Fabric Edge Finishing, plus the Differential Feed Control means no waving or puckering along the bias.
With simple Machine Maintenance Tips and easy-to-follow Sewing Tutorials, it stays reliable for every Sewing Project or new trick up your sleeve.
Best For: Beginners and experienced sewers who want easy, clean seam finishes on all kinds of fabrics, especially thick or tricky ones.
- Durable metal frame and powerful motor handle denim and multiple fabric layers effortlessly
- User-friendly with color-coded threading, LED lighting, and included accessory feet
- Fast sewing speed (up to 1,300 stitches per minute) gets projects done in a flash
- Threading can seem intimidating at first, though guides make it easier over time
- Creates quite a bit of lint and fluff, so frequent cleaning is needed
- Some users find the foot pedal less responsive for slow, precise work
Measuring and Drafting Your Circle Skirt Pattern
Before you cut any fabric, you need precise measurements and a plan. Getting your pattern right is what makes the skirt truly fit.
Here are the steps for measuring and drafting your circle skirt pattern.
Taking Accurate Waist and Length Measurements
Did you know a ¼-inch difference in your Waist Measurement can make or break a Circle Skirt fit? Use a Measuring Tape at your true waist, minding Body shape influence.
A quarter-inch waist measurement error can make or break your circle skirt’s fit
Measure Skirt Length down from the waistband at several points—fabric stretch impact is real. A key step is to accurately determine the waist radius for a proper fit.
Tool precision needs matter, especially when a small Waist measurement error creates big fitting problems.
Using a Circle Skirt Calculator
Think a Circle Skirt calculator is just a shortcut? It’s how pros guarantee Calculator accuracy and reduce fabric waste. Plug in your Waist Measurement and Skirt Length; most calculators handle formula variations and flag user errors.
Mobile accessibility means you can double-check Circle Skirt patterns right at your cutting table. These calculators often include options for creating a half circle skirt. It’s fabric-saving math, baked into your Circle Skirt tutorial workflow.
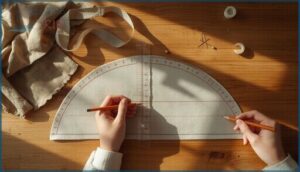
Drafting a Full, Half, or Quarter Circle Pattern
Ever wonder how pattern making shapes your skirt’s style and movement? A full circle skirt uses precise Waist Radius calculations for smooth Hem Arcs, while panel geometry changes Fabric Efficiency—think two panels for a classic look or four for quarter-circle designs.
Lay your patterns on the Bias Grain, and you’ll reveal the secret to truly energetic Circle Skirt Patterns.
Adding Seam Allowances to The Pattern
After drafting your circle skirt pattern, pause to pencil in seam allowances—don’t let this detail trip you up. Clothing pattern standards call for 1 cm at the waist, 1.5 cm on side seams, and up to 4 cm for hems.
Mastering best practices in marking methods shields you from sizing errors or unnecessary material waste, elevating both your pattern making and fabric selection.
Cutting and Preparing Your Fabric
Once you’ve drafted your pattern, it’s time to get your fabric ready for cutting. Picking the right material and prepping it correctly will make the next steps much smoother.
Here’s what to keep in mind as you set up for a great-looking circle skirt.
Choosing The Right Fabric for Drape
Fabric selection can make or break your circle skirt. For graceful movement, look for textiles with fluid drape—rayon and viscose top industry trends here. Fabric weight matters too: 2–4 ounces per square yard is just right for flow. Aim for these qualities:
- Fiber content with natural drape
- Midweight structure
- Smooth or matte surface texture
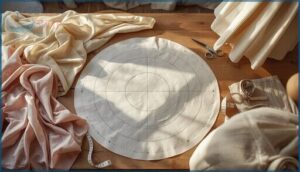
Laying Out and Folding Fabric Correctly
You’ve weighed fabric drape—now, grainline alignment is next. Lay your textile flat and smooth, pinning with care.
Match your folding method to the circle skirt style: fan-folds work well for lightweight fabrics, while square folding helps with wider widths.
Mark your pattern pieces with the grain running true; this prevents bias warping later and honors good pattern placement practice.
Marking and Cutting The Pattern Pieces
Once your fabric layout is smooth, reach for tailor’s chalk and yardstick. Mark the waist radius gently, working in increments for better cutting accuracy.
Trace out the rest of your circle skirt pattern, adding seam allowance as needed. Double-check your lines—marking tools can make or break a crisp result.
Now, with sharp scissors, cut along your marks.
Tips for Cutting Slippery or Bias Fabrics
When you’re handling tricky textiles, stabilization is key—think tissue paper beneath your fabric for steadier cuts. Try rotary cutters with a fresh blade on a cutting mat and anchor everything with pattern weights. Double-check the grainline alignment before diving in.
For best results, keep your workspace’s humidity controlled. With these sewing techniques, you’ll master bias tape and textile arts and crafts with confidence.
Assembling and Sewing The Skirt Panels
Once your fabric is ready, it’s time to start putting the skirt together. This next part covers how to join the panels and shape the skirt for a smooth fit. Here’s what you’ll need to focus on next.
Pinning and Stitching Side Seams
Taming circle skirt side seams begins with Pinning Accuracy—place pins perpendicular, spacing them every two inches for smooth edges. Match notches, and double-check Seam Allowance, since just a quarter inch off can shift your fit.
Use a straight stitch at 2.5 mm for sturdy results. Press seams flat as you go; this simple step gives your work a polished edge.
Leaving an Opening for The Zipper
Before you stitch the last side seam, pause to mark your zipper opening length—usually 7 to 9 inches, depending on fit.
Follow these steps:
- Measure and mark the opening position at the side or center back.
- Add a 5/8 inch seam allowance for secure zipper installation.
- Pin and baste below the opening, prepping for smooth zipper foot action and lasting zipper durability.
Using Proper Stitch Settings for Curved Seams
Ever noticed how a curve can trip up even an experienced hand? For circle skirt seams, set your sewing machine’s stitch length between 1.8–2.2 mm, especially on the bias. Using the right tension and stitch type keeps pucker at bay.
Slow, steady fabric handling—pivoting with needle down—gives clean lines. Precision here is garment construction’s secret sauce.
Pressing Seams for a Professional Finish
Think pressing’s just extra work? It’s where your circle skirt shifts from homemade to masterful. Every seam gets a quick visit from your iron—before crossing or enclosing—using the right Iron Temperature for your fabric. A flat, open seam means smoother waistbands, crisper seams, and a sleek finish. This is the “secret sauce” pros won’t skip:
- Use steam burst or spray Pressing Tools for thick seams.
- Always finger press seam allowances open before heat.
- Press from both sides to set Fabric Texture and Seam Durability.
Constructing The Waistband and Adding a Zipper
Now that your skirt panels are ready, it’s time to finish the waist and add the zipper. This part shapes the fit and gives your skirt a clean, polished look. Here are the steps you’ll follow next.
Measuring and Cutting The Waistband
Drafting a waistband isn’t just measuring; it’s tailoring your comfort. Add 1–2 inches to your waist for ease, then divide by 6.28 for your perfect radius.
Cut your fabric strip using standard dimensions—say, 4 inches wide for a finished 1.5-inch waistband. Mark every inch for accuracy, checking thrice to confirm your circle skirt waistband fits like a glove.
Attaching a Fitted or Elastic Waistband
A circle skirt waistband is more than just numbers—it’s your skirt’s anchor. Elastic vs. fitted impacts comfort, adjustability options, and style. Waistband interfacing adds stability, especially for fitted styles that resist stretching. Use precise stitching techniques to prevent failure. Sewing tutorials will walk you through garment construction techniques like these, ensuring your waistband construction techniques guarantee a snug, reliable fit.
- Pin and measure twice before sewing for accuracy.
- Use interfacing with fitted waistbands for extra durability.
- Elastic bands offer simple adjustability, ideal for everyday wear.
- Try zigzag stitching for strong elastic joins and fewer breakages.
- If waistband gapes, double-check measurements or choose elastic for a forgiving fit.
Inserting an Invisible or Standard Zipper
Once your waistband is secure, it’s time for zipper installation—a step where precision pays off. Align the invisible zipper or standard zipper to your seam allowance, using basting stitches to hold everything in place. Reach for your zipper foot for clean, close stitches. Careful method now helps prevent slider malfunction later.
Here’s a quick comparison:
| Zipper Type | Installation Methods |
|---|---|
| Invisible Zipper | Basting stitches, zipper foot, seam allowance (industry benchmarks) |
| Standard Zipper | Basting stitches, topstitching, careful seam alignment |
Troubleshooting Waistband and Zipper Issues
Once you’ve sewn in your invisible zipper, you may discover waistband sizing or zipper alignment isn’t quite right—don’t stress. Bias stretch sometimes makes the waistband gap or shift, especially if the fabric wasn’t stabilized early.
If you spot seam defects or puckering during garment construction, review your stitch settings and double-check hand-basting. Careful correction now saves frustration later.
Hemming and Finishing Techniques for Circle Skirts
Finishing your circle skirt starts with the right hem. The way you handle this last step makes all the difference in drape and flow.
Here’s what to keep in mind as you get ready to hem and finish your skirt.
Managing The Bias and Settling The Hem
Your skirt’s fabric stretches differently depending on how it’s cut. Parts of the circle hang on the bias grain, which can expand up to 3 cm after hanging for 24 hours.
Here’s how to manage bias distortion and achieve even hemlines:
- Hang the skirt for at least 24–48 hours before hemming
- Use a yardstick for hem leveling while someone marks the distance
- Stay stitch within 6 mm of the waist edge
- Press bias sections with steam to stabilize fibers
Settling time prevents uneven hems and saves you from reworking later.
Creating a Narrow or Rolled Hem
For circle skirts, a rolled hem foot transforms lightweight fabrics like chiffon and silk into polished hemlines. This tool delivers narrow hems measuring 1/8″ to 1/4″, minimizing bulk while managing curved edges efficiently.
Set your machine to 2.5 mm stitch length for precision. Press carefully along the bias to prevent stretching.
Fabric compatibility matters—reserve rolled hemming techniques for lighter materials to avoid puckering and maintain professional results.
Preventing Wrinkling or Wavy Hems
Hanging your circle skirt for 24 to 72 hours lets bias settling work its magic, reducing uneven hemlines by up to 4 cm.
Apply fabric stabilization along the hem edge to prevent 80% of wrinkling. Keep your hem allowance narrow—under 1 cm—and adjust stitch tension slightly lower.
Use proper pressing techniques with steam between each hemming step to achieve professional results.
Final Pressing and Care Tips
After the final hem is complete, press your circle skirt at the correct iron temperature for your fabric—cotton needs 180–220°C while synthetics require 110–150°C. Equipment selection matters: use a press cloth and seam roll for curved seams.
Hang your skirt overnight before final pressing to improve hem alignment by 16%.
For long-term maintenance, wash every 5–7 wears and store flat to preserve drape.
Frequently Asked Questions (FAQs)
Can I make a full circle skirt?
You can absolutely tackle a full circle skirt sewing project.
This beginner-friendly sewing tutorial helps you master pattern alterations, fabric choice, waistband options, and hemming challenges for a beautiful, flowing result.
How many variations can you make a circle skirt?
You can create dozens of DIY fashion projects using fabric combinations, hemline asymmetry, waistband styles, layered skirts, and panel construction.
Five basic circle skirt patterns (full, three-quarter, half, quarter, double) expand into countless fashion design variations.
How do you sew a circle skirt?
Sewing techniques merge like clockwork precision with fabric selection. You’ll draft your pattern, cut panels with proper seam finishes, attach a waistband using pattern alterations, insert a zipper, and complete hemming techniques for your circle skirt.
Is a circle skirt easy to sew?
Yes, a circle skirt is an excellent beginner-friendly sewing project. Most first-time sewists complete one successfully in under four hours.
The simple pattern and minimal pieces make it ideal for learning basic construction techniques.
How much fabric do you need for a circle skirt?
A full circle skirt generally needs 5 to 4 yards of fabric. Waist size matters, length affects yardage, and fabric width impact the final amount.
Online calculators help determine precise circle skirt pattern requirements.
How do you make a simple round skirt?
A round skirt starts with measuring your waist and desired length.
Draft the pattern using a circle skirt calculator, cut fabric on the fold, stitch side seams, attach a waistband, and finish with a narrow hem.
What is the formula for a full circle skirt?
To calculate waist radius for your circle skirt pattern, divide your waist measurement by
Add your desired skirt length to find the cutting radius, then include seam allowance for accurate fabric area.
What is the best fabric for a circle skirt?
Lightweight fabrics with natural drape work best for circle skirts. Chiffon, cotton, and rayon create beautiful movement and swirl.
Consider seasonal needs—linen for summer, wool flannel for winter—and match fabric weight to your desired silhouette.
How do I create a waistband without elastic?
Instead of elastic, rely on interfaced waistbands with button closures or invisible zippers for structure.
Reinforce with grosgrain ribbon, staystitch seams to prevent stretching, and guarantee zipper stability for a crisp, polished circle skirt finish.
What is the easiest way to attach a waistband?
The simplest method involves elastic waistbands. Fold your pre-washed fabric to form a casing, thread the elastic through, then hand-stitch the opening closed.
Pinning techniques guarantee even distribution and prevent overstretching.
Conclusion
Ever wonder why a perfect circle skirt feels almost magical in its movement? Each step you’ve mastered—from measuring to hemming—has unlocked that secret. Now you know exactly how to sew a circle skirt that turns heads and fits beautifully.
Let every twirl remind you that skill, not luck, creates that beautiful drape. Whether this is your first try or your tenth, the next skirt you make is another chance to shape fabric into something uniquely yours.
- https://sweetredpoppy.com/back-school-diy-circle-skirt-spoonflower/
- https://mellysews.com/sew-circle-skirt/
- https://sewspiratrice.com/how-to-draft-any-circle-skirt-sewing-pattern/
- https://anicka.design/online-gathered-circle-skirt-pattern-calculator/
- https://www.theshapesoffabric.com/2019/04/21/conquer-circle-skirt-patterns/

