This site is supported by our readers. We may earn a commission, at no cost to you, if you purchase through links.
Use your sewing machine’s zipper foot to stitch close to the coil without catching it. Coil zippers are more forgiving than metal ones – they bend with your fabric, making them perfect for curved seams and stretchy materials.
Pin carefully, backstitch at both ends, and keep your stitching line consistent. The secret lies in taking your time with alignment and letting the zipper foot guide you.
Master these basics and you’ll discover techniques that make even the trickiest fabric combinations manageable.
Table Of Contents
Key Takeaways
- You’ll find coil zippers more forgiving than metal ones since they bend with your fabric, making them perfect for curved seams and stretchy materials.
- Use your sewing machine’s zipper foot and position the zipper face-down on the right side of your fabric, stitching 1/8 inch from the coil without catching it.
- Take time with alignment by pinning carefully perpendicular to the coil, basting the seam closed temporarily, and backstitching at both ends for security.
- Choose the right size coil zipper (size 3 for lightweight fabrics like dresses, size 5 for jackets) and cut it one inch longer than your opening for best results.
Sewing Coil Zippers
Sewing a coil zipper might seem tricky at first, but it’s actually one of the easiest zipper types to work with once you know the basics.
You’ll need the right tools and a clear understanding of the process to get professional-looking results every time.
Essential Tools and Materials
Before tackling your first coil zipper project, you’ll need specific tools that make installation smooth and professional.
Grab a zipper foot for your sewing machine, marking tools like tailor’s chalk, and a seam ripper for corrections. Don’t forget fabric clips to hold everything in place and basting thread for temporary stitching.
A specialized presser foot can greatly simplify the process, making zipper sewing from frustrating to manageable with the right tools.
Preparing Fabric for Zipper Installation
Now that you’ve gathered your tools, it’s time to prep your fabric for coil zipper installation.
Start by pre-washing fabric to prevent shrinkage later. Mark placement lines using chalk or washable pen where the zipper will sit.
Add interfacing to lightweight fabrics for stability. Remember to evaluate zipper length options to match your fabric edge.
Press seam allowances flat and baste the opening closed temporarily. This groundwork guarantees your zipper lies smooth and professional-looking once sewn.
Understanding Zipper Types and Sizes
Coil zippers use nylon or polyester threads wound into flexible spirals.
You’ll find sizes 3-5 work best for most clothing projects. Size 3 suits lightweight fabrics like dresses, while size 5 handles jackets and bags.
Choose zipper length one inch longer than your opening. Coil zippers bend easily around curves, making them perfect for curved seams in garments and accessories.
These zippers are also known for their self-healing functionality, which is a key feature of coil zippers with flexible design.
How to Sew Coil Zippers
Now that you’ve gathered your tools and materials, it’s time to put them to work. Installing a coil zipper requires patience and precision, but the results are worth the effort.
Follow these key steps to achieve professional-looking results:
- Zipper Length Guide: Measure your seam opening and add 1 inch to determine proper zipper length
- Basting Seam Closed: Temporarily stitch the seam closed with long, loose stitches for even alignment
- Zipper Foot Use: Attach your zipper foot to sew close to the coil without obstruction
- Stitching Line Distance: Maintain 1/8 inch from the zipper coil for secure attachment
- Seam Allowance Finish: Use zigzag stitching or serging to prevent raw edges from fraying
Start your zipper insertion methods by placing the zipper face down on the seam allowance. Pin perpendicular to the coil for stability.
It’s vital to understand zipper pull anatomy for proper installation. This zipper installation guide guarantees your coil zipper sewing stays neat and functional.
Your sewing zipper tutorial begins with controlled, slow stitching from the pull end downward.
Zipper Installation Techniques
Once you’ve mastered the basics of zipper preparation, you’ll need to focus on proper installation techniques to achieve professional results.
These four key methods will help you attach your coil zipper securely and smoothly to any project.
Aligning and Pinning The Zipper
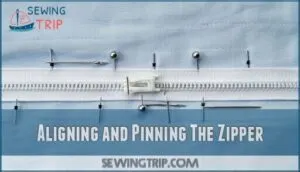
Proper fabric alignment sets you up for success. Start by marking zipper placement with tailor’s chalk or washable pen. Place the zipper face down on your seam allowance, ensuring the coil sits precisely where you marked.
Pin perpendicular to the zipper teeth, starting at the pull end. This pin placement prevents slippage during sewing. Space pins evenly for even distribution along the entire length.
Double-check your zipper teeth alignment before proceeding. For a cleaner finish, consider pressing seam allowances before pinning to achieve a cleaner finish and ensure proper alignment with even distribution.
Sewing The Zipper With a Machine
Attach your zipper foot to the sewing machine and set stitch length to 2.5mm.
Use a universal needle size 14 for most fabrics. Adjust thread tension to normal setting.
Start stitching at the zipper pull end, keeping your seam 1/8 inch from the coil. Backstitch at both ends for security.
A specialized zipper foot is essential for this process. Finish seam allowances with zigzag stitching.
Hand-Sewing a Zipper for Delicate Fabrics
While machine sewing offers speed, delicate fabrics like silk demand hand-sewing for invisible zipper technique.
Use fine needles and polyester thread for fabric selection. Employ tiny backstitches as your stitch type, catching only few threads.
Start from zipper’s bottom, securing ends with knotted thread on tape side. This zipper installation prevents damage while maintaining professional results for sewing zipper beginners.
Pre-shrinking both the fabric and zipper helps prevent future fabric distortion to ensure a long-lasting and invisible finish.
Reinforcing The Zipper for Added Strength
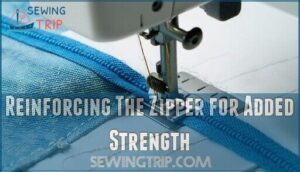
After hand-sewing, strengthen your zipper with seam reinforcement techniques. Extra stitches prevent future problems and extend zipper life.
- Add fabric tabs at zipper ends to distribute stress and prevent tearing
- Increase stitch density around high-wear areas like zipper stoppers
- Apply lightweight interfacing beneath the zipper area for additional support
These zipper techniques work with any sewing machine zipper installation, creating professional results that last, and are a key part of zipper installation.
Troubleshooting Zipper Issues
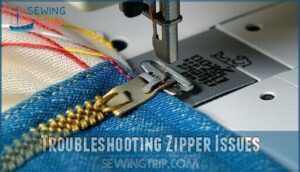
Even the most careful sewers run into zipper problems from time to time. You’ll learn how to identify common issues and fix them before they ruin your project.
Common Mistakes in Zipper Installation
Skipped stitches plague sewers who forget their zipper foot sewing attachment.
Puckering fabric results from stretching material during zipper sewing or uneven seam allowances.
Zipper misalignment happens without proper pinning or marking before sewing machine zipper installation.
Coil damage occurs from rushing near zipper stops, and end breakage stems from inadequate reinforcement during zipper types explained installation processes.
Fixing a Broken or Damaged Zipper
When coil separation occurs, you’ll need slider replacement or complete zipper replacement guide depending on damage severity.
Clean stuck zipper fix areas first using mild soap.
For zipper teeth repair, manually stitch detached coils back onto tape. Severe zipper tape damage requires full replacement since patching multiple sections proves unreliable for long-term use, which may necessitate complete zipper replacement.
Preventing Zipper Misalignment and Puckering
Precision prevents problems when installing zippers.
Accurate measurements and careful preparation create professional results that last.
- Even Seam Allowance: Maintain consistent 5/8-inch seam allowances throughout your project for proper zipper alignment
- Proper Pinning: Use fabric stabilization techniques with pins placed perpendicular to zipper coils before sewing
- Tension Adjustment: Set correct needle size and adjust machine tension while using zipper foot sewing for smooth stitching
Advanced Zipper Sewing Skills
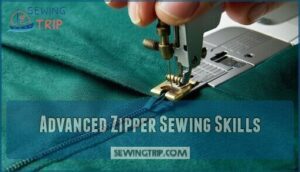
Once you’ve mastered basic zipper installation, you can tackle more challenging techniques like curved seams and specialty fabrics.
These advanced skills will help you create professional-looking garments with zippers in any location.
Sewing a Zipper in a Curve or Corner
Tackling curved zippers requires patience and the right approach. Mark your curve precisely, then ease the zipper tape around it using multiple pins. Snip the zipper tape at quarter-inch intervals for flexibility on tight bends. Some sewers prefer to use fusible knit stay tape for stabilization.
| Curved Zipper Tips | Corner Zipper Techniques | Fabric Manipulation |
|---|---|---|
| Use shorter stitch length | Pivot with needle down | Clip seam allowances |
| Increase machine tension | Hand-crank problem areas | Press after stitching |
| Test on scrap fabric first | Backstitch at endpoints | Trim zipper ends closely |
Your zipper foot sewing becomes vital here. Reduce speed and use gentle pressure to prevent puckering. These precise stitching methods guarantee professional results in your sewing projects zipper applications.
Installing a Zipper in a Stretchy or Thick Fabric
Installing zippers in stretchy or thick fabrics requires special techniques to prevent distortion and guarantee smooth operation.
Perfect zipper installation means choosing the right techniques for your fabric’s unique challenges.
You’ll need proper fabric stabilization and needle selection for professional results.
Key considerations for success:
- Fabric Stabilization – Apply fusible interfacing along seam edges to prevent stretching
- Needle Selection – Use ballpoint needles for knits and heavy-duty needles for thick materials
- Tension Adjustments – Reduce machine tension to accommodate fabric thickness
- Zipper Choice – Select nylon coil zippers with knit tape for stretch fabrics
Use walking feet for even feeding and grade seam allowances for bulk management.
Creating a Zipper Fly or Placket for Garments
Garment zipper construction takes fly installation to the next level.
You’ll create a professional placket by cutting facing pieces that mirror your main fabric.
Position the zipper behind the left front panel, securing with precise topstitching options.
Button placement requires careful marking—typically 3/4 inch from center front.
Master facing techniques by pressing seam allowances toward the facing.
These advanced sewing techniques transform basic zipper methods into polished garment details that rival ready-to-wear construction, using professional methods.
Frequently Asked Questions (FAQs)
Can you repair a coil zipper?
Looking at damaged coil zippers? You can often fix minor issues like stuck sliders or separated teeth.
Try gently working a stuck slider with soap or graphite from a pencil.
For separated coils, carefully realign the teeth and work the slider slowly back up to fix minor issues.
Can you wash garments with coil zippers safely?
You can safely wash garments with coil zippers, but close them first and use cold water.
Turn garments inside out to protect the zipper coil from snags and friction during the wash cycle.
How do you remove a sewn coil zipper?
Like breaking free from invisible chains, you’ll need your seam ripper to carefully cut the stitches holding the zipper.
Work slowly along both sides, removing topstitching first, then main seam stitches, finally lifting the zipper away.
What thread type works best with coil zippers?
Use polyester or cotton-wrapped polyester thread with coil zippers.
These threads offer strong durability and flexibility that won’t break under tension.
Match the thread weight to your fabric – lighter threads for delicate materials, heavier for sturdy fabrics.
Can coil zippers be shortened after installation?
Yes, you can shorten coil zippers after installation, but it’s tricky business.
Cut from the bottom, add a new stop with pliers or hand-stitching, then trim excess tape.
It’s easier to measure twice and install once, which makes the process less tricky.
Conclusion
Mastering how to sew a coil zipper transforms your sewing projects from amateur attempts to professional-looking creations.
You’ve learned the essential techniques, from proper alignment to machine stitching methods that prevent puckering.
Practice makes perfect with these flexible closures, and simple projects like pouches are a good starting point before tackling curved seams or stretchy fabrics.
Remember, coil zippers forgive minor mistakes better than metal ones, and with patience and the right tools, you’ll confidently install zippers that function smoothly and look polished every time.

