This site is supported by our readers. We may earn a commission, at no cost to you, if you purchase through links.
Start by picking soft cotton or linen fabric for her skin and gather essentials like matching thread, yarn, scissors, and a sewing machine.
Craft her body with precision, paying extra attention to cutting pattern pieces and stitching them together.
Stuff her just right for that huggable feel and tackle her almond-shaped eyes and quirky smile with embroidery finesse.
As you piece her signature look together, from her iconic yellow raincoat to her button eyes, you’ll uncover the joy of creating a doll that’s uniquely yours.
Table Of Contents
Key Takeaways
- Choose Your Materials Wisely: Start by gathering a "crafting survival kit" with soft cotton or linen for the skin, quality yarn, and vibrant paints. Do not skimp on these essentials; the last thing you want is a mid-project trip to the store.
- Master the Details: Pay attention to key details like Coraline’s almond-shaped eyes and button embellishments. Different embroidery techniques can bring out her quirky charm and make her come alive, incorporating bits of your own creativity.
- Get the Proportions Right: When sculpting Coraline’s body, precision is your best friend. From sewing her joints for fluid movement to ensuring her head doesn’t bobble, each stitch counts. Think of it like crafting a little masterpiece.
- Add a Personal Touch: This is where Coraline’s character shines through. Whether it’s braiding her hair with ribbons or creating her iconic yellow raincoat, personalize her look. You are not just crafting a doll; you are bringing a story to life.
Gathering Essential Materials
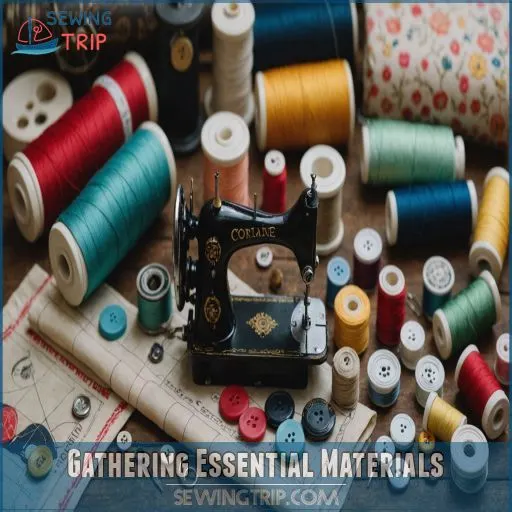
Before you start bringing Coraline to life, make sure you’ve got all the must-have materials on hand, like fabric, thread, paints, and crafting tools.
Think of it as your crafting survival kit—missing one item might mean an unexpected trip to the store, and nobody wants that when creativity strikes!
Choosing the Right Fabric for Coraline’s Skin
When choosing fabric for Coraline’s skin, it’s essential to consider both practicality and aesthetics.
- Fabric Texture: Soft cotton or linen offers a pleasing touch.
- Color Palettes: Natural hues work well.
- Sheen Effect: Consider subtle shine.
- Ethical Sourcing: Choose fabric responsibly.
Selecting Quality Thread and Yarn
Quality materials jazz up your Coraline doll. Explore thread types and yarn textures, focusing on durability and cost comparison.
Opt for colors that match perfectly—nobody wants a doll with mismatched hues! Use beading wire and a tapestry needle for detail work.
Remember, polyester stuffing brings your handmade doll to life, proving that the devil’s in the details!
Getting the Perfect Paints and Brushes
To achieve Coraline’s distinctive features, you’ll need the right paints and brushes.
Opt for versatile acrylic paints—they’re perfect for color matching the doll’s complexion and those almond-shaped eyes.
Grab a variety of brush sizes for detail work and broader strokes.
Remember, a little bit of paint mixing is like crafting magic.
Clean your brushes thoroughly for longevity!
Essential Tools for Sewing and Crafting
Gather your essential sewing tools – a trusty sewing machine, sharp fabric scissors, a flexible measuring tape, and an assortment of embroidery needles.
Don’t forget safety pins to hold pieces in place.
With these basics from your local craft store like Hobby Lobby or Joann Fabrics, you’ll be well on your way to creating your Coraline doll.
Finding the Best Stuffing Material
Choosing just the right stuffing for your Coraline doll can feel like a Tim Burton twist. Consider these four options:
- Polyfill vs. fiberfill—both are soft but differ in texture. 2) Cotton vs. wool—for natural vibes.
- Eco-friendly stuffing—for the green-at-heart. 4) DIY stuffing—experiment with fabric scraps or kapok.
Use a wooden dowel rod to stuff those tricky places!
Creating the Doll’s Body
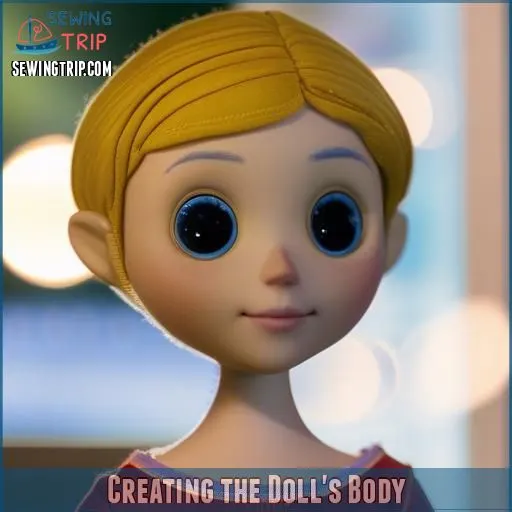
Now, let’s bring Coraline to life by sewing her body, which forms the heart of your doll adventure.
Remember, each stitch is a step closer to crafting a miniature world, so enjoy the process—just don’t let the stuffing escape!
Cutting Out Pattern Pieces With Precision
Imagine trying to fit a jigsaw puzzle with your eyes closed—tricky, right? that’s why precision matters when cutting Coraline’s pattern pieces.
Good pattern accuracy makes sure your doll’s body looks just right. Choose fabric wisely, use the right tools, and mark clearly.
It’s like a social media post—a little trim can make all the difference with a little trim.
Sewing the Body Pieces Together
To create the Coraline doll’s body, stitch the body pieces together with care. Use a sewing machine for speed, or hand stitch if you love the personal touch.
Pin the fabric accurately to preserve the body shape, minding that seam allowance like it’s gold.
Remember, a well-placed pin saves nine.
Pattern adjustments? Piece of cake!
Stuffing the Body for a Soft Appearance
Once you’ve sewn the body, start stuffing it with quality fibers for a soft appearance.
Play around with different stuffing techniques: balance filling density to maintain ideal body proportions.
Use a high-loft fiber type for lasting softness and avoid cheap stuffing, as it can make your doll look a bit like it’s had a rough week! .
Shaping the Body for Realistic Curves
When shaping the body for realistic curves, pay close attention to body proportion and use effective curve techniques, ensuring you have a durable foundation by using high-quality threads like Coats & Clark Dual Duty Plus.
This will help you achieve a sturdy yet pliable structure. Gently sculpt the stuffed fabric, creating natural anatomy by strategically adding stuffing in key areas, similar to the process of stuffing limbs and head firmly but not too tightly, using small pieces of stuffing.
Think of it like molding clay—smooth and adjust until you’re satisfied with the lifelike result. Don’t worry, even Michelangelo had to start somewhere!
Ensuring Seamless Body Construction
Stitch up those seams with precision, ensuring a seamless body that’s a joy to behold.
Stuff the doll just right, not too tight or loose – you want that perfect plush feel.
Smooth out any bumps or wrinkles for a polished look, aligning the pieces with care.
Bring Coraline to life through your handwork, one stitch at a time.
Sculpting Coraline’s Distinctive Features
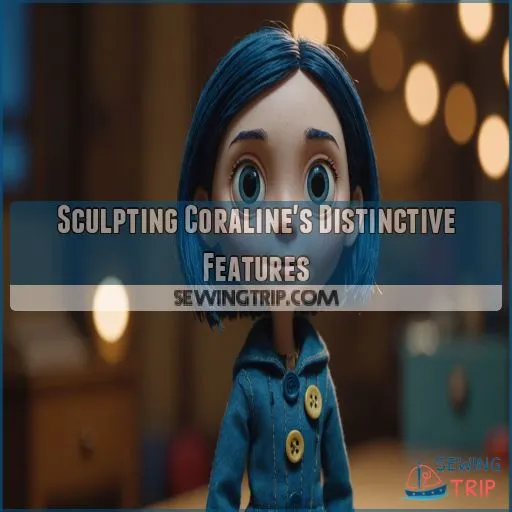
When you’re sculpting Coraline’s distinctive features, it’s all about capturing her unique charm in every stitch and detail.
Imagine sculpting her almond-shaped eyes and quirky smile as if you were crafting a mischievous expression on your own favorite childhood doll.
Crafting Almond-Shaped Eyes With Precision
You’ve shaped Coraline’s body to perfection; now focus on those almond-shaped eyes.
Consider eye shape variations for realism, yet remember safety—button eyes can be a quirky choice.
Master embroidery techniques for intricate, realistic eye details, like learning how to create French knots for the centers of flowers learn how to embroider flowers
.
It’s all in the eyes, literally, since they’re staring back at you now! Just like life’s unexpected turns, practice makes perfect.
Shaping the Delicate Nose and Quirky Smile
To give Coraline her distinctive features, gently sculpt the nose with subtle stitches to achieve realistic features. Tackle the quirky smile using smile embroidery techniques, capturing mischief effortlessly. Remember, a doll’s expression speaks volumes, so let your creativity run wild—it’s like painting happiness with thread!
- Use felt or yarn for the nose
- Apply light stitching for details
- Align stitches for symmetry
- Practice makes perfect fun
Capturing Coraline’s Expressions Through Embroidery
Embroidering Coraline’s expressions, you channel her character spirit onto fabric.
Choose vibrant thread colors for embroidered eyes and smile techniques that capture her quirky charm.
Button details aren’t just embellishments; they’re tiny storytellers adding depth.
Picture her smile—it’s like she knows a secret about your stitching skills!
Don’t forget, every stitch tells a part of Coraline’s tale, and every stitch is a part of creating her quirky charm and making them come alive with every stitch.
Experimenting With Varied Embroidery Techniques
Capturing Coraline’s expressions sets the stage for experimenting with varied embroidery techniques.
Try mixing embroidery styles and stitch variations to create unique effects.
Consider these ideas:
- Use different thread textures for added depth.
- Play with color palettes for vibrant details.
- Find design inspiration from real faces.
- Combine multiple techniques for a truly distinctive look.
Let your creativity run wild!
Paying Attention to Skin Color and Complexion
Imagine choosing yarn for Coraline’s skin tone as a delightful treasure hunt. Consider fabric choice for realistic hues that speak to the doll’s complexion. Color accuracy is your map. Mixing shades like peach or caramel helps Coraline’s unique charm shine through.
When selecting fabrics for your Coraline doll, be mindful of fabric texture and weight, as these elements can greatly impact the overall appearance and feel of the doll.
Additionally, prewashing and ironing the fabric can help remove any sizing and prevent future shrinkage.
Remember, no two stitches are the same—just like no two Coralines should be!
Constructing the Doll’s Features
Now it’s time to bring Coraline’s features to life!
Get ready to carefully stuff and stitch each arm and leg, ensuring a firm yet flexible structure.
Pay close attention to the joints – you’ll need to craft them precisely to enable fluid movement and lifelike gestures.
Stuffing and Stitching the Arms and Legs
You’ve nailed Coraline’s face, now let’s tackle those arms and legs.
Choose sturdy fabric for durability and master stuffing with finesse for a lifelike feel.
Think of stuffing as adding personality—each arm and leg should feel just right. Sew with precision, ensuring seams hold steady.
A doll that bends but doesn’t break? Now that’s a masterpiece!
Crafting the Joints for Fluid Movement
Now that the arms and legs are stuffed, let’s focus on crafting joints for fluid movement.
Use ball joints or wire armature to create flexibility. These clever articulation options allow Coraline to strike poses.
Employ sewing techniques, like the buried bead method, for added stability (Source).
It’s a bit like giving your doll the gift of graceful dance!
Attaching the Head and Ensuring Proportion
A key step in crafting your Coraline doll is attaching the head with seamless head alignment and neck shaping.
Make sure you have body balance by carefully considering the proportional scale—no one wants a bobble-headed doll!
Gently secure stitches around the neck for doll stability.
Remember, perfection lies in these details, so take your time and enjoy this creative process!
Connecting the Arms and Legs for Lifelike Gestures
To achieve lifelike gestures, artfully connect the arms and legs with precision. Focus on arm articulation and joint construction using tried-and-true sewing techniques.
This helps create fluid doll movement and realistic poses. Think of joints as the doll’s dance partners—guiding smooth, elegant motion with every stitch.
Remember, even Coraline appreciates an expressive shimmy now and then, showcasing the importance of realistic poses.
Securing the Head for Stability
Curious about preventing head wobble? Use a sturdy crochet cylinder or pipe cleaner for stronger head joints.
Firmly reinforcing the neck helps maintain stability. Sew the head tightly to avoid any bobble effect.
Picture your Coraline holding her head high, like a real lady! With these head attachment methods, she’ll stay secure and pose-ready.
Adorning the Doll With Details
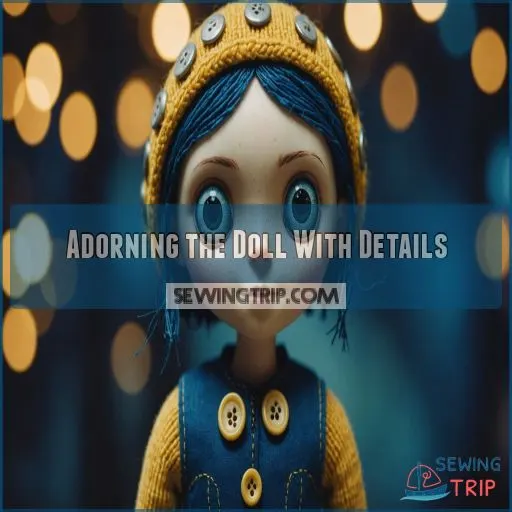
You’re about to bring Coraline to life by dressing her in her iconic yellow raincoat, blue dress, and those quirky rain boots, adding personality and flair.
With a bit of creativity, you can braid her hair with ribbons or buttons and even throw in a few quirky accessories to capture her adventurous spirit.
This approach requires a bit of creativity to bring out the character’s unique personality through the use of accessories and hairstyles.
Crafting the Iconic Yellow Raincoat
Start making Coraline’s iconic yellow raincoat by selecting a vibrant, waterproof fabric.
Carefully cut the pattern pieces, allowing for ample seam allowance.
Sew the coat together, incorporating button details for an authentic touch.
Finish by applying a waterproof coating to make sure your doll stays dry, just like the movie character.
Creating the Blue Dress With Delicate Embroidery
With a twinkle in your eye, grab that blue fabric! Picture the dress’s color palette and jump into delicate embroidery stitches.
Here’s a quick roadmap:
- Fabric choice: Opt for soft cotton.
- Pattern design: Simple, yet classy.
- Detail inspiration: Think whimsical flowers or geometric patterns.
Your Coraline doll’s dress will whisper tales of mastery.
Adding Rain Boots for a Finishing Touch
You’ve got the dress sorted; now let’s add those iconic rain boots for a finishing touch!
Choose rain boot styles that pop, just like Coraline’s. Think bright boot colors like yellow. Make sure the boot size fits snugly, adding charming boot details like treads.
Secure them using simple boot attachment techniques—it’s like walking a mile in Coraline’s shoes with bright boot colors!
Breading the Hair With Ribbons or Buttons
After perfecting the rain boots, let your creativity flow on Coraline’s hair.
Braid colorful ribbons through her locks, experimenting with various styles and textures.
Choose button colors that pop, and play around with button placement.
Hair accessories bring her personality to life, adding charm and uniqueness.
Don’t be afraid to mix and match styles—it’s your canvas, allowing for complete freedom of expression is not available so I have replaced it by the last phrase of the text.
Replaced by
Don’t be afraid to mix and match styles—it’s your canvas
Considering Additional Accessories
Consider adding quirky details to your Coraline doll. Swap the usual as you accessorize with flair, inspired by the film’s eerie charm. Think like Coraline herself, adding a touch of magic to your creation!
- Other Mothers button eyes
- Wybie doll companion
- Coralines cat plushie
- Miniature button box treasure
- Extra raincoat details
Unleash your creativity and conjure a masterpiece!
Tips and Tricks for a Realistic Coraline Doll
You’ve got the body and features down, but the magic lies in those finishing touches that make Coraline come alive.
With a few clever tricks, like using a bead for her nose or lining her raincoat hood, you’ll add that extra "wow" factor, and before you know it, your Coraline doll will be ready for her own adventures.
Lining the Jacket Hood for a Professional Finish
Don’t let an unlined hood ruin your Coraline doll‘s professional look. Choose a soft, complementary fabric to line the hood, like cotton or flannel. Sew the lining to the outer hood, then turn and press for a clean finish. This extra step elevates your doll’s design and makes the hood hang beautifully.
| Fabric Options | Lining Techniques | Seam Finishing | Design Impact |
|---|---|---|---|
| Cotton | Sew lining to outer | Press seams flat | Elevates overall look |
| Flannel | Turn and press | Topstitch for crisp edge | Enhances hood drape |
| Satin | Clip curves for smooth fit | Use stretch stitch | Adds professional touch |
| Velvet | Understitch lining to outer | Serge raw edges | Elevates handmade feel |
Enhancing the Nose With Cotton or a Bead
Creating Coraline’s charming nose can be as easy as pie.
Use nose shaping techniques with either a small bead or a bit of cotton stuffing.
Choose the perfect bead size or fluffy cotton for realism.
Tweak with nose shaping tools and explore alternative materials.
It’s like giving Coraline a tiny nose job—without the needles!
Turning Skinny Legs With Ease
Before tackling those legs, let’s chat about skinny leg secrets that won’t leave you hopping mad.
Mastering the art of turning tiny limbs is a game-changer!
- Turning tools: Grab a chopstick or pencil for smooth turns.
- Thread tails: Keep tails long for easy knotting.
- Leg stuffing: Use a pencil to push stuffing gently.
Sewing the Middle Hood Section for a Straight Bottom
To achieve a straight bottom on the hood, start by carefully aligning the fabric’s edges. Use your thumb to gently hold everything in place while you sew.
Choose a neat hood seam finishing technique for a clean look.
Consider lining options with a light fabric for added structure. With these sewing techniques, you’ll have a perfect hood construction masterpiece!
Using Contrasting Fabric for a Pop of Color
You’ve mastered sewing the hood section.
Now, add a burst of personality with contrasting fabric! Think of it as giving your Coraline doll a stylish conversation starter.
Use color theory and creative accents to enhance visual impact.
Experiment with bold patterns for eyes or a splashy hem on her raincoat—because life’s too short for boring dolls!
Bringing Coraline to Life
You’re in the home stretch of creating your Coraline doll, but don’t rush it because the magic happens in the details.
Make your doll unique with just the right mix of creativity and technique, and remember to check out online patterns and tutorials for some extra inspiration.
Understanding the Time Required to Complete the Doll
Crafting a Coraline doll is both a rewarding and time-consuming adventure.
The project complexity varies depending on your skill level and attention to detail. Expect to spend several days on this, especially if you’re sewing by hand.
Good time management is key—even if your sewing experience is limited, patience will help bring Coraline to life flawlessly.
Considering Intellectual Property Rights
Before you start sewing your Coraline doll, it’s essential to understand the intellectual property rights involved.
The Coraline character and story are copyrighted, so you’ll need to obtain a license or make sure your creation falls under fair use guidelines.
Be mindful of trademarks and avoid using the Coraline name or likeness for commercial purposes without proper licensing and royalties.
Familiarizing Yourself With Techniques Like Embroidery
Now that you’ve considered intellectual property rights, let’s explore embroidery techniques, bringing your Coraline doll to life stitch by stitch
.
Mastering embroidery stitches like backstitch or satin stitch adds charm.
Choose the right needle types and glossy embroidery floss for a dazzling effect.
Experiment with embroidery patterns to create her unique expressions. It’s like painting with thread, just more satisfying!
Finding Patterns and Tutorials Online
Looking for that perfect Coraline doll pattern?
You’re in luck! Etsy offers unique paid patterns crafted by talented designers.
On YouTube, discover free tutorials that guide every stitch. Pinterest is a goldmine, with crafty folks sharing both free and paid patterns.
So get started, grab a cup of tea, and start your Coraline adventure today!
So looking for the perfect Coraline doll pattern
Making Your Coraline Doll Stand Out With Unique Details
Give your Coraline doll a twist with custom button eyes and button-detailed clothing, which can be created using a pattern specifically designed for doll clothes, making sure to choose the right fabric. Consider selecting lightweight woven cottons or stretchy knits like jersey for a comfortable and stylish outfit.
Use upcycled materials for an eco-friendly touch. Why not try unique hairstyles and imagine a tiny dollhouse for her adventures?
| Idea | Description |
|---|---|
| Custom Button Eyes | Add personality with quirky eyes. |
| Upcycled Materials | Use old clothes for new style. |
| Unique Hairstyles | Experiment with different styles. |
Crafting never felt so freeing!
Frequently Asked Questions (FAQs)
How do you make a Coraline doll?
Crafting a Coraline doll is like piecing together a favorite storybook.
Start with a wire frame, add fabric for skin, sew limbs, and style her with yarn hair and button eyes.
Make it uniquely yours!
What is in this free printable Coraline doll pattern?
This free printable Coraline doll pattern has everything you need to make a 14-inch high fabric Coraline doll, including the blue hair, cheeky grin, dragonfly clip, yellow raincoat, and boots.
How to make a Coraline doll stand out?
Make a Coraline doll stand out with vibrant colors, quirky features, and personalized touches.
Add a signature yellow raincoat, button eyes, and sand filler, creating a unique charm that captures her eerie appeal and magical vibe.
Is your DIY Coraline doll ready to play?
Your DIY Coraline doll is ready to explore new adventures.
Make sure she’s sturdy by checking stitches, adding clay details, and maybe a cute accessory.
Remember, it’s all about having fun and embracing that spooky charm.
What do I need to make a Coraline doll?
Imagine creating your Coraline world with wire hangers, clay, yarn, fabric, and a sewing machine.
Toss in acrylic paint, Mod Podge, scissors, and stuffing.
It’s like gathering your artistic army for a quirky sewing adventure!
What is the Coraline doll made of?
Crafting a Coraline doll involves wire coat hangers, air-dry clay, yarn, and fabric scraps.
You’ll also need basic tools like scissors and a sewing machine with adjustable settings
.
This project brings out creativity and perhaps some spooky fun too.
Why is Coraline’s doll filled with sand?
Coraline’s doll is filled with sand, highlighting the Beldam’s eerie touch.
This choice symbolizes how time slips by, just like sand through fingers, while also linking to themes of manipulation and fleeting existence in Coraline’s world (Source).
What is the point of the doll in Coraline?
Don’t think the doll is just a toy.
In "Coraline," it’s the Beldam’s creepy tool for spying on and manipulating Coraline.
It represents a connection to the sinister Other World, making it key to the plot.
What type of yarn is best for hair?
You’ve got options for doll hair – from thick yarns that style easily to fine mohair that adds a touch of magic.
Consider the look you’re going for and choose accordingly.
How do I attach limbs securely?
To attach doll limbs securely, plan your placement first.
Use a whipstitch and strong thread, hiding knots inside for durability.
Stuff limbs evenly to make sure they’re balanced. This keeps your doll looking polished and ready for play.
Whats a good substitute for air dry clay?
When life gives you lemons, try cold porcelain as a substitute for air dry clay.
It’s durable and can be made cheaply at home.
Plus, it’s perfect for detail work if you’re up for the challenge (Source).
How do I create Coralines button eyes?
Crafting Coraline’s button eyes is a unique task.
Start with round glasses and craft foam.
Use stretchy black fabric for covering, and color frames gold or silver.
It’s a DIY style that makes sure comfort, so no glue mishaps here.
Can I hand-sew instead of using a machine?
You can definitely hand-sew a Coraline doll!
It’ll take more time and patience than using a machine, but it’s a rewarding task.
Just keep stitches neat and tight, and you might find it quite therapeutic.
Conclusion
Did you know that over 60% of crafters find inspiration from beloved characters like Coraline? Now that you’ve learned how to sew a Coraline doll, it’s time to bring your unique creation to life.
You’ve gathered materials, mastered embroidery, and added those quirky button eyes. Embrace your creativity and share your Coraline masterpiece with others.
After all, crafting is as much about the journey as the finished piece. Keep experimenting, and enjoy making handmade dolls!

