This site is supported by our readers. We may earn a commission, at no cost to you, if you purchase through links.
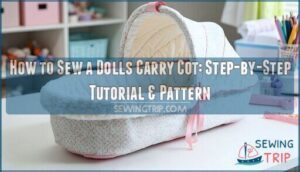
 To sew a doll’s carry cot, cut two rectangles from fabric and batting – roughly 12" x 8" works for most dolls.
Pin the pieces together with batting as your middle layer, then stitch around three sides, leaving one short end open. Add sturdy fabric handles by cutting two strips and sewing them securely to the long sides before closing.
Turn right-side out through your opening, then topstitch around the edges for that polished look. The beauty lies in customizing the size – measure your doll first, then add 2-3 inches for comfort.
A few strategic quilting lines will keep everything in place during playtime adventures, and choosing washable fabrics means this cozy creation will survive countless tea parties and bedtime stories.
Table Of Contents
Key Takeaways
- Measure your doll first and add 2-3 inches – You’ll cut two 12" x 8" rectangles from fabric and batting, but customize the size based on your specific doll for the perfect fit.
- Create sturdy handles before assembly – Cut two 3" x 10" fabric strips, fold and sew them securely to the long sides before closing the cot to ensure safe carrying.
- Leave a turning gap when sewing – Stitch around three sides but leave one short end open (2½-3 inches) so you can turn the cot right-side out after assembly.
- Add quilting lines for durability – Use strategic quilting stitches through all layers to keep the batting in place during play and choose washable fabrics for easy maintenance.
Materials and Measurements
Before you cut your first piece of fabric, you’ll need to gather your materials and understand the precise measurements that make this carry cot both sturdy and adorable.
Getting these dimensions right from the start saves you from frustrating do-overs later and guarantees your doll’s new bed fits perfectly.
Fabric and Batting
Your doll’s carry cot deserves quality materials that’ll stand up to countless tea parties.
Choose cotton or quilting cotton for durability and easy washing. Polyester batting provides lightweight cushioning, while cotton batting offers breathability.
Choose your fabrics wisely—they’re the foundation of every beautiful doll project that lasts.
Pre-wash fabric to prevent shrinkage surprises. Select coordinating thread colors that complement your fabric choices for professional-looking seams throughout your doll bedding sewing project.
When selecting fabrics, consider the benefits of working with cotton fabric types to guarantee the best results for your doll’s carry cot.
Cutting The Pieces
Sharp fabric cutting creates your doll carry cot foundation. Start by laying fabric flat on a stable surface, then position your pattern pieces carefully. You’ll need precise measurements for professional results that’ll make your sewing friends jealous.
To achieve accurate cuts, understanding fabric grain lines is vital for maintaining fabric stability.
- Use pattern weights instead of pins to prevent fabric shifting during fabric cutting
- Cut main body pieces on the fold to guarantee perfect symmetry for your doll cot tutorial
- Add ¼-inch seam allowance to all edges for proper piece measurement accuracy checking
Handle Length and Turning Gap
When you’re ready to sew doll carry cot handles, cut two pieces at 3 x 10 inches for ideal handle safety and strap adjustment.
The turning gap should measure 2½-3 inches along one seam—this vital opening lets you flip the carrier right-side out after secure stitching.
Position handle attachment points 1¾ inches from edges, ensuring your turning techniques create smooth corners.
Double-stitch for strength. To guarantee durability, consider using materials suitable for doll cot handles when sewing the straps.
Creating The Carry Cot
Now you’ll create the foundation of your doll’s carry cot by preparing the handles and assembling the main structure.
This step transforms your cut fabric pieces into a functional carrier that’s both sturdy and comfortable for your doll.
Attaching The Handles
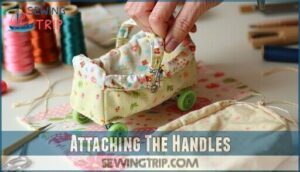
Position your handles 1¾ inches from each short side, ensuring perfect handle positioning for balanced carrying.
Fold each 3×10-inch strip lengthwise, press, then fold raw edges inward. This folding method creates clean, professional edges.
Sew both sides using secure stitching techniques—backstitch at beginning and end for secure fastening. Your handle attachment becomes the foundation for strap attachment success, making this doll carrier pattern both functional and beautiful.
Joining The Inside and Outside Pieces
With your handles secured, it’s time to unite the inside and outside pieces like puzzle pieces finding their perfect match.
Place right sides together, ensuring fabric matching and piece alignment are spot-on. Pin carefully around edges, maintaining consistent seam allowance.
When you sew doll cot pieces, leave a 2½-3 inch turning gap on one side—this opening becomes your gateway to flipping everything right-side-out later.
Proper edge finishing and turning techniques transform your doll carry cot from inside-out to picture-perfect.
Proper edge finishing and turning techniques are crucial for a successful outcome, and ensuring a consistent seam allowance is key to a professional finish.
Quilting and Finishing
Now you’ll transform your carry cot from a simple fabric shell into a cozy, cushioned bed that’s perfect for doll playtime.
The quilting process adds both comfort and visual appeal, while proper finishing techniques guarantee your handmade creation will withstand countless hours of imaginative play, providing comfort.
Quilting The Inside Piece
Now you’ll create the quilting magic that transforms your doll carry cot from basic to beautiful. Layer your inside fabric piece with batting, smoothing out wrinkles like you’re tucking in a sleeping child.
Choose lightweight cotton/polyester batting for perfect portability without bulk. When selecting materials, consider the quality of quilting fabric to guarantee a professional finish.
- Quilt Patterns: Try straight lines or gentle diagonals for clean, professional results
- Batting Types: Select thin, soft batting that won’t overwhelm your tiny masterpiece
- Stitch Techniques: Use 2.5-3mm stitches with walking foot to prevent shifting
- Fabric Choices: Pre-washed cotton eliminates surprise shrinkage after assembly
- Quilting Tools: Washable fabric markers help mark precise stitching lines
Turning The Carry Cot Right Side Out
Through the turning gap, gently invert your carry cot right side out—this moment reveals your quilting work like unwrapping a gift.
That magical moment when inside becomes outside—your hard work finally shows!
Use careful turning techniques to preserve seam allowance integrity and avoid fabric folding mishaps.
Check handle attachment points remain secure during inversion methods.
Proper edge finishing and stitch quality guarantee your creation withstands enthusiastic doll adventures ahead, ensuring the overall durability of your work.
Making The Quilt and Pillow
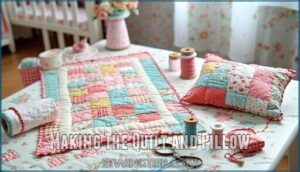
With your carry cot beautifully assembled, you’ll want to complete the set with matching accessories. Start by cutting two quilt pieces measuring 5½ x 5½ inches, plus batting to match. Layer your fabric choices with batting sandwiched between, then secure with straight-line quilting or simple crosshatching patterns. These quilting tips guarantee durability while showcasing your fabric’s design.
For the pillow, cut pieces at 3½ x 4½ inches. Sew around three sides, leaving one end open for turning. After flipping right-side out, stuff lightly with polyester fiberfill—you don’t want a rock-hard pillow for your doll! Hand-stitch the opening closed using a ladder stitch.
When selecting batting options, consider thin cotton for delicate quilts or slightly thicker polyester for plump pillows. Your doll quilt and pillow designs should complement each other, creating cohesive doll bedding sets that’ll make any little caregiver proud of their handiwork. To achieve professional results, understanding sewing pillow basics is essential for a polished finish, and it helps to have a good grasp of sewing basics and quilting techniques.
Customization Tips and Additional Projects
Your quilt and pillow complete the basic carry cot, but customization transforms it into something special. Making your doll carry cot uniquely yours starts with thoughtful fabric choices and creative embellishment ideas.
Customization tips for sewing doll accessories include:
- Fabric Choices: Mix cotton prints with coordinating solids for visual interest while maintaining durability
- Embellishment Ideas: Add rickrack trim, tiny buttons, or hand-embroidered details for charm
- Project Variations: Create reversible liners or detachable covers for easy washing
- Sewing Techniques: Try French seams for extra durability or decorative topstitching
- Doll Accessories: Coordinate with matching doll bedding sets for a complete nursery look
Adjust measurements based on your doll’s size, adding seam allowances accordingly. Consider seasonal themes or holiday colors for doll accessories sewing projects that grow with your child’s interests. Incorporating custom embroidery ideas, such as those found in custom designs, can elevate your doll’s carry cot and make it truly unique.
Frequently Asked Questions (FAQs)
What type of dolls fit this cot?
Like a cozy nest for your cherished companion, this versatile carry cot welcomes dolls measuring 12-18 inches tall.
You’ll find it perfectly accommodates baby dolls, American Girl dolls, and similar-sized treasures with room for comfortable snuggling, making it an ideal space for your child’s cherished companion.
How long does this project take?
This intermediate-level project typically takes 3-4 hours to complete, depending on your sewing experience and attention to detail. You’ll spend most time on quilting and precise seam work.
Can beginners attempt this sewing project?
Threading your creative needle, you can absolutely tackle this project!
While it’s labeled intermediate-level, don’t let that intimidate you.
You’ll master basic techniques like straight seams and handle attachment, building confidence with each stitch as you create something truly special.
What if my sewing machine breaks?
Don’t panic! You can hand-stitch everything using a backstitch or running stitch. It’ll take longer, but many quilters prefer the meditative rhythm of hand-sewing for detailed work like this.
How do I fix sewing mistakes?
Don’t let a wonky stitch throw you off track! Stop immediately, carefully unpick the mistake with a seam ripper, realign your fabric pieces, and re-sew slowly with steady hands.
Conclusion
Before Instagram influencers made DIY trendy, crafty parents were already creating magical toys for their children.
You’ve mastered how to sew a dolls carry cot that’ll become your child’s treasured companion.
Your finished carry cot transforms ordinary playtime into extraordinary adventures, whether it’s transporting beloved dolls to imaginary destinations or creating cozy naptime scenes.
The skills you’ve developed here—precise measuring, clean finishing, and thoughtful construction—will serve you well in future sewing projects.
Most importantly, you’ve created something that’ll spark countless hours of imaginative play.


