This site is supported by our readers. We may earn a commission, at no cost to you, if you purchase through links.
 You’ll create stunning custom pillows by following this tutorial on how to sew a pillow.
First, choose fabrics with the desired drape and feel, like soft cotton or structured velvet, and stuffing for the perfect firmness.
Cut precisely with sharp scissors, allowing for seam allowances.
Pin the fabric squares right sides together, pivoting at each corner for crisp points.
Turn right side out through an opening, evenly stuffing the corners.
Topstitch the opening closed, fluffing the finished pillow.
Elevate your pillows with contrasting fabrics, embellishments like trim or appliques, and convenient removable covers.
For professional results, press seams, backstitch, and adjust stitch lengths accordingly.
Learn more expert tips to create beautiful handmade pillows.
Table Of Contents
Key Takeaways
- Choosing the right fabric and stuffing is crucial for achieving the desired drape, feel, and firmness of the finished pillow
- Precise cutting, pinning, and sewing techniques, such as pivoting at corners, are essential for creating crisp points and a professional look
- Turning the pillow right side out, evenly distributing the stuffing, and closing the opening are important steps for shaping the pillow and maintaining its structure
- Variations like using contrasting fabrics, adding embellishments, and making removable covers allow for customization and easy care
Choosing Your Fabric and Supplies
Your fabric choice affects the drape and feel of the finished pillow.
With cottons and lighter fabrics creating a softer look, while heavier fabrics like velvet or chenille lend more structure.
The stuffing you select, whether it’s polyfill, foam, or other materials, determines the firmness and loftiness of the pillow.
Fabric Type Affects Drape
The fabric you choose for your pillow will greatly impact its overall look and feel.
Consider the durability, texture, color, pattern, and weight of the fabric.
Cotton duck and twill are sturdy options.
Velvet and chenille add a luxurious touch.
Upholstery fabrics are perfect for pillows that need to withstand heavy use.
Choose a fabric that complements your decor and personal style.
Stuffing Determines Firmness
When making a pillow, the choice of stuffing largely determines its firmness and support. Different pillow materials, such as poly-fill, down, and memory foam, offer varying levels of firmness and comfort (Source). The appropriate stuffing can improve the overall feel of the pillow, making it crucial to examine the firmness offered by each type when selecting the materials for your pillow project.
| Stuffing Material | Firmness |
|---|---|
| Poly-fill | Medium |
| Down | Soft |
| Memory Foam | Firm |
Notions Enhance Appearance
Notions like trim, buttons, and zippers can elevate your pillow’s appearance. Choose contrasting colors or textures for visual interest. Embellish with custom appliques, embroidery, or beading. Sew a removable pillow cover for easy cleaning and versatility. Pair a smooth cotton with a fluffy down insert for a luxurious feel. Let your creativity shine through notions that reflect your style.
Cutting the Fabric
To create your pillow, start by selecting the perfect fabric.
Cotton, linen, and velvet are all excellent choices that offer different textures and drapes.
Once you have your fabric, it’s time to measure and cut.
Lay the fabric right sides together and use a ruler or measuring tape to mark out your desired pillow size, adding a 1/2 inch seam allowance on all sides.
For crisp corners, measure and mark the corners at a 90-degree angle.
Use sharp scissors or a rotary cutter to cut along the marked lines.
If you’re working with a delicate fabric, consider using pinking shears to prevent fraying.
Press the fabric with a hot iron to remove any creases or wrinkles before moving on to sewing.
Sewing the Pillow
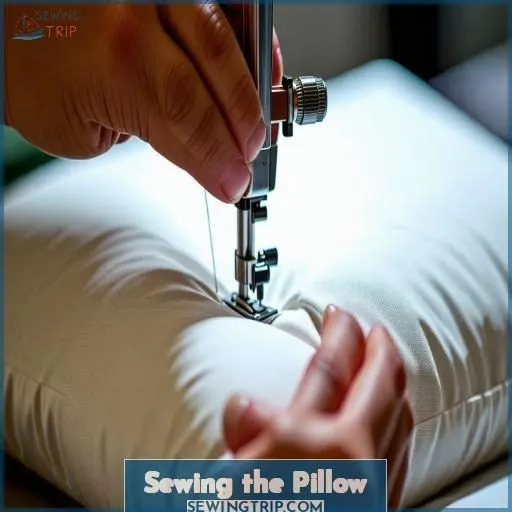
Start by pinning or clipping the two fabric squares together, right sides facing, around all four edges – this will keep the layers aligned as you sew. As you approach each corner, stop with your needle down, lift the presser foot, pivot the fabric 90 degrees, and continue sewing – this technique creates crisp, pointed corners.
Pin the Fabric Squares Together Around All Four Sides
To sew a throw pillow, accurately align and pin the fabric squares with a specified seam allowance.
Guarantee precise stitching by using straight pins strategically for fabric placement.
This step sets the foundation for creating a beautifully hand-sewn pillow, ensuring a smooth process.
Pivot at the Corners for Sharp Points
As you sew around the pillow, pivot at each corner to create sharp points and crisp lines. Clip the corners after sewing to reduce bulk and help the pillow hold its perfect shape. This technique is essential for achieving a clean finish on your envelope pillow cover. Pivot slowly at each corner using your sewing machine for best results.
Turning and Stuffing
After sewing the pillow pieces together, leaving a gap for turning, carefully clip the corners to reduce bulk. Next, reach through the opening and pull the pillow right-side out, then use a chopstick or knitting needle to fully push out the corners before evenly distributing the stuffing and filling the corners.
Clip the Corners to Reduce Bulk
When sewing a pillow, using the right clipping techniques is essential to achieve well-defined corner shapes and reduce bulk.
Pay attention to the fabric density and seam allowances to determine the best approach.
Whether you’re an indoor or outdoor fabric enthusiast, understanding bulk reduction through proper clipping techniques is important.
This tutorial How to Sew a Pillow will guide you through details on fabric choices like linen blends and Premier Prints.
Turn the Pillow Right Side Out Through the Opening
Reach inside the pillow and gently pull it through the gap to turn it right-side-out. Use a pointy tool like a chopstick or That Purple Thang to carefully push out the corners for a crisp shape. The gap should be placed on the bottom or back of the pillow for a clean look. You’re almost ready to stuff your pillow!
Distribute the Stuffing Evenly, Filling the Corners
Reach inside the pillow and gently pull the fabric through the opening, turning it right-side-out.
Use a pointy tool like a chopstick to push out the corners, ensuring they’re sharp and defined.
Distribute the stuffing evenly throughout the pillow, taking care to fill the corners completely to maintain the pillow’s shape and prevent lumps.
Fluff and arrange the pillow to your liking.
You’re ready to hand-stitch the opening closed using a ladder stitch for a professional finish.
Finishing the Pillow
With the pillow turned right side out and evenly st■, it’s time to seal the opening. Pin or clip the opening closed, then machine stitch it, backstitching at the start and end for security. Once sewn shut, give the pillow a final fluff, smoothing the fabric and arranging the stuffing to achieve your desired plump, lofty shape.
Machine Stitch the Opening Closed for a Permanent Finish
To create a durable closure and a neat appearance, machine stitch the opening closed for a permanent finish.
Guarantee a strong and invisible seam by carefully aligning the fabric edges and selecting a matching thread.
Use a backstitch at the beginning and end of the seam for added reinforcement.
This will result in a professional-looking pillow that will withstand regular use and washing.
Fluff and Arrange the Pillow to Your Liking
Fluff and arrange your pillow to achieve the perfect look and comfort.
Make sure the stuffing is evenly distributed for a balanced overall shape.
Fill the corners to maintain the pillow’s aesthetic appeal.
Adjust the pillow’s arrangement to enhance its comfort level.
Once these steps are completed, the finished product will be a beautiful and comfortable addition to your living space.
Variations and Embellishments
You can create decorative pillows in various shapes and sizes by adjusting your fabric cutting dimensions. For a custom look, mix contrasting fabrics for the front and back, add piping or trims, or embellish with appliques.
Make Pillows in Different Sizes and Shapes
Express your creativity by creating pillows in various shapes and sizes! Experiment with squares, rectangles, circles, or even whimsical animal shapes. Mix and match different patterns, textures, and styles to create a unique look. Adjust the fabric dimensions accordingly and follow the same sewing techniques. Embrace your inner designer and let your imagination soar!
Use Contrasting Fabrics for the Front and Back
Express your creativity by using contrasting fabrics for the front and back of your pillow! Mix and match colors, patterns, and textures to create a unique design. Experiment with color blocking for a bold statement. The possibilities are endless when you play with contrasting fabrics, allowing you to craft a one-of-a-kind piece that reflects your personal style.
- Combine solid colors with prints for visual interest
- Mix different fabric weights like cotton and velvet
- Juxtapose stripes and polka dots for a playful look
- Pair complementary colors like blue and orange
- Contrast smooth satin with nubby burlap for texture
Add Piping, Trim, or Appliques for a Custom Look
To add piping, choose a contrasting color that complements your fabric. Sew the piping around the pillow’s edges, mitering the corners for a professional look. Trim adds visual interest – place it strategically to highlight design elements. Appliques in fun shapes or monograms personalize your pillow. Experiment with different fabric textures for custom details that reflect your style.
Make a Removable Pillow Cover for Easy Cleaning
To make a removable pillow cover, use zippered, button, envelope, tie, or Velcro closures. Sew the closure into the bottom seam allowance before assembling the pillow. This allows you to easily remove and wash the cover. Choose a closure that suits your style and skill level. Zippered and envelope closures are beginner-friendly options.
Stuff With Down, Memory Foam, or Other Specialty Fillings
For a luxurious feel, try down or memory foam cushion inserts. Down provides a soft, cozy embrace, while memory foam molds to your shape. Hypoallergenic stuffing is ideal for sensitive skin. Experiment with decorative textures like corduroy or velvet. Specialty fabrics like microsuede or outdoor canvas create unique looks. For easy care, choose machine washable fabrics and removable covers.
Tips for Success
For crisp, professional results, press the seams as you sew, and backstitch at the beginning and end of each seam. When working with thick fabrics like fleece or chenille, adjust your stitch length accordingly; serge or zigzag the raw edges to prevent excessive fraying.
Press the Seams as You Sew for Crisp Results
As you sew, press the seams with your iron to set the stitches and create crisp, professional-looking results. Use your presser foot to guide the fabric and maintain an even seam allowance. Press curved corners and bulky seams on an ironing board for best results. Pressing as you go makes the final pillow look its best.
Backstitch at the Beginning and End of Seams
When sewing a pillow, it’s essential to backstitch at the beginning and end of seams to secure the stitches.
This prevents unraveling and ensures durability.
Adjust the stitch length for different fabric thicknesses to maintain consistent quality.
To prevent fraying, consider serging or zigzagging the raw edges.
Adjust the Stitch Length for Thick Fabrics
When sewing with thick fabrics like velvet or chenille, adjust your machine’s stitch length to 2.5-3mm for best results. Use a larger needle size, like 90/14, and heavy-duty thread. Reinforce stitching at the beginning and end of seams by sewing in reverse for a few stitches. This prevents puckering and guarantees your pillow can withstand regular use.
Serge or Zigzag the Raw Edges to Prevent Fraying
To prevent fraying and create a polished look, serge or zigzag the raw edges of your pillow fabric before sewing. This decorative stitching adds stability and can be done in a contrasting thread color for a fun accent. Alternatively, leave the edges raw for a fun fringe trim effect when using thick, non-fraying fabrics like felt or velvet.
Caring for Your Handmade Pillow
To maintain your handmade pillow’s shape and plumpness, fluff it regularly by squeezing and manipulating the stuffing. Over time, you may need to replace the pillow form or restuff it with new stuffing material to restore its loft and support.
Fluff the Pillow Regularly to Maintain Its Shape
To keep your handmade pillow looking its best, fluff it daily. Gently squeeze and reshape the pillow, focusing on the corners. This redistributes the stuffing evenly, maintaining the pillow’s ideal firmness and shape. Fluffing also enhances the fabric’s drape, creating a plush, inviting appearance. Make fluffing a habit for a pillow that always looks freshly plumped.
- Fluff daily for best results
- Focus on corners and edges
- Redistributes stuffing evenly
Replace the Pillow Form or Stuffing as Needed
To maintain your handmade pillow’s shape and comfort, periodically replace the pillow form or stuffing. Select appropriate fillings based on your preference for firmness and comfort. Consider changing the fillings seasonally for freshness and adaptability. Explore creative options like mixing different stuffing materials or incorporating unique fabrics to refresh the look and feel of your pillows. Regularly fluffing and cleaning your pillow is key to its longevity and comfort.
| Fillings Selection | Creative Uses |
|---|---|
| – Poly-fill | – Mix different stuffing materials |
| – Memory foam | – Use unique fabrics for a fresh look |
| – Down | – Incorporate specialty fillings for variety |
| – Batting | – Experiment with contrasting textures |
Frequently Asked Questions (FAQs)
How to make a pillow step by step?
Cut two fabric squares, pin right sides together leaving a gap. Sew edges, clip corners. Turn right-side-out, stuff, distribute filling. Hand- or machine-stitch the gap closed.
What is the best sewing method for a pillow?
The best sewing method for pillows is a French seam. It encloses raw edges inside for a clean finish, preventing fraying and leaking stuffing.
How many pillows can you make with 1 yard of fabric?
Did you know the average pillow uses about 1/3 yard of fabric? With one yard, you can craft around 3 pillows, giving your space a fresh look! Precise cutting and careful stitching guarantee success.
How to sew a pillowcase by hand step by step?
Fold fabric in half, right sides together. Sew 3 sides using a 1/4 seam allowance, leaving one side open. Turn right side out, push out corners. Insert pillow form. Hand-sew the open side closed using a blind stitch.
Can I use a sewing machine if Im a beginner?
Sure, using a sewing machine as a beginner is totally doable! Start with simple projects like placemats or pillows to get comfortable with the machine. Take it slow, read the manual, and practice on scrap fabric before tackling bigger projects.
How do I choose the right pillow form size?
Measure the area where you’ll place the pillow. Choose a form that’s slightly smaller for a full, overst■ look, or the same size for a sleek fit. Consider 16, 18, or 20 sizes for standard accent pillows.
What if my corners dont turn out perfectly?
Over 90% of home sewers have slightly imperfect corners – it adds charm! Gently reshape where needed with small clips or pins, distributing stuffing evenly into the corners after filling.
Can I make a pillow cover without a zipper?
Yes, you can absolutely make a pillow cover without a zipper. Simply sew three sides, leaving an opening on one side to turn the cover right-side-out and insert your pillow form. Then, hand-stitch the opening closed using an invisible ladder stitch.
How do I clean my handmade pillow cover?
Hand-wash with mild detergent; machine-washing risks shrinking or fading. Spot clean spills immediately using a damp cloth and mild soap. Air dry completely before reusing.
Conclusion
Ultimately, your journey through this tutorial on how to sew a pillow will yield remarkable handcrafted creations that elevate any space.
Embrace the satisfaction of personalized pillows, whether adorning your living room or gifting a treasured creation.
With diligent practice and an eye for detail, you’ll master the art of pillow construction, imbuing each piece with your unique flair.
Revel in the beauty you’ve created—one impeccably sewn pillow at a time.
- sewingfromhome.com


