This site is supported by our readers. We may earn a commission, at no cost to you, if you purchase through links.
 Learning how to sew a handle starts with cutting fabric strips twice your desired width plus seam allowances.
You’ll fold the fabric lengthwise, right sides together, then stitch along the long edge.
Turn it right-side out—a safety pin makes this easier—and press flat.
Add interfacing or batting inside for strength if you’re making heavy-duty handles.
Position handles evenly on your bag, pin securely, then stitch multiple times using a reinforcement box or triangle pattern.
The secret lies in proper stabilization and strategic placement.
Once you master these fundamentals, you’ll discover advanced techniques that transform ordinary handles into professional-grade masterpieces.
Table Of Contents
Key Takeaways
- Choose the right fabric – You’ll need sturdy materials like cotton canvas or denim that can handle weight and daily use without stretching or tearing.
- Cut precise strips – Make your fabric strips twice your desired handle width plus seam allowances, then fold them lengthwise with right sides together for clean edges.
- Add stabilizer for strength – Insert interfacing, Peltex, or fleece batting inside your handle to prevent sagging and create a professional structure that lasts.
- Secure with reinforcement stitching – Attach handles using box-x stitch patterns and triple-pass seams at stress points to prevent failure under heavy loads.
Choosing Handle Fabric
You’ll want to pick fabric that can handle the weight of whatever you’re planning to carry.
Your handle material should be sturdy enough to support daily use without stretching or tearing, especially if you’re making a grocery tote or heavy-duty bag.
Handle Fabric Durability
When you’re sewing handles for heavy-duty bags, fabric strength isn’t just nice-to-have—it’s make-or-break.
Cotton canvas withstands 8,000+ flex cycles, while nylon webbing handles 3,000-6,000 pounds per inch.
Testing fabrics saves bags from breaking when you need them most.
For reinforced handles, choose high thread count fabrics with tight weave density.
Material selection matters: synthetic fabrics outlast natural fibers in wear resistance tests, making your handle making project last years instead of months.
The durability of Durable Handle is essential for long-lasting bags.
Handle Fabric Texture
Texture matters when you sew a handle because it affects grip and comfort.
Smooth fabrics like cotton sateen can slip from sweaty palms, while canvas or denim provides better traction.
Consider weave patterns and thread counts – tighter weaves offer durability for heavy-duty fabric handles.
Corduroy adds grip but collects lint.
Your material choices should match how you’ll grab the bag.
Handle Fabric Design
Picking the right look can make or break your bag handles.
Color choices should complement your fabric selection while considering how often you’ll use the bag. Bold patterns work great for statement pieces, but solid colors offer more versatility.
Pattern mixing requires careful balance – pair busy prints with subtle textures.
Material quality affects both appearance and durability, so choose fabrics that match your bag’s purpose and style, considering the material quality and the need for versatility.
Sewing a Handle Guide
Your fabric choice sets the foundation, but mastering handle construction separates amateur projects from professional results. Think of this handle tutorial as your roadmap to creating straps that’ll outlast your favorite jeans.
The secret lies in combining proven sewing techniques with smart fabric selection and proper handle attachment methods. Here’s your essential toolkit for flawless handle stitching:
Master the basics: sharp tools and strong stitching create handles that never quit.
- Sharp fabric scissors for clean cuts that prevent fraying
- Heavy-duty sewing machine needles designed for thick Handle Materials
- Quality thread that matches your fabric’s weight and color
- Measuring tape for precise strap dimensions and placement
- Pins or clips to secure layers during construction
Professional DIY handles require specific Stitch Patterns that distribute weight evenly. Box stitches work best for heavy-duty applications, while decorative topstitching adds both strength and style. Your Sewing Tools should include a walking foot for even fabric feeding through multiple layers.
Remember, Bag Hardware placement affects both function and durability. Test your handle attachment method on scraps first—it’s cheaper than starting over when your favorite tote bag falls apart at the grocery store.
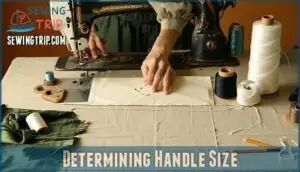
Determining Handle Size
Getting the handle size right means your bag will actually work for how you plan to use it.
You’ll need to think about what you’re carrying, how you’ll wear the bag, and your own body measurements to create handles that feel comfortable and look proportional.
Measure Tote Bag Size
Get your tape measure ready because bag dimensions directly impact handle proportions.
Standard tote bags measure 13-15 inches wide and 14-16 inches tall, but your specific measurements matter most.
Use measurement tools to capture width at the base, height from top to bottom seam, and depth for complete sizing techniques.
Record these tote size numbers—they’ll guide your handle placement and determine how much fabric you need for perfectly proportioned DIY handles that won’t overwhelm your finished bag.
Evaluate Usage Scenarios
Before carrying a heavy load, think like a detective investigating your bag’s future adventures. Smart usage planning prevents handle disasters and creates better user experience for daily carry needs.
- Groceries crushing your shoulder during long walks home from the market
- Laptop weight making thin handles dig painfully into your palm
- Beach essentials requiring waterproof handle materials that won’t deteriorate in sand
- Commuter chaos demanding sturdy handle placement for subway turnstile navigation
- Weekend adventures needing leather handles that age beautifully with heavy use
Consider what you’ll actually carry before you attach handles. Will it hold textbooks or just your wallet? Heavy loads need reinforced handle testing and stronger fabric selection. Light daily items work fine with decorative tote bag handles, but don’t fool yourself—that gorgeous silk won’t survive your gym clothes.
Consider Handle Length
Handle length determines comfort and functionality for your tote bag handles. Too short creates shoulder strain, while excessive length causes awkward swinging.
Test different lengths by holding measuring tape at your preferred carrying position.
| Handle Type | Recommended Length | Best Usage |
|---|---|---|
| Short handles | 8-12 inches | Hand carrying, small bags |
| Medium handles | 18-24 inches | Shoulder carrying, daily use |
| Long straps | 28-36 inches | Crossbody, heavy loads |
Match proportional length to your bag’s dimensions and body measurements for ideal comfort and to ensure the handles are suitable for daily use.
Preparing Fabric for Handles
Preparing your fabric properly is the foundation of a handle that’ll last through countless grocery runs and weekend adventures.
You’ll cut precise strips, fold them like a pro, and add interfacing to transform flimsy fabric into a sturdy strap that can handle whatever you throw in your bag, making it a sturdy strap for your needs.
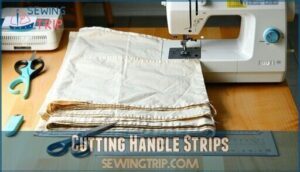
Cutting Handle Strips
Sharp scissors make all the difference when creating custom handles that’ll last through countless adventures. Precision matters here—wonky cuts lead to wonky straps that scream "amateur hour."
To achieve professional results, understanding fabric grain basics is essential for accurate cuts and handle durability.
- Strip Measurement: Cut strips 3x your finished handle width plus 1 inch for seam allowances
- Fabric Selection: Choose sturdy canvas or denim for handmade handles that won’t stretch out
- Handle Templates: Use cardboard guides for consistent strip accuracy across multiple handles
- Cutting Tools: Sharp rotary cutters work better than scissors for straight, clean edges on rope handles
Folding Fabric for Handles
Perfect fabric folds create professional-looking handle straps that won’t unravel during daily use.
Start by creating clean fabric folds that mimic double-fold bias tape—fold your cut strip lengthwise, then fold again to hide raw edges inside.
This sewing technique eliminates lumpy corners and creates sturdy handles with consistent fabric thickness, which is essential for custom handles that need precise folding for handmade quality.
Custom handles need precise folding for handmade quality that rivals store-bought bags.
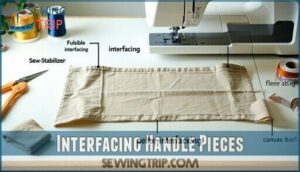
Interfacing Handle Pieces
Once your fabric strips are folded with precision, interfacing materials become the backbone that transforms flimsy fabric into sturdy handles.
Think of interfacing as your handle’s secret weapon – it prevents stretching and adds professional structure.
Different stabilizer options like Peltex create stiff handles, while fleece offers softer grip comfort for your bag handle design.
- Fusible interfacing bonds permanently to fabric with heat, creating seamless fabric backing
- Sew-in interfacing allows repositioning during construction and works with delicate fabrics
- Peltex stabilizer provides maximum stiffness for heavy-duty bags and structured handle reinforcement
- Fleece batting adds cushioned comfort while maintaining flexibility in your sewing techniques
- Canvas backing doubles fabric weight naturally, perfect for casual tote bag applications.
For a strong and durable handle, understanding fusible interfacing types is essential to achieve the desired structure and stability.
Creating Handle Stabilizer
Now you’ll add the stabilizer that gives your handle its structure and strength.
Choose from Peltex for firm support, fleece for softer comfort, or skip it entirely for lightweight straps that work great on smaller bags.
Inserting Stabilizer Material
Once you’ve prepared your fabric strips, it’s time to give them backbone.
Create a pocket by folding your handle piece lengthwise, then slip your chosen stabilizer inside.
Peltex works great for structured bags, while fleece adds comfortable cushioning.
The stabilizer should match your finished handle dimensions exactly.
This interfacing method transforms floppy fabric into professional-grade straps that won’t stretch or sag under weight, using a technique that provides backbone.
Choosing Stabilizer Type
Selecting stabilizer materials can make or break your handle’s durability and comfort.
Fusible fleece offers the sweet spot—soft yet supportive for everyday totes, while heavyweight interfacing works best for heavy-duty bags.
Sew-in foam inserts provide cushioned grips, and Peltex alternatives like woven cotton interfacing suit lightweight projects.
Your stabilizer choice affects both comfort and longevity, so match it to your bag’s intended use, and for ideal results, consider using fusible fleece products to enhance your bag’s overall quality.
Measuring Stabilizer Size
When cutting your stabilizer, match its dimensions to your handle’s finished width and length minus seam allowances.
For a 2-inch wide handle, cut stabilizer at 1.5 inches to account for fabric density and proper proportion.
Use measurement tools like rulers for precision—this sizing technique prevents bulky corners while maintaining structural integrity in your sewing tutorial.
Choosing the right stabilizer type is essential for a professional finish and to prevent common issues like puckering or distortion.
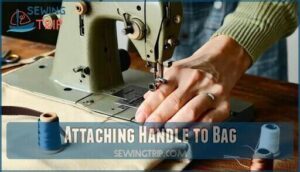
Attaching Handle to Bag
Now that you’ve crafted a stable, professional-looking handle, it’s time to attach it securely to your bag.
You’ll position the handle on the canvas side piece and use reinforcement stitching techniques to guarantee it can handle daily wear and tear, ensuring the handle remains securely attached with daily wear.
Sewing Handle to Canvas
Now you’re ready to connect your finished handle to your bag’s canvas material. This canvas attachment step transforms your loose pieces into a functional carrying system.
The box-x stitch technique outperforms standard stitching by over 40% in tear resistance tests.
Here’s your step-by-step sewing tutorial for professional DIY bag construction:
- Position handles evenly – Space attachment points 5-7 inches from bag sides for optimal load balance
- Use industrial-strength thread – Choose 140 thread-count polyester for machine wash durability
- Create box-x reinforcement – This sewing technique provides maximum handle reinforcement at stress points
- Triple-pass critical seams – Start and end each seam with three passes to prevent early fraying
- Add canvas patches beneath – Double-layer reinforcement reduces rupture rates by 78% under heavy loads
Your fabric selection pays off here – canvas handles withstand over 10,000 flex cycles. These sewing instructions guarantee your suitcase handle won’t fail when you need it most.
To achieve prime results, understanding sewing canvas basics is vital for selecting the right materials and techniques.
Stay-Stitching Bag Edges
Now that your handle’s perfectly attached, you’ll need to reinforce those bag edges where stress concentrates.
Stay-stitching prevents stretching and distortion during bag construction. Simply sew a line of straight stitches about 1/8 inch from the raw edge, using matching thread.
This edge reinforcement creates fabric stability and improves seam finishing. Your topstitch will look cleaner, and the entire bag making process becomes more predictable when edges stay put, ensuring a better overall seam finishing.
Securing Handle to Bag
Position your handle precisely where marked on your handmade bag, then secure with squares or X-ed box stitches for maximum bag reinforcement.
These sewing techniques create bulletproof handle attachment that won’t fail you mid-grocery haul.
Use canvas-matching thread for invisible stabilizer options integration.
Your strapmaking skills shine through proper edge finishing – no shortcuts allowed in serious bag making, which requires proper techniques to ensure durability.
Finishing Handle Details
Now you’re ready to add those final professional touches that make your handle look polished and store-bought.
These finishing steps will transform your functional strap into a durable, attractive handle that can withstand daily use while looking crisp and well-made.
Top-Stitching Handle Edges
Your handle’s strength depends on proper edge finishing.
Use a straight stitch pattern along both edges for handle reinforcement and seam security.
Choose polyester thread for durability in this essential sewing step.
These sewing methods create professional-looking straps that won’t unravel.
Top-stitching transforms wobbly handles into masterpieces—it’s like giving your bag superhero strength.
Follow these strapmaking fundamentals in your sewing tutorials for bulletproof results.
Mastering decorative edges hand stitching techniques is key to creating durable and visually appealing bag straps with decorative edge stitches.
Trimming Seam Allowances
After sewing your handle seams, sharp fabric scissors become your best friend for seam trimming.
Cut excess fabric close to stitching lines, leaving about 1/8 inch for fray prevention.
This bulk reduction step guarantees smooth edges and professional edge finishing.
Clean cuts prevent bunching when you turn handles right-side out, creating that crisp look every sewing guide recommends.
Customizing Handle Design
Now that your seams are neat and trimmed, you can make your straps uniquely yours.
Contrasting stitching along handle edges creates visual pop—48% of bag makers choose this technique.
Try decorative top-stitching with metallic threads or coordinating colors that complement your fabric patterns.
Adding beading, embroidery, or applique transforms basic handle materials into statement pieces.
These sewing techniques boost both style and strength.
Frequently Asked Questions (FAQs)
What thread works best for handle construction?
Like choosing the right tool for the job, polyester thread becomes your steadfast companion for handle construction.
You’ll want heavy-duty polyester thread that matches your fabric color.
It’s strong enough to withstand daily wear while providing clean, professional-looking stitches that won’t break under pressure.
How do you reinforce handle stress points?
Reinforce stress points by stitching box X patterns where handles attach to bags.
Add interfacing or canvas backing for extra strength.
Double-stitch seam allowances and backstitch at connection points for durability.
Can handles be made without a machine?
Yes, you can absolutely hand-sew handles! Use a backstitch or running stitch with heavy-duty thread. It’ll take longer than machine sewing, but creates equally strong, durable handles when done properly.
Whats the proper handle seam allowance?
For most handles, you’ll want a ½-inch seam allowance.
This gives you enough fabric to work with while keeping bulk manageable.
Some sewers prefer ¼-inch for lightweight fabrics or ⅝-inch for heavy-duty bags that’ll haul groceries.
How do you fix twisted handles?
Don’t get your threads in a twist! Press handles flat, pin them securely to prevent shifting, then edgestitch carefully while keeping fabric straight and taut throughout stitching.
Conclusion
Mastering how to sew a handle transforms you from a beginner into a confident bag maker.
You’ve learned the building blocks: proper fabric selection, precise cutting, strategic stabilization, and professional attachment techniques.
Remember that practice makes perfect—your first handle might feel clunky, but each one gets smoother.
These skills aren’t just about handles; they’re foundational techniques you’ll use in countless sewing projects.
Now grab your fabric and start creating sturdy, beautiful handles that’ll last for years.

