This site is supported by our readers. We may earn a commission, at no cost to you, if you purchase through links.
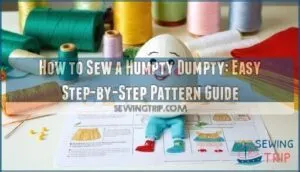 To sew a Humpty Dumpty, you’ll need fabric scraps in different colors for the body, face, arms, legs, and accessories like bow ties or hats.
Start by cutting out your pattern pieces – think egg-shaped body, stubby limbs, and a round head. Pin the pieces together and stitch with a 1/4-inch seam allowance, leaving openings for turning and stuffing.
Turn everything right-side out, stuff firmly with polyfill, and hand-stitch the openings closed. Attach arms and legs to the body, then add facial features with embroidery or fabric markers.
The magic happens when you discover the clever techniques that’ll make your Humpty perfectly plump and wonderfully wobbly.
Table Of Contents
Key Takeaways
- Choose sturdy fabrics like fleece or cotton – they’re forgiving to work with, won’t fray when cut, and create the perfect huggable texture for your egg-shaped character.
- Stuff firmly but don’t overpack – you’ll want your Humpty to be plump and stable enough to sit upright, but not so tight that seams strain or the fabric loses its soft appeal.
- Attach limbs after stuffing the main body – this prevents lopsided proportions and ensures your arms and legs sit symmetrically for that classic nursery rhyme look.
- Use safety eyes and secure stitching for all features – this makes your creation child-safe and machine washable, so it’ll survive countless tumbles and cuddles.
Legs (Make 2)
You’re about to craft the foundation that’ll keep your humpty dumpty sewing pattern standing tall! Start with your Fabric Choices – sturdy cotton or fleece works best for Doll Stability.
Cut four leg pieces using your humpty dumpty doll pattern, remembering that seam allowance we talked about earlier.
Cut clean, stitch straight, stuff smart – your Humpty’s legs need precision from start to finish.
For Leg Construction, pin two pieces right sides together and stitch around the edges, leaving the top open. This Joint Creation technique guarantees your sewn character doll won’t wobble like a real egg on a wall!
Trim corners to reduce bulk, then turn right-side out – a chopstick helps push out those corners perfectly.
Stuff each leg firmly but not overly tight. You want them supportive, not rock-hard. Sewing Techniques matter here: machine stitch across the opening, leaving about half an inch of fabric.
This creates the perfect attachment point for your sewing for kids project. Repeat for the second leg, and you’re halfway to bringing this classic nursery rhyme character to life!
When working with various fabrics, consider sewing harem techniques for inspiration on creating comfortable and stylish clothing.
Arms (Make 2)
Creating Humpty’s arms brings your character doll to life with personality and charm. Start with white or flesh-tone yarn using single crochet stitches in continuous rounds to avoid visible seams.
Arms bring Humpty to life with charm and personality through simple crochet stitches.
Begin each arm with a magic ring technique for neat hand details. Work 5-8 stitches for the initial hand section, then gradually increase for the arm’s base. Keep your gauge consistent at 22 stitches per 4 inches using a 2.5mm-3.5mm hook.
Here’s what makes perfect Humpty Dumpty arms:
- Short and chubby proportions that match his egg-shaped body perfectly
- Light stuffing density prevents overstuffing while maintaining shape
- Symmetrical positioning between rows 10-15 from the head section
- Secure whipstitch attachment guarantees durability during play
- Decorative cuffs or mittens add personality and seasonal flair
Stuff each arm lightly with polyester fiberfill before attachment—think marshmallow consistency, not rock-solid. Pin both arms in place first to check alignment, then use ladder stitch for invisible seaming.
This sewn character doll’s arms should measure 2.5-3 inches, creating that classic nursery rhyme proportions kids adore. To achieve a proper fit, consider sleeve pattern adjustments when working with different arm sizes.
Hat
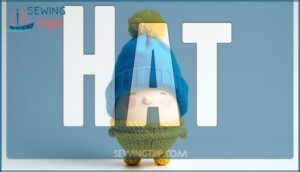
Now it’s time to top off your Humpty with the perfect finishing touch. Hat making transforms your egg-shaped friend from ordinary to extraordinary, and this fleece crafting project couldn’t be simpler.
Cut a semi-circle from bright blue fleece, about 4 inches wide. Fold it in half and sew the straight edges together, creating a cone shape. Turn it right-side out and gently stuff with a small amount of fiberfill. The sewing tips here are straightforward—use a 1/4-inch seam allowance and backstitch for durability.
For your humpty dumpty costume’s crowning glory, add a small pom-pom to the tip. Simply wrap yellow yarn around two fingers twenty times, tie tightly in the center, then trim the loops. This doll accessories detail brings personality to your character costume sewing project.
To guarantee a professional finish, consider using proper sew a sun hat techniques. Pin the hat’s base to Humpty’s head and hand-stitch securely. Your humpty dumpty craft now has that classic nursery rhyme charm that’ll make kids smile every time.
Assembling The Mini Crochet Humpty Dumpty
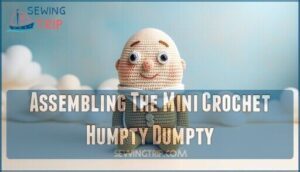
Now you’ll bring all your pieces together to create your finished humpty dumpty doll. Start by positioning the body pieces correctly – the head should sit naturally atop the torso without awkward gaps. Use whip stitch or mattress stitch to join sections, as these create neat, invisible seams that won’t distract from your amigurumi egg’s charm.
Place face details at about one-third down from the head’s top for proper proportions. Safety eyes work great, but embroidered features eliminate choking hazards for little ones. Your yarn choices matter here – consistent tension keeps everything looking polished.
Attach arms and legs after stuffing the main body completely. This prevents the humpty dumpty costume from looking lopsided or saggy. Sew appendages symmetrically, checking alignment frequently. The legs should allow stable sitting, while arms need light stuffing for flexibility.
When you sew humpty dumpty pieces together, your stitch patterns should remain consistent throughout. Take time to adjust any wonky placement – uneven doll accessories can throw off the whole look of your sewing nursery rhyme creation. Mastering the seamless join technique is essential for a professional finish.
Additional Easter Crochet Patterns
Once you’ve mastered your Humpty Dumpty, you’ll want to expand your Easter collection. Popular patterns include Easter Bunnies with floppy ears, fluffy Baby Chicks perfect for Spring Decor, and colorful Easter Eggs that double as Crochet Toys.
These amigurumi egg variations use similar techniques you’ve already learned. Mini amigurumi style dominates 40% of new Easter patterns, making them perfect stash-busters.
Try textured stitches like bobble or popcorn for added charm – they’re featured in nearly half of current bunny designs. Most patterns offer beginner-friendly instructions with step-by-step photos.
Whether you’re creating a sewing nursery rhyme collection or expanding your humpty dumpty craft repertoire, these sew toy egg alternatives keep your hooks busy. From flat appliqué designs to removable accessories, there’s something for every skill level to complement your newly sewn Humpty.
Using free easter designs can help inspire your next project and add a personal touch to your Easter crafts.
Sharing Finished Projects on Social Media
Your handmade humpty dumpty craft deserves the spotlight after mastering each sewing tutorial step. When you share your doll making process, you’re joining vibrant online communities where fellow makers celebrate handmade treasures.
Smart photo editing and media tips can transform your finished project into scroll-stopping content. Natural lighting works magic—snap your creation near a window for that perfect glow.
Here’s how to make your posts pop:
- Stage your humpty dumpty on a clean, neutral background that won’t compete for attention
- Capture multiple angles showing off intricate details like your perfectly stitched bow tie
- Include work-in-progress shots that tell the story of your creative journey
- Add props like colorful yarn balls or vintage buttons to create visual interest
Social sharing becomes effortless when you use 7-13 relevant hashtags mixing broad terms like #handmade with specific ones like #humptydumptysewing. Tag the pattern designer and engage with craft blogs—your creation might just inspire someone’s next weekend project. Exploring various sewing machine projects can help you discover new ideas and techniques to enhance your handmade crafts.
Frequently Asked Questions (FAQs)
How to make a Humpty Dumpty?
Did you know that Humpty Dumpty wasn’t actually described as an egg until Lewis Carroll’s 1872 book?
You’ll create your own unbreakable version using fleece, safety eyes, and fiberfill stuffing for a huggable nursery rhyme character.
Is there a free pattern for Humpty Dumpty softie?
You’ll find free printable templates available online that include full-size patterns for creating a huggable, machine-washable fleece Humpty Dumpty softie with detailed step-by-step instructions.
How do you make a Humpty Dumpty hat?
Cut a circle from colored fleece, fold it in half, then sew the curved edge leaving the bottom open.
Turn it right-side out, stuff lightly, and gather the bottom edge with running stitches to create the crown shape.
How do you sand a Humpty Dumpty made of an egg?
Ironically, you can’t sand an actual egg without destroying it completely.
Real eggshells crack instantly under abrasive pressure.
Instead, you’ll need a hard-boiled egg or foam egg for any smoothing work using fine-grit sandpaper.
How do you make a Humpty Dumpty bag?
Take a white paper lunch bag and stuff it with newspaper for that perfect egg shape.
Fold the top corners, draw on blue pants, then cut out arms, legs, and bow tie from construction paper using the template.
What fabric works best for Humpty Dumpty?
Like knights donning armor, you’ll want fleece as your trusty fabric choice.
It’s forgiving, stretches perfectly, won’t fray when cut, and creates that huggable softness every Humpty needs for tumbling adventures.
How much stuffing do I need total?
You’ll need about 5 ounces of fiberfill stuffing for a standard 16-inch tall Humpty Dumpty doll. That’s enough to give him proper plumpness without overstuffing the seams.
Can I make Humpty Dumpty washable?
Yes, you can make your Humpty Dumpty completely washable.
Use fleece fabric throughout and secure all features with stitching rather than glue.
Safety eyes with washers stay put through multiple wash cycles perfectly.
What size will the finished doll be?
When your fabric friend reaches completion, you’ll have a delightfully chunky 16-inch tall companion that’s perfect for cuddles and won’t easily tumble from walls again!
How do I attach facial features securely?
Use 12mm safety eyes with washers – they’re child-safe and won’t pull out.
For embroidered details like the mouth, double-stitch with embroidery floss rather than gluing features to prevent choking hazards.
Conclusion
Surprisingly, learning how to sew a Humpty Dumpty connects you to countless childhood memories while creating something entirely new.
You’ve mastered the essential steps—from cutting egg-shaped patterns to perfecting that signature wobble.
Your finished creation will bring smiles whether displayed on a shelf or gifted to someone special.
Remember, each stitch adds personality to your unique character. Don’t worry if yours looks slightly different from others—that’s what makes handmade treasures so wonderfully imperfect and charming.
- https://www.etsy.com/listing/176700422/humpty-dumpty-pdf-sewing-pattern-with
- http://www.ahappysong.com/2012/09/humpty-dumpty-tutorial-pattern.html
- https://www.ikatbag.com/2009/07/humpty-dumpty.html
- http://thelongthread.com/wp-content/uploads/2008/03/humpty-dumpty-pattern.pdf
- https://www.factmr.com/report/4539/stuffed-and-plush-toys-market

