This site is supported by our readers. We may earn a commission, at no cost to you, if you purchase through links.
Create limbs by joining inner and outer pieces, leaving openings for joint placement. Construct the body with reinforced attachment points where arms, legs, and head will connect.
Install joint discs with cotter pins to create movable connections – this is where the magic happens.
Table Of Contents
- Key Takeaways
- Materials and Tools Needed for Sewing a Jointed Teddy Bear
- Choosing The Right Fabric for Your Jointed Teddy Bear
- Step-by-Step Instructions for Sewing The Head and Ears
- Sewing The Legs and Arms for Your Jointed Teddy Bear
- Assembling The Body of Your Jointed Teddy Bear
- Finishing Touches for Your Jointed Teddy Bear
- Tips and Tricks for Sewing a Jointed Teddy Bear
- Free Printable PDF Patterns for Jointed Teddy Bears
- Ideas for Customizing and Personalizing Your Jointed Teddy Bear
- Frequently Asked Questions (FAQs)
- Conclusion
Key Takeaways
- Choose quality materials wisely – You’ll need mohair or faux fur with consistent pile direction, plus jointing discs, cotter pins, and washers to create smooth, durable movement in your finished bear.
- Master the jointing system – You’ll install five joints total (head, both arms, both legs) using disc-and-cotter pin assemblies that transform static fabric pieces into a posable, articulated companion.
- Focus on precise construction techniques – You’ll need to maintain consistent seam allowances, stuff limbs firmly while leaving flexibility around joint areas, and secure all components tightly for professional results.
- Pay attention to finishing details – You’ll bring personality to life through careful eye placement, nose embroidery, and final mobility testing to ensure your jointed teddy bear moves smoothly and maintains its charm for years.
Materials and Tools Needed for Sewing a Jointed Teddy Bear
Creating a jointed teddy bear requires specific materials and tools that’ll make your project successful. You’ll need fabric selection basics like mohair or faux fur, plus essential sewing notions including sharp fabric scissors, hand-sewing needles, pins, and matching thread.
Don’t forget your sewing machine for efficient stitching. The jointing system demands five jointing discs with washers and sturdy cotter pins for movable limbs and head. These components transform your bear from static to posable.
Grab teddy bear patterns (printed or digital), polyester fiberfill stuffing, and safety eyes or embroidery floss for facial features. Additional tools include an awl for precise hole-making, pliers for bending cotter pins, and a stuffing stick for even filling.
Quality materials make the difference between a floppy toy and a treasured keepsake. This teddy bear sewing foundation guarantees your jointed bear pattern comes together smoothly, setting you up for successful teddy bear crafting adventures ahead. Mastering the whipstitch technique is vital for a professional-looking finish and durable seams.
The right materials transform your sewing project from ordinary craft to cherished heirloom that lasts generations.
Choosing The Right Fabric for Your Jointed Teddy Bear
The fabric you choose will make or break your jointed teddy bear’s personality and durability.
You’ll want to take into account texture, pile direction, and how well the fabric holds up to stuffing and movement before making your final decision, considering the overall durability.
Mohair Vs. Faux Fur
When choosing between mohair and faux fur for your jointed teddy bear, you’re making a decision that’ll shape your bear’s entire personality.
Mohair delivers that luxurious, traditional teddy bear feel with natural sheen, while faux fur opens up endless color possibilities at budget-friendly prices.
Here are your key considerations for fabric types:
- Mohair – Premium fiber choice with exceptional durability and heirloom quality, though it’ll cost substantially more ($200-$400+ per yard)
- Faux fur – Versatile plush options starting around $12 per yard, perfect for experimenting with different fur textures and colors
- Material costs – Your budget will likely guide this choice, with faux fur allowing more room for mistakes and creative exploration in teddy bear sewing.
For the best results, consider mohair fabric options to find the perfect material for your project.
Considering Pile Direction
Understanding pile direction is your secret weapon for creating a professional-looking jointed teddy bear.
This fabric orientation affects how light reflects off your bear, making the difference between amateur and expert craftsmanship.
When designing pattern pieces, check that pile direction runs head to toe on each part for a smooth, cohesive look.
- Evaluate pile direction when positioning pattern pieces.
- Cut all pieces with nap running the same direction.
- Be mindful of texture and fur direction during assembly.
- To guarantee softness, brush the fur upwards and trim as needed after sewing.
Picture these scenarios in your mind:
- Stroking your fabric to feel which direction glides smoothest – that’s your nap direction guide
- Marking tiny arrows on fabric backing like breadcrumbs leading you toward perfect alignment
- Watching light dance consistently across your finished bear’s fur without patchy shadows
- Creating seam direction that flows naturally from nose to toes for seamless fur texture
Carefully checking pile direction guarantees your handmade jointed teddy bear has lush, cohesive nap alignment throughout.
For a detailed guide on sewing a jointed teddy bear, follow the teddy bear instructions to achieve professional results.
Importance of Seam Allowance
Don’t let loose seams sabotage your handcrafted masterpiece. Proper seam allowance keeps your jointed teddy bear intact through countless cuddles and adventures.
| Factor | Recommendation |
|---|---|
| Seam Width | Follow pattern specs (typically 4mm) |
| Fabric Type | Mohair needs wider allowance than faux fur |
| Curve Allowance | Add extra width for head gussets |
| Strength Impact | Double-stitched seams prevent splitting |
Your teddy bear sewing guide should specify exact measurements, but consistent seams matter most. When sewing jointed limbs, generous allowances let you ease fabric around curves without puckering.
This becomes essential when sewing teddy bear eyes and attaching limbs to the body. Skimping here means stuffing will eventually peek through worn stitches, turning your lovable creation into a repair project.
Step-by-Step Instructions for Sewing The Head and Ears
Now you’ll start creating your teddy bear’s most expressive feature – the head and ears that give your bear its unique personality.
This essential step requires precision with seam placement and careful attention to stuffing to achieve that perfect, huggable shape.
Sewing The Head Side Parts
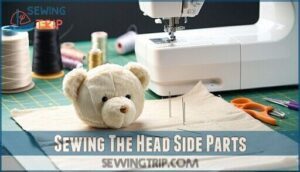
Between the seam lines and pattern markings, you’ll start your teddy bear head by joining the side pieces. Match right sides together, ensuring pile direction flows consistently for smooth sewing curves.
- Pin head seam carefully, aligning notches and markings for precise assembly
- Sew with 4mm seam allowance using backstitch or machine for bear sewing techniques
- Press seams gently to avoid crushing fabric pile before next assembly step
When working with stretchy fabrics, understanding fabric selection tips is essential for a comfortable and durable teddy bear.
Adding The Middle Piece
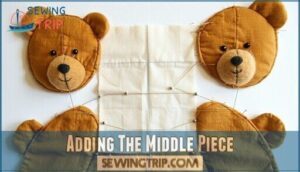
Now attach the middle piece to your joined head sides.
Pin this central gusset carefully along the seam alignment, matching all fabric cutting edges precisely.
The middle piece bridges your head assembly, creating that classic rounded teddy bear shape.
Proper joint construction starts here – this gusset determines how well your jointed teddy bear’s head will sit on its body.
| Step | Action | Key Point |
|---|---|---|
| 1 | Pin gusset to head sides | Match seam edges exactly |
| 2 | Sew with 4mm seam allowance | Use backstitch for strength |
| 3 | Check curve alignment | Verify smooth head shape |
Stuffing The Head and Basting The Neck
Before adding the joint disc, stuff your teddy bear head firmly using small portions of polyester fiberfill.
Start at the nose and work toward the neck, using a chopstick to pack filling into corners.
Insert the head disc through the neck opening, then run gathering stitches around the neck edge.
Pull tight to secure the joint and create a firm foundation for your jointed teddy bear.
Attaching The Ears
Two perfectly shaped ears now wait for their rightful place on your teddy bear’s head.
Position each ear about halfway between the center seam and side edge, matching fur direction with the head’s pile.
Pin carefully, ensuring ear alignment stays even, and use small, tight stitches for secure attachment methods, catching only the backing fabric to maintain the ear shape and professional finish.
Use these stitches to ensure that the ears are securely attached, which is crucial for the overall appearance of the teddy bear, and to achieve a perfectly shaped result.
Sewing The Legs and Arms for Your Jointed Teddy Bear
Now you’ll move from shaping your teddy bear’s head to creating the limbs that bring movement and personality to your jointed companion.
This section covers the precise techniques needed to construct sturdy, properly proportioned legs and arms that will articulate smoothly once the joints are installed.
Sewing The Leg Parts and Inserting The Foot Sole
Begin with proper leg sewing techniques to build sturdy limb construction for your jointed teddy bear.
Sew leg parts together with right sides facing, leaving the sole opening. Insert the foot sole carefully, pinning edges to match curves perfectly.
This creates the foundation for smooth joint assembly and proper teddy bear anatomy in your jointed stuffed animals project. Understanding teddy bear legs is essential for a realistic and adorable teddy bear design with a focus on jointed stuffed animals.
Sewing The Hand-Palm Onto The Inner Arm
Align the palm piece with your inner arm pattern, matching the fabric grain and pile direction for consistent texture.
Pin carefully around the curved edges, maintaining proper seam allowance for clean finishing.
This palm placement sets the foundation for joint mobility in your jointed teddy bear, so precision matters here for professional results.
Sewing The Outer and Inner Arm
With your hand-palm already attached, you’re ready to join the arm pattern pieces.
Pin the outer and inner arm sections fur-side together, carefully matching markings and maintaining consistent seam allowance.
Using proper sewing techniques, stitch around the entire perimeter except for the designated opening at the back.
This teddy bear sewing step requires patience—rushing creates bunched fabric that affects your jointed teddy bear’s final appearance.
Strong thread and backstitch reinforcement guarantee your teddy bear arms withstand future adventures.
Turning The Legs and Arms Inside Out
After sewing your arm pieces together, you’ll need to turn them right-side out along with your completed legs. This step reveals your teddy bear anatomy and prepares these movable limbs for jointed toy construction. Handle your seam allowance carefully during this process.
Here’s your arm turning and leg assembly approach:
- Gently turn each piece – Use a blunt tool like a chopstick to push out corners without damaging your fabric selection
- Check all seams – Verify no puckering or loose stitching that could affect your jointed teddy bear’s durability
- Smooth the curves – Work fabric gently around rounded areas for proper teddy bear sewing results
- Test joint placement – Verify openings align correctly for sewing bear joints and future assembly
Assembling The Body of Your Jointed Teddy Bear
With your teddy bear’s limbs complete, you’re ready to tackle the body assembly where all the magic comes together.
This stage involves preparing the body pieces, creating joints, and connecting your bear’s head to bring your creation to life.
Cutting Vs in The Body Parts
Creating strategic Vs in your body parts isn’t random fabric cutting—it’s dart creation that transforms flat pieces into three-dimensional teddy bear sewing magic.
These triangular cuts allow proper body shaping around joint preparation areas.
Mark your teddy bear pattern carefully, then snip small V-shaped notches where seam allowance meets curved edges, ensuring your jointed teddy bear achieves professional contouring for seamless bear sewing guide results, which is the key to three-dimensional teddy bear sewing magic.
Sewing The Body Parts Together
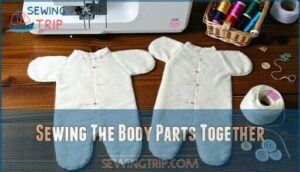
Now carefully position your body pieces right sides together, maintaining proper seam allowance throughout this critical stage of your jointed teddy bear construction. Your fabric cutting precision pays off here as you create the foundation for joint assembly.
- Pin body front and back pieces together, matching notches and curves perfectly
- Stitch along marked seam lines using your preferred teddy bear sewing method
- Leave designated openings for stuffing techniques and joint placement later
- Press seams gently to maintain body shaping without crushing the fabric pile, ensuring a smooth finish for your teddy bear construction.
Attaching Discs and Cotter Pins for Joints
Precision matters when installing teddy bear joints.
First, mark disc placement on each limb using a small stitch or tailor’s tack for perfect symmetry.
Insert the cotter pin through the disc inside the stuffed limb, then push it through the body fabric at your marked spot.
Add the second disc and washer, then use needle-nose pliers to curl both pin legs into tight circles against the disc.
Test joint assembly—it should rotate smoothly without sagging under weight.
Proper articulation techniques guarantee your jointed teddy bear moves naturally for years.
Understanding cotter pin types and cotter pin uses is vital for a sturdy joint.
Connecting The Head to The Body
Now it’s time to bring your teddy bear head and body together.
Insert the cotter pin from your neck assembly through the pre-marked hole in your body’s top opening.
Make sure your teddy bear head sits naturally aligned with the body before securing the joint discs inside.
This connection transforms separate pieces into your jointed teddy bear’s foundation, setting the stage for final detailing work.
Securing The Eyes and Embroidering The Nose
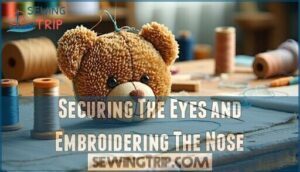
With your bear’s body assembled, it’s time to bring personality to life through Eye Placement and Facial Features.
Position teddy bear eyes using a long doll needle, threading through the head and anchoring at the neck seam for security.
For Nose Embroidery, use satin stitches with embroidery thread to create that classic teddy bear expression.
Safety eyes work great for adult collectors, but skip small parts for children’s bears following Embellishment Tips.
Finishing Touches for Your Jointed Teddy Bear
You’re almost there! Now it’s time to add the joints and put those finishing touches on your teddy bear that’ll bring it to life.
This final stage transforms your sewn pieces into a movable, huggable companion that’s ready to steal hearts.
Adding Joints and Testing The Mobility
Installing jointed teddy bear joints transforms your creation from a static plush into a movable companion. With proper disc placement and cotter pin assembly, you’ll achieve smooth limb articulation that’ll last for years.
Here’s your mobility testing checklist:
- Joint Construction – Insert discs and cotter pins through pre-marked holes, ensuring flush placement against fabric for maximum stability.
- Secure Cotter Pin Ends – Use pliers to curl pin legs into tight circles, creating firm connections while maintaining movable parts functionality.
- Test Range of Motion – Rotate arms and legs at least 180°, checking that joints move smoothly without excessive slack or stiffness.
- Final Mobility Testing – Gently shake your jointed bear and pose limbs at various angles to confirm proper teddy bear joints installation before finishing.
Adding Final Embellishments and Features
With your bear’s joints moving smoothly, you’ll now bring its personality to life through carefully placed details.
Position teddy bear eyes using a long doll needle, securing them through the head to the neck seam.
Create expressive facial expressions with nose embroidery using satin stitches in a classic triangle shape.
Add fur texturing by gently brushing the pile and teasing out any caught fibers from seams.
Complete your personalization with accessories like bow ties or scarves, ensuring all embellishments are securely attached for lasting charm.
To further enhance your teddy bear’s design, consider applying applique techniques to create intricate and beautiful fabric art.
Tips and Tricks for Sewing a Jointed Teddy Bear
Creating a jointed teddy bear requires attention to detail that separates amateur attempts from professional-quality bears. These essential bear sewing tips will help you navigate common challenges and achieve stunning results.
Fabric Selection makes or breaks your project. Choose medium-pile fur with consistent nap direction, cutting pieces with fur side down to preserve the pile. Test your fabric’s stretch before committing – it needs enough give for smooth stuffing without losing shape.
Joint Construction demands precision. Here are key techniques for success:
- Mark joint placement accurately using templates before cutting holes
- Insert cotter pins through fabric holes, not seams, for secure attachment
- Test joint mobility before final assembly – adjustments are easier now
- Use pliers to bend cotter pin ends carefully for ideal tension
- Stuff limbs firmly but leave flexibility around joint areas
Sewing Techniques impact durability. Use backstitch for hand-sewing or double-stitch seams by machine. Tease fur from seams after assembly for professional appearance.
Remember Teddy Bear Safety – secure all components tightly and avoid small parts for children’s bears. Join the Crafting Community online for troubleshooting support and inspiration throughout your jointed teddy bear journey.
Free Printable PDF Patterns for Jointed Teddy Bears
Quality free patterns release your teddy bear crafting potential without breaking the bank.
You’ll find authentic jointed teddy bear designs that match professional standards.
| Pattern Type | Skill Level | Features |
|---|---|---|
| Traditional Jointed | Intermediate | Glass eyes, cotter pin joints |
| Beginner Friendly | Novice | Simple joints, basic features |
| Heirloom Style | Advanced | Complex joint mechanisms, detailed features |
| Memory Bear | Beginner | Unjointed, sentimental fabric use |
Download PDF patterns from reputable crafting sites for reliable pattern design and clear instructions.
These free resources offer various bear sizes from 8 inches to 24 inches, complete with fabric selection guidance and joint mechanism details.
Crafting tips within patterns help you master professional techniques.
Ideas for Customizing and Personalizing Your Jointed Teddy Bear
Once you’ve mastered the basic construction techniques, your jointed teddy bear becomes a canvas for creative expression. Transform your bear’s personality through thoughtful fabric choices – swap traditional mohair for luxurious velvet paw pads or create striking contrast with corduroy accents.
Eye details make all the difference; experiment with vintage glass eyes, hand-painted expressions, or even asymmetrical designs for character. Master nose embroidery using satin stitches in unexpected colors, or try needle-felted noses for texture.
Joint customization lets you adjust limb tightness for different poses – looser joints create playful bears while tighter ones maintain elegant postures. Accessorizing options are endless: miniature spectacles, embroidered names on foot pads, or themed costumes that reflect hobbies.
Your teddy bear design becomes uniquely yours through these personal touches, elevating basic teddy bear crafting into heirloom artistry.
Frequently Asked Questions (FAQs)
How do you sew a teddy bear?
Like threading a needle with hope, you’ll craft a cuddly companion that’ll warm hearts for years.
Cut fabric pieces, sew them together, stuff firmly, and attach limbs using joints for movement.
How do you make a jointed teddy bear?
You’ll need five joints total – one for the head and two each for arms and legs.
Insert cotter pins through fabric-covered discs, secure inside each limb, then attach to body through pre-made holes for movable joints.
How do you make a teddy bear posable?
Like a marionette yearning for freedom, your teddy bear transforms through strategic joint placement.
Install disc-and-cotter pin joints at neck, shoulders, and hips.
Secure washers inside limbs, thread pins through fabric, then bend pin ends for movable articulation.
Can you make a teddy bear with a free PDF pattern?
Yes, you’ll find plenty of free PDF teddy bear patterns online.
Download your chosen pattern, gather fabric and jointing supplies, then follow step-by-step instructions for cutting, sewing, and assembling your bear.
How do you make a teddy bear with cotter pins?
Breathe life into fabric bones by threading cotter pins through body and limb discs.
You’ll insert pins through pre-cut holes, secure washers inside, then bend pin ends with pliers for articulated movement.
How do you articulate a teddy bear?
You articulate a teddy bear by inserting disc-and-cotter-pin joints at five key points: neck, both arms, and both legs. These joints enable smooth movement and posing for your finished bear.
How to put a teddy bear head together?
Sew head side pieces together first, then attach the middle gusset from nose to neck.
Stuff firmly, insert the head disk through neck opening, and secure with cotter pin before closing.
What are jointed teddy bears?
Ever wondered what makes a teddy bear come alive?
Jointed teddy bears feature movable limbs connected by discs and cotter pins, allowing arms, legs, and heads to rotate smoothly.
These articulated joints transform static plush toys into dynamic companions that can pose and express lifelike movement through crafted connections.
What stitch should I use to sew a teddy bear?
Use backstitch or machine stitching with a 3-4mm seam allowance for main construction.
You’ll want to sew twice by machine or once by hand for durability, then use ladder stitch for closing stuffing openings invisibly.
How do you repair loose joints over time?
Tighten those wobbly limbs, restore that perfect posture, bring back that beloved bear’s stability.
Remove the cotter pin, add washers for firmness, or replace worn discs entirely.
You’ll breathe new life into treasured memories, and by doing so, restore stability.
Conclusion
Congratulations—you’ve just discovered the secret to creating your very own movable companion!
By learning how to sew a jointed teddy bear, you’ve mastered one of the most rewarding crafting skills.
Your handmade bear won’t just sit pretty on a shelf; it’ll move, pose, and become a cherished keepsake for years to come.
Remember, each stitch you’ve sewn adds character and love to your creation.
Now you’re ready to craft more bears or teach others this wonderful skill.
- https://bunnyhello.com/how-to-make-a-jointed-teddy-bear/
- https://teddybearacademy.net/what-tools-do-i-need-to-make-a-teddy-bear/
- https://www.youtube.com/watch?v=TpyxSNmnQjA
- https://www.reddit.com/r/sewhelp/comments/1eixkhw/jointed_bear_need_to_reattach_head_how_do_i_sew/
- https://www.teddy-talk.com/viewtopic.php?id=38777


