This site is supported by our readers. We may earn a commission, at no cost to you, if you purchase through links.

You’ll learn the art of cutting with precision, sewing pieces together to create something uniquely yours, and adding those finishing touches that make your jumper not just a piece of clothing, but a piece of you.
Whether you’re a seasoned tailor or picking up a needle for the first time, this guide promises the freedom to express, understand, and belong in the world of fashion sewing.
Yes, you can sew a jumper by selecting appropriate fabric and following a detailed sewing tutorial that includes cutting patterns, sewing seams, and finishing touches.
Table Of Contents
Key Takeaways
- Select a fabric that is warm and durable, such as wool, or opt for lightweight and stretchy blends of cotton and wool or synthetic materials, ensuring it is prewashed to prevent shrinkage.
- Draft patterns using existing garments as templates, adding seam allowances and adjusting for size and fit with proper labeling for ease of assembly.
- Employ precise cutting techniques using pattern weights, a rotary cutter, and a cutting mat, and choose the right needle, such as a ballpoint needle, to prevent fabric damage.
- Sew the jumper with care, attaching sleeves and neckbands properly, using a zigzag stitch for sweater knits, and reinforcing seams at stress points for durability, finishing with appropriate hemming and edging techniques.
Choosing Your Fabric
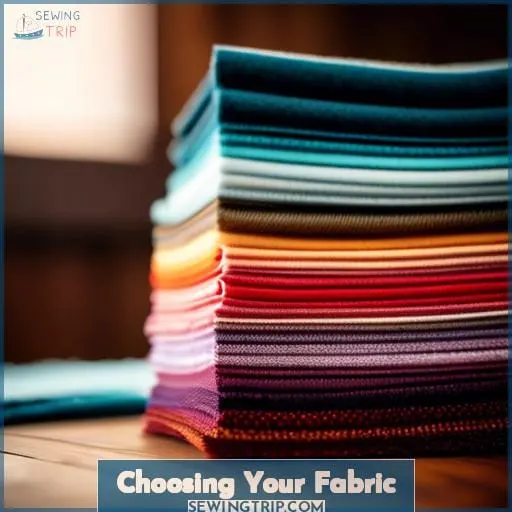
When selecting fabric for your jumper, consider the warmth and durability of wool, which is a favorite for its softness and strong natural fibers.
For a more lightweight and stretchy option, blends of cotton and wool or synthetic materials like polyester can offer a balance of comfort and practicality.
Always prewash your chosen fabric to prevent future shrinkage and to ensure the material’s quality and care requirements align with your project needs.
Best Fabrics for Sweaters
When selecting fabrics for your sweater, consider the warmth and durability of wool, a classic choice that’s both soft and strong. For a modern twist, explore sweater knit fabrics that blend wool with other fibers like cotton or acrylic, enhancing the fabric’s characteristics.
Wool blends offer a balance between warmth and breathability, making them suitable for various climates. Pay attention to knitting techniques, as they can affect the texture and stretch of your sweater, ensuring comfort and fit.
Your fabric selection should reflect your color choices and texture preferences, contributing to the sweater’s overall aesthetic. Consider weave variations for different looks and feels, and remember that stretch considerations are crucial for a comfortable fit.
When planning your sweater, think about pattern matching, especially if you’re working with a printed or textured knit, to achieve a professional look. Lastly, choose seam finishes that will support the sweater’s structure and enhance its durability.
Preparing Your Material
After selecting the ideal fabric for your sweater project, it’s crucial to prepare your material properly to ensure a smooth sewing process.
You’ll want to prewash your fabric according to the care instructions for the finished garment.
This step is especially important if you plan to machine wash and dry the garment, as it will pre-shrink the fabric and prevent any surprises in size or texture after the garment is completed.
For fabrics containing wool or other materials that may shrink or distort, hand washing and laying flat to dry is recommended to maintain the integrity of the fabric before you begin cutting and sewing.
Drafting the Pattern
When drafting a pattern for a jumper, using existing garments as templates can be a game-changer. You’ll want to select a piece that fits well and reflects the style you’re aiming for.
This approach not only simplifies the process but also ensures that the final product will suit your size and preferences.
Adjusting for size and fit might require some tweaks to the original template, but it’s a solid starting point for creating a garment that’s uniquely yours.
Using Existing Garments as Templates
To draft a pattern using an existing garment as a template, you’ll need to carefully trace around the garment laid flat on pattern paper, ensuring it remains still for accurate measurements.
This process involves tracing separate patterns for each section of the garment, such as the front piece, back piece, and sleeves.
After tracing, you’ll draw a second line around the traced outline to add a seam allowance, typically ½ inch from the edge.
It’s important to use a straight or curved tailor’s ruler for this step to ensure the seam allowance is even.
Additionally, you should label each pattern piece with details like the garment section it represents and any specific features like buttonholes or darts.
This method allows you to replicate the fit and style of existing garments without deconstructing them.
Adjusting for Size and Fit
Once you’ve selected a garment to use as a template, it’s crucial to adjust the pattern for size and fit to ensure your jumper fits perfectly. You’ll need to measure yourself accurately and compare these measurements to those provided by the pattern.
If your measurements don’t align perfectly with a single size, don’t worry; it’s common to fall between sizes. In such cases, you should opt for the larger size as it’s easier to take in fabric than to add it.
- Altering proportions: Modify the pattern’s width and length to fit your body shape.
- Customizing measurements: Adjust the pattern at key points like the bust, waist, and hips.
- Tailoring adjustments: Make changes to the raglan sleeve or side seam for a better fit.
- Modifying dimensions: Use a straight stitch for precision and stretch mesh for areas needing flexibility.
- Adapting sizes: Add or remove ease to ensure comfort without compromising style.
Cutting Techniques
When it comes to crafting a jumper, precision in cutting your fabric is paramount.
This step sets the foundation for a garment that looks professional and fits well.
By using the right tools and techniques, you’ll ensure that your fabric maintains its integrity, leading to a beautifully constructed jumper.
Tools for Precision
Transitioning from drafting your pattern to the cutting phase, precision in cutting is paramount to ensure the integrity of your fabric and the accuracy of your project. You’ll need the right tools to achieve clean, precise cuts without distorting the fabric.
Essential tools for this task include pattern weights, a rotary cutter, and a cutting mat. Pattern weights hold your pattern in place on the fabric, eliminating the need for pins that can leave holes or distort the fabric.
A rotary cutter allows for quick, straight cuts, especially useful for long, straight lines or gentle curves. Meanwhile, a cutting mat protects your work surface and helps extend the life of your rotary cutter blade.
| Tool | Purpose |
|---|---|
| Pattern Weights | Secure pattern without distortion, fostering a sense of belonging. |
| Rotary Cutter | Ensures sharp, clean edges, symbolizing freedom from inaccuracies. |
| Cutting Mat | Protects, offering a stable foundation for consistent shapes and precision. |
| Ball Point Needle | Ideal for knits, preventing fabric damage, embodying understanding care. |
Preserving Fabric Integrity
When cutting your sweater knit, you’ll want to use pattern weights and a rotary cutter to maintain the fabric’s integrity without distorting its shape.
Select a ballpoint needle to glide through textured sweater knit, preventing snags.
Employ a walking foot or twin needle for even stitch techniques, ensuring seam reinforcement and preventing distortion. These steps are crucial for preserving the beauty of your raglan jumper or any sweater knit project.
Sewing the Jumper
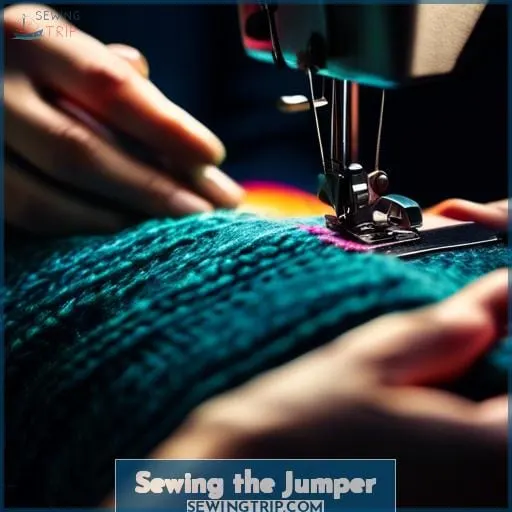
Now that you’ve got your jumper pieces ready, it’s time to bring them all together.
Next, the neckband comes into play, giving your jumper a polished look.
This process might seem daunting, but with patience and precision, you’ll see your jumper take shape right before your eyes.
Assembling the Pieces
How do you begin assembling the pieces of your jumper to ensure a seamless and professional finish? Here’s a step-by-step guide:
- Start by joining sections, carefully pinning fabric right sides together to maintain seam alignment.
- Baste edges if necessary, to hold the shape before final stitching, and always check measurements for accuracy.
- Sew sweater knits with a zig-zag stitch to allow stretch, especially when attaching the dolman sleeve.
- Reinforce seams at stress points, like the neckband, for durability and wear.
Attaching Sleeves and Neckband
After aligning the sleeve and neckband pieces with the bodice of your jumper, you’ll sew them together, ensuring a snug fit around the arms and neckline. Sleeve alignment is crucial for a comfortable fit, so take your time to match notches and ease the fabric without puckering.
For the neckband fitting, divide both the neckband and neckline into quarters to evenly distribute the stretch.
| Step | Detail | Emotion |
|---|---|---|
| Sleeve Alignment | Match notches and ease around the armhole. | Confidence |
| Neckband Fitting | Quarter both neckband and neckline for even stretch. | Satisfaction |
| Seam Reinforcement | Strengthen shoulder seams to maintain shape. | Security |
Stitch tension should be adjusted to accommodate the dense sweater knit, preventing unwanted gathers. When handling the fabric, be gentle to maintain its integrity and finish raw edges neatly to prevent fraying.
Whether you’re crafting a cozy oslo cardigan or a breezy tie shoulder jumper, these sewing techniques will elevate your garment’s finish.
Reinforcing and Finishing
When it comes to reinforcing and finishing your jumper, it’s crucial to focus on strengthening seams, hemming, and edging to ensure durability and a polished look.
You’ll want to reinforce seams in high-stress areas to prevent them from ripping under strain, using techniques such as double stitching or adding a strip of fabric for extra support.
For hemming, consider using a double needle for a professional finish or a hem band for a clean edge, especially on sweater knits.
Edging can be neatly completed with a serger or a zigzag stitch to prevent fraying and maintain the stretch of the fabric.
These steps are essential for creating a jumper that not only looks great but also withstands wear and tear.
Strengthening Seams
To ensure your jumper’s seams can withstand wear and tear, you’ll need to reinforce them using specific techniques and materials.
Employ reinforcement methods like clear elastic or stretch mesh to prevent stretching, especially when sewing sweater knit.
Ensure your feed dogs gently move the fabric, and always use a ballpoint needle to protect delicate threads.
Hemming and Edging
One can achieve a polished look on their jumper by mastering the techniques of hemming and edging, which are crucial for reinforcing and finishing the garment.
- Utilize topstitching techniques to add durability and a professional touch to seams.
- Explore various seam finishing methods, including serging or using a double needle for a clean look.
- Experiment with edge treatments like a split hem bottom band or bias binding for a unique flair.
- Consider rolled hems or a hem band for lightweight ponte knit fabric, ensuring a smooth, stretchable finish.
Care and Maintenance
After you’ve finished sewing your jumper, it’s crucial to know how to care for it properly to ensure it lasts. Pressing your seams with care and avoiding excessive steam will keep the texture of your knit fabric intact.
When it comes to washing, handwash your garment, especially if it’s made of wool, and lay it flat to dry to prevent any distortion.
This attention to detail in the finishing touches will make all the difference in the longevity and appearance of your handmade jumper.
Pressing for Perfection
You’ll need to press your seams gently to ensure a crisp finish without damaging the texture of your sweater knit. Ironing techniques are crucial in garment maintenance to avoid stretching the material.
Use interfacing to stabilize areas needing extra support. A long straight stitch can help with wrinkle removal, but gentle pressing is key. Follow these pressing tips for fabric care that keeps your jumper looking its best.
| Pressing Tips | Fabric Care |
|---|---|
| Gentle pressing | Avoid direct heat |
| Use a pressing cloth | Handwash when possible |
| Iron seams, not fabric | Lay flat to dry |
| Avoid steam pressure | Use correct temperature |
| Interfacing for support | Store properly |
Washing Instructions
After pressing your jumper to perfection, it’s essential to follow specific washing instructions to maintain its quality and shape.
Whether you’ve chosen a woven fabric or a tightly knit sweater fabric, always opt for a gentle cycle to keep the fibers intact.
For drying, skip the tumble dryer; air dry your creation instead. This method not only preserves the fabric but also ensures your hand-sewn jumper remains as beautiful as the day you finished it.
Frequently Asked Questions (FAQs)
What type of thread should I use for sewing a jumper, and does it vary based on the fabric type?
For sewing a jumper, opt for polyester thread for its strength, durability, and flexibility, making it suitable for most fabrics.
If working with natural fibers like cotton, consider a cotton thread, but remember it’s less durable.
Adjust your choice based on fabric type and project needs.
Can I add a lining to my jumper for extra warmth, and if so, what lining materials are recommended?
Yes, you can add a lining to your jumper for extra warmth. Recommended lining materials include silk, viscose, acetate, polyester, and rayon for their comfort and warmth properties.
Adding a lining to your jumper not only increases its warmth but also enhances comfort. When selecting a lining material, consider silk for its luxurious feel and warmth. Viscose and rayon are also good choices due to their breathability and soft texture, resembling silk.
Acetate is another option, known for its static-free nature and comfort. Polyester, while less breathable, is strong and durable, making it a practical choice for a lining material. Each of these materials has unique properties that can contribute to the overall feel and function of your lined jumper.
How can I adjust the pattern for a jumper if I want to include a zipper or button closures?
To adjust a jumper pattern for zipper or button closures, first, extend the pattern’s back or side where the closure will be, allowing extra fabric for overlap or seam allowance.
For buttons, add enough width for buttonholes and a facing or placket.
For zippers, ensure the fabric edges align neatly, possibly reducing width slightly for a clean finish.
Always test the closure placement on a mock-up to perfect the fit and function before final sewing.
What are some creative ways to personalize my jumper with embellishments or unique stitching techniques?
Add unique flair to your jumper with appliqué, embroidery, or sequin embellishments.
Experiment with decorative stitches like the herringbone or sashiko for a textured look.
Don’t forget to personalize with fabric paint or dye for a splash of color.
How do I handle sewing curves and corners on a jumper to ensure a clean, professional finish?
Don’t let the thought of sewing curves and corners intimidate you; with the right approach, you can achieve a clean, professional finish on your jumper. When sewing curves, gently guide the fabric, allowing the sewing machine to do most of the work.
For corners, reduce your sewing speed and use a handwheel if necessary to make precise turns.
Clipping the seam allowances on curves and pressing them will help the fabric lay flat and smooth.
Conclusion
Embarking on the journey of sewing a jumper is akin to painting your dreams with fabric and thread, each stitch a testament to your creativity and dedication. You’ve navigated through the selection of soul-stirring fabrics, drafted patterns that embrace your form, and mastered the dance of the sewing machine.
Now, as you stand at the threshold of completion, remember that this garment is more than just threads intertwined—it’s a reflection of your unique story and passion. Care for it as you’d a cherished memory, pressing and washing with gentle hands, ensuring it remains a testament to your journey in the world of fashion sewing.
Let your jumper be a beacon of your artistic spirit, a warm embrace on cool days, and a proud declaration of your sewing prowess.

