This site is supported by our readers. We may earn a commission, at no cost to you, if you purchase through links.
 Want to master how to sew curve like a pro? Start by starching your fabric for better control and using a shorter stitch length around 2.0.
Pin your curved edges vertically every quarter-inch to keep everything in line. Sew slowly, guiding the fabric with gentle fingertip pressure and keeping your eyes on the seam line.
For convex curves, clip small triangular notches into the seam allowance to help the fabric lie flat. When you reach those tricky inner curves, clip the seam allowance every half-inch and ease the fabric carefully.
The secret’s in taking your time and letting the machine do the work.
Table Of Contents
- Key Takeaways
- Sewing Curves Tutorial
- How to Sew Curves That Are Convex
- Sewing Curves That Are Concave
- How to Sew Curved Seams
- Start With Starched Fabric
- Cut Precise Pieces for Sewing Curves
- Baste Curves in Place With Glue or Pins
- Tips for Sewing Curves on Your Sewing Machine
- Press It Flat
- Finish Sewing Your Quilt Block
- Frequently Asked Questions (FAQs)
- Conclusion
Key Takeaways
- You’ll master curves by starching your fabric first, which gives you better control and reduces distortion during sewing.
- Take your time and sew slowly, using a shorter stitch length (around 2.0) and pinning vertically every quarter inch to ensure precise curve alignment.
- Clipping is your secret weapon—make small triangular notches in the seam allowance to help the fabric lay flat, especially for convex and concave curves.
- Practice your technique with patience, focusing on guiding the fabric smoothly and letting the machine do the work while maintaining gentle, consistent pressure.
Sewing Curves Tutorial
With a deep breath and steady hands, venture into sewing curves – your gateway to quilting magic. Mastering curved piecing isn’t rocket science; it’s about patience and precision.
Start with gentle curves, cutting fabric pieces carefully along the grainline. Pin generously, setting your machine to a shorter stitch length.
Sew slowly, pivoting with purpose. Press each seam flat, letting the fabric tell its story.
Using a pre-starching technique with spray starch can make a big difference in handling and sewing curved pieces.
Practice transforms intimidation into confidence, turning complex curves into your creative playground.
How to Sew Curves That Are Convex
Mastering convex curves in sewing might seem tricky, but with the right techniques, you’ll be crafting smooth, professional-looking seams in no time.
You’ll learn to mark, pin, stitch, and clip your way to curved perfection.
Transforming potentially frustrating fabric challenges into confident sewing victories.
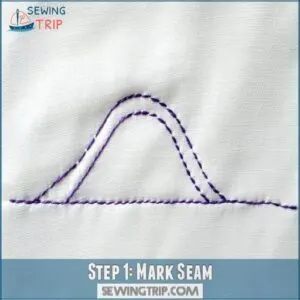
Step 1: Mark Seam
Ready to nail those curves? Before stitching, you’ll want to mark your seam allowance like a pro. Grab your trusty removable fabric marker and trace that line with precision. Remember to use a sharp needle and maintain a consistent seam allowance for a smooth finish, especially when working with stay-stitch techniques.
- Choose a marker that’ll disappear after sewing
- Mark just inside your seam allowance
- Follow the curve’s natural shape
- Keep lines clean and visible
Your roadmap to curve-sewing success starts here.
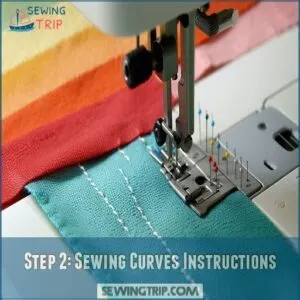
Step 2: Sewing Curves Instructions
Glide your fabric through the machine like a dance partner, guiding those curves with precision.
Set your stitch length to 2.0 and slow down your pace.
Pin vertically every quarter-inch, keeping the seam allowance tight. Using the right convex curve sewing tools can also make a big difference.
Let your needle pivot smoothly, treating each curve as a delicate choreography of fabric and thread.
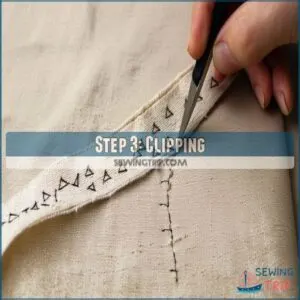
Step 3: Clipping
Your scissors become your secret weapon when taming curved seam allowances.
Clip strategically into the fabric’s edge, creating tiny triangular notches that’ll help your curved seams lay flat without compromising the stitch line.
Different fabric types demand different clipping techniques – lightweight materials need fewer clips, while sturdy fabrics require more precise notching.
Pro tip: Always clip toward, but never through, your stitching to maintain structural integrity. curved seam allowances
Step 4: Turn & Press
After sewing those curves, it’s time to transform your fabric piece into a smooth masterpiece.
Turn the fabric right side out with care, revealing your handiwork.
Here’s how to press like a pro:
- Use a clean, hot iron set to your fabric’s recommended temperature
- Press gently, moving the iron up and down to avoid stretching
- Let the seam settle and cool before handling
Your crisp, professional finish awaits!
Sewing Curves That Are Concave
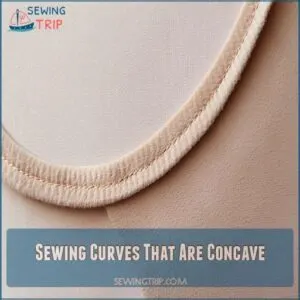
When tackling concave curve challenges, fabric manipulation becomes an art form. Clip into the inner curve’s seam allowance every 1/2 inch, letting the fabric spread and breathe. Grade those seam allowances by trimming the inner curve slightly narrower to banish bulky bumps.
Grainline matching is your secret weapon for preventing distortion. Gently ease the outer curve piece, treating it like a delicate dance partner that needs careful guidance. Sew slowly, pivoting and lifting to maintain smooth lines.
Your iron becomes a precision tool for pressing, transforming potentially tricky concave curves into seamless, professional-looking masterpieces. Practice makes perfect in sewing curves. When working with curves, understanding sewing on the bias is key.
How to Sew Curved Seams
Mastering curved seams can transform your sewing projects from basic to professional-looking in just a few simple steps.
You’ll learn how to add seam allowances, mark centers, ease and pin fabric.
sew precisely, and clip curves for a smooth, polished finish.
Step 1: Add Seam Allowance
Mastering seam allowances is your ticket to curve-sewing success.
Grab a fabric pencil and mark those essential lines like a pro, aiming for that sweet 1/4 to 3/8-inch sweet spot.
Here’s your game plan for seam allowance triumph:
- Measure twice, mark once with precision
- Use contrasting chalk for clear guidelines
- Check pattern requirements before marking
- Adjust allowance based on fabric weight
Step 2: Mark Centers
Every skilled sewist knows the secret to perfect curves starts with precise center marking. Use a reliable marking tool like a Fons & Porter chalk pencil to lightly dot the midpoint on each curved piece’s wrong side.
| Tool | Benefit | Pro Tip |
|---|---|---|
| Chalk Pencil | Visible Marking | Light Touch |
| Fabric Marker | Temporary Mark | Test First |
| Tailor’s Chalk | Clean Removal | Sharp Edge |
| Pin | Temporary Guide | Vertical Placement |
| Washable Pen | Precise Lines | Water Soluble |
Center matching prevents puckering and guarantees smooth, professional-looking curved seams.
Step 3: Ease and Pin
Pinning curved seams feels like a dance with fabric. Your secret weapons? Thick pins and a gentle touch. For even smoother curves, consider using curved seam pins for better control.
- Slide pins perpendicular to the curve’s edge
- Create small dashes along the seam line
- Let the fabric breathe and align naturally
Ease those curves like a pro, no stress allowed.
Step 4: Sewing Curves
With a steady hand on the fabric’s wheel, guide your curves through the sewing machine like a pro navigator. Take it slow and steady, letting the machine do its magic. To achieve a clean finish on your curved seams, make sure to trim excess material, creating a smooth finish.
| Technique | Tips |
|---|---|
| Speed | Slow and controlled |
| Pressure | Adjust machine foot |
| Direction | Manual fabric guidance |
| Curve Type | Adjust approach |
| Practice | Patience is key |
Your curves will thank you later.
Step 5: Clipping
Once you’ve sewn those curves, it’s time to tap into their true potential with strategic clipping techniques.
Snip small, precise notches into the seam allowance, cutting perpendicular to your stitching line without slicing through the threads. These strategic cuts release tension, allowing fabric to flex and lay flat.
Your scissors become precision tools, transforming stiff seams into smooth, fluid curves that glide and drape effortlessly across your project. strategic cuts release tension. smooth, fluid curves
Start With Starched Fabric
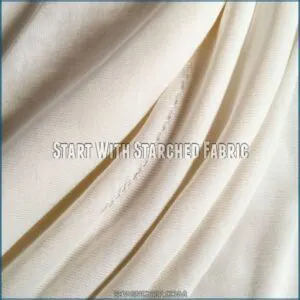
Want to conquer those tricky curved seams? Reach for your secret weapon: spray starch. This magical fabric enhancer transforms floppy fabric into a precision sewing tool. Magic Starch by Faultless or Best Press spray starch will be your new best friends.
Using starching for quilting, you’ll find it reduces fabric fraying and distortion.
Lightly mist your fabric, focusing on seam allowances – you’re creating temporary stability, not a cardboard costume. Press with a hot iron using an up-and-down motion, letting the starch penetrate the fibers.
The goal? A crisp, manageable fabric that holds its shape like a well-trained dancer. Experiment with different starch brands to find your perfect match.
Pro tip: acid-free glue sticks work as an alternative stabilizer if you’re sensitive to traditional starches. Your curves are about to look absolutely flawless.
Cut Precise Pieces for Sewing Curves
Precise curve cutting is the secret weapon that’ll transform your sewing from amateur to pro, giving you clean, professional-looking results every time.
You’ll want to master the right tools and techniques, whether you’re using a fabric cutting machine or a trusty rotary cutter, to guarantee your pieces line up perfectly before you even thread your needle.
Using a Fabric Cutting Machine
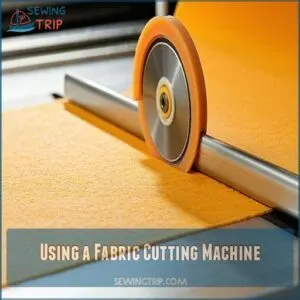
Mastering fabric cutting machines releases precision for sewists keen to conquer curved masterpieces.
Adjusting machine pressure and feed rate transforms complex cuts into smooth, professional results.
Using high-quality rotary cutter blades, such as those available at rotary cutter blades, can greatly enhance the cutting experience.
Test settings on scrap fabric first, marking seam allowances carefully.
Align fabric with great care, following marked lines with laser-like focus.
Your sewing machine becomes a curve-cutting champion, slicing through fabric with surgical accuracy.
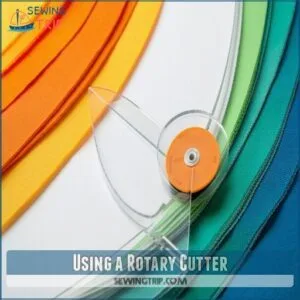
Using a Rotary Cutter
After nailing fabric cutting machine techniques, grab your rotary cutter for precision curve cutting.
Pair it with a sturdy acrylic template to slice fabric like a pro.
High-quality blades like Olfa are your secret weapon—they’ll glide through layers effortlessly.
Position your template carefully, trace the outline with a highlighter, and apply consistent pressure as you cut.
Different fabrics demand different touch, so experiment and find your groove.
With the right Ergonomic Handle, your rotary cutter isn’t just a tool; it’s your pathway to clean, professional curved pieces that’ll make your sewing projects sing.
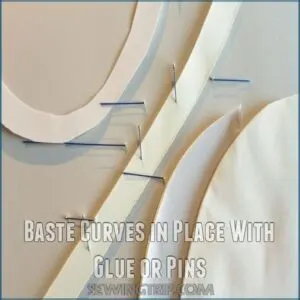
Baste Curves in Place With Glue or Pins
Now that you’ve cut your fabric pieces with precision, it’s time to bring those curves together. Glue basting can be your secret weapon for perfect alignment. Grab a washable fabric glue like Sewline or Elmer’s and test it on scrap fabric first.
Let the glue tack up for a moment before gently pressing pieces together, following a more detailed guide to glue basting curves for perfect results.
Pin lovers, don’t worry – vertical pins work just as well for keeping curved edges in check. Check your center points and edges carefully before the glue sets.
A steam iron becomes your best friend here, helping those curves lie flat and smooth. Practice makes perfect, so don’t stress if your first attempts aren’t flawless.
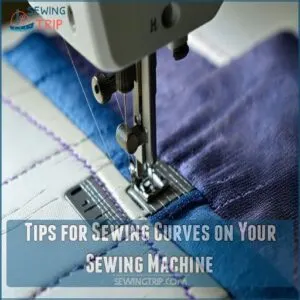
Tips for Sewing Curves on Your Sewing Machine
Ready to conquer curved seams without breaking a sweat? When you’re sewing curves, slow and steady both wins the race and keeps your fabric smooth and your stitches precise.
Sew Slowly
When sewing curves, slow stitching benefits your final results more than speed ever will. Reduce your machine’s speed or hand crank for precision.
Patience is key—take it slow to prevent puckers and uneven seams.
Short stitches are your secret weapon for smoother sewing curved seams, giving you better control over the fabric.
Use gentle pressure and make small adjustments as you guide the fabric. Whether working with delicate or stiff fabric types, embracing patience practice supports sewing curved pieces becoming second nature. Slow and steady truly wins the curve game! Reduce your machine’s speed or hand crank for precision.
Use The Needle Down Feature on The Sewing Machine
Slow stitching gets a serious upgrade with your machine’s needle down feature. This game-changing setting keeps your fabric rock-solid while you pivot through tricky curves.
Here’s how to master it:
- Locate the needle down button
- Press before lifting presser foot
- Rotate fabric smoothly
- Maintain stitch accuracy
- Prevent fabric slippage
By utilizing the correct sewing tools and materials, precision becomes your sewing superpower, transforming complicated curves into seamless perfection.
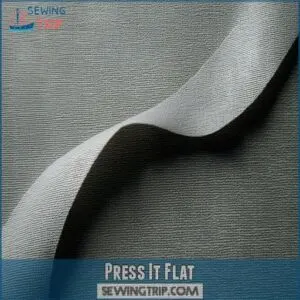
Press It Flat
Smooth sailing through curved seam pressing starts with the right technique, especially when working with curved pieces that have concave and convex arcs overlapping by 1/2" curved piecing basics. Your iron becomes a magic wand that transforms rumpled fabric into crisp, professional-looking masterpieces.
- Use steam to relax stubborn fabric tensions
- 鱗 Select the right pressing tool for each curve
- ️ Adjust iron temperature to fabric type
- Check seam alignment before pressing
- ️ Apply gentle, even pressure
A tailors clapper is your secret weapon for ultra-sharp edges. Glide your steam iron with confidence, letting heat and pressure work their magic. Pressing isn’t just about flattening—it’s about sculpting your fabric into perfection, one curve at a time. Your quilt block is about to look professional-grade!
Finish Sewing Your Quilt Block
With your curved seam mastered, it’s time to celebrate your quilting triumph. Remember to check out Suzy’s detailed guide on sewing curve techniques for even more tips and tricks.
Let’s break down the final steps to showcase your creation:
| Block Display | Storage | Preservation |
|---|---|---|
| Wall hanging | Acid-free box | Protect from sunlight |
| Quilt label | Folded flat | Avoid moisture |
| Professional framing | Cool, dry space | Acid-free tissue |
Your sewing curves technique has transformed fabric into art. Add a personalized label detailing your project’s story – date, inspiration, and your name. Store your masterpiece carefully, protecting those intricate curved seams from damage. Whether you’re displaying your quilt or tucking it away, you’ve conquered one of quilting’s most challenging techniques. Each stitch tells a story of patience, precision, and creative passion. Your curved seam is more than fabric – it’s a reflection of your growing skill.
Frequently Asked Questions (FAQs)
How to sew curves for beginners?
Start by pinning fabric right sides together, using short stitches.
and vertical pins to master curve sewing.
Clip seam allowances, pivot carefully, and press gently to master those tricky curved edges like a pro.
What stitch is best for curves?
Did you know 90% of sewers struggle with curved seams?
You’ll want to use a shorter stitch length (0-5) when tackling curves.
Stitch slowly, pivot carefully, and clip seam allowances to help your fabric flow smoothly around those tricky curves.
How to sew a curve without puckering?
Pin vertically, use a short stitch length, and clip your seam allowances.
Sew slowly, guiding fabric gently.
Press with an up-and-down motion to prevent stretching, ensuring a smooth, pucker-free curved seam.
How to sew a curved corner?
Sew curved corners smoothly by marking seam lines, clipping carefully, and using short stitches.
Align fabric edges precisely, pivot slowly with the needle down, and press gently to create crisp, professional-looking corners.
My curved seams puckered after sewing. How can I fix this?
You’ll want to clip your seam allowances with tiny notches to release fabric tension.
Use a shorter stitch length.
Press gently with an up-and-down motion, and avoid stretching the material while working.
What fabric types work best for curves?
Smooth as silk, lightweight cotton and soft chambray are your curve-sewing allies.
Avoid heavyweight or stretchy fabrics.
Test fabric combinations first, and you’ll master those tricky curves with confidence and finesse.
How do I handle slippery curved fabrics?
Tame slippery fabrics with tissue paper underneath while sewing.
Pin vertically, use a walking foot, and reduce machine speed.
Stabilize edges with starch spray, and press gently to prevent fabric from shifting during curved seams.
Can I sew curves with delicate materials?
Soft as a whisper, delicate fabrics can be tamed with tender care.
Pin sparingly, use tissue paper as a stabilizer.
Choose fine needles, and sew slowly.
Patience transforms fragile materials into beautifully curved masterpieces.
What tools help sew perfect curved seams?
You’ll need sharp fabric scissors, pins, and tailor’s chalk.
a short-stitch sewing machine, and a marking tool.
Don’t forget a presser foot that gives clear seam visibility—your secret weapon for sewing perfect, smooth curved edges every time.
How do I prevent fabric distortion while sewing?
Imagine your fabric’s pulling apart like a stretched rubber band.
Pin vertically, use a shorter stitch length, and clip seam allowances strategically.
Guide fabric gently, preventing distortion with precision and patience.
Conclusion
Mastering how to sew curve techniques transforms your sewing game from amateur to artisan.
Patience and practice are your true companions in creating flawless curved edges.
Whether you’re quilting, garment-making, or crafting home decor, these pro tips will guide you in the direction of sewing curves that are smooth, precise, and professional. sewing excellence.
Remember, every stitch is a step in achieving flawless curved edges – so take your time and enjoy the creative journey.

