This site is supported by our readers. We may earn a commission, at no cost to you, if you purchase through links.
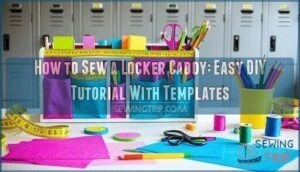 Learning how to sew a locker caddy starts with gathering felt fabric, strong thread, and neodymium magnets.
Cut two identical rectangles from your felt – one for the base and one for pockets.
Sketch your pocket layout on paper first, then mark it on the felt using chalk.
Sew straight lines to create individual compartments, leaving the tops open for easy access.
Attach magnets to the back using sturdy stitches or fabric glue.
The whole project takes about two hours and costs under ten dollars, which is a relatively low cost and can be completed in about two hours.
Your biggest challenge won’t be the sewing – it’ll be deciding which pockets deserve prime real estate.
Table Of Contents
Key Takeaways
- You’ll need basic supplies like felt fabric, strong thread, and neodymium magnets – most items you probably already have at home, and the rest cost under ten dollars total.
- Cut two identical rectangles from felt, sketch your pocket layout on paper first, then mark it on the felt using chalk before sewing straight lines to create individual compartments.
- Use a sewing machine with wide zigzag stitches for thick felt, maintain consistent ¼-inch seam allowances, and attach 6-8 strong neodymium magnets to the back for secure locker mounting.
- The entire project takes about two hours to complete and transforms into a versatile organizer that works beyond lockers – you can use it as a bedside caddy, car storage, or anywhere you need convenient pocket storage.
Materials Needed
Before you start sewing your awesome locker caddy, you’ll need to gather a few basic supplies that’ll make this project super smooth.
The good news is you probably already have most of these items at home, and the rest are easy to find at any craft store.
Felt
You’ll want to choose your felt carefully since it’s the backbone of your locker caddy project.
The right felt thickness and durability make all the difference in how well your organizer holds up to daily use.
Here are the best felt types for sewing your locker caddy:
- 100% wool felt – Premium choice for maximum durability and professional results
- All-synthetic felt – Budget-friendly alternative that’s easier to clean and maintain
- Thick rectangular felt pieces – Provides structure without doubling layers
- Commercial craft felt – Widely available felt sourcing option from hobby stores
- Farm-quality felt – Heavy-duty felt materials for long-lasting locker organization
Consider wool felt’s versatility for various projects.
Thread
Quality thread types make or break your locker caddy’s durability. Choose strong polyester or cotton thread that matches your felt’s color—or pick a contrasting shade for decorative stitching that pops.
Wind several bobbins before starting so you won’t run out mid-seam. Match your needle size to thread weight for smooth sewing, and test thread tension on fabric scraps first.
Proper thread choice guarantees your seam strength holds up to daily use in this sewing tutorial. Many sewers find polyester thread reliable for its strength.
Magnets
Strong magnets keep your locker caddy exactly where you put it.
Choose high-power neodymium magnets for the best grip on metal surfaces. You’ll need 6-8 rare earth ring magnets for secure attachment.
Test magnet strength before sewing—weak magnets mean a caddy that slides around.
Consider magnetic sheets as alternative fasteners if ring magnets feel too bulky for your design, and opt for rare earth ring magnets for the best results.
Cutting and Preparing
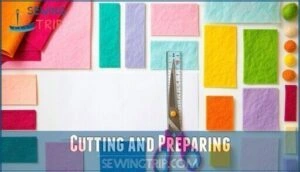
You’ll want to start by washing your felt in cool water with mild detergent, then air dry it to prevent any unwanted shrinkage surprises later.
Next, cut your felt rectangles to size—think of this as creating the foundation for your locker’s new best friend.
Washing Felt
Before diving into your sew locker caddy project, you’ll want to prep your felt fabric properly.
Natural fiber felt needs washing to prevent unwanted felt shrinkage later. Here’s your game plan:
- Water temperature: Use cool water with mild detergent choice to avoid color bleeding
- Drying methods: Air dry or tumble dry on low heat setting
- Pressing: Iron with medium heat to smooth wrinkles
This simple prep keeps your fabric locker storage project looking sharp!
For the best results, consider using specialized felt products.
Cutting Rectangles
Two rectangle dimensions matter most: cut four 8"x24" pieces for standard felt or two for thick felt.
Sharp cutting tools make all the difference—dull scissors create frayed edges that’ll drive you crazy later. Pay attention to fabric grain direction when layering felt pieces.
Use a rotary cutter and mat for accurate cuts that look professional. These sewing basics set you up for success.
Master these cutting techniques now, and your locker caddy will thank you with clean, crisp fabric cutting results throughout all remaining sewing steps.
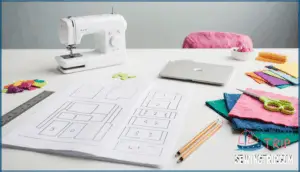
Making Templates
Creating accurate paper templates is your first step toward a perfectly organized locker caddy. Think of templates as your blueprint for success—they’ll save you time and prevent those "oops, that’s crooked" moments we’ve all had.
Good templates are like having a sewing GPS—they guide you straight to success without any wrong turns along the way.
Start by sketching your desired pocket shapes and sizes on lightweight paper. Consider what you’ll store in each compartment: phone, pens, or snacks.
Here’s how to master template accuracy:
- Measure twice, cut once – Use a ruler for precise dimensions
- Test fit your items – Place actual objects on paper templates before cutting
- Number each template – Label them to match your locker caddy pattern
- Create backup copies – Paper templates tear easily during repeated use
- Check scaling – Make certain templates fit your felt dimensions
Digital templates work great too if you prefer printing sewing patterns. Pin your finished templates securely to felt, then cut around them with sharp scissors. Quality template materials make all the difference in your locker organizer DIY project.
Marking The Felt
With your templates ready, it’s time to mark your felt like a pro. Start by laying your fabric flat on a clean surface – wrinkled felt makes for wonky pockets! Use a fabric pen that contrasts with your felt color for easy visibility.
Template precision matters here, so pin each template securely before tracing. Mark your seam allowances with dotted lines and cutting edges with solid lines. This marking technique prevents confusion later when you’re at the sewing machine.
For pocket placement, measure twice and mark once – you don’t want lopsided storage spaces for your locker essentials. Choose your marking tools wisely. Water-soluble fabric pens work great for felt, while chalk pencils suit darker colors.
Remember, proper fabric preparation earlier makes this step smoother. Take your time with these sewing tips – rushing through marking leads to crooked pockets that’ll drive you crazy every time you use your locker caddy.
Sewing Steps
Now you’ll turn those marked pieces into a working caddy by sewing the guide lines and connecting the front to the back.
Don’t worry if your first stitches look a bit wonky—even experienced sewers know that felt can be tricky to handle, but it’s forgiving enough to hide small mistakes.
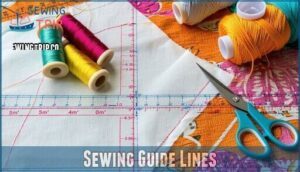
Sewing Guide Lines
Think of guide lines as your roadmap to success. They’ll keep your sewing straight and prevent wonky pockets that’ll drive you crazy later.
Here’s your sewing guide checklist:
- Use contrasting thread so you can actually see your lines
- Increase stitch length to 3.5mm for easy visibility
- Check thread tension stays balanced throughout
- Maintain consistent seam allowance along marked paths
- Choose a universal needle type for smooth fabric feed
These step-by-step instructions and sewing techniques create the foundation for professional-looking results. To guarantee durability, consider the stitch strength requirements for your chosen fabric, ensuring a strong and durable finish.
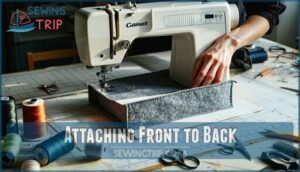
Attaching Front to Back
With your guide lines complete, it’s time to marry those pieces together.
Align your front felt over the back piece, matching edges perfectly—this alignment technique prevents wonky pockets later.
Pin securely, then follow your marked lines with a straight stitch, using a 1/4-inch seam allowance.
At pivot points, lift your presser foot and turn smoothly.
Add reinforcement stitching at stress points for this locker caddy project.
Finishing Touches
You’re almost there, and this is where your locker caddy really comes to life!
Now you’ll carefully cut out the pocket openings and attach your hanging system, transforming your sewn piece into a functional organizer that’s ready to tackle locker chaos.
Cutting Out Pockets
Now comes the fun part – bringing your locker caddy to life!
Grab sharp scissors and carefully cut along your stitched pocket shapes. Work slowly around each template precision line to avoid fabric waste.
Your cutting tools should slice cleanly through both fabric layers, creating perfect layered pockets. Take your time with intricate pocket design areas – rushed cuts can ruin hours of work.
Soon you’ll have functional compartments ready for your hanging locker caddy masterpiece!
Adding Hangers
Now that your pockets are cut, it’s time to add the hanging methods that’ll keep your locker caddy secure and accessible.
The right hanger choice makes all the difference between a wobbly organizer and rock-solid locker accessories.
- Magnetic Support – Sew heavy-duty magnets to corners for instant attachment to metal locker surfaces
- Ribbon Strength – Add sturdy ribbons for tying onto backpack straps or stroller handles
- Loop Placement – Create fabric loops to hook over knobs, handles, or closet rods
- Hanger Alternatives – Use clips, grommets, or adjustable hooks for versatile mounting options.
To guarantee longevity, consider standard fabric finishes to enhance durability.
Customizing Your Caddy
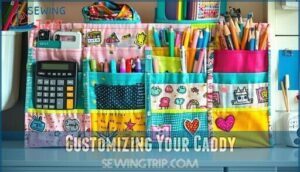
Make your locker caddy uniquely yours with smart customization choices. Adjust pocket sizes to fit calculators, lunch bags, or art supplies perfectly.
Use fabric scraps from old projects—mix terrycloth with canvas for interesting textures. Add Velcro additions to keep items secure during busy school days.
Sew on patches featuring your school mascot or favorite band. Consider decorative elements like colorful stitching or fun appliques.
Smart fabric selection and personalization transform a basic organizer into something special. These decorative touches make your caddy stand out while serving your specific needs with unique features.
Hanging Your Caddy
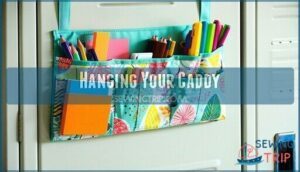
Your handmade locker caddy deserves the perfect hanging solution.
Transform your locker into an organized haven with the perfect hanging method for your handmade caddy.
Choose the method that works best for your space and style:
- Magnet Strength: Attach heavy-duty neodymium magnets to corners for secure metal locker mounting
- Loop Options: Sew fabric loops at the top for easy hook or doorknob hanging
- Hanger Styles: Create wooden hanger attachments for closet rod compatibility
- Ribbon Choices: Add decorative ribbons as hanging ties that match your personality
- Placement Ideas: Position at eye level for quick access to essentials
Your personalized locker caddy transforms any space into an organized haven with these versatile locker accessories DIY hanging methods.
Sewing Tips
Successfully completing your locker caddy sewing project requires mastering several key techniques that’ll make the difference between a wobbly organizer and a sturdy storage solution. Start by prewashing natural felt to prevent unwanted shrinkage later. Double up lighter commercial felt for better structure and durability.
Here are essential sewing tips for your project:
- Use disappearing ink pens for marking—they’ll vanish without leaving traces
- Maintain consistent ¼-inch seam allowances throughout your project
- Select a universal needle (size 90/14) for felt fabric handling
- Adjust thread tension to medium for smooth, even stitches
- Baste guide lines first before permanent stitching
Press each seam as you go to keep everything crisp and professional-looking. Remember to oil moving parts to prevent friction. When cutting out pocket openings, work slowly to prevent fraying edges. Topstitch around trimmed outlines for extra durability. This attention to detail transforms your sewing tutorial into a masterpiece that’ll serve you well, providing a smooth and even finish, and making it a truly professional-looking project.
Using Your Caddy
Your freshly sewn locker caddy transforms chaos into calm organization. Install it on your school locker’s door using those strong magnets you attached. The caddy’s strategic pockets handle different items perfectly—phones slip into side compartments while water bottles nestle in deeper sections. Your lunch bag fits the full-width pocket like a glove.
Test weight limits by gradually adding items. Most caddies handle textbooks, supplies, and snacks without sagging. Position heavier objects in lower pockets for better balance. The caddy’s location should allow easy door closure while keeping everything within arm’s reach.
Your accessibility needs matter. Adjust pocket usage based on your height and dominant hand. This locker storage solution grows with your school organization system, adapting to different subjects and schedules throughout the year, providing calm organization and ensuring easy door closure.
Frequently Asked Questions (FAQs)
What size locker is this caddy designed for?
This caddy’s designed for standard school lockers, but you can easily scale it up or down to fit your specific locker dimensions.
The base pattern works perfectly for most typical locker sizes you’ll encounter, with complete concepts being essential for a proper fit.
Can I use a sewing machine or should I hand sew the caddy?
You can definitely use a sewing machine for faster, stronger seams.
The project specifically mentions using a sewing machine with standard presser foot and wide zigzag stitches for extra durability and professional results.
What types of appliques or decorative touches can I add?
Like adding sprinkles to a cupcake, you can personalize your caddy with fabric patches, embroidered initials, colorful appliques, decorative buttons, or fun ribbon trim to make it uniquely yours.
How do I wash and care for the finished caddy?
Spot-clean your caddy with a damp cloth and mild soap for everyday maintenance.
For deeper cleaning, hand wash in cool water with gentle detergent, then air dry completely to prevent shrinkage and maintain shape.
What other uses are there for this project besides a locker caddy?
You can transform this versatile organizer into a bedside caddy, car storage solution, kitchen helper, craft room organizer, or bathroom accessory.
It’s perfect for dorm rooms, offices, or anywhere you need convenient pocket storage.
What if my sewing machine keeps jamming?
Threading troubles turning your machine into a temperamental toddler?
Check your needle’s sharp, rethread completely, and clean out lint buildup.
Sometimes switching to a heavier needle helps thick felt glide through smoothly.
Can I make this without a machine?
You can hand-sew your locker caddy using a simple running stitch or backstitch. It’ll take longer than machine sewing, but you’ll get that satisfying handmade touch that’s totally worth it.
How do I fix uneven pocket placement?
Remove the pockets carefully with a seam ripper, then measure and mark new placement lines using a ruler.
Pin pockets in position, double-check spacing before sewing, and stitch slowly for accuracy.
Whats the best stitch for thick felt?
Use a wide zigzag stitch for thick felt – it’s your best friend here.
This stitch grabs more fabric and creates stronger seams that won’t pull apart, even with heavy use.
How strong should the magnets be?
Don’t worry about crushing your locker door.
You’ll need high-power neodymium magnets or 6-8 rare earth ring magnets.
They’re strong enough to hold your caddy securely without damaging the metal surface underneath.
Conclusion
Congratulations on mastering this delightful organizational challenge!
Your newly crafted locker caddy will transform that chaotic metal box into a tidy haven.
Now you’ll spend less time digging through backpack debris and more time actually finding your stuff.
Remember, learning how to sew a locker caddy isn’t just about creating storage—you’ve gained a valuable skill that’ll serve you well beyond middle school hallways.
Your friends will definitely want their own custom caddies next, and you can help them with your newly crafted locker caddy skills, which include sewing a locker caddy, and creating a tidy haven.

